Tuesday, July 31, 2007

Roasted Eggplant, Red Peppers and Goat Cheese Sandwich

Saying 'Cheese' Again

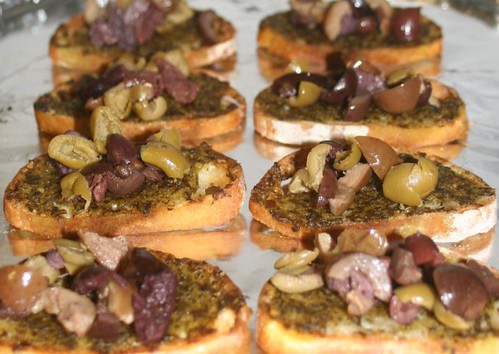
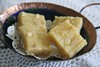
The path to getting my blood calcium to a normal level was arduous and painful, but hopefully behind me now. One of the things I missed a lot during this time was 'cheese', and it was something I was waiting to get back to. So I went a little crazy last week and bought no less than five types of cheeses, which will now be savored with some good bread or crackers, or alone, and as an ingredient in various things, inspirations for which are already gushing forth - but first, I had to make this favorite sandwich, which is based on a fairly common vegetarian offering in cafes and restaurants. I never seem to tire of it; it is that delicious.

This sandwich relies a lot on the flavor and freshness of the main ingredients, and is perfect in summer when farmers' markets are overflowing with some terrific eggplants, peppers, and basil. In fact, our local farmers' markets have some amazing bread and goat cheese too, so nearly all the ingredients can be bought there. Naturally, this is a great choice to take for summer picnics, and I have found it to be quite a crowd pleaser, whether the people are vegetarians or not. Even kids have loved it, much to the disbelief of their parents. There is usually atleast one person who asks me how 'exactly' I make it, which I am only happy to tell. Here I have given the details of the main components of the sandwich, which involves cooking the eggplant, roasting the peppers, and making the pesto.
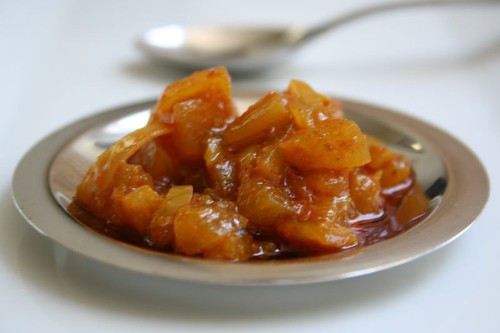
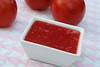
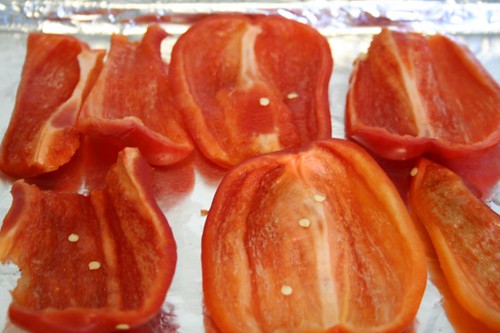
Roasting Peppers

You can do this with either red or yellow peppers or both. Preheat the oven to 425°F. Slice the top and bottom off the peppers and then cut the "walls" of the peppers. Rub them with a little bit of olive oil. Lay these peppers skin side down on a baking sheet, and roast for 20-25 minutes. Sometimes I also put some slices of red onions drizzled with olive oil right next to the peppers. While the peppers are still hot, pick them up with tongs, put them in a bowl, and cover the bowl tightly with plastic wrap. This causes the peppers to steam, and when they are cool, it is easy to peel the skin right off.

Roasted red peppers

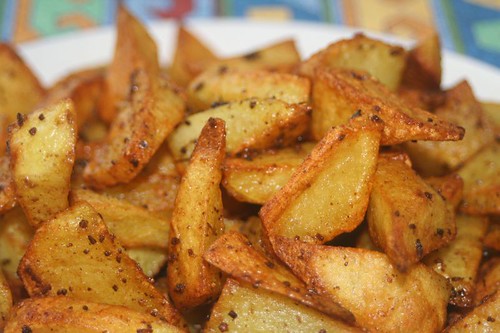
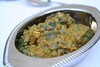
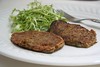
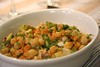
Preparing the Eggplant

The eggplant can be either grilled, pan fried, or baked, and the pan fried one is by far my favorite, since the eggplant stays moist, and you can control each slice to be cooked evenly. The advantange of the oven baked version is that it does not need any attention.

For that, pour 3-4 Tablespoons of oil in a cookie sheet and put the tray in the oven while the oven preheats to 425°F. Use a firm globe eggplant, and slice it about 1/4 inch thick. Place these slices in a pot of salted water, and place a weight (like a saucer) on top, so that they do not float up. When the oven is heated, drain the eggplant well, and place each slice on the cookie sheet without overlapping. Cook for 15 minutes, flip the slices, and let cook for another 15 minutes. At this point the eggplant slices should be cooked golden brown on both sides. If they seem dry, brush a little olive oil on it.
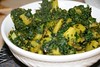
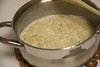
Roasted Eggplant

Basil Pesto

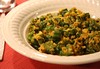
Make a simple pesto with a bunch of basil leaves, several cloves of garlic, salt, pepper, a handful of pinenuts, a few tablespoons of extra virgin olive oil, and if you like, some grated parmesan cheese. Put all these things together into a food processor and puree.
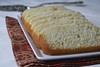
Bread

I usually use a flattish loaf like ciabatta or herb slab, to make a giant sandwich that I slice into four or six, but this time I used ciabatta rolls to make individual sandwiches.

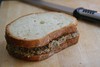
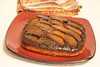
Putting the sandwich together

Slice the bread horizontally. Spread pesto on the bottom part of the bread. Top with eggplant, peppers, onions (optional), and sprinkle salt to taste and some paprika. Spread the goat cheese thickly on the inside of the top half of the bread, and cover. Press tightly. Slice if required.

Sandwich with goat cheese

Update on the state of the machine
As promised the pictures are up! I managed to recover my data, but will need to do reinstalls of a lot of software. So, it will be an uphill climb for a while.

Tuesday, July 24, 2007

Watermelon Rind Pickle

Watermelon has been a ritual of summer for me, ever since I was a child. I loved the drama of going to the corner kalingadwallah, first with parents, then later by myself, poking around to find the best looking one, tapping and thumping it, and finally asking the guy to slice off a chunk to see how red it is inside. Perfect at the art of cutting it, he would pierce the knife exactly so as to pull out the center, where the watermelon is the crispest, reddest, and tastiest. How could we complain? After proudly showing us how perfect it was he would snap the cut slice in place again, for us to carry it back home. Then lovingly it would be cut into even wedges, placed in a bowl and refrigerated for a few hours to chill. Something always happened in the fridge, the flavors concentrated and the watermelon got sweeter. It still does. And a watermelon still always brings back these memories for me.

I know many people slice a watermelon with the skin on, and then nibble at the red and throw off the rest. We rarely did that. The rind and peel was always removed and discarded off before eating. The only thing lacking was the tiny forks meant for eating fruit.

Watermelon slices

When I read about watermelon rind used in pickling and cooking in Chinese and Japanese cuisines, I was curious about where else it is used and found that watermelon rind pickles are quite common in America too, particularly in the South. Then, while browsing through 'Usha's Pickle Digest' last year I checked if she had anything on watermelon in her comprehensive book. I found not one, but four recipes for pickling watermelon rind. All of these involved cooking the rind, thereby making them 'instant' or ready to eat. Since I am quite stocked on pickles at the moment, it wasn't something I wanted to try, but the AFAM event provided just the opportunity.

I chose one of the four recipes for which I had all ingredients on hand and the flavors of which appealed to me. I used the recipe as a guideline for the main ingredients but tweaked it heavily otherwise. The result is pretty good, and getting better as it sits. It is supposed to stay good for a month but I don't think it will last that long.

I used the rind of half a large watermelon. After peeling off the green outer skin it was roughly 500 gm.

Watermelon Rind Pickle

Watermelon (rind) pickle

500 gm watermelon rind (the white part between the red flesh and green skin)
1 large shallot (100 gm)
2 teaspoons urad dal
5-6 dried red chilies
pinch of methi (fenugreek) seeds
1 Tablespoon + 5 Tablespoons oil
1/2 teaspoon mustard seeds
2 teaspoons salt (or more)
1 teaspoon turmeric
1 Tablespoon thick tamarind extract
2 Tablespoons sugar

Chop the watermelon rind and shallots into fine pieces.

In a small skillet, roast the urad dal, chilies, and methi seeds until the seeds start to turn golden brown. Let it cool and powder it completely.

In a large pan, heat a tablespoon of oil, add the mustard seeds, and when they start to pop add the chopped shallot and watermelon rind, and cook it together. Add salt, turmeric, tamarind extract, spice powder, sugar and remaining oil, and cook it on low heat until the rind softens, stirring occasionally to make sure it doesn't stick to the pan. [It took me about 25 minutes to get it to this consistency]. Check for salt and add more if needed. Let it cool completely before filling into a jar.

Note: I didn't care much for the taste of shallot in this pickle. If I had to make it again, I would leave it out without altering anything else.

Friday, July 20, 2007

Random Masala

Two wonderful bloggers tagged me simultaneously for the 7-random-facts meme. When Komal tagged me, I had never seen her blog before, so it was a revelation, though out of the blue. The other person to tag me was the Cooker, who always has wonderful informative posts whether she is doing something innovative or traditional. I won't deny that I was fazed about this at first, and also wondered how random random should be, but I thought it would be fun to play along.

To keep food in the mix, I am also posting seven random dishes, none of which are likely to get their own posts.


Although I have always been a good student I used to be frozen when it came to writing essays in Hindi. More than once I tried to get my mother to do my hindi homework for me, but she did not comply.

potatoes
Pan fried potatoes with a dry spice rub

I know many people who do not like their hair, but I absolutely hate mine.

chaat1
Phyllo shells with chaat inspired filling

When I was young and footloose, I once went hiking by myself in an unknown area and was utterly terrified for the forty-five minutes stretch where I did not see any other humans.

thaicurry
Vegetarian thai green curry with tofu, broccoli, green beans, and carrots

I have lived in three countries in three continents, and visited seven others, in the same three.

puffpastries
Baked turnovers filled with spicy vegetables

I starting speaking my first words before I was a year old, or atleast that is what I am told.

crostini
Mixed Olive and basil pesto crostini

Between a blisteringly hot summer and chilly winter I would chose summer.

Dessert
Ladyfingers, Grand Marnier soaked strawberries, mascarpone cheese and whipped cream

I bumped into a NFL quarterback in a store, a day after he was inducted into the Hall of Fame; I graciously congratulated him about it, and he was just as gracious in return.

ricotta burfi
Ricotta cheese burfis with almonds


I am tagging Shami and Musical.

Wednesday, July 18, 2007

Translating India, Sometimes Fluently


The New York Times Praises Ammini's book

(Free registration required to read the article)

This article written by Anne Mendelson appeared today in the New York Times, full of praise for the book "Grains, Greens and Grated Coconuts", written by Ammini Ramachandran. Makes me feel so proud to have known Ammini. Please join me in congratulating her on this achievement!

Here is what part of the article has to say about the book:

"Grains, Greens and Grated Coconuts," a self-published volume sold almost exclusively online, is a much more consistent work whose virtues are the direct opposite of those in "The Calcutta Kitchen." Expect no photographic tours or colorful reportorial vignettes. The purpose of this modest no-frills book is to place a region, its history, and its family and cultural heritages into a coherent context for understanding food.

Instead of trying to cover all menu bases that an editor might insist on, Ms. Ramachandran is free to concentrate on unorthodox categories, including amazingly diverse “curries” (sauced vegetable combinations), pickles and preserves, breakfast specialties, rice dishes associated with sacred observances and temple or rite-of-passage offerings.

Other books have ably explored India’s far southern territory, but Ms. Ramachandran reveals amazing range and depth in Kerala’s Hindu vegetarian traditions. And American home cooks should find her introductions to ingredients, techniques and equipment accessible.


You can purchase the book directly from Ammini's Website or on Amazon

More reviews of the book at

Jugalbandi
RP's Workshop
Indian Food Rocks

Tuesday, July 17, 2007

Oats a la Pongal

It is an irony of fate that soon after I wrote my post declaring my favorite breakfast to be oats, brown sugar and raisins, I received two blows. First, I was told by my doctor to watch my carbs. I wasn't at a point where I had to bring it down, but where it would be better to keep an eye on it. The bigger blow however was that my blood calcium was found to be too high, and that had to be addressed more urgently. As investigations continued, I practically gave up paneer, cheese, and mithai, and switched from milk to soymilk for the most part.

This double whammy was what really led to my search for an alternative to my regular breakfast of cereal or oats with milk; something lower in sugar as well as calcium and ready to make in minutes. Since I like oats a lot, I didn't want to give it up, and thought that something made with it would really fit the bill.

Inspiration Strikes

Earlier this year I did a 5K run, at the end of which runners were rewarded to a nourishing Pongal breakfast sponsored by a local restaurant. The soft, well cooked runny rice and dal seasoned with whole black peppers, curry leaves and cashews, with a river of ghee flowing through it was a delicious way to replenish spent calories, and then some.

That was the source of inspiration to try making such a pongal at home for breafast, not with rice, but oats. I turned to my favorite book of Tamilian cooking, 'Dakshin', knowing that it had a pongal recipe. I substituted the rice and moong dal with an equivalent amount of oats by volume, and used just a teaspoon of ghee, brought way down from the stated amount. I absolutely loved the result and I am quite hooked to it now.

Oats Pongal

Method to make Pongal Style Oats

Cook about a cup of steel-cut Irish oats with four cups of water. You can even do this in a pressure cooker. When you are ready to make the pongal, make a coarse powder with a pinch of cumin seeds and a few black peppercorns in a mortal and pestle. Grate a little ginger to yield about half a teaspoon. In a sauce pan, heat a little ghee, add the powder to it, along with a few fresh leaves of curry patta, a tablespoon of chopped cashews, hing, grated ginger, and stir it together, followed immediately by the cooked oats. Add a pinch of salt, and some water as required, a little at a time, to keep the oats mixture to a runny consistency.

You could also add a tiny pinch of turmeric to the oats, and additional ghee if you like.

I am sending this to WBB #13 : Oats.

Sunday, July 15, 2007

Broccoli and walnut salad with tadka

Flavorful, healthy, fresh, and simple are some of the qualities I strive for in everyday food, but do not like to sacrifice good taste towards that end. This is one of those dishes that meets these requirements very well and is unbelievably delicious as a bonus. It fits in with any kind of meal, from pairing with a sandwich to being a part of an elaborate Indian meal.

Even though this is a yogurt based dish served at room temperature, I hesitated over calling it a raita since a raita has no tadka, in the strictest sense of the word, and only has one or more ingredients mixed into yogurt that is seasoned with a few dry spices. I learned this from someone I consider very knowledgeable about food, North Indian cuisines being one of her areas of expertise. Calling it a 'salad' is a lot more inclusive, although the approach to putting this dish together is very Indian.

This is not a precise recipe, but more of a guideline.
Steam about a cup or two of broccoli florets for few minutes and then chop it into smaller pieces when cool. Mix it with about as much plain yogurt or dahi by volume. Add a handful of chopped walnuts to it. Season with salt to taste and pinch of sugar. In a small pan, heat a little oil, and to it, add one or two cloves of minced garlic, a crumbled dried red chili, and a pinch of sesame seeds. Take it off the heat when it starts to sizzle, and pour it over the prepared salad. Stir it together gently and serve.

Broccoli and Walnut raita

Broccoli and Walnut Salad with a tadka of red chilies, garlic, and sesame seeds drizzled on top; should be stirred together before eating.

Friday, July 13, 2007

Very Forgiving Banana Nut Bread

Banana Nut Bread: Sliced

As I write this post, a google search for 'banana nut bread' gives me 1,290,000 results. I am curious to know how many results were available when I did the exact same search on yahoo roughly ten years ago, but one of the recipes that showed up on the first page was this one and for that I am immensely thankful.

I printed out the recipe because it looked too simple to be true, and tried it out, and it turned out wonderful. I never again looked for another one. I have made it countless times since, and given it to people who liked it, and then they have continued to make it.

This is among the very few recipes that I can bake with at any time without having to look it up even one bit. If all the ingredients are around, then it takes only minutes to stir up the batter, and usually it is the three ripe bananas that are the most difficult to come by. About halfway through the baking time a most amazing aroma starts to waft around, and it continues till the timer goes off. Then an exercise in patience begins. 'Wait till it cools' is easier said than done, but the reward is great. This bread is soft and moist, full of banana flavor, and sweet enough to be called a 'banana cake'.

Banana Nut Bread: batter

The recipe is called the 'Best Ever Banana Nut Bread', and that name does sufficient justice to it.

Ingredients

1 stick (8 Tablespoons) butter, melted in oven in a large oven proof bowl
1 cup sugar
1 egg, well beaten
2 cups all purpose flour
1 tsp baking soda
pinch of salt
3 large very ripe bananas, mashed
1 tsp pure vanilla extract
1/2 cup chopped pecans


Method

Preheat the oven to 350 F°. Grease a 9x5x4 inch (approximately) loaf pan with a little butter.

In a medium bowl, stir together the flour, baking soda, and salt.

Add the sugar to the melted butter and mix together. Add the egg and vanilla extract and continue mixing. Add the bananas, flour mixture, and nuts one by one, and keep mixing until all the ingredients are combined. Pour the batter into the greased loaf pan. Bake at 350 F° for one hour.

Let it cool in the pan. Loosen the edges with a knife and remove from pan.

Banana Nut Bread: In loaf pan

Now let me count the ways in which it is forgiving. First of all, it doesn't need any specialized equipment. A hand-mixer is fine, but a whisk or large spoon will do just as well. Don't like pecans? Use any other kind of nuts, like walnuts or macadamias, or leave out the nuts altogether. Don't like it too sweet? Use 3/4th cup of sugar. Feeling virtuous? Substitute half the flour with whole wheat flour, or upto 2 tablespoons of the flour with flax seed meal, which is a good source of Omega 3 Fatty Acids and high in fiber. Looking to cut down fat? Substitute half of the butter with applesauce. Or try your own variation and have fun with it. It will not betray.

To end with a disclaimer, I am not fond of bananas at all, but this bread I love.

Wednesday, July 04, 2007

Yellow Sanza.. the traditional and the adapted

'A sanza is always yellow', is the first thing I am likely to hear when I mention yellow sanza. Yes, yes, I know that 'sanza' is yellow because it has turmeric in it, but why I started calling it so as a kid has to do with the degree of bright yellowness of the sanza that one of my Maushis made, as opposed to the one my mother made.

Regular rawa Sanza

Before I go ahead, let me introduce Maushi M, my mother's older sister, famous for her 'aagraha'. Yup, the same force-feeding-with-love that I mentioned once before. People were known to make all kinds of excuses when they visited her - "I just had lunch", "I am on my way to dinner", and so on, but nothing worked. Her mission seemed incomplete until people left her home groaning under the amount of food she brought out.

I had many reasons to visit or stay over at her house, because her daughters were my friends and their house was minutes away from ours. So there were numerous occasions when I fell under her 'aagraha', and I have tried all ways to finagle my way out of it, with no success. She is a great cook of everyday food, but one of the things I have eaten umpteen times at her house is sanza, and she makes the best one I have ever eaten. Never lumpy or sticky, and always delicious. It was something she would make in minutes, practically in the same time that tea was prepared on the next stove, or a 'limbu sarbat' (lemonade) was stirred up if it was a hot afternoon.

After I left home and started cooking, I asked my mother to get me her recipe, with no secrets withheld. One of those secrets was that she always kept a jar of roasted rawa ready, so that she could conjure up the sanza anytime. I still have the original copy of the recipe, even though I do not need it anymore because I know it so well by now, and have always meant to convert it to standard measurements and translate it, but never got around to doing that. Here it is.

Ingredients

1 cup of coarse rawa (semolina or farina)
1 small yellow onion
2-3 Tablespoons oil
3-4 Tablespoons of peanuts (or as much as you like)
1/4 teaspoon mustard seeds
pinch of hing (asafoetida)
1/4 teaspoon turmeric (or a little more if the turmeric is pale)
8-10 curry leaves
1-1/2 teaspoons salt (or to taste)
1 teaspoon chili powder
1 teaspoon sugar
some chopped cilantro, grated coconut, and wedges of lemon or lime for serving

Method

Pour the rawa into a deep skillet, and roast on medium high heat until it gets evenly golden brown in color and keep it aside to cool. This roughly takes 5-10 minutes.

Dice the onion. Heat the oil in a kadhai or wok. When it gets hot, fry the peanuts in it, and remove them with a slotted spoon to a small bowl.

Let the temperature of the oil come down a little, and then add the mustard seeds (they will pop right away since the oil is hot), hing, turmeric, curry leaves and onion. Saute it for a few minutes until the onion softens, and add 2 cups of water.

When the water comes to a boil, add the salt and chili powder. Start adding in the roasted rawa in a steady stream with one hand, while stirring it together with the other. Reduce the heat, add sugar and fried peanuts and stir through completely until the rawa has absorbed all the water. [At this point, the original recipe says to take a teaspoon of oil and drizzle it around the edge of the pan, but I don't do that.] Serve it right away, with a little bit of cilantro and coconut on top and a wedge of lemon or lime on the side.

Is it like Upma?

In terms of technique, it is very similar to its famous sibling 'upma', and is usually eaten for breakfast, or at tea time in Maharashtra, but I'll keep the spotlight on the lesser known one in this post. The seasoning is different, and naturally, so is the taste. It is also not as moist as upma, in fact in a good sanza the grains of rawa can be well separated, though they don't have to be. I have also rarely encountered any vegetables other than an occasional potato in a sanza, unlike upma which ranges from plain to additions of vegetables and cashews.

Adaptation with Quinoa

If you have read my posts until now, you know I cannot resist twists on ingredients and techniques. I had always wanted to try Quinoa for a long time, for its high nutrition value and protein content, but only when I read about how to cook Quinoa on the-cooker's blog, I knew that I could try giving it the sanza treatment. It worked out very well. 'The Cooker', thank you for those pictures and information!

Quinoa Sanza

I used the above sanza recipe as it is, but there was no need to roast the grains beforehand. After the water started boiling and spices were added, I stirred in the quinoa, turned down the heat and cooked everything for roughly 10-15 minutes, and added the sugar and peanuts at the end. By then, the grains absorbed all the water, and the germ ring was visible too!

At this point, it is actually hard to decide which one I like better. The original will always remain a favorite, no doubt, but the quinoa version will not be left behind either, especially when a good protein boost is needed.
Related Posts Plugin for WordPress, Blogger...