Showing posts with label flour: besan. Show all posts

Tuesday, January 12, 2010

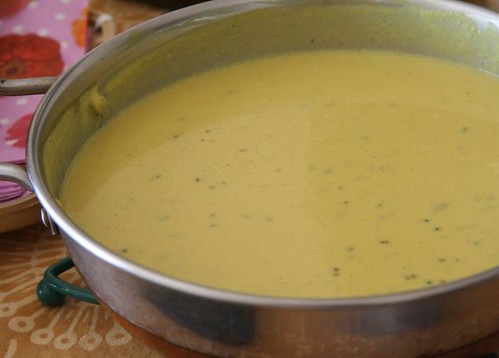
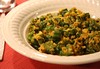
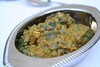
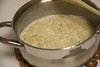
Soy Milk Kadhi

I have a niece who is lactose intolerant, and drinks soy milk everyday. So whenever she visits, I make sure soy milk is well stocked at home, but when she leaves, there is invariably some leftover. If it is a tiny quantity I add it to a shake or soup, but what does one do with a lot of soy milk if one doesn't consume it regularly?

The idea for this kadhi (for lack of a better name) was sown on one such occasion. This dish is neither a traditional kadhi, nor is it a substitute for the regular version made with yogurt, but came in handy recently when cooking for vegan and low carb-ing friends. For those not watching their carbohydrate intake, it goes rather well with plain white rice.

If you can find fresh soy milk, by all means use it rather than the carton variety.

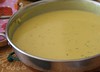
Kadhi

Soy Milk Kadhi

Serves 4 as a main course

Ingredients

4 cups of unsweetened soy milk
1 teaspoon turmeric
4 Tablespoons besan
1 teaspoon ajwain seeds
1-2 Tablespoons oil
1 teaspoon mustard seeds
1 teaspoon cumin seeds
1 teaspoon fenugreek seeds
5-10 curry leaves
4 cloves garlic
1 inch piece of ginger
4 green chilies
1/4 cup of tamarind extract (not concentrate!)
1 Tablespoon jaggery (optional)
1 Tablespoon chopped cilantro leaves (optional)
salt to taste

Method

In a large bowl, stir together the soy milk, turmeric and besan with a whisk, until there are no lumps of flour. (Alternatively, you can add the turmeric later with the other ingredients in the hot oil.)

Pound the ajwain seeds to a coarse powder in a mortar and pestle. Mince the garlic, grate the ginger, and finely chop the green chilies.

Heat the oil in a large saucepan. Add the mustard seeds. As they start to pop, add the cumin and fenugreek seeds, curry leaves, garlic, ginger, chilies, and the ajwain powder. Stir and quickly add the soy milk and besan mixture. Keep whisking as it comes to a boil, and then turn it down to a simmer.

Stir in the tamarind paste, jaggery and salt. Cook for 5-10 minutes on low heat until the mixture starts to thicken, stirring occasionally.

Add the cilantro at the very end, just before serving.

Monday, July 28, 2008

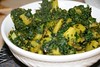
Squash Blossoms and Basil Pakoras

One underwhelmed, and the other was a joyous discovery

Squash Blossoms

I don't always buy ingredients because I need to. Sometimes I buy something because I have seen it around for so long that my interest in it has been intrigued, sometimes because it is a hot trendy favorite, and sometimes because it looks too darned pretty to ignore.

With squash blossoms it was all of the above, and I had to finally give in and try them out at least once, so I bought a box without any specific ideas or recipes in mind. As I had known, I found that the most popular way to consume these was to stuff them with cheese and fry them in a flour batter. Naturally, I wanted to put an Indian twist on it, and also skip the cheese.

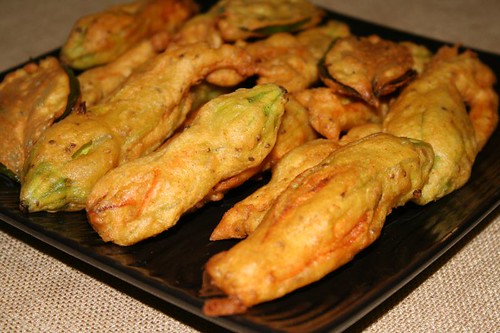
I made a loose batter with besan, water, salt, pinch of chili powder, and a pinch of ajwain (owa seeds). I intentionally kept the batter neither too thick nor too spicy so that I could discern the flavor and taste of the flowers. Dipped each flower gently into the batter, shook off the excess and deep fried in oil.

After the entire batch of flowers had been fried up, I had a little more batter left so I dipped in some large basil leaves that had been bought on the same day and were very fresh and firm, and fried those too. These little critters were a surprising joy to behold, as they turned into crisp and crackling morsels in the batter.

Squash Blossom Fritters / Pakoras / Bhajias

There is not much to complain about deep fried anything most of the time, but I was not too taken by the flowers this time, although I loved the batter fried basil! Still, I thought I would post this. For those fascinated by the idea of eating flowers, or for those who like squash blossoms otherwise, this might help. Plus, it is just so right to send to Rachna for JFI: Flower Power as well as to Rushina for her Pakora Contest.

Sunday, February 24, 2008

Baroda Dal Dhokli

Considering that I was fairly familiar with Gujarati food throughout my life, I found out about Dal Dhokli very very late, and when I did, my first reaction was 'whoa, this is like fresh pasta, on steroids!'. As soon as I tasted it, it was such a revelation that something so simple could taste so good, that I had to immediately ask the person who made it, for the recipe, and ever since I have made it several times myself. Dal Dhokli consists of two main parts, the dhoklis which are pieces of thinly rolled out dough, and the thin dal in which they are boiled until cooked. The overall result is thicker than soup, and substantial enough to be eaten as a main dish. This is a very comforting sort of meal, and even good to eat when one is under the weather (like I am right now, unfortunately). A crudites style salad rounds off the meal very nicely. For those not familiar with the dish, I should add that these 'dhoklis' bear no relation to the more popular and accessible 'dhoklas'.

Even though I like my usual recipe a lot, I wanted to try out something different for a change, and I found one that looked good in 'Rotis and Naans of India' by Purobi Babbar which happens to be quite a favorite cookbook of mine. This book is low on contextual information but it is a solid compilation of recipes that always work really well, or at least have worked really well for me so far. Even though the book has recipes for things besides rotis and naans that look very promising, that is the only section I have used.

In this particular case, I don't know why the title in the book says 'Baroda' Dal Dhokli and what it is (if there is anything) that distinguishes it from the Dal Dhokli made in other parts of Gujarat. Perhaps someone like Priyanka might know. Even though I made several changes to the original, I was rather pleased with the result. Pleased enough to want to use this recipe until I decide to fall back on the old favorite. I did not add any garlic in the tadka as specified, used brown sugar instead of white, and instead of amchoor, the choice of acid was (you guessed it) Meyer lemon juice, squeezed over the dal at the very end. Another thing I did this time (and was left wondering why I didn't think of it before) was to make a double batch of the dhoklis and freeze them, so that next time around I only need to make some dal and pop in the dhoklis.

Gujarati Dal Dhokli
Photo taken in a small window of opportunity right before dinner, with the squeezed lemon landing fortuitously in the background.

Here is my recipe, adapted. The book says it serves 6, but based on experience, I'd say not more than 4.

For the dhoklis

1 cup wheat flour (chappati flour, atta)
1/2 teaspoon turmeric
1/2 teaspoon chili powder
1 teaspoon salt
2 teaspoon oil
water for mixing.

Sift the flour and add the spices and salt to it. Rub the oil into the flour, and slowly add water to make a stiff and smooth dough. Divide the dough into 4 or 5 pieces, and roll out each piece into a rectangle about as thick as a chappati. Using a sharp knife or pizza cutter, cut into pieces about 2" X 2" in size.
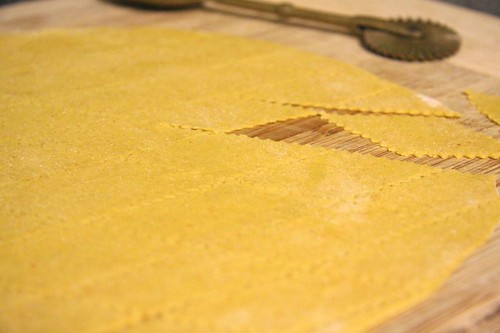
Dhoklis: Rolled and Cut
Making the dhoklis

For the dal

1 cup (or 160 grams) toor dal
1/2 of a medium yellow onion
1 teaspoon turmeric
1-2 teaspoons salt (or to taste)
2 teaspoon brown sugar
1/2 teaspoon garam masala (I used rajwadi)
1 teaspoon amchoor (or lemon juice)

1 Tablespoon oil or ghee
1/2 teaspoon mustard seeds
1/2 teaspoon cumin seeds
5-6 cloves
2-3 dried red chilies (boriya or small round chilies)
10-12 curry leaves
pinch of asafoetida (hing)
2-3 Tablespoons of chopped cilantro
ghee, optional

Chop the onion fine. Cook the dal with turmeric and onion using 5 cups of water, in a pressure cooker or directly on stove top. When it is fully cooked, whisk together until smooth, and add salt and sugar. Bring the dal to a boil, add the rajwadi garam masala. If using amchoor, add it as well. Add the dhokli pieces to the dal, and cook for a few minutes.

In the meanwhile, heat the oil in a small pan for the tempering (vaghaar) to be poured on top. Add the mustard seeds and when they start to pop, add cumin seeds, cloves, chilies, curry leaves and asafoetida, and pour the mixture on the dal. Add the chopped cilantro leaves, and if using lemon juice, squeeze it on top. Add a little ghee, if you like. Tastes best if served immediately.


The old favorite

I am also adding here the usual dal dhokli recipe I have used until now.

For 2-3

For the Dhoklis

3/4 cup chappati flour (atta)
1/4 cup besan
1 tsp ajwain
1/2 teaspoon red chili powder (or to taste)
1/2 teaspoon salt (or to taste)

Mix the atta, besan, ajwain, chili powder, and salt, and add enough water to it to make a stiff dough. Roll out the dough, cut it into pieces, separate the individual pieces and leave them on a large tray to dry out for 1-2 hours.

For the dal

3/4 cup toor dal
1/2 teaspoon turmeric
2 green chilies
1 inch piece of ginger
about 10 sprigs of cilantro, chopped

1 Tablespoon oil
1/2 teaspoon mustard seeds
1/2 teaspoon cumin seeds
5-10 curry leaves
pinch of fenugreek (methi) seeds
pinch of urad dal
pinch of asafoetida (hing)

1/4 teaspoon cumin powder
1/2 teaspoon coriander powder
salt to taste

Cook dal with turmeric in a pressure cooker. Whisk it to make sure it is smooth. Make a paste of the chilies, ginger, cilantro.

In a large and deep pan, heat the oil, and add the mustard seeds. When they start to pop, add cumin seeds, curry leaves, fenugreek seeds, urad dal, asafoetida, and finally add the cooked dal. Add the ground paste, and plenty of water. Add the cumin and coriander powders and salt. Bring it to a boil. Add the dhokli pieces to the dal and cook it for a few minutes on medium heat until the dal starts to thicken and the dhoklis have softened and cooked.

Freezing Dhoklis
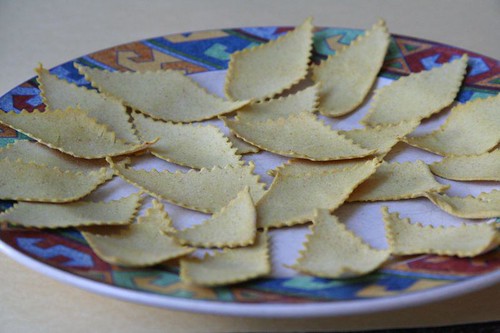
Dhoklis: Frozen
If you wish to freeze dhoklis, lay out the individual dhoklis without crowding on a tray and keep it in the freezer for a few hours, and then transfer to a freezer bag or container and put it back in the freezer. When you are ready to use them, they can be put directly into boiling dal without thawing.

Sending this entry to RCI: Gujarat.

Thursday, June 14, 2007

A spin on the farmer's lunch

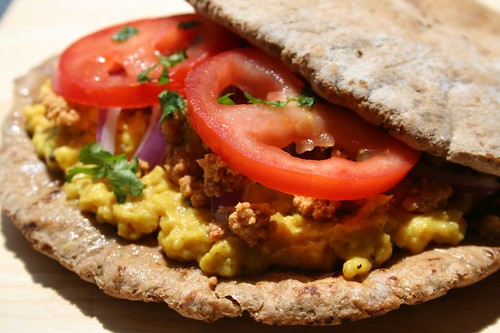
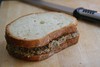
Pithale - Bhakri Sandwich

Growing up in a big city, having a yard was a dream, and being on a farm was just impossible. In fact there wasn't a farm to be seen for miles. So you have to forgive me, but my idea about farmers on the deccan plateau of Maharashtra was derived from geography books, and marathi movies that were shown on Doordarshan on Saturday evenings. These movies often romanticised the hard working farmer (shetkari), who ate a humble lunch of pithale and bhakri, wrapped in a cloth, with a garlic chutney and chilies on the side, washed down with buttermilk. It was an impressionable age, after all, and this was the image that lasted with me.

Apart from something seen from a car or bus, I have yet to see a real farm in Maharashtra or meet a farmer who eats such a lunch, but I think I am on the right track about the food. While the visit remains a dream, the lunch is much more achievable, and hopefully atleast half as good. After all, nothing can replace that smell of the earth and the crops swaying in the field, as I partake a fresh warm bhakri.

About the main components

Pithale, pronounced 'piTh-luh', but usually spelled in English as 'pithale', is a dish made out of chickpea flour (besan), with basic ingredients that are typically available in the pantry. It is unbelievably quick and easy, as you will see in the recipe below. The thickness of the pithale varies from runny to scrambled depending on the preferences of people. It can be thickened even further, at which point it beomes very dry, nearly crisp, but not completely, which is then referred to as 'zunkaa'.

Bhakri (bhAkri, bhaakri) is a flatbread, made by patting the dough on a flat surface, rotating it as it flattens and spreads. Easier said than done, as I know from experience. I have tried to learn it from someone who has made bhakris for years, and hoped to emulate her, but have abandoned it now as something I might not be able to do. There are bhakris made out of bajri, jowar, nachani, even rice.

Here, I have adapted the concept, to make a handy sandwich, which can be enjoyed outdoors, or anywhere else. It is a great option for a picnic lunch or a busy weeknight dinner.

pithale bhakri

Pithale - Bhakri Sandwich

Ingredients:

1 small onion
3/4 th cup besan (chickpea flour)
2 Tablespoons oil
1/2 teaspoon mustard seeds
pinch of hing (asafoetida)
1/2 teaspoon turmeric
1-1/2 teaspoons kanda-lasun masala (*see note)

4 whole wheat pita breads
a little softened butter or ghee
1 tomato, sliced
4 Tablespoons peanut sesame chutney or to taste
4 Tablespoons chopped cilantro

Peel the onion, cut 2 or 3 round slices, separate into rings, and leave these aside to add to the sandwich. Chop the rest of the onion. In a medium bowl, add a little water to the besan, just enough to make a thick paste.

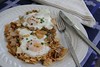
Heat the oil in a wok or kadhai. Add the mustard seeds, and when they pop, add the hing, turmeric, chopped onion and kanda lasun masala. Saute it for a few minutes until the onion softens, and add half a cup of water. When the water comes to a boil, add in the besan paste, and stir continuously with a wooden spoon as it starts to thicken. Stir it until it forms a thick mass, roughly scrambled.

Apply butter to the pita breads, and spread some of the pithale on it. Top with the reserved sliced onion, chutney, cilantro, and tomato. Cover with another pita bread, press gently, and slice into two or four. Repeat for the other sandwich.

This will make 2 sandwiches.

Notes and Variations:

* In this recipe, you could substitute the kanda-lasun masala with 2 cloves of minced garlic, 1/2 teaspoon red chili powder, and 1 minced scallion.

If you like very spicy food, you could add some red chili powder to the paste, depending on how hot the kanda lasun masala is.

I use whichever chutney is on hand - garlic chutney or cilantro chutney works just as well, although they lack the crunch of the peanuts.

Add some lettuce leaves to the sandwich if you like.


I am sending this too to the 'Regional Cuisines of India - Maharashtra' event.
Related Posts Plugin for WordPress, Blogger...