Showing posts with label nuts: peanuts. Show all posts

Friday, November 30, 2012

Ridge Gourd Chutney, Deconstructed

Everything I learned about "ridge gourds", I learned online. This might sound like an exaggeration, but it is very close to the truth. Ridge gourd, which is called 'doDake' or 'shiraLe' in Marathi, and 'turai' in Hindi is a vegetable that I wasn't familiar with while growing up. While it is quite commonly used in most regions of India, I don't recall eating it much, if at all, and I know for sure I never ever watched anyone cooking it either at my home or anyone else's.

Like many other vegetables that I had never tried before, I began to see loads of beautiful gourds in the Asian stalls at the local farmers market, and was tempted to try it out. I started looking for recipes to use it, and found plenty of ideas online. But I was clueless right from selecting the gourds. Are the smaller ones better or the larger? Slim better or hefty? I had to even search online for instructions on how to peel and prepare them before using in a recipe. After reading and searching about it, I felt I was finally ready to cook with it.

Turai with dumplings

The first thing I ever cooked was this 'Ridge Gourd with dumplings' sabjee, about five years ago. I used oat flour instead of jowar, and made the dumplings bite sized, about the same size that I chopped the gourds into. It was such a hit that I made it repeatedly. Soon after that, I started looking for more recipes to expand my repertoire, and tried this 'Stuffed Ridge Gourd' which was an instant hit too. I realized that I enjoyed the slightly earthy taste and texture of of this vegetable, unlike some of my other family members, because of which the vegetable must have never made an appearance in our house.

Then one day, when there wasn't enough time to make the dumplings, or the stuffing, I wanted to make some kind of a quick saute bhaaji (chop, sizzle, and stir) and that was when I deconstructed Mint's 'Ridge Gourd chutney' to make a bhaaji, and it has become a huge favorite ever since.Here it is, adapted and translated with her permission.
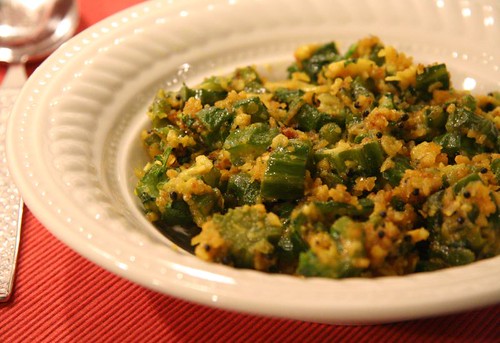
Turai Bhaaji

Ingredients

2-3 ridge gourds (depending on their size)

4 cloves of garlic
4 green chilies

1-2 Tablespoons oil
1/4 teaspoon mustard seeds
pinch of asafoetida
1/2 teaspoon turmeric
a few curry leaves (optional)

3-4 tablespoons crushed peanuts
1-2 Tablespoons dried shredded coconut
1/2 teaspoon salt, or to taste
about 4 Tablespoons chopped cilantro

Method

Cut off the ends of the ridge gourds. Scrape off the bumpy ridges with a vegetable peeler. Cut each into half lengthwise, and then slice crosswise into half moons. Add the pieces to a bowl of cold water with a teaspoon of salt, for about 10-15 minutes, and drain in a colander before using.

In the meanwhile, prepare the other things. Peel the garlic. Remove the stems of the green chilies and wash them. In a mortar and pestle, smash the garlic and chilies together until they barely hold their shapes. Do not smash into a paste, but you need them to release all their flavor.

Heat the oil in a wide pan or wok. Add the mustard seeds, and when they start to pop, add the asafoetida, turmeric, curry leaves, smashed garlic and chilies, and stir for a few seconds or until the garlic starts to change color slightly.

Add the chopped ridge gourd, and saute just until coated with the seasoned oil. Cook on medium-high heat, stirring occasionaly, until the ridge gourd is almost done. The gourds usually release a fair amount of water, so I do not cover them while cooking.

In the meanwhile, roast the coconut in a small dry skillet until it turns slightly golden brown. When it is cool enough to handle, crush it coarsely with fingers, or a rolling pin, or a pestle.

Add salt to taste, and the crushed peanuts and coconut to the vegetable in the last couple of minutes before turning the heat off, and stir everything around. Add the cilantro just before serving, and serve warm, with polis or rice and dal.

Turai Bhaaji served

Dodkyachi Bhaaji served with Polis
Thursday, July 01, 2010

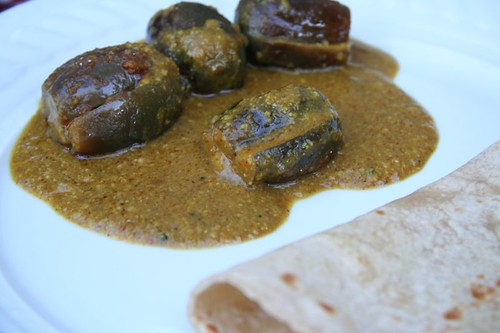
Khatte Meethe Baghari Baingain

Sweet and sour eggplants in creamy nut sauce

I said a big hurrah recently because it seems like 'baby eggplants' season has started now. Well, eggplant season in general, for which I have been waiting for several months. It has been a while since I bought much produce from a grocery store, so there are certain things that are just not in my purview if the farmers don't bring them in. Among the few things I miss are the eggplants. Fret no more, because hopefully they will go strong well into fall now. Which means there will be eggplants in the basket during each trip to the Farmers market, and it means that khatte meethe baingain will be devoured many times as well.

Khatte Meethe Baingain: Baby eggplant


Ever since I found this recipe, via Culinary Annotations, it has been a complete keeper and has turned into one of the many recipes that I barely have to look up because I have made it so many times. Like several others in my rep, it never made it to the blog because I never had a good photo to accompany it. The reason for that should be obvious too - could never wait long enough to take a photo after it was cooked, and there were never any leftovers to photograph!

One of the interesting bits in the recipe is cooking the eggplant partially in a microwave. While I do not use the microwave for any real cooking, I thought I could give this a try, and I have to say that it was a good thing to listen to the chef! The eggplants get just a little tender in the microwave first, and then get charred and crisp just right on the stovetop.

The other thing I like about this recipe is that it is a lot less complicated than the traditional Maharashtrian stuffed eggplant (bharli vangi), so it can be made even on a busy weeknight.

Khatte Meethe Baingain: Baby eggplant


Here is the paraphrased recipe with some tips, minor changes, and translations of ingredients to English.

Khatmitthe Baghari Baingan

Ingredients

Little baby eggplants 1/2 kg (about 12-15)
1-2 Tablespoons oil
1/4 cup peanuts
1 Tablespoon white poppy seeds (khus khus)
1 Tablespoon sesame seeds (beige)
1 teaspoon coriander powder
1 teaspoon red chili powder (cayenne)
1 teaspoon turmeric
1 teaspoon sambhar powder
2 teaspoons tamarind (not concentrate)
1 Tablespoon jaggery
1/2 teaspoon salt, or to taste

1/4 teaspoons fenugreek seeds (methi dana)
a few curry leaves
pinch of asafoetida
1-2 green chilies, slit lengthwise (optional)

Method

Dissolve the tamarind in 1/2 cup of hot water, and let is sit for 30 minutes or longer. Using a fork or your fingers, extract the pulp completely and strain it to get tamarind juice.

Wash the eggplants and pat them dry. Make two cross slits on them without separating the slices. I remove the tops, and make the slits from there, but you can keep the top and make the slits from the opposite end. Rub them with a few drops of oil, and place on a microwave safe plate. Microwave for four to five minutes.

Grind the poppy seeds and sesame seeds to a fine powder. Add the peanuts towards the end and grind them as well.

Heat about 1 Tablespoon oil in a large wide pan, and add in the eggplants with a pinch of salt. Cook the eggplants for a few minutes, turning them a few times until they are golden brown on all sides.

Add the spices, and the nut and seed powder, and saute everything together for a minute. Add the tamarind juice, jaggery, salt to taste, and bring it to a gentle boil. Cook for 5-10 minutes, making sure the sauce starts to seep into the eggplants. Add a little water if needed, by the tablespoon, if the sauce starts to thicken up.

In a separate tadka pan (or butter warmer, or small saucepan), heat about a teaspoon of oil, and add the asafoetida, fenugreek seeds, curry leaves, and green chilies. When they start to crackle, pour everything over the eggplants.

Wednesday, December 31, 2008

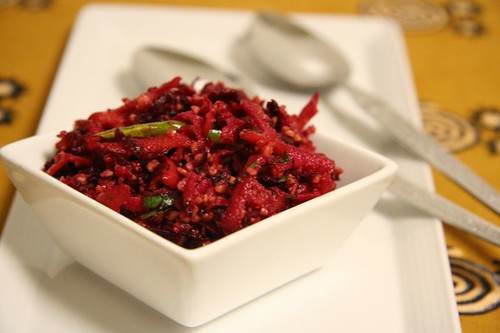
Carrot, Beet, and Jicama koshimbir

If I said that I have been busy for the last few months, that would be quite an understatement. The blog was started and nurtured in calmer times, but as other things took over, it fell aside. I did have things to write about at the back of my mind, but time wasn't in my favor.

A well-intentioned post for a friend's JFI event got delayed, and even my own 2nd blogiversary post couldn't be completed in time. Finally, I couldn't let the year end without one last post.

I have mentioned before that koshimbirs are a favorite of mine. These are usually dismissed as simple seasonal salads, but fortified with peanuts, and amped with seasonings, they are bright with flavor and texture.

This combination came together one evening inspired by what was bought at the farmers' market, and based on my usual recipe for carrot koshimbir. The jicama added a crisp sweetness, and the beets added color and earthiness to create a completely new favorite which was deliciously addictive, and healthy to boot. I practically finished the entire bowlful.

This can be made with only carrots and will be called gajarachi koshimbir, the Maharashtrian carrot salad. As always, all seasonings can be adjusted to taste, but my preference is to have a good balance of heat, tang, and sweetness.

Carrot, Beet, and Jicama Salad / Koshimbir

Carrot, Beet, and Jicama koshimbir

Ingredients

1 medium carrot
1 small beetroot (raw is fine)
1 small jicama
1/4 cup crushed peanuts
3/4 teaspoon red chili powder
1 teaspoon sugar
1 teaspoon salt, or to taste

For phodni (tempering):
1 teaspoon oil
pinch of mustard seeds
pinch of asafoetida (hing)
1/4 teaspoon turmeric
1 green chili, slit lengthwise into 2

1 Tablespoon lemon juice
1 Tablespoon chopped cilantro

Method

Grate the carrot, beet, and jicama in a medium sized bowl. Add the peanuts, chili powder, salt, and sugar.

Heat the oil in a small pan. Add the mustard seeds, and when they start to pop, add the asafoetida, turmeric, and chili. When the chili starts to change color, pour the oil over the rest of the ingredients.

Add the lemon juice and cilantro, and stir everything together to mix.


Have a healthy and happy new year!

Tuesday, April 15, 2008

Come say 'Hello'

At a different kind of milestone

A few months ago, I completed a year of my blog, and many of you wished me then. However, there is another day that is also very important to me, and that is the day when the blog really became public, because Manisha announced and endorsed it on her very popular blog. Until then, I was writing in my own little corner. A few friends who knew about it perhaps read it, but after that day, I was out there for the world to see. I got new readers, some of whom stop by regularly, made some new friends, and found out about many fascinating blogs, but I also suspect that there are some people who might be reading along, but have stayed silent so far for whatever reason. I do that too. So, on this day, I offer you the chance to delurk. Treat this as an open house, and come stop by. If you prefer to stay anonymous, tell me something about yourself. Or not, of course.

Since the post that Manisha linked to was a take on sabudana khichadi, I thought it was only fitting that this post should be about the classic, authentic sabudana khichadi, the real deal. It is truly one of my favorites, but the main thing about getting it right is the quality of sabudana, and how much water it absorbs. I even had one batch that practically turned to powder the minute I added water to it. Ever since, I have been mostly getting sabudana from our regular grocer in India, for the last few years. It sounds like a stretch, but then, on an average, I make sabudana khichadi only a few times in a year, and I want it be as perfect as it can be.

To test the quality, wash about a teaspoon of sabudana, and let it soak in a very small bowl, with just enough water for it to absorb. Cover, and let it sit for a few hours. Then separate the grains and press one of them gently to check. It should be soft and swollen, there should be no leftover water, and minimal powdery stuff. If not, you can use the batch to make sabudana wadas, thalipeeth, kheer, dahi sabudana, or something like that, which can be a lot more forgiving. With these parameters at hand, go ahead and soak a larger batch. Rinse the grains once, and then add just enough water to cover the grains, and not any more.

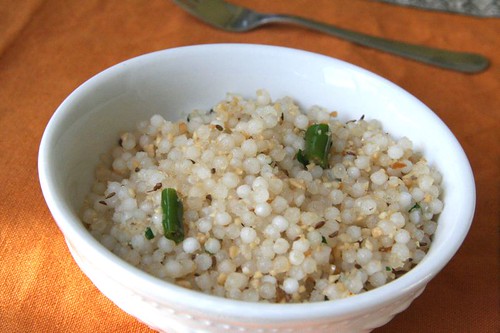
Sabudana Khichadi

Sabudana Khichadi

Ingredients

1 cup sabudana, soaked for several hours (or overnight) in minimal amount of water
1/2 cup of peanuts, coarsely powdered in a food processor
2 Tablespoons of grated coconut (optional)
salt to taste
1/2 teaspoon sugar
2-3 Tablespoons ghee
1 teaspoon of cumin seeds
2-4 small green chilies
1 small boiled potato (optional)
4 stalks of cilantro, finely chopped (optional)

Method

In a wide bowl, separate the sabudana gently with fork or finger. If there is too much powdery residue, shake off the sabudana in a sieve, and pour it back into the bowl. Add the peanuts, coconut, salt and sugar to the sabudana, and mix evenly.

Chop the chilies, about 1/2 inch wide. If using the potato, chop it into small pieces.

In a large and wide pan, heat the ghee, and add the cumin seeds. When they start to sizzle, add the chilies and stir for a few seconds. Add the potato and stir it around till it gets coated with ghee. Add the sabudana mix, and stir together until the grains get coated too. Keep stirring occasionally for about 10-15 minutes on medium high heat, until the sabudana is well cooked. The stirring is necessary to make sure that the grains do no clump together. If needed, you can add a little more ghee. When completely done, add in the cilantro. Best eaten right away.

Thursday, April 03, 2008

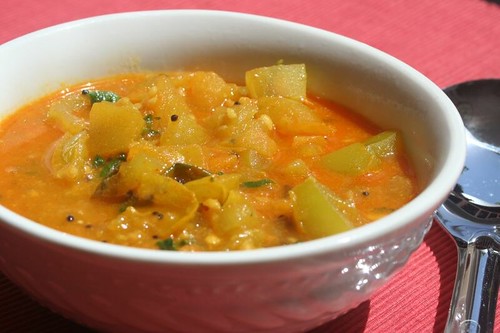
Green Tomato Rassa

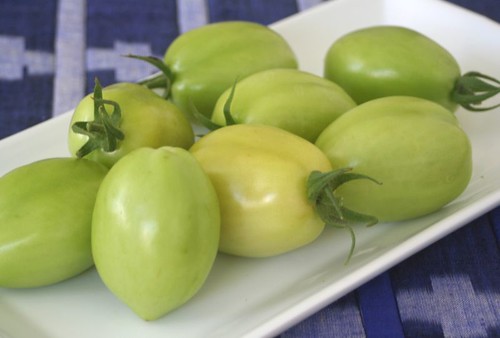
hirvyaa tomatochi bhaaji

Green tomatoes are something I have not seen in supermarkets here, and only rarely in farmers markets, so the only time I have had access to a lot of green tomatoes was when I had planted tomatoes one year and got a bumper crop all throughout summer. While I let most of the tomatoes ripen on the vines, occasionally some of the green ones fell to the ground, and once, an entire branch full of them fell down because of the weight.

Green Tomatoes

Red ripe tomatoes have started showing up at our markets in the last couple of weeks, and one of the farmers even had a small basket of green tomatoes. I grabbed a bunch right away. I didn't even have to think about what I would do with them - it had to be the green tomato rassa style bhaji that was one of my absolute favorites while growing up. Whenever it was made at home, I ate more than usual.

I always use my mother's recipe for this, but naturally, when I make it, it only comes close, and doesn't taste exactly the same. This simple homey side dish is best served with good polis, or thin soft rotis, brushed with a touch of ghee if you like.

Green Tomato Rassa bhaji

Green Tomato Rassa Bhaji

Ingredients

6 medium sized green tomatoes
1-2 Tablespoons oil
1/2 teaspoon mustard seeds
pinch of asafoetida (hing)
1/2 teaspoon turmeric
3/4 teaspoon chili powder (or to taste)
3/4 teaspoon salt (or to taste)
1 teaspoon sugar or jaggery
1 teaspoon goda masala
1 Tablespoon crushed peanuts
1 Tablespoon freshly grated coconut (optional)
2-4 Tablespoons chopped cilantro


Method

Core the tomatoes and chop them into roughly 1 inch sized pieces.

Heat the oil in a saucepan and add mustard seeds. When the seeds start to pop, reduce the heat, add the asafoetida and turmeric. Add the tomatoes, and stir around for a minute or two. Add chili powder and salt. Bring the heat back up, add about a cup (or more as required) of water, and when it comes to a boil, turn the heat down again, and let it simmer until the tomatoes are well cooked and soft but not falling apart. You can place a lid on it, partially, to speed up the cooking.

Since this is a rassa style bhaji, a fair amount of gravy is desirable, which means you can add more water if it gets too thick or too dry.

Finally, add the rest of the ingredients, and let it cook for just a few minutes more until the rassa starts to thicken. After the heat is turned off, let it sit for a few more minutes before serving. This really helps all the flavors to come together.

Variations

Curry leaves can be added just before the tomatoes are added. This wasn't in the original family recipe, but I love the flavor it adds.

Coconut is optional, I usually don't add it.

Tuesday, February 12, 2008

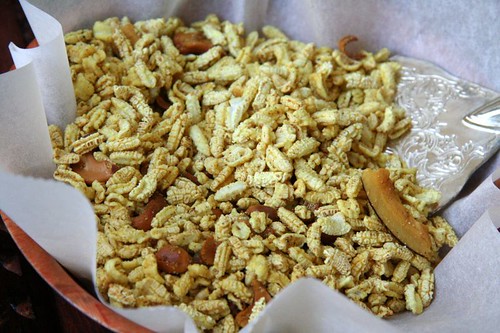
Popped Rice Chiwda

lahyancha chiwda

A recent invitation to a housewarming party said 'no gifts please'. While I appreciate the sentiment, I have known the hosting family for a long time, and hadn't met them in a while, so I just didn't feel it was right to go there empty handed. I decided on taking an edible gift instead, in place of an unwanted trinket that they were probably trying to avoid.

I thought of muffins or some kind of breakfast bread that they could have the next day, but wasn't sure if they ate eggs, so dropped that idea. They would also in all likelihood have some food leftover from the party that day, so I thought perhaps something that would last a little longer would be better. Something old-fashioned, but familiar, something healthy, but delicious, and with this list of criteria, I zeroed in on chiwda, more specifically lahyancha chiwda. It is much quicker to make than the traditional Diwali chiwda that I make annually for Diwali (of course) and all the ingredients needed for this chiwda were already at home.

Chiwda: of Lahya

Lahya (plural) is the marathi term for popped grains. The original recipe called for popped jowar (jondhalyacha lahya), but I have not seen those here. The popped rice lahya on the other hand are found quite easily in Indian grocery stores, and in giant big bags too, referred to as puffed paddy. This nomenclature doesn't sound right to me, because puffed paddy could also apply to regular kurmure that are used to make bhel, but that doesn't bother me. It is the store strategy of packing things in giant bags and thus forcing me to buy more of what I need that is actually very annoying.

This chiwda is adapted from a recipe in Ruchira, and needs two uniquely maharashtrian ingredients - goda masala and metkut, that together impart a wonderful taste distinct from the regular chiwda. Metkut is a multi-purpose powder made out of various grains and spices, and is one of the many things that I have never made myself. I bring a packet of metkut made at home every time I go to India, and it usually lasts in the fridge well until my next trip back. Metkut is also increasingly available now in well stocked Indian grocery stores in the US. If you cannot find it here, of course, you can look for it when you travel to Maharashtra. In Bombay, you will need to head to a store that is geared towards a more niche marathi clientele.

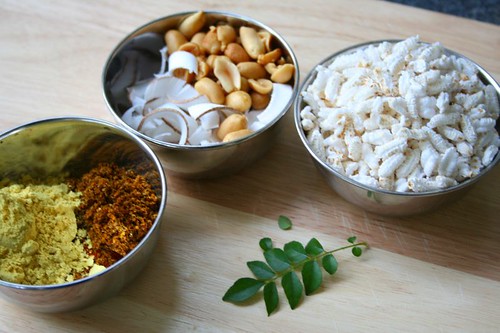
Chiwda: Ingredients
Spices, Nuts, Lahya, Curry Leaves

Before making the chiwda, check to see if the popped rice is crisp and crumbly. If not, spread it out on a cookie sheet and keep in a low temperature oven (between 150 and 170) for about 15 minutes, until the grains can be crumbled by just pressing it between a finger and thumb. This method works for me, but the grains available here could vary in quality.

Ingredients

6 cups of lahya (popped rice or jowar), crisped in the oven if required

4 Tablespoons oil
1/2 teaspoon mustard seeds
pinch of asafoetida (hing)
1/2 teaspoon turmeric
10-12 curry leaves
1/2 cup peanuts (or cashewnuts, or a mix of both)
1/2 cup coconut curls

1 teaspoon red chili powder (or to taste)
1 teaspoon coriander powder
1 teaspoon cumin powder
2 teaspoons goda masala
4 teaspoons metkut
2 teaspoons granulated sugar
1 teaspoon salt (or to taste)

Method


Mix the chili powder, coriander powder, cumin powder, goda masala, metkut, sugar and salt in a small bowl.

Heat the oil in a large wok, kadhai, or Dutch oven. Add the mustard seeds, and when they start to pop, add the asafoetida, turmeric, curry leaves, and the peanuts. When the peanuts are almost fried in the oil, add the coconut curls, and when they start to turn golden brown, take the wok off from the heat, and let the oil cool slightly.

Stir in the remaining dry spices into the oil, and then add the popped rice to it, and using a large spoon mix until the grains are coated with the spice and oil mix.

Let cool completely before eating, and store the remaining in an air tight containers. It can last for several days.


Notes

  • This is a moderately spicy chiwda, so reduce the amount of chili powder if you like it mild.
  • Keep the chiwda slightly undersalted when you make it, as it tends to absorb the salt in about a day.
  • Metkut often has salt added to it, so make sure you adjust the quantity of salt according to how salty the metkut is.


An Alternative to Popped Rice

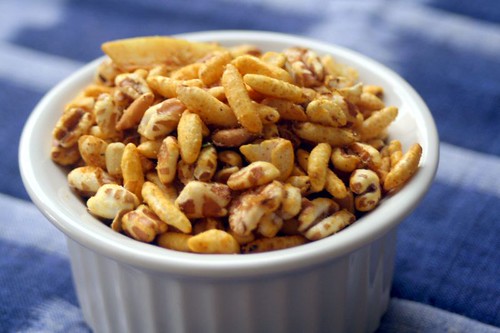
I have also made this chiwda using Kashi Wholegrain Puffs, and it tastes just as good. The story goes that I bought the cereal while on a virtuous eating mission, but did not like it at all as a regular cereal with milk. So something had to be done with it, and turned to this chiwda formula to take it from blah to ah!

Chiwda: Of Kashi Wholegrain Puffs

Sunday, December 30, 2007

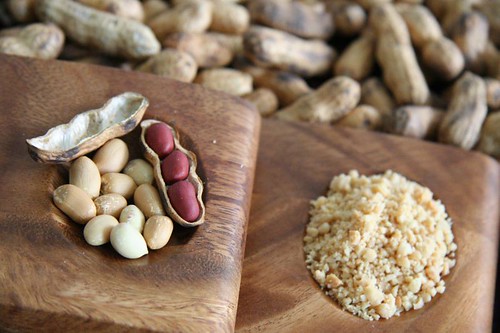
Crushed Peanuts

dANyAcha kUT

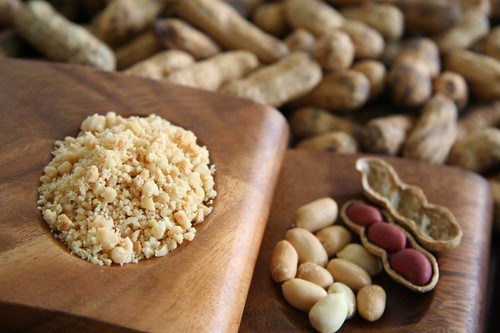
Focus on Crushed Peanuts
This picture is my entry to the Click event: Powdered peanuts ready for cooking are the focus here, with the peanuts a step below, and peanuts in their shell in the bokeh.

Peanuts are a staple in Marathi food and in a few other regional Indian cuisines as well, in many different forms, but the most common way of using them is either crushed or powdered. They are used in koshimbirs and salads, (a few recipes should be coming up), sabudana khichadi (a quick version of which is already a favorite) and other food that is eaten for fasts, for stuffings and gravies (not of the Thanksgiving variety!), in various snacks like besan coated, spiced and fried peanuts, and even in sweets. The list can go on.

In India, we used to buy the peanuts with the skin on them, which were then roasted at home in a thick kadhai. This caused the skin to blister and get brittle. When cooled, the peanuts were rubbed between palms to remove the skin, and then the skin could be separated from the nuts and discarded. The peanuts were then ready to be used for cooking. In the days before electrical gadgets, a large batch of the peanuts were pounded in a stone mortar to get a coarse powder which was then stored to be used.

Here, I buy roasted peanuts, which I quickly pulse a few times in the food processor as required. I rarely make a large batch to keep, just because it is so convenient to make some when I need it.

For times when you don't have a food processor, or might be too bothered to wash the bowls, there comes a tip from a friend who often reads this blog and sometimes comments. She says that you can put the requisite amount of peanuts in a strong 'ziplock' style plastic bag, close the bag after removing any excess air, lay it flat, and use a rolling pin to crush the peanuts inside the bag as coarse or fine as you like. Voila, powdered peanuts ready to be used in Maharashtrian and other dishes. I have tried it, and it really works well.

Focus on Peanuts
This is a picture with the peanuts in focus, and is not an entry to the Click event.

Wednesday, July 04, 2007

Yellow Sanza.. the traditional and the adapted

'A sanza is always yellow', is the first thing I am likely to hear when I mention yellow sanza. Yes, yes, I know that 'sanza' is yellow because it has turmeric in it, but why I started calling it so as a kid has to do with the degree of bright yellowness of the sanza that one of my Maushis made, as opposed to the one my mother made.

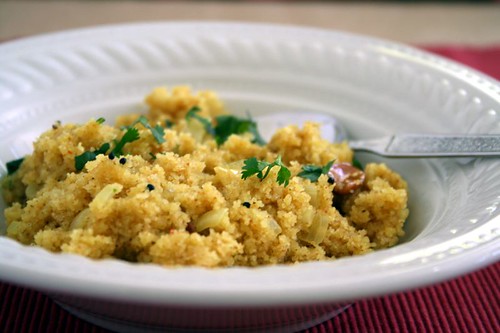
Regular rawa Sanza

Before I go ahead, let me introduce Maushi M, my mother's older sister, famous for her 'aagraha'. Yup, the same force-feeding-with-love that I mentioned once before. People were known to make all kinds of excuses when they visited her - "I just had lunch", "I am on my way to dinner", and so on, but nothing worked. Her mission seemed incomplete until people left her home groaning under the amount of food she brought out.

I had many reasons to visit or stay over at her house, because her daughters were my friends and their house was minutes away from ours. So there were numerous occasions when I fell under her 'aagraha', and I have tried all ways to finagle my way out of it, with no success. She is a great cook of everyday food, but one of the things I have eaten umpteen times at her house is sanza, and she makes the best one I have ever eaten. Never lumpy or sticky, and always delicious. It was something she would make in minutes, practically in the same time that tea was prepared on the next stove, or a 'limbu sarbat' (lemonade) was stirred up if it was a hot afternoon.

After I left home and started cooking, I asked my mother to get me her recipe, with no secrets withheld. One of those secrets was that she always kept a jar of roasted rawa ready, so that she could conjure up the sanza anytime. I still have the original copy of the recipe, even though I do not need it anymore because I know it so well by now, and have always meant to convert it to standard measurements and translate it, but never got around to doing that. Here it is.

Ingredients

1 cup of coarse rawa (semolina or farina)
1 small yellow onion
2-3 Tablespoons oil
3-4 Tablespoons of peanuts (or as much as you like)
1/4 teaspoon mustard seeds
pinch of hing (asafoetida)
1/4 teaspoon turmeric (or a little more if the turmeric is pale)
8-10 curry leaves
1-1/2 teaspoons salt (or to taste)
1 teaspoon chili powder
1 teaspoon sugar
some chopped cilantro, grated coconut, and wedges of lemon or lime for serving

Method

Pour the rawa into a deep skillet, and roast on medium high heat until it gets evenly golden brown in color and keep it aside to cool. This roughly takes 5-10 minutes.

Dice the onion. Heat the oil in a kadhai or wok. When it gets hot, fry the peanuts in it, and remove them with a slotted spoon to a small bowl.

Let the temperature of the oil come down a little, and then add the mustard seeds (they will pop right away since the oil is hot), hing, turmeric, curry leaves and onion. Saute it for a few minutes until the onion softens, and add 2 cups of water.

When the water comes to a boil, add the salt and chili powder. Start adding in the roasted rawa in a steady stream with one hand, while stirring it together with the other. Reduce the heat, add sugar and fried peanuts and stir through completely until the rawa has absorbed all the water. [At this point, the original recipe says to take a teaspoon of oil and drizzle it around the edge of the pan, but I don't do that.] Serve it right away, with a little bit of cilantro and coconut on top and a wedge of lemon or lime on the side.

Is it like Upma?

In terms of technique, it is very similar to its famous sibling 'upma', and is usually eaten for breakfast, or at tea time in Maharashtra, but I'll keep the spotlight on the lesser known one in this post. The seasoning is different, and naturally, so is the taste. It is also not as moist as upma, in fact in a good sanza the grains of rawa can be well separated, though they don't have to be. I have also rarely encountered any vegetables other than an occasional potato in a sanza, unlike upma which ranges from plain to additions of vegetables and cashews.

Adaptation with Quinoa

If you have read my posts until now, you know I cannot resist twists on ingredients and techniques. I had always wanted to try Quinoa for a long time, for its high nutrition value and protein content, but only when I read about how to cook Quinoa on the-cooker's blog, I knew that I could try giving it the sanza treatment. It worked out very well. 'The Cooker', thank you for those pictures and information!

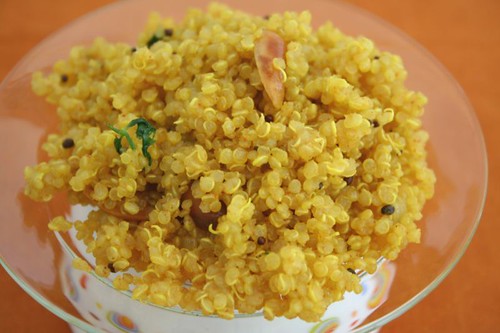
Quinoa Sanza

I used the above sanza recipe as it is, but there was no need to roast the grains beforehand. After the water started boiling and spices were added, I stirred in the quinoa, turned down the heat and cooked everything for roughly 10-15 minutes, and added the sugar and peanuts at the end. By then, the grains absorbed all the water, and the germ ring was visible too!

At this point, it is actually hard to decide which one I like better. The original will always remain a favorite, no doubt, but the quinoa version will not be left behind either, especially when a good protein boost is needed.

Monday, June 11, 2007

Peanut Sesame Chutney

Good things come in small packages

It would be an understatement to say that chutneys are an integral part of an Indian meal. They come in countless forms and combinations, and are used as condiments to zip up something that someone might find bland. In traditional maharashtrian meals, chutneys are generally served as part of a meal, in small quantitites, on the top left side of the plate.

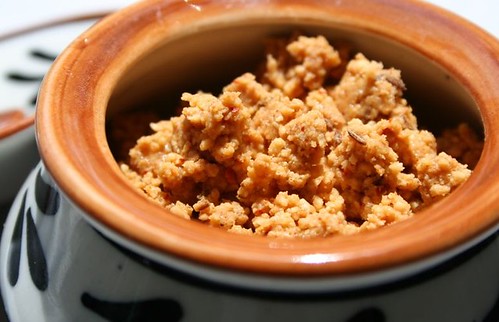
Peanut Sesame Chutney

This is a simple dry chutney that takes only minutes to make, but is high on flavor and very versatile. Since it is dry, it also lasts for a long time. In marathi it could be called 'shengdANe ANI tILAchi chaTNI'.

Ingredients

1 scant cup of peanuts
2 Tablespoons sesame seeds
2 dried red chilies
1 teaspoon cumin seeds
1/2 teaspoon red chili powder
1/2 teaspoon salt (or to taste)
1 teaspoon sugar

Method

On a medium skillet, roast the peanuts, sesame seeds, chilies and cumin seeds for a few minutes. Take it off the heat and let it get cool. Add the chili powder, salt, and sugar to it, and powder everything in a food processor. Do not over process, as it could get sticky. It will keep in an airtight container for several days, even weeks.

Serving Suggestions:

While this chutney can be definitely served as part of a meal, there are plenty of uses for it that I like. It can be stirred into some sesame oil to eat with dosas and idlis, or it can be stirred into some yogurt to make a wet chutney.

Other uses:

Add it to simple salads like onion-tomato or tomato-cucumber. Add it to sauteed okra at the end for an added crunch and taste. Sprinkle some on top of a bagel with cream cheese, a new favorite use.

I am sending this to the 'Regional Cuisines of India - Maharashtra' event.

Monday, May 28, 2007

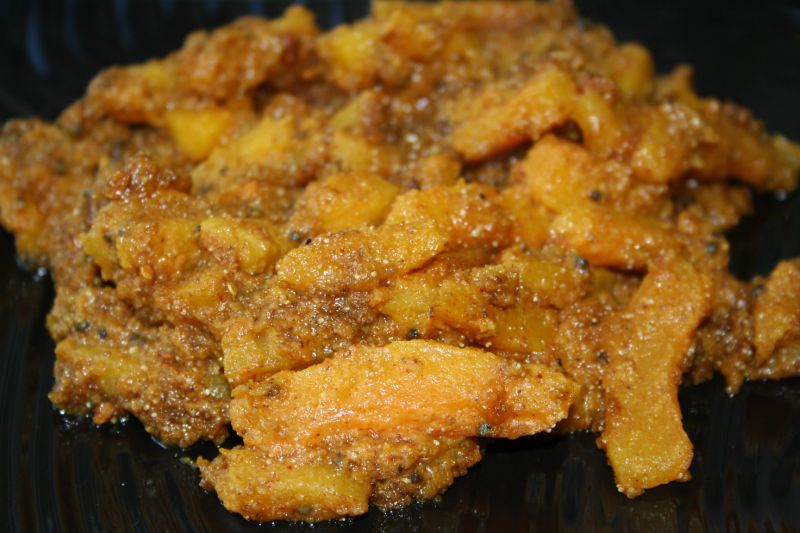
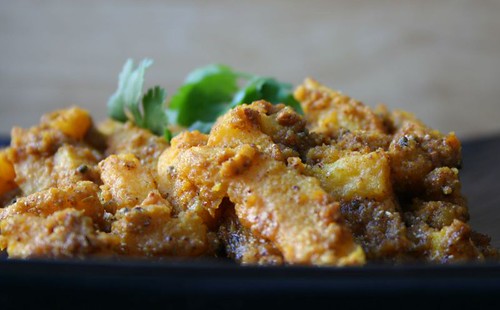
A pumpkin recipe, on request

Baakar Bhaaji

butternut squash bakar bhaji 1

A while back, gudy2shuz asked me if I had a recipe for 'lal bhoplyachi bakar bhaji' with sesame seeds and peanuts. She even offered me her aaji's (grandmother's) recipe, which was:
"you dice the pumpkin, roast together some dry coconut, khus khus, peanuts and sesame seeds. grind the stuff into a coarse powder. make a phodni of mustard seeds, hing and haldi, saute the pumpkin in it for a bit, cover and cook, then add the powder, some jaggery, red chilli powder and salt. garnish with coriander powder."
She added:
"its easy enough, but getting the mixture of sweet/spicy/nutty is at the heart of the puzzle."
In my mind, this was already good enough, but she wanted to know the precise proportions. I would have happily given them to her if only I knew how the result is supposed to taste like. Suddenly I felt quite responsible. I searched through some of my cookbooks to see if there was anything like that, and there wasn't. So the next thing was to search around the web, and I found Anita's recipe, which looked very close to what 'gudy' had described. To complete my quest, I checked with a friend if she knew something, and she said that she hadn't heard the term 'baakar bhaji', but there was a recipe in Ruchira that was very similar. Sure enough, it looked like it might be just the thing.

Since pumpkin season is well over now, I was skeptical about how the squash bought in a grocery store out of season would taste, because I have found that winter squashes bought at the local farmers' market are way superlative in taste compared to the others. I found a butternut squash that was grown in Mexico, because waiting until next fall would have been too long. Butternut squash is usually my first choice for making Indian sabjis that call for pumpkin. Acorn squash follows closely, because it also takes to spices very well.

The result was fantastic! I made a few changes to the original, like peeling the skin off instead of keeping it on, and reducing the amount of hing (1/2 teaspoon!). Here is the adapted recipe.

butternut squash bakar bhaji 2

Ingredients:

500 gm butternut squash
3 Tablespoons khus khus (white poppy seeds)
3 Tablespoons dried grated coconut
3 Tablespoons charoli nuts (can use peanuts instead)
3-4 pieces of tamarind or 1 teaspoon tamarind paste
6 Tablespoons oil
1/2 teaspoon mustard seeds
2 pinches of asafoetida
1/4 teaspoon turmeric
1 teaspoon methi (fenugreek) seeds
3/4 teaspoon red chili powder
salt to taste
1-1/2 Tablespoon jaggery
3 teaspoons goda masala

Method:

Peel the butternut squash and chop it into large pieces, about 2 inches in length.

Dry roast the khus khus, coconut and nuts for a few minutes until they start to change color. Let it get cool, and grind to a powder. Make a solution with half cup of water and tamarind.

Heat the oil in a kadhai or wok, and add the mustard seeds. When they start to pop, add the asafoetida, turmeric, methi seeds, and the pieces of squash. Saute for a minute or two, and then cover with a lid for a few minutes or until the squash is almost done. Add 3/4th cup of water, and to it add the ground powder. Add red chili powder, salt, tamarind water, jaggery, and goda masala, and stir it so that all these ingredients form a sort of gravy. By then the squash should be fully cooked too. Best to serve with plain rotis, polis, or parathas.

Thanks gudy2shuz, for introducing me to a new dish which is so good that I will be definitely making it again.

Wednesday, April 04, 2007

Sabudana Khichadi, is it really?

This is something I would have never blogged about if it hadn't been for desiknitter, and it is definitely not something I would tell purists either, who are likely to turn up their noses at what they hear.

IMG_3194_ed

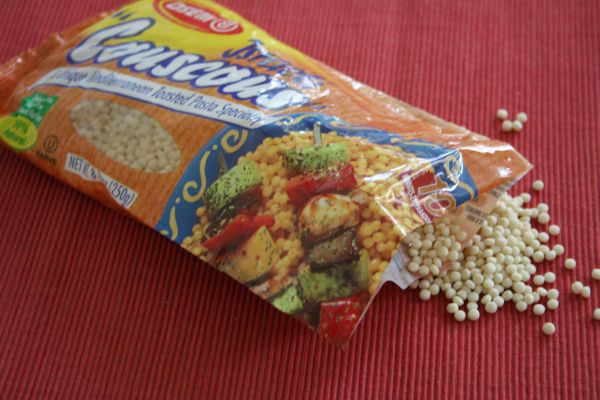
First of all, sabudana is made of sago, and Israeli Couscous which is also called pearl couscous is a toasted pasta. They are similar in appearance and size, but sabudana is white in color while the couscous is more of a light beige. Sabudana by itself does not have a strong taste, but it has a chewy texture that is very similar to that of cooked pearl couscous.

Sabudana khichadi in my book is on a pedestal. It is something I adore so much that I wouldn't mess with it, even for experiment's sake. But for a long time now it has been quite difficult for me to consistently find good quality sabudana that I know will not get powdery when soaked in water or get clumpy. In order to make khichadi, the grains have to absorb water and plump up, and stay separate. I suffered through several bad batches of sabudana, and in the quest to find the good stuff, I thought it may not be so bad to try out the couscous, and happily, the experiment worked! In fact, if I didn't tell someone what my key ingredient was, I am confident they would not be able to tell the difference. Having said that, I have found that the sabudana bought in India has worked the best for me so far.

Sabudana Khichadi

To cook the couscous:

1-1/4 th cup of water
pinch of salt
1/2 teaspoon of ghee
1 cup of Israeli couscous

Heat the water in a small saucepan. When it comes to a boil, add the salt and ghee to it. Add the couscous, and cook for about 5-7 minutes. Then turn off the heat and cover the pan. When slightly cool, run a wooden spoon through the grains to separate them and spread them on a plate.

Once the couscous is cooked, I apply the classic, traditional sabudana khichadi formula to it.

For the khichadi:

1/2 cup of peanuts, coarsely powdered in a food processor
2 Tablespoons of grated coconut (optional)
salt to taste
1/2 teaspoon of sugar
2 Tablespoons of ghee
1 teaspoon of cumin seeds
2-4 small green chilies, chopped
1 small boiled potato (optional)
4 stalks of cilantro, finely chopped

Add the peanuts, coconut, salt and sugar to the couscous on the plate and mix evenly. If using the potato, chop it into small pieces.

Heat the ghee, and add the cumin seeds. When they start to sizzle, add the chilies and stir for a few seconds. Add the potato and stir it around till it gets coated with ghee. Add the couscous, and stir it until it get coated too. If needed, you can add a little more ghee at this point. Stir for just a few more minutes, and then add in the cilantro. It is best eaten right away, but leftovers heated in the microwave are fine too.

For the authentic version, check this post.

Tuesday, March 27, 2007

Dudhi with Peanuts

Inspiration for cooking something can come from some odd places at times. Even tabloids! I don't recall when I saved this link in my ever growing list of recipes to try out, but when I was looking for something different to cook with bottle gourd (or dudhi or lauki or lau) I found it.


The 'lauki-groundnut sabji' looked simple, and particularly appealing with the use of garlic and peanuts, neither of which I usually associate with bottle gourd, even though they are familiar ingredients in marathi cuisine.

I weighed the gourd I had in the fridge and it was exactly 500 grams. Arre wah. Knowing that cups in India are often smaller than standard size cups, and also because it seemed like too much of a good thing, I decided to use only 3/4 th cup of peanuts, but when I was cooking, I thought that even that might be too much, so I held back some of it. Naturally, that meant losing some of the garlic and chili flavor too, which was part of the powder. Also, considering that the size of onions in India is much smaller than those in the U.S., I used only half an onion.

I cooked the vegetable right in the tadka, because boiling it in water does not appeal to me. So that normally takes 15-20 minutes depending on how tender the gourd is. Here is my version, with the quantities and method modified.

Dudhi with peanuts

Ingredients

500 gms dudhi or bottle gourd
1 teaspoon + 2 tablespoons of oil
1/2 cup of peanuts
1 teaspoon of red chili powder
4 cloves of garlic
1/2 teaspoon mustard seeds
1 teaspoon cumin seeds
pinch of turmeric
1/2 an onion, chopped
salt to taste
a handful of cilantro leaves, chopped

Method

Peel the bottle gourd, de-seed, and chop into about one inch cubes.

Heat one teaspoon of oil in a pan, and saute the peanuts with garlic for a few minutes. Grind the mixture with the chili powder in a food processor and set aside.

Heat the remaining two tablespoons of oil in a kadhai or wok. Add the mustard seeds, and when they start to crackle, add the cumin seeds and turmeric, followed by the chopped onion and saute until it starts to change color to a golden brown.

Add the chopped bottle gourd and stir it in. Add salt to taste, lower the heat, and place a lid on the pan. Let it cook for about 10-20 minutes until it gets tender, stirring once or twice. If it sticks to the pan, add a few spoonfuls of water.

Finally, add the ground peanut mixture and saute for a few minutes more. Check for seasoning and then add the chopped cilantro leaves. Best to serve with simple polis or rotis.


Update: The link to the recipe in Mid-Day does not work any more since they reconfigured their site.

Related Posts Plugin for WordPress, Blogger...