Showing posts with label snack. Show all posts

Saturday, April 20, 2013

Vegetable Tortillitas

I have never been one to catch onto trends quickly. It is no surprise then that I went to my first Zumba class only a few months ago. In fact it is a surprise I went to any kind of dance class. Dancing has never been my thing, and I have always been very diffident about it. For my first class, I took a spot at the back of the room, trying to follow along rather awkwardly. As the music proceeded, I realized that I just had to let go and have fun. Spanish songs that sound like new Bollywood music? Check. Belly dancing moves, hip hop beats? Check. And that certain Korean 'style'? I was supposed to groove to that too. How embarrassing. It took me some getting used to, but I find now that if taken with the right dose of attitude, Zumba can feel like a one hour vacation for the body rather than just a workout.

What does that have to do with this post? Well, the dish I am writing about is a little bit "everything goes" like Zumba. It started off from a Mark Bittman recipe for Spanish Tortillitas, and I adapted it with some Indian flavors, giving it a healthy and vegan twist, but the end result is utterly fun and enjoyable. It makes for a fine brunch or solo light meal, and is a fantastic (and I don't use this word lightly) vehicle for many different kinds of leftovers.
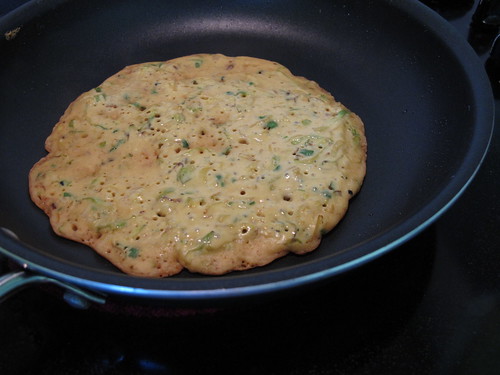
Tortillita cooking on pan

The first time I made it, I had a little leftover sauteed cauliflower with garlic and spices, made using Madhur Jaffrey's recipe for Baghari Phool Gobi. I used it in place of the shrimp, and had such a satisfying lunch while working from home, that the recipe zoomed up very quickly in my repertoire of all-time-bests.

Since then, I have used sauteed cabbage, brussels sprouts, or any type of greens such as these, and they all work great. Here is just one variation in which I used brussels sprouts and panch phoran, that I have made and loved.

For about 7-8 pancakes
Ingredients

1 cup besan
1/2 cup all purpose flour
1/2 cup whole wheat flour (see note)
1 teaspoon baking soda
salt to taste

For the filling:
1 cup finely chopped brussel sprouts
1 small shallot, finely chopped
1 green chili, finely chopped
8-10 sprigs of cilantro, finely chopped
2-3 Tablespoon oil
1 teaspoon panchphoran
1/2 teaspoon turmeric
1-2 teaspoons salt (or to taste)

Method

Heat 1 tablespoon of the oil in a deep skillet or wok. Add the panch phoran, and as the seeds start to swim around, add the Brussels sprouts, chili, and turmeric. Saute until the vegetable is coated with the oil and spices. Add some salt, and continue to cook for a few minutes on high heat until the Brussels sprouts start to get a few light brown spots. Then turn down the heat and cook for a few more minutes. Add in the chopped shallots, and let it cool. You can make this ahead of time as well.

In the meanwhile, mix the flours, baking soda, and salt. Add about 2 cups of water, starting with 1 cup, and whisking until a thick mixture of pancake batter consistency is formed. You want it to be just thick enough so that you can pour it from a ladle.

Add in the cooled Brussels sprouts and cilantro, and stir gently with a large spoon. Heat a wide non-stick skillet or omelet pan, and spread a few drops of oil on it. Pour in about a ladleful of the batter, and spread it around gently by swirling the pan to form a pancake. Check in a couple of minutes to see if it is starting to get brown on the bottom. When the top feels set, flip with a spatula, and cook for another two or three minutes, adding a few drops of oil on the side until is crisp outside. Try to serve and eat immediately.
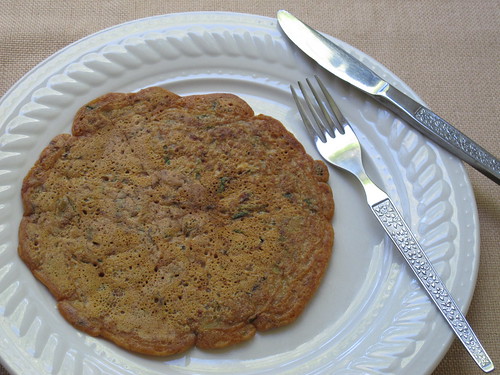
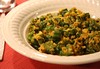
Tortillitas

Note: 

* You can use just all purpose flour as in the original recipe. I have tried different kinds of flours in the mix, like cornmeal, fine rawa, and atta. Feel free to experiment, keeping overall ratios about the same.

* Use a non-stick skillet. When I tried to make this on a cast iron pan, it stuck to the pan miserably!

Monday, March 26, 2012

Rava Cake

I truly vanished from the blogging scene. If one can say that I was ever on the scene at all. The reason for not posting much wasn't any kind of a conscious decision. Those few who read Evolving Notes know that the kitchen is still buzzing with action, even though I have gotten busier and busier over the months. I am packing lunches, trying to squeeze in quick healthy dinners every weekday, and trying out new things or baking on the weekends. What I do not have any more time for is taking pictures, whether good, bad, or ugly. I hardly ever have the few seconds between preparing a meal and sitting down to eat it, as right away I need to continue meetings with the other half of the world that comes in to work by then. That is just how my life has been, thanks to work, commute, and travel.

Several weeks ago, I was driving in the dark, after just another busy day, when I thought about the "rawa cake" that my sitter used to make as an afternoon snack. To this day, I count her among the best cooks whose food I have had the pleasure of eating. On most afternoons she would make some kind of snacks for everyone who was around. Her ghavans were legendary, her chaklis are still the best, and thanks to her weekly upwas, she instilled in me a lifelong fondness for sabudana khichadi.

It is inexplicable why I thought of her rava cake though. It wasn't among my most favorite things back then, but suddenly the memory of the taste had gripped me, and I wanted to make it as soon as I could. I asked a few trusted friends, and they gave me their family recipes, but since it was a specific taste that I was going after, I had to go to the source and call up the lady whom I have always called Aatya. She said she used equal parts of rava, dahi (plain yogurt), and sugar by volume, and some LoNi (home made butter), adding that they do like things on the sweet side. "What about ghee or oil?", I asked. "Ghee is fine, but not oil". (See later how I flouted her rules anyway). I asked her if she added anything else for flavor, like cardamom. "I don't add anything else, but why would that taste bad. You can add anything you like".

I made the cake right away, reducing the sugar a little. The simplicity of the taste was astounding, and the best news was that it tasted just like Aatya's!

Later, I got creative and made other versions of the cake, adding cardamom and saffron, lemon zest and lemon, and even a vegan version with soy yogurt, oil, and orange zest, and they were all good. Within the last couple of months, I have made this cake five times.

It holds a special place for me, and I wanted to share it with others. It also meets my blogging criteria of posting something that I have made multiple times and would want to make again and again.

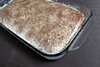
Rava Cake / Semolina Cake


Semolina cake / Rava Cake / Ravyacha Cake

Ingredients

1 cup unroasted medium coarse or fine rava (can also use semolina or farina)
1 cup yogurt (regular or soy yogurt)
3/4 cup sugar
3 Tablespoons softened butter, ghee, or oil
1/4 teaspoon baking soda
Optional : 2 cardamom pods powdered fine, and a small pinch of saffron

Method

In a large bowl, mix the rava, yogurt, sugar, and butter, and mix everything with a large spoon, until all the ingredients are mixed well and a batter is formed. Let it rest for 30 minutes to an hour. Add the baking soda, and flavoring ingredients of choice, and stir everything again until completely mixed.

Pre-heat the oven to 350 degrees. Grease an 8 X 8 inch square or 9 inch round glass or ceramic baking pan, and pour the batter evenly into it, using a spatula.

Bake for about 30 minutes, or until the top is just golden brown and springy to touch. Let it cool completely before turning it out of the pan.

Tuesday, July 20, 2010

Easy Mango Cake

Is there such a thing as 'too easy'?

One of my grandfather's friends has a small mango canning and preservation enterprise. They live in the middle of the best mango producing regions in India, and use some of the finest local mangoes in their products. They sell a lot of their products in their store locally, but also send it out to several cities in India, and perhaps abroad too.

If I or some of my relatives ever get a chance to get there, we stop by their house, which is right next to the store (or is it the other way around?) and usually buy a few things from them, especially their jars of mango pulp. These are glass jars, unlike the tin cans one sees commonly, and I prefer those for two reasons. One is that one can see what is inside, and secondly, I think there is a much lesser chance of any kind of strange stuff happening, such as something that could happen if the acid in the mango reacts with metal.

Other than those few jars, I rarely buy canned mango pulp. The jars are by and large savored by themselves as Aamras, particularly when pooris are on the menu. Hence I went back and forth over whether I should use up almost half of a precious jar just to try out something new. I can say now for sure that it was worth it. This cake is superb, in taste as well as texture. I have also yet to meet a cake recipe that was easier to whip up; it is literally "dump and stir". It is a complete keeper that I would definitely try again, and perhaps even buy some cans of mango pulp if needed!

Adapted from here.

Mango Cake


Rava Mango Cake

Ingredients

1 cup fine rava (or semolina flour)
1 teaspoon baking powder
1/2 cup sugar
2 pods of green cardamom
1 cup canned mango pulp
1/4 cup oil
1 Tablespoon golden raisins (optional)
1 Tablespoon chopped almonds (optional)

Method

Preheat the oven to 375 degrees.

In a medium bowl, mix the rava, baking powder, and sugar. Using a flexible spatula, stir in the mango pulp, and the oil, until the rava absorbs the liquids completely to form a batter.

Powder the seeds of the cardamom in a mortar and pestle and add it to the batter.

Lightly grease a small loaf pan (8 X 4 inches would be fine, mine is 9 X 5).

Pour the batter into the pan. Sprinkle the raisins and almonds on top. Bake for 25 minutes. Insert a toothpick to check if done.

Notes

1. I actually forgot to add the cardamom powder, but it was not missed. I am eager to try it with it next time.

2. Most likely, the quantities can be increased by 1.5 times to fit a loaf pan better.

3. It can be made just as well with melted butter in place of oil, I think.

4. The dried fruit and nuts are optional, and can be played around with. Mix into the batter, or add on top like I did.

Entry Update

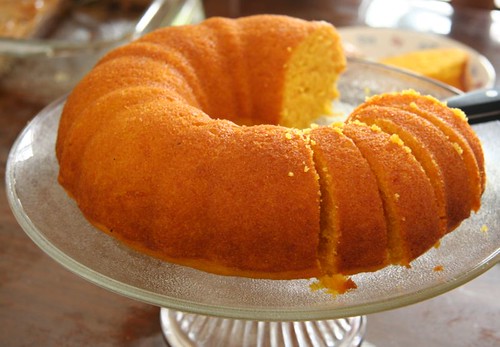
I recently made this cake again, with increased quantities, and baked it in a bundt pan. It took me 35 minutes to bake it. Since the mango pulp was quite sweet, I decreased the overall sugar quantity as well, and did not use any dried fruit or nuts. It was enough for 12-16 people. The process remains the same as above, but here is an update on the quantities.

2.5 cups fine rava (or semolina flour)
2.5 teaspoons baking powder
1 cup sugar
4-5 pods of green cardamom
2.5 cups canned mango pulp
1/2 cup + 2 Tablespoons vegetable oil
a few drops of oil for greasing pan

Mango Cake again

Saturday, March 20, 2010

Hearty and Healthy Whole Bean Cutlets

In all these years, I can hardly recall having made 'cutlets'. I am referring to the very Indian 'vegetable cutlets', which you would be hard pressed to find much in the mainstream outside India. When I think about it, there are several probable theories to it. The main reason is probably because they usually involve frying, and they invariably involve potatoes. The other is that they were seldom made at home. This was something we ate occasionally as part of a large buffet, at tea time at someone's place or as a snack or appetizer at casual restaurants. So then I suppose I never thought about making them myself either.

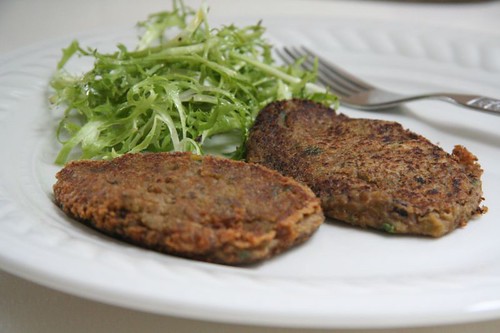
However, after I tasted these lightly fried bean cutlets made by Mints, I made them twice in just the last two months. They are full of proteins, do not need much fat, and the best part is that most of the work is done by the pressure cooker and food processor. The type of beans you can use is also flexible - I used whole moong, matki, garbanzo beans, and whole dried peas. If shaped into larger sizes these would be perfect bean burgers too. Just be sure to salt the batter well as most beans have a tendency to absorb quite a bit of salt.

With this post, I am defying two norms of my usual cooking. First is the making of 'cutlets' itself. The other thing is freezing. I hardly ever freeze food but I found that these are really freezer-friendly. I make a large batch, then pop some of the cutlets, without frying, into a freezer bag or box, such that they lay flat in the freezer. Then I saute a few as needed, to add heft to a salad, to increase the protein quotient of a meal, or just to add some zip to leftovers. These can also be baked on a lightly oiled baking sheet, at about 400 degrees for 20 minutes, 10 minutes on each side. There is no need to thaw them out either.

Dal Cutlets

Another good thing about this post is that the recipe posted by Mints is perfect as is, and so it is on its way to the first edition of Blog Bites.

Sunday, January 31, 2010

Eggless Low-fat Lemon Loaf

It is about that time of the year when I start scouring my bookmarks, links, notes, and cookbooks for ideas to use lemon zest, lemon juice, or the whole lemon, as my Meyer lemon tree is heavy with fruit and ready to harvest. There will be plenty of citrusy salads and even a basic waran bhaat will get a generous squeeze of home grown lemons, but it is the baked goods that I look forward to experimenting with.

While many of the recipes I look through get pushed lower on the list if they are too daunting or time consuming, this snack cake looked easily adaptable. The fact that it is low-fat made it sound even better. I added plenty of lemon zest for flavor, and baked it in a loaf pan, turning it into a lemony loaf cake. I had to bake it a little longer which was probably due to the shape of the pan. I also de-veganized it because I didn't want to run out to buy a small amount of soy yogurt and soy milk, but using soy would make it truly vegan.

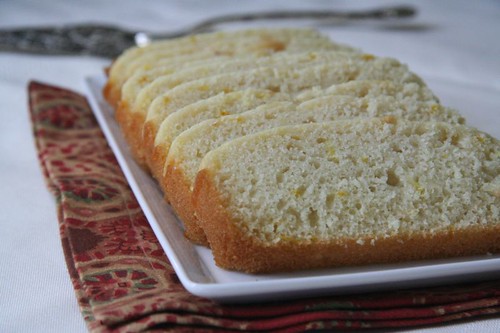
This is a lovely light cake that can be enjoyed without guilt as a snack, with tea, or for breakfast, and when dressed up with a fruit compote or puree it works as an elegant dessert too. I am sending it to this month's Grow Your Own event.

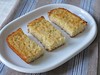
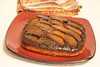
Lemon loaf cake

Here is my recipe, adapted from Susan's, with many thanks to her.

Meyer Lemon loaf Cake

Ingredients

1 3/4 cups cake flour
1/2 cup sugar
3/4 teaspoon baking soda
1/4 teaspoon baking powder
pinch of salt
1/4 cup yogurt (regular or soy)
1-1/2 Tablespoons oil, plus a little more for the pan
1/2 teaspoon vanilla extract
1/2 cup water
1/2 cup milk (regular or soy)
2 Tablespoons lemon juice
1 teaspoon lemon zest

Method

Pre-heat the oven to 350 degree F.

Grease a 9x5 inch pan well with oil.

In a medium bowl, sift together flour, sugar, baking soda, baking powder, and salt.

In a large bowl, blend the yogurt, oil, vanilla, water, soymilk, and lemon juice. Do not overmix. Stir in the lemon zest. Stir in the dry ingredients with a whisk or spatula.

Pour the batter into the greased pan.

Bake for about 35 minutes until a toothpick comes out clean. Remove and allow to cool completely. Loosen sides gently with a knife and remove from pan.


Serving suggestion

Mango Sauce: Mix together a few tablespoons of mango jam with equal amount of water, and heat for a few minutes until it forms a sauce.

Lemon cake with mango sauce

Saturday, June 14, 2008

Cranberry Orange Bread

For the last few weeks I have been having house guests off and on, and while it has been a lot of fun, having many people at home is also quite an exercise in coordination.

The differences start early in the day and continue on till next day. There are early risers and late risers, coffee drinkers, tea drinkers, bournvita drinkers, and lactose intolerant soymilk drinkers. Cereal eaters, toast eaters, egg eaters, rice eaters, roti eaters, spice haters, spice needers, short nappers, long nappers, non nappers, slow walkers, fast walkers, early sleepers, late sleepers, and so on it goes. They are all excused though, they are family.

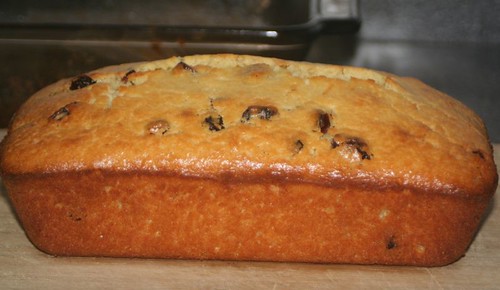
Cranberry Orange Bread/Cake: loaf

The gang was supposed to arrive in the late afternoon, too late for lunch and too early for dinner. So I baked this cranberry orange bread earlier in the day so they could have it as a quick snack. I skipped the glaze, since there is enough sugar in it already, and also because there were children in the party. This is yet another of those 'is this a bread or cake' conundrums, but whatever you call it, it is a moist, sweet, slice-able, delicious loaf that is easy to make, and disappears almost as soon as it is put out for consumption. Yes, it is darned rich too, which is why I usually bake it when sharing it with several other people.

Here is the recipe, nearly verbatim, but halved for one loaf.

Cranberry Orange Bread (with Grand Marnier Glaze)

Ingredients

3/4 cup unsalted butter, softened, plus more for buttering pan
3/4 cup sugar
2 eggs
1/2 cup orange juice
1/2 cup sour cream
1 tablespoons freshly grated orange zest
1 teaspoons vanilla extract
2 cups all-purpose flour
1/2 tablespoon baking powder
1/4 teaspoon salt
3/4 cups dried cranberries

For the glaze, if making

1 cup powdered (confectioner's) sugar
3 to 4 tablespoons Grand Marnier or other orange liqueur

Method

1. Preheat oven to 330°. Butter a 6-cup-capacity loaf pan.

2. With an electric or standing mixer on medium speed, cream butter and sugar together in a large bowl until pale and fluffy, about 3 minutes. Add eggs one at a time, mixing well after each. Add orange juice, sour cream, orange zest, and vanilla; mix until blended.

3. In a separate bowl, whisk together flour, baking powder, and salt. Add flour mixture and cranberries to wet ingredients and mix just until dry ingredients are absorbed; do not overmix.

4. Pour batter into prepared loaf pan. Bake for about 60 minutes or until a toothpick inserted in the center of bread comes out clean.

5. Let the loaf cool in the pan for 10 minutes, then remove and transfer to a cooling rack set over a large baking sheet.

6. For the optional glaze: in a small bowl, whisk together powdered sugar and 3 tablespoon Grand Marnier. Glaze should have consistency of thick maple syrup or corn syrup. If it is too thick, thin with an additional liqueur by the teaspoon.

With a thin skewer or long toothpick, poke deep holes in the top of the loaf. Drizzle with Grand Marnier glaze so that it coats the top, runs down the sides, and seeps through the holes.

7. Let the loaf cool completely before slicing.

Cranberry Orange Bread/Cake: sliced

Tuesday, April 08, 2008

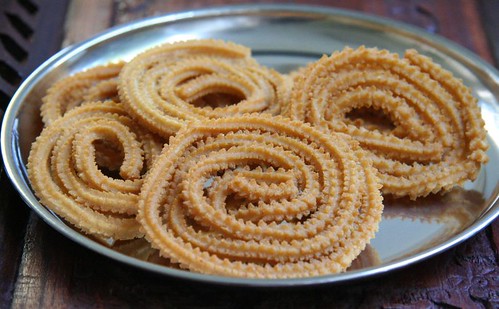
Chaklis, the first attempt

Chaklis, the ultimate snack

Ingredients

chakli bhaazani
water
red chili powder, hing, salt
oil


Method

Visit the person who you think makes the best chaklis in the whole wide world, during Diwali. Eat chaklis, and start asking questions. Whip out small diary from bag as they talk, and take notes.

Steer the conversation gently until they offer you some of their freshly ground chakli bhaazani. They love you anyway, so that won't be too difficult. In addition, they might also give you their thalipeeth bhaazani, which is not a bad thing at all.

Return home, put the packet in the freezer. After a few months you will hear from them and they will ask whether you got around to making chaklis. Be shameful that you haven't. Put it on a priority list. Wait for a day when the weather is cool but not damp.

Take out the sorya (chakli press) that has been lying unused for a couple of years. Whip out diary again, and follow instructions for making chaklis. Within twenty minutes, gorgeous looking chaklis will be coming out of the frying oil. Go against most instructions and don't wait until they are cool because that is impossible. Check each chakli for optimum crispness. Wonder why some are slightly softer than others. Jump joyously at the ones that have just the right crispness and color. Suddenly remember that pictures of the beauties have to be taken.

Feel confident about a second attempt.

Friday, March 28, 2008

An Aloo Tikki Factory

Potato Patties: Closeup

Good friends shouldn't need much of an excuse to get together, but with busy lives and global schedules it can get really difficult to get a bunch of people to meet for even one meal. I am referring to some old friends of mine - whenever we meet, we have such a fabulous time we wonder why we don't all get together more often, and then part with promises to meet soon, but before we know it another year has passed, or two.

Recently, when one of them decided to leave the land, it was a compelling reason for all to meet, as it would be our last chance to see the family for a while. Someone offered to host, and the planning for a spontaneous last minute potluck began, which meant quick decisions and even quicker work. The yeses and the nos, the headcount, and of course the menu.

The host wanted grazing dishes, rather than the usual fare, so I offered the first thing that came to mind - potato patties, if someone could make ragda, so we could have ragda pattice. One friend immediately opted for it (got to love friends like these!).

Making these potato patties seemed simple, but it can become fairly laborious and time consuming when one has to make almost 5 dozen of them. Unlike aloo tikkis, the potato patties that are served with ragda don't need to be deep fried, and they are crisped on the skillet with only a little oil. So, strictly speaking, these potato patties used in ragda pattice were not aloo tikkis, but that just gives the title a much better ring.

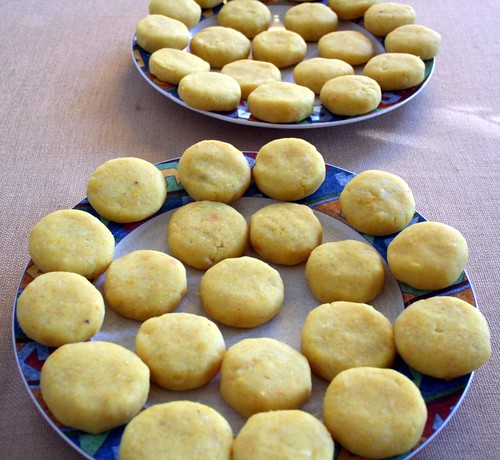
Potato Patties: before frying

I boiled a dozen large russet potatoes in the pressure cooker. When cool enough to be handled, these were peeled, and roughly mashed in a large bowl, and seasoned with about 1/4th teaspoon turmeric, about 1 teaspoon red chili powder, and plenty of salt. To this mix, I added about 8 crumbled slices of good white bread, (the crusts were removed, left to dry in the fridge, and ground up later to make bread crumbs, but that is another story), and adjusted the seasoning.

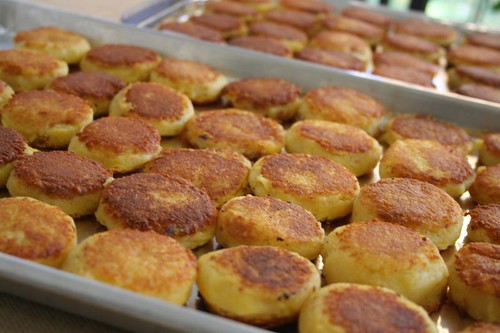
Potato Patties: the batch

Then, the life saver came into play. To get the potatoes mashed up really smooth, I put the whole mixture through a potato ricer, creating a dough like consistency which could be formed into patties. These were shallow fried on a large skillet, on medium heat, for a few minutes on each side to get them evenly brown and crisp. Placed on large trays, these were ready to be taken to the party.

Cool Tool: Potato Ricer

I had bought the ricer originally to make gnocchi, which I have yet to get around to make, but besides the patties, I have used it a few times to mash potatoes for alu parathas. The potatoes turn out really smooth, with no sticky bumps while rolling out the parathas.

Potato Ricer

Cool Tool: The picture of this nifty gadget goes to Click: Metal.

Tuesday, February 12, 2008

Popped Rice Chiwda

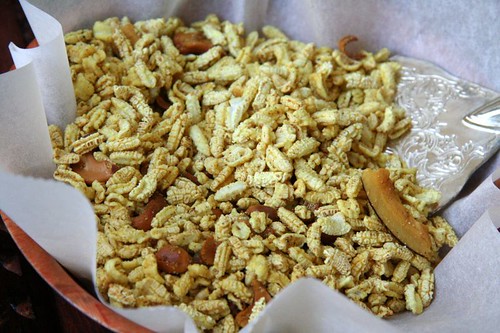
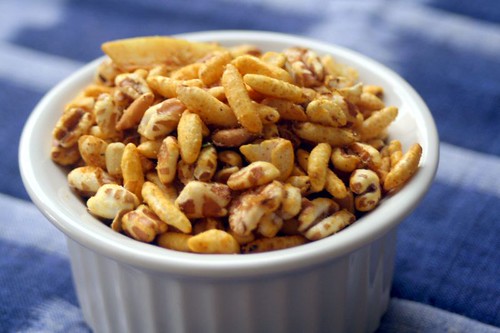
lahyancha chiwda

A recent invitation to a housewarming party said 'no gifts please'. While I appreciate the sentiment, I have known the hosting family for a long time, and hadn't met them in a while, so I just didn't feel it was right to go there empty handed. I decided on taking an edible gift instead, in place of an unwanted trinket that they were probably trying to avoid.

I thought of muffins or some kind of breakfast bread that they could have the next day, but wasn't sure if they ate eggs, so dropped that idea. They would also in all likelihood have some food leftover from the party that day, so I thought perhaps something that would last a little longer would be better. Something old-fashioned, but familiar, something healthy, but delicious, and with this list of criteria, I zeroed in on chiwda, more specifically lahyancha chiwda. It is much quicker to make than the traditional Diwali chiwda that I make annually for Diwali (of course) and all the ingredients needed for this chiwda were already at home.

Chiwda: of Lahya

Lahya (plural) is the marathi term for popped grains. The original recipe called for popped jowar (jondhalyacha lahya), but I have not seen those here. The popped rice lahya on the other hand are found quite easily in Indian grocery stores, and in giant big bags too, referred to as puffed paddy. This nomenclature doesn't sound right to me, because puffed paddy could also apply to regular kurmure that are used to make bhel, but that doesn't bother me. It is the store strategy of packing things in giant bags and thus forcing me to buy more of what I need that is actually very annoying.

This chiwda is adapted from a recipe in Ruchira, and needs two uniquely maharashtrian ingredients - goda masala and metkut, that together impart a wonderful taste distinct from the regular chiwda. Metkut is a multi-purpose powder made out of various grains and spices, and is one of the many things that I have never made myself. I bring a packet of metkut made at home every time I go to India, and it usually lasts in the fridge well until my next trip back. Metkut is also increasingly available now in well stocked Indian grocery stores in the US. If you cannot find it here, of course, you can look for it when you travel to Maharashtra. In Bombay, you will need to head to a store that is geared towards a more niche marathi clientele.

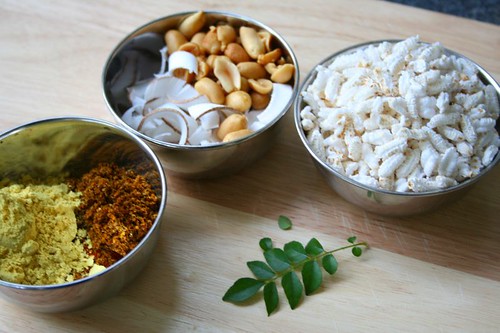
Chiwda: Ingredients
Spices, Nuts, Lahya, Curry Leaves

Before making the chiwda, check to see if the popped rice is crisp and crumbly. If not, spread it out on a cookie sheet and keep in a low temperature oven (between 150 and 170) for about 15 minutes, until the grains can be crumbled by just pressing it between a finger and thumb. This method works for me, but the grains available here could vary in quality.

Ingredients

6 cups of lahya (popped rice or jowar), crisped in the oven if required

4 Tablespoons oil
1/2 teaspoon mustard seeds
pinch of asafoetida (hing)
1/2 teaspoon turmeric
10-12 curry leaves
1/2 cup peanuts (or cashewnuts, or a mix of both)
1/2 cup coconut curls

1 teaspoon red chili powder (or to taste)
1 teaspoon coriander powder
1 teaspoon cumin powder
2 teaspoons goda masala
4 teaspoons metkut
2 teaspoons granulated sugar
1 teaspoon salt (or to taste)

Method


Mix the chili powder, coriander powder, cumin powder, goda masala, metkut, sugar and salt in a small bowl.

Heat the oil in a large wok, kadhai, or Dutch oven. Add the mustard seeds, and when they start to pop, add the asafoetida, turmeric, curry leaves, and the peanuts. When the peanuts are almost fried in the oil, add the coconut curls, and when they start to turn golden brown, take the wok off from the heat, and let the oil cool slightly.

Stir in the remaining dry spices into the oil, and then add the popped rice to it, and using a large spoon mix until the grains are coated with the spice and oil mix.

Let cool completely before eating, and store the remaining in an air tight containers. It can last for several days.


Notes

  • This is a moderately spicy chiwda, so reduce the amount of chili powder if you like it mild.
  • Keep the chiwda slightly undersalted when you make it, as it tends to absorb the salt in about a day.
  • Metkut often has salt added to it, so make sure you adjust the quantity of salt according to how salty the metkut is.


An Alternative to Popped Rice

I have also made this chiwda using Kashi Wholegrain Puffs, and it tastes just as good. The story goes that I bought the cereal while on a virtuous eating mission, but did not like it at all as a regular cereal with milk. So something had to be done with it, and turned to this chiwda formula to take it from blah to ah!

Chiwda: Of Kashi Wholegrain Puffs

Saturday, August 18, 2007

The Power of Sugar

Sweet!

It is time to celebrate, as Manisha of Indian Food Rocks, sent me this pretty pink 'Rockin' Girl Blogger' award, which is easily my first award in the world of blogging. Even though it would take a good stretch of the imagination to call me a girl anymore, I love it. I also really don't see myself so much as a blogger as much as someone who has a blog - is there a subtle difference? I still love it. Thanks, Manisha.

rockinggirlblogger

In the tradition of passing on the awards, I started making a list of people I would have liked to send it on to, and the list kept growing, so I pared it down a lot.

Even though both my favorite food blogs incidentally also have some guy power associated with them, this is specially for the women, Melissa of The Travelers Lunchbox and Nicky of Delicious Days.

With so much professional acclaim and press to their credit, I am a complete nobody to give them an award, but this is a token of my appreciation for the huge inspiration that they were to me, and for all the things I am continuously learning from their sites. So I am sending it over to them anyway.

This was also a perfect chance to sing their praises. Detailed crisp writing and the dreamy photographs are what drew me to 'The Travelers Lunchbox', and have kept me there, making me come back, again and again.

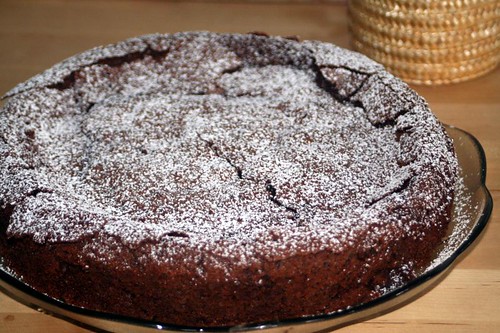
To add to all of this, her recipes are excellent. Like this flourless chocolate cake that I made for a potluck dinner that a friend had hosted. Luscious.

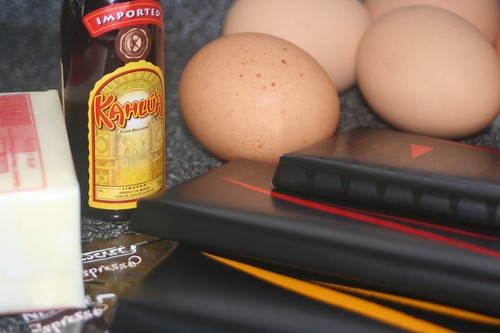
'mise en place' for Flourless chocolate cake

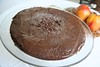
Flourless chocolate cake

Her Avocado Milkshake (you read that right) and Pesto Rosso are amazingly good too.

With Nicky's blog, first those photographs hooked me, but once I started reading her posts, it was her attempts to recreate German classics, including those from her grandma's kitchen, that struck a chord with me, as it resonated to a great extent to the way I sometimes try to reach out to my roots via food. From her site, I chose these Sponge Cake Rolls, that I made half with strawberry jam and half with an Alfonso mango jam.

Jam Rolls, still unrolled

Jam Rolls, just rolled and cut

Jam Rolls, finished

If you are not already lost in their site, I recommend this Bircher Müesli too.

Last but not least, I want to pass it to desiknitter, who doesn't yack about food like me, but instead knits knits knits and keeps a lively blog full of interesting episodes in her life. Although, sometimes she slips, and talks about food too. Try that raw mango chutney, it's the best.

kairichi chatni
Related Posts Plugin for WordPress, Blogger...