Showing posts with label region: ambiguous. Show all posts

Thursday, June 16, 2011

There is 'curry' in my salad

When I refer to my salads on this blog, or while talking to friends, I am asked to write up something about them for ideas and inspirations. While it is not difficult, I am always stumped about what I should write about salads. They are usually just mixed greens with a few substantial things tossed in, and a dressing that I think would go with everything. There are no recipes and no stories to tell. However, I definitely understand the point of these queries. So I am going to try and fit in here some of my favorite salads.

The salad I am going to write about today actually does have a bit of a story attached. It starts with a recurring flashback from a few years ago. It was a hot and sunny summer afternoon in Salzburg. We had just crossed over from the old town to the newer part of town, and after escaping hordes of tourists we started looking for a spot to eat. I had a guidebook, but not enough time to figure out the optimal route to any recommended place. There was a train to catch, and we were getting hungry, and the summer heat was starting to get unbearable. There didn't seem to be any restaurants around, but finally, on a side street, we found a cafe that was open. Anything to eat was welcome at that point. I looked through the German menu and found nothing vegetarian. Zilch. I managed to communicate with the server and ordered a salad without any meat in it. She seemed to understand.

The salad was served in a lovely white bowl. Crisp greens, a lemony creamy dressing, and a topping of cooked potatoes and scallions, that had the classic 'curry powder' flavor that one tends to find in Europe. I wondered a little bit if the addition of curry powder was a concession to the color of my skin. In fact, that is what I seemed to remember long after, more than the salad itself. Since the salad was just something they put together for me, I found myself pondering over whether the 'curry powder' was standard or if it was an improvization, but I wouldn't have known because the menu was barely understandable.

Then one day, as I ran out of ideas and ingredients for my lunch while working from home, I thought about it. I sauteed some thinly sliced potatoes and onions, and added some basic spices, and used it to top lighly dressed greens. I also added some cashews to the mix. The warm topping and crunchy cashews over the salad greens was lovely and satisfying, and this combination soon became part of my regular menu.

To make it more filling, I toss in cooked and shelled edamame if I have them on hand, or cooked garbanzos beans, or add a boiled egg on the side. And every time I eat this salad, I think of the non-descript cafe in Salzburg.
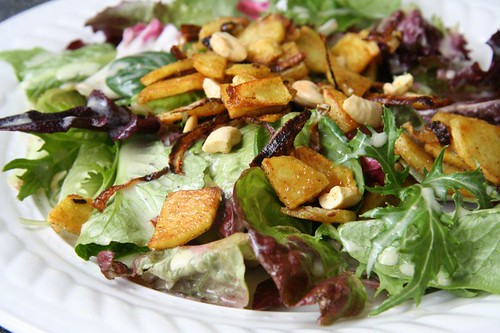
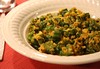
Salad with spicy potatoes

Mixed Green Salad with Warm Spicy Potatoes

Makes 1 main salad, multiplies easily for more servings

Ingredients

For the salad:

2-3 big handfuls of mixed greens (like mesclun or spring mix)
1 small-medium potato (yukon gold, red, or similar type)
2-3 Tablespoons thinly sliced onion or 1 small shallot
1 Tablespoon oil
1 Tablespoon roasted cashews
a handful of shelled and cooked edamame or garbanzo beans (optional)
salt to taste
1/8 teaspoon coriander powder
1/8 teaspoon cumin powder
pinch of turmeric powder
pinch of red chili powder

For the dressing:

1/4 teaspoon mayonaisse (or tahini for a vegan version)
1-2 teaspoons lemon juice
1/2 Tablespoon olive oil
salt and pepper

Procedure

Wash and dry the potato(es). Slice it along the length, and then slice each half along the length again. Slice each resulting quarter thinly along the width.

Slice the onion or shallot thinly.

Heat the oil in a deep skillet, and when it gets fairly hot, add the sliced onions, and potatoes and a pinch of salt. Saute on medium high heat until the potatoes start to turn golden brown. Add the cashews and beans, and the spices, and saute everything further for a few minutes. Turn the heat off and let it cool just a little so that the potatoes are not steaming hot.

In the meanwhile, make the dressing by whisking all the ingredients together until they emulsify and form a dressing.

Place the salad greens on a serving plate, spoon just enough dressing to dress them lightly, and toss with a fork. Top with the warm potato mix.

Note

In place of combining various spice powders, use a scant 1/2 teaspoon of a mild spice mix, such as a commercial curry powder or garam masala.

Friday, May 27, 2011

Tofu, Vegetable, and Walnut Sandwich Stuffer

Busy Evolving!

From the silence on this space it is probably obvious that I have been too busy with other things to post anything here. It wasn't my choice to ignore my blog completely, but with a new job, much longer commute than before, and more traveling that ever before, it was hard to get a lot of things done, and blogging naturally started to fall lower in the priority list.

One thing that now cuts into my available time even more is that I have to pack my lunch, because food options near the workplace are very limited. When I add my parameters of vegetarian, healthy, low-fat, nutritious, fresh, filling, and preferably organic, the options are practically non-existent. So it means I have to pack a good lunch for myself and it has to be built into the routine.

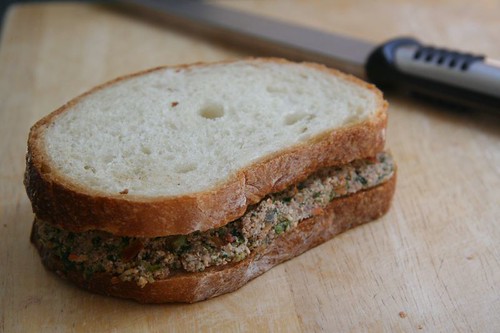
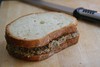
Sandwich with Tofu and Vegetable spread

My first choice is usually a good salad with add-ins, dressing on the side, and some seasonal fruit. I can happily eat that on a regular basis. but then, every now and then I need a change. So my next favorite packable lunch is a sandwich that uses a tofu based stuffing. The idea originated from Madhur Jaffrey's 'World Vegetarian'. She calls it 'bean curd salad or spread' in the book, but what I make now has morphed so much that one wouldn't know that that was where it started.

The vegetable combination is all different too. I generally use carrots, broccoli, mushrooms, and spinach, but you can use bell peppers, cauliflower, cabbage, greens, or any of your favorite vegetables, or use it as an opportunity to use up odds and ends. This is a very versatile recipe, but what I usually don't change is the use of walnuts, soy sauce, black pepper, and the bit of sugar. That seems to do the flavor magic.

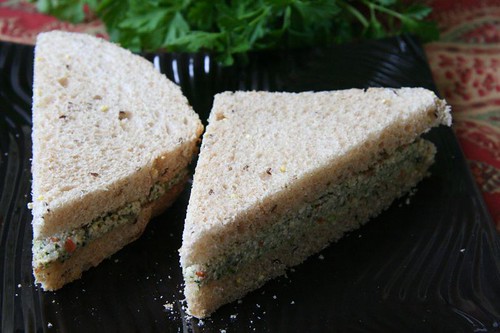
Sandwich with Tofu and Vegetable spread

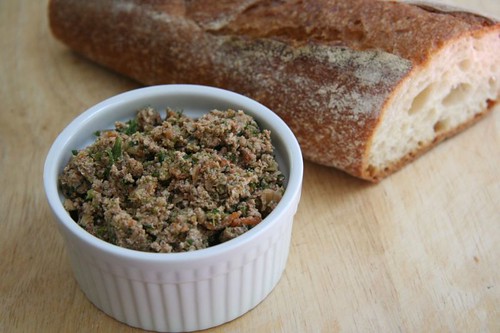
I use the same recipe two ways. Depending on the type of bread I have, I either chop all ingredients into medium chunks and then quickly pulse the cooked mixture a few times in the food processor, or I finely chop all ingredients to begin with. The roughly processed spread is good to use between slices of hearty bread because it sticks to the bread well and the filling does not fall out while eating. The bhurji-like chunky textured mix is great for filling plump whole wheat pita halves, with the added advantages that you do not have to wash any food processor bowls. Either of the sandwiches are also immensely packable for travel as they don't have any distinctive 'smell'. I have taken them on domestic flights because options at airports or in flight never seem appealing.

Tofu and vegetable spread

Tofu, Vegetable, and Walnut Stuffing for Sandwiches

Makes enough for about 4 sandwiches

Ingredients

Note: All Quantities are approximate

About 8 oz of firm tofu (or enough to yield about 2 cups)
1/2 medium onion (or use scallions)
1-2 small carrots
1-2 cups of broccoli
2-4 mushrooms
a big handful of spinach leaves
handful of walnuts
2 Tablespoons oil
1/4 teaspoon salt
1 teaspoon sesame seeds or sesame oil (optional)
black pepper to taste (about 50 turns of the pepper mill)
1 Tablespoon soy sauce
1/2 teaspoon sugar
4-5 Tablespoons chopped cilantro

Procedure

Press the tofu gently between clean tea towels or paper towels to remove any excess water, and grate it or chop it finely. Chop the onion, and grate the carrots. Chop the other veggies and walnuts small if you want a bhurji, you can keep them large if you are going to whirl it in the food processor at the end.

In a large saute pan, heat the oil. Add the onion, and other veggies, and saute them for a few minutes on medium heat until they start to soften. Add the walnuts and spinach and cook for a couple of minutes. Add the tofu, cilantro, and rest of the ingredients, and stir everything together until the tofu is heated through.

If you want to use it like a spread, wait for the mixture to cool down and then pulse it a few times in a food processor.

Saturday, March 20, 2010

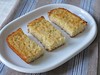
Hearty and Healthy Whole Bean Cutlets

In all these years, I can hardly recall having made 'cutlets'. I am referring to the very Indian 'vegetable cutlets', which you would be hard pressed to find much in the mainstream outside India. When I think about it, there are several probable theories to it. The main reason is probably because they usually involve frying, and they invariably involve potatoes. The other is that they were seldom made at home. This was something we ate occasionally as part of a large buffet, at tea time at someone's place or as a snack or appetizer at casual restaurants. So then I suppose I never thought about making them myself either.

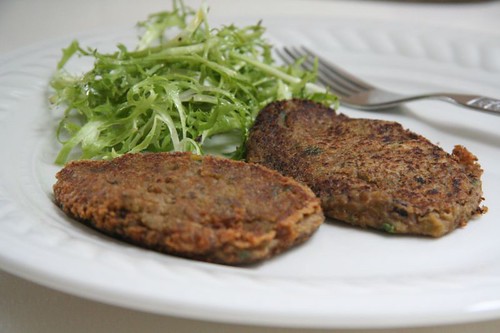
However, after I tasted these lightly fried bean cutlets made by Mints, I made them twice in just the last two months. They are full of proteins, do not need much fat, and the best part is that most of the work is done by the pressure cooker and food processor. The type of beans you can use is also flexible - I used whole moong, matki, garbanzo beans, and whole dried peas. If shaped into larger sizes these would be perfect bean burgers too. Just be sure to salt the batter well as most beans have a tendency to absorb quite a bit of salt.

With this post, I am defying two norms of my usual cooking. First is the making of 'cutlets' itself. The other thing is freezing. I hardly ever freeze food but I found that these are really freezer-friendly. I make a large batch, then pop some of the cutlets, without frying, into a freezer bag or box, such that they lay flat in the freezer. Then I saute a few as needed, to add heft to a salad, to increase the protein quotient of a meal, or just to add some zip to leftovers. These can also be baked on a lightly oiled baking sheet, at about 400 degrees for 20 minutes, 10 minutes on each side. There is no need to thaw them out either.

Dal Cutlets

Another good thing about this post is that the recipe posted by Mints is perfect as is, and so it is on its way to the first edition of Blog Bites.

Tuesday, January 12, 2010

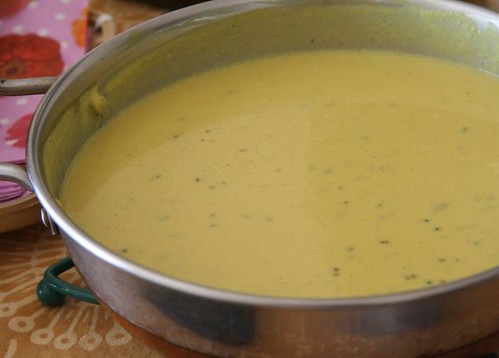
Soy Milk Kadhi

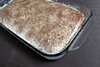
I have a niece who is lactose intolerant, and drinks soy milk everyday. So whenever she visits, I make sure soy milk is well stocked at home, but when she leaves, there is invariably some leftover. If it is a tiny quantity I add it to a shake or soup, but what does one do with a lot of soy milk if one doesn't consume it regularly?

The idea for this kadhi (for lack of a better name) was sown on one such occasion. This dish is neither a traditional kadhi, nor is it a substitute for the regular version made with yogurt, but came in handy recently when cooking for vegan and low carb-ing friends. For those not watching their carbohydrate intake, it goes rather well with plain white rice.

If you can find fresh soy milk, by all means use it rather than the carton variety.

Kadhi

Soy Milk Kadhi

Serves 4 as a main course

Ingredients

4 cups of unsweetened soy milk
1 teaspoon turmeric
4 Tablespoons besan
1 teaspoon ajwain seeds
1-2 Tablespoons oil
1 teaspoon mustard seeds
1 teaspoon cumin seeds
1 teaspoon fenugreek seeds
5-10 curry leaves
4 cloves garlic
1 inch piece of ginger
4 green chilies
1/4 cup of tamarind extract (not concentrate!)
1 Tablespoon jaggery (optional)
1 Tablespoon chopped cilantro leaves (optional)
salt to taste

Method

In a large bowl, stir together the soy milk, turmeric and besan with a whisk, until there are no lumps of flour. (Alternatively, you can add the turmeric later with the other ingredients in the hot oil.)

Pound the ajwain seeds to a coarse powder in a mortar and pestle. Mince the garlic, grate the ginger, and finely chop the green chilies.

Heat the oil in a large saucepan. Add the mustard seeds. As they start to pop, add the cumin and fenugreek seeds, curry leaves, garlic, ginger, chilies, and the ajwain powder. Stir and quickly add the soy milk and besan mixture. Keep whisking as it comes to a boil, and then turn it down to a simmer.

Stir in the tamarind paste, jaggery and salt. Cook for 5-10 minutes on low heat until the mixture starts to thicken, stirring occasionally.

Add the cilantro at the very end, just before serving.

Monday, December 28, 2009

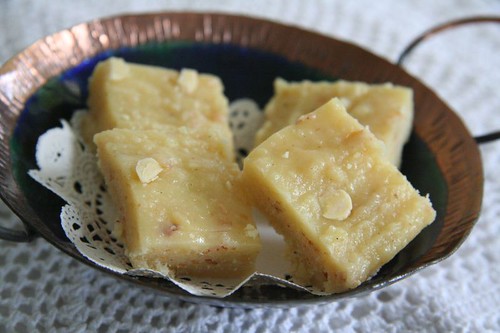
Making burfi at home

is possible!

These days, it is fairly easy to find almost any kind of Indian food here in the United States - a lot of Indian vegetables, spices, condiments and snacks are available. However one thing that is nearly impossible to get is good mithai, the kind you get in India. In terms of quality, variety, freshness, and accessibility, what we have here is light years apart from what one would find 'back home'.

So it was only natural that some of us were driven to try and recreate some things at home. One thing I tried many times and failed miserably at was burfis, and that is because one of the main ingredients for it is often fresh khoya (also called mawa or khawa), which is made by evaporating milk to a point where all liquid has evaporated and only the milk solids remain behind. In India, one can practically walk to a corner sweet store to purchase some freshly made khoya as needed. Things have improved ever so gradually over the years here, and we can now buy khoya in the refrigerated section, though the date of manufacture is usually unknown, and the origin could be several hundred miles away. Despite all that, I went ahead and bought a block of khoya recently because I really wanted to try Tartlette's Cardamom Mava Cakes, but didn't want to go through the trouble of making the mava. The cakes are lovely and I made them twice, but I had a lot of remaining khoya.

I went in search of recipes to use it up, and zoomed in on a Badam Burfi, in a Marathi book called "DiwALI ANI saNAsudiche padArth", written by Mangala Barve. The recipe sounded a bit simplistic to be true, but it actually worked quite well. It tasted delicious, creamy and rich. Here is the adapted version of the original recipe.

With this post I end the year on a sweet note, and also wish my little space a rather belated third bloggiversary!

Badam (Almond) Burfi

Almond Burfi / Badam Burfi

Ingredients

25 grams almonds
250 grams khoya/mawa/khawa
1 teaspoon ghee
1/2-3/4 cup of sugar
5-6 pods of green cardamom
a few strands of saffron (optional)
a few slivered almonds (optional)

Method

Soak the almonds in a bowl of water for 2-6 hours. Peel them, and process them finely in a food processor.

Peel the cardamom pods and powder them in a mortar and pestle.

Process the khoya in a food processor until it has completely crumbled.

In a wide pan or wok heat half the ghee just until it melts, and add the khoya to it until it starts to soften. Do not let it get brown. Add in the almond powder and sugar and stir everything together for a few minutes on low heat. Add the cardamom powder and saffron strands. The mixture will have the consistency of a thick paste.

Grease a small pan (about 6 inch square in size) with the remaining ghee, and pour the khoya mixture in it. Using an offset spatula, spread it in to one even layer. Top with additional slivered almonds, and press them firmly. Let it set and then chill it in the refrigerator for at least 2 hours till it gets firm. Cut it into shapes of your choice and remove from the pan.

You can bring the burfi to room temperature before eating.

Friday, March 28, 2008

An Aloo Tikki Factory

Potato Patties: Closeup

Good friends shouldn't need much of an excuse to get together, but with busy lives and global schedules it can get really difficult to get a bunch of people to meet for even one meal. I am referring to some old friends of mine - whenever we meet, we have such a fabulous time we wonder why we don't all get together more often, and then part with promises to meet soon, but before we know it another year has passed, or two.

Recently, when one of them decided to leave the land, it was a compelling reason for all to meet, as it would be our last chance to see the family for a while. Someone offered to host, and the planning for a spontaneous last minute potluck began, which meant quick decisions and even quicker work. The yeses and the nos, the headcount, and of course the menu.

The host wanted grazing dishes, rather than the usual fare, so I offered the first thing that came to mind - potato patties, if someone could make ragda, so we could have ragda pattice. One friend immediately opted for it (got to love friends like these!).

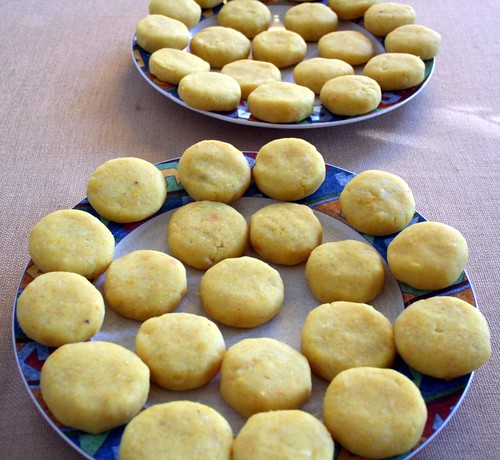
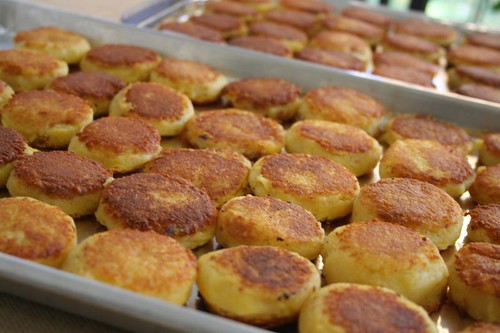
Making these potato patties seemed simple, but it can become fairly laborious and time consuming when one has to make almost 5 dozen of them. Unlike aloo tikkis, the potato patties that are served with ragda don't need to be deep fried, and they are crisped on the skillet with only a little oil. So, strictly speaking, these potato patties used in ragda pattice were not aloo tikkis, but that just gives the title a much better ring.

Potato Patties: before frying

I boiled a dozen large russet potatoes in the pressure cooker. When cool enough to be handled, these were peeled, and roughly mashed in a large bowl, and seasoned with about 1/4th teaspoon turmeric, about 1 teaspoon red chili powder, and plenty of salt. To this mix, I added about 8 crumbled slices of good white bread, (the crusts were removed, left to dry in the fridge, and ground up later to make bread crumbs, but that is another story), and adjusted the seasoning.

Potato Patties: the batch

Then, the life saver came into play. To get the potatoes mashed up really smooth, I put the whole mixture through a potato ricer, creating a dough like consistency which could be formed into patties. These were shallow fried on a large skillet, on medium heat, for a few minutes on each side to get them evenly brown and crisp. Placed on large trays, these were ready to be taken to the party.

Cool Tool: Potato Ricer

I had bought the ricer originally to make gnocchi, which I have yet to get around to make, but besides the patties, I have used it a few times to mash potatoes for alu parathas. The potatoes turn out really smooth, with no sticky bumps while rolling out the parathas.

Potato Ricer

Cool Tool: The picture of this nifty gadget goes to Click: Metal.

Sunday, January 27, 2008

Polenta Kheer

The first time I ever encountered polenta was on a plain jane PBS show one Saturday morning (in the days before Food Network!), and I was so fascinated by it that I had to seek it out. After I found it, I taught myself how to make it just based on the instructions on the back of the packet. Having never cooked with cornmeal of any kind before that and after having read a few onerous articles on the subject, I was concerned about the results, but I was lucky that the brand I started with was a good one, and it never gave me any problems. To be on the safer side I started with the oven method which makes a firmer polenta that can be cut into pieces, but later as I started feeling more comfortable with it I turned to cooking it directly in boiling water, and have never looked back. Even now, I come across writings that make it sound as though cooking polenta is rocket science, whereas it really is very simple.

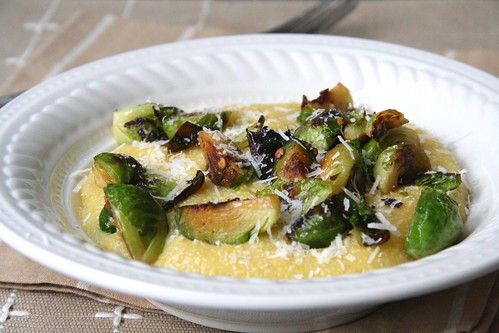
There is something inherently so warming about stirring a pot of polenta over the stove that it has now become a ritual I look forward to every winter, a few times at least. It is also a perfect blank canvas for numerous delicious accompaniments, and there is the comfort of favorite pairings and the joy of discovering some new ones. It is no co-incidence that the best polenta accompaniments are often perfectly suited for the winter season as well, and my current favorites are roasted vegetables, especially root veggies, pan fried brussel sprouts and grated parmesan cheese, and sauteed mushrooms, by themselves, or in a red wine sauce.

Polenta with Brussel Sprouts and Parmesan

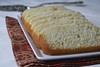
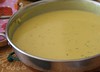
Soft, Creamy Polenta

For making basic soft polenta, I start by heating 4 cups of water in a large pot, and when it starts boiling, add about 1 teaspoon of salt, 1-2 tablespoons of butter, and then the polenta, whisking continuously. When it starts to bubble, lower the heat and keep whisking occasionally until the polenta is fully cooked, and starts to become very soft and creamy. For more information, check out this link to the 'The Basics of Polenta Cookery' that covers it all, and even includes several recipes.

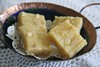
Perfectly Round Sliced Polenta

Once polenta is fully cooked and starting to thicken, it can be poured into a flat tray to cool. It will firm up and can be cut into shapes, but here is a tip if you want to eat or serve round slices of polenta but do not like the idea of having to waste all the pieces that would be leftover after cutting out the rounds - after the polenta has completely cooked and is starting to thicken, pour it into straight walled cups or glasses greased on the inside with a little butter. When cooled completely, run a knife around the polenta, and it will come out in one cylindrical piece that you can slice as thick as you like. These slices can be further baked or pan fried, and used with toppings of choice.

Polenta Sliced


Polenta as Dessert

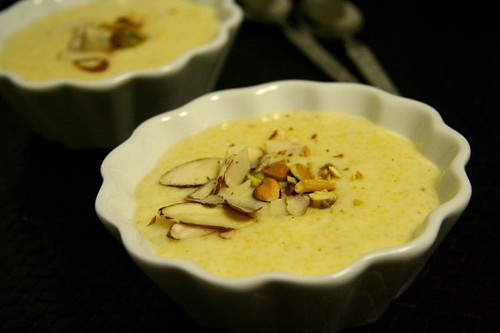
The idea for making polenta kheer just came out of nowhere, but I wouldn't be surprised if some enthusiastic home cook has tried it out already. At home, rawyachi kheer or kheer made out of coarse rawa (rawa in Marathi, sooji in Hindi, semolina in English) was more common than any other type of kheer. It was a simple and quick dessert for any night of the week, when the menu needed a little perk. It is forgiving on the amounts, and so the basic instructions would be to saute a little bit of coarse rawa in a little ghee, add milk, then let it cook for a little while to thicken, and then add sugar. Some cardamom and nuts can be added, time permitting, or it can be left plain. I always liked it at room temperature, or slightly warm.

So once the inspiration struck, I did the same with polenta, and what was most surprising about the end result was that it tasted a lot more like rawa kheer than like polenta.

Kheer is really pretty low on my dessert choices, but this is the stuff of childhood memories, and for a mid-week winter dessert that practically gets done on the literal back burner, this is perfect. It is as comforting as a blanket in the chill, and takes as much effort to make for a dozen as it does for one.

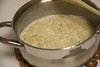
Polenta Kheer

The following proportions would make 2 generous portions, or can stretch out to 3 dainty portions.

Ingredients

1 teaspoon ghee
1/4 cup of medium grain polenta
2 cups plus more milk (whole milk would be nice)
2 green cardamom
4-6 Tablespoons sugar (I like about 5)
few strands of saffron
chopped almonds, pistachios or other nuts, about 2 tablespoons (optional)

Method

In a large wide pan, heat the ghee, and as soon as it starts to melt, add the polenta, and stir it around till it gets coated with the ghee. As soon as it starts to smell like it is being roasted (but do not wait until it changes color), add the milk, and start to whisk it using a wire whisk until it comes to a boil. Lower the heat considerably, and then let it simmer until the polenta cooks fully. This took me about 10 minutes, but polentas differ a lot in their coarseness. Stir occasionally to make sure it does not stick to the bottom of the pan.

In the meanwhile, remove the seeds of the cardamom and powder them finely. Chop the nuts and leave them aside.

If the kheer starts to thicken too much, add a little more milk. Add the sugar, and let everything simmer on the low heat for another 5-10 minutes. After you turn off the heat add the cardamom and crumbled saffron, and let it sit with a lid on it, preferably on the still warm stove. Just before serving add the nuts.

Picture of Polenta Kheer is my entry to the Click Event, where this month's theme is 'Liquid Comfort'.

Sunday, January 13, 2008

Whole Masoor Pulao

Trial Run with a Packaged Masala

A few weeks ago on a cold and rainy evening, when there were plenty of leftovers for dinner, and nothing great on television, I found myself with some rare time to go rummaging through the fridge, freezer, and pantry to take stock of all the spice powders that have been sitting idly in the kitchen, for months, perhaps longer. Out came packets, bottles, plastic containers, of odd shapes and sizes. I did not even know how some of these came into the house. I could take some reasonable guesses, but wasn't completely sure about some. Some probably came with guests, and some were gifts from relatives, but I know that a lot of them were the doing of my own greed for trying out different things.

Perhaps I should spare you the details, but there are no less than 26 of them right now, some of them highly suspect, like "Curry" Powder, some intriguing, like "Kitchen King" Masala, and some downright useless, like a branded Sambar Masala, which was bought when I was going to make sambar for guests and found out at the last minute that I had run out of my stock of mom's sambar masala.

Still, there is something innate to my Indian sensibilities because of which I found it rather difficult to just chuck these away. I thought that I must try using some of the unopened ones at least once, to see what they are like. The Biryani Pulao Masala was an easy choice, of which I had not one, but two packets, a Badshah, and an Everest, of which Everest had a mix of whole and powdered spices, and I settled on that, and used the recipe on the back as a rough guideline.

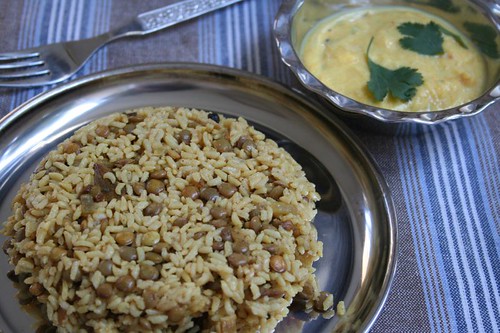
Masoor Pulao, Pumpkin raita

I soaked 1/2 a cup of whole masoor (similar to generic brown lentils) for about an hour, and 1 cup of basmati rice for about half an hour, and drained both of these before cooking. Sliced some onion, and sauted it a bit of oil and ghee, add the biryani-pulao masala, followed by the masoor dal, rice, pinch of turmeric and red chili powder. Added 3-4 cups of water, salt, and cooked everything like a pulao.

What did I think of it?

Eaten with a pumpkin raita, the pulao was definitely delicious, so the masala might be ok in a pinch for a quick weeknight rice dish, but nothing special that my own whole spices (bay leaf, cloves, cardamom, cinnamon stick) and ground garam masala couldn't do. It might be fine for someone who does not want to buy the usual whole spices used in a pulao and yet wants to make pulaos or biryanis frequently. The pumpkin raita, by the way, deserves its own post.

If more cold rainy nights persist, fun times lie ahead. I could do a dal count, flour count, or even grain count, and find interesting things hidden in my own kitchen.


Sending this to the Legume Affair at the Well Seasoned Cook.

Sunday, December 16, 2007

Apple Apricot and Fig Chutney

One good substitution deserves another

Food bloggers can be admirably observant at times. For instance, consider the picture of a plateful of food, with poori and bhaji as stars of the post, and yet, what two of my favorite bloggers, Richa and Bee asked me was about the tiny speck of Apple Chutney, which was nearly hidden under a papad! Giving them the recipe was the easy part, but if I had to post it, then an unwritten requirement was to take a halfway decent photo of it, and that meant I needed a fresh batch of it, since I was already out of it.

The original recipe is from Madhur Jaffrey's Indian Cooking, and called 'Apple, Peach and Apricot Chutney' translated into Hindi as 'sev, aroo, aur kubani ki chutney'. Even though one should not judge food by looks alone, it was the orange hued picture of the chutney in a silver bowl that first caught my attention and made me want to try it out. I checked how many apples it called for, and set two aside to make a half batch of it. It was when I was ready to start cooking that I realized that I did not have any dried peaches. Dried apricots are usually in the pantry, but dried peaches, never. Ever so resourceful, I used dried papaya instead and proceeded, and it was a hit. It was absolutely easy to make, and it was evident that the quantities of the seasonings could be easily adjusted according to taste.

The next time, I didn't have any dried papaya, so I used dried figs from India, you know, those types that come in the form of discs on some sort of a string, most often seen in the Diwali dry fruit boxes wrapped with yellow cellophane? I don't particularly like those, and don't remember how they landed home, but they were sitting for a long time, so they were put to good use in the chutney in place of the dried papaya, I mean, peaches. So that's the story of the chutney that the ladies spotted in the picture.

Now with the bounty of delicious local fall and winter apples here, that is what I decided to make, but this time, I didn't have any dried figs on hand either! So I went to buy some and was staring at the Black Mission and Calimyrna, thinking what a difficult choice this was, did a eena-meena-mina-mo on them, and went for the Calimyrnas. The apples I used were Jonagolds, but nearly any type of apple works here just fine.

Apple Chutney with Apricots, Raisins, and Figs

Apple Apricot and Fig (or Peach or Papaya) Chutney

Yields
About 4 cups chutney

Ingredients

1/2 kg apples (4-5 medium sized apples)
3/4 cup dried apricots
3/4 cup dried figs
1/2 cup golden raisins
4 cloves garlic
2 X 1 inch cube ginger
1-1/2 cups white vinegar
1-1/2 cups granulated sugar
2 teaspoons salt
1 teaspoon cayenne pepper

Method

Core, peel, and chop the apples. Chop the dried figs and apricots into pieces as large or small as you like. Mince the garlic, and grate the ginger.

Combine all the ingredients in a medium sized stainless steel pan, and bring to a boil. Turn the heat to medium-low and cook for about 30-40 minutes until it reaches a thick consistency similar to jam. Stir occasionally if required to prevent sticking.

Let it cool in the pan for some time. It will thicken slightly more as it cools. Let cool completely before filling into a jar.

Notes, Substitutions

  • The above recipe is what I have made, with changes to the original. I have reduced the amount of garlic a little, and increased the amount of cayenne pepper.
  • The original recipe uses white wine vinegar, but I use white distilled vinegar or apple cider vinegar. The vinegar could fume during cooking, so make sure to turn on the exhaust or keep a window open.
  • I have reduced the amount of sugar significantly from the original, and yet it is somewhat sweet in taste, but the sugar is required for preserving the chutney for a longer period. I have been able to keep the chutney in good condition for a few months without having to refrigerate it.

Taking a cue from a certain new cookbook title, this chutney is tangy, tart, hot and sweet! It should also come with a warning that there is a danger that this chutney might be consumed in side dish quantities rather than as a condiment, but that should be alright, considering that it contains things that are mostly good for you.

Tuesday, December 04, 2007

Baby vegetables in Cilantro Lemongrass broth

The only herb that is nearly always in my fridge, and most likely in other Indian fridges too, is cilantro. The first thing I do after getting cilantro home is trim off the hard stalk portion, then wrap the leafy part in a paper towel, and this package then goes off into a plastic box, to be used as required. The cilantro stays fine for a couple of weeks.

If the stalks are particularly healthy and fresh, and if I have even a few additional minutes, one of the things I like to do instead of throwing the stalks away is to drop them into a large pan of water and bring the water to a boil. Add a few chunks of ginger either bruised by a pestle or grated, a few crushed peppercorns, some salt, and within about 15-20 minutes, a rather delicious cilantro-ginger broth is ready. Once strained, it can be sipped just by itself, or used as a base for soups, dal, or noodle dishes.

Making broth

The variations on this simple basic are endless. Sometimes I add slices of lime or lemon to it, sometimes, a bay leaf. This time I used a couple of stalks of lemongrass, roughly cut into pieces and smashed, and let those boil with everything else, infusing the broth with the characteristic flavor of lemongrass.

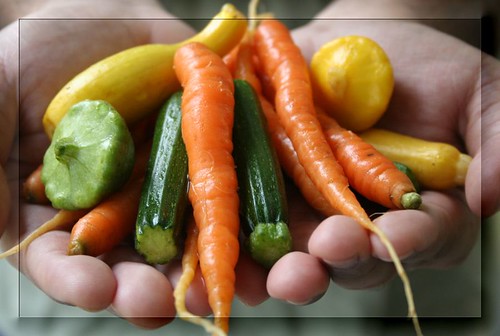
Baby Vegetables

To it, I added some fresh baby vegetables, such as baby carrots small enough to fit in the palm of one's hand, along with various baby squashes like zucchini, yellow crookneck, sunburst and pattypan, all so tiny that they barely needed to be halved. I let the vegetables cook in the clear stock for a few minutes until they were fork tender, garnished with a bit of finely chopped cilantro, and an austerely beautiful and surprisingly satisfying first course was ladled out.

Soup

Sunday, October 14, 2007

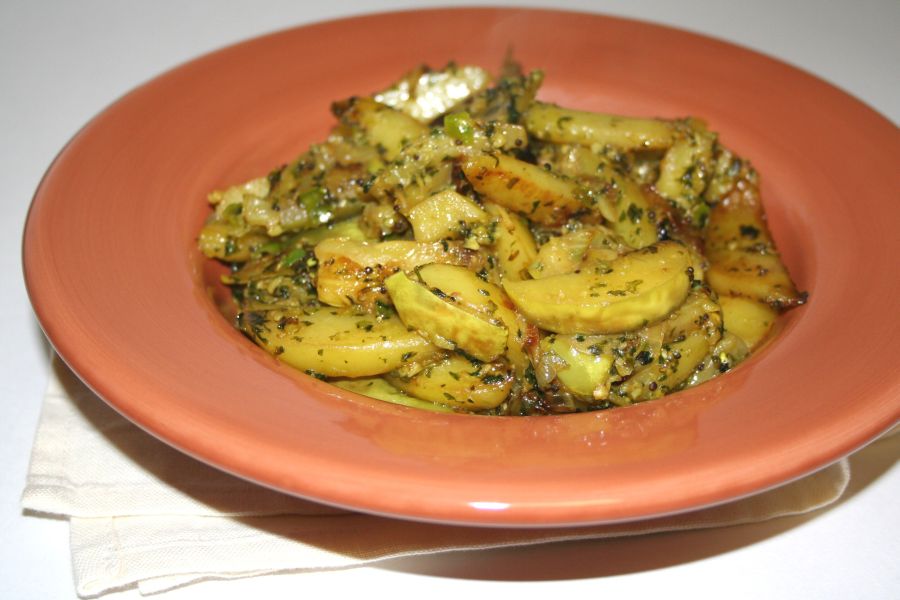
White Eggplant and Potatoes with Garlic and Cilantro

The eggplant tales continue

As far as possible, I like to write a story in my posts, however short it might be; just a little something to give a sense of purpose to the dish I post about. For this one, there just isn't much to say. The recipe itself is based on some random recipe from the web that I copied down years ago (hah, copied down?) and then it underwent some experimentation and changes until it established itself in my permanent repertoire.

It is a simple vegetable dish, that needs a few basic ingredients, and depends solely on the quality and taste of these vegetables and herbs to shine. The only dry spices used are mustard seeds and turmeric and I think one could even leave those out. It is a slight balancing act to make sure that both the potatoes and eggplant cook just right. If either of these gets cooked sooner, it could get mushier than the other. I like to make it with baby eggplants whenever possible, but in this picture I have used one white eggplant. The white eggplant worked perfectly here, because as mentioned in my previous post it holds its shape even when fully cooked.

Cilantro is by far the most common herb used in Indian cooking, usually chopped and added towards the end. This is however one of the few Indian dishes that I make in which cilantro is neither an afterthought nor the main ingredient as in cilantro chutney, and yet it plays a very solid supporting role with its own distinct flavor. It is also one of the few dishes in which the cilantro gets cooked with other things. I would encourage you to use as much as you can here.

Sadly, the dish doesn't even have a proper name to it, and I think the original recipe was called something very generic like green masala vegetables. So I call it 'Eggplant and Potatoes with garlic and cilantro', which is so descriptive that it could as well be a one-line recipe. What's in a name though, when the result is terrific. I like to eat it with fulka or poLI, just like any other sabjee, as part of an Indian meal, but it would be equally delicious as a stuffing for pita bread or other sandwiches.

White Eggplant with cilantro and garlic

Ingredients

4 baby eggplants (or 1 medium sized eggplant)
2 medium potatoes
1/2 medium onion
4 cloves of garlic
2-4 green chilies (depending on size and preferred heat level)
1/2 – 1 cup of chopped cilantro (not tightly packed, about 30-40 healthy stalks)
2 Tablespoons oil
1/2 teaspoon mustard seeds
1/2 teaspoon turmeric
salt to taste

Method

Chop eggplant into quarters or sixths, lengthwise, and place in cold salted water. If using a large eggplant, slice about as thick as large fries (approximately 2 X 3/4 X 1/2 inches in size). Peel and chop potatoes into similar shapes and add it to the water. Slice onion into thick semi circles. Drain the eggplant and potato. Grind the garlic, chilies, cilantro in a food processor.

Heat the oil in a wide saute pan or wok, add the mustard seeds, and when they pop, add the turmeric, followed by the green paste, onion, eggplant and potatoes. Stir fry everything together on high heat. Add salt. Let the vegetables cook and change color, stirring occasionally. If required, place a lid on the pan and lower the heat when the potatoes turn golden. If the mixture starts to stick to the pan, add a tablespoon of water at a time and reduce the heat. Let cook for a few minutes more, and then just a little more more after turning off the heat. Pierce one of the potato pieces to check if it is cooked through.

Notes

Use any type of potato that will hold it shape after it is sauteed. I like to use either Yukon gold, White rose, or red potatoes here.


Cilantro is definitely the most used and favorite herb in my kitchen, and in general, in Indian food, and eggplant is an absolute favorite vegetable, so this makes a fitting entry to the Weekend Herb Blogging Two Year Anniversary at Kalyn's Kitchen, which is being celebrated with a collection of recipes that combine vegetables with herbs. This is my first ever entry to her event.

Tuesday, August 28, 2007

Corn two ways: roasted bhutta and with potato

As August draws close to an end, I am getting ready to bid adieu to my favorite of the month, the summer corn. When it comes to produce, many people like to think of tomatoes come summer, but for me, it is corn. Especially the freshest fresh corn that one finds in the farmers market. If I could write poems, I would have composed an ode to it by now, but clearly that hasn't happened yet. By the way, frozen or canned do not even come close, and do not enter my thoughts or my kitchen either.

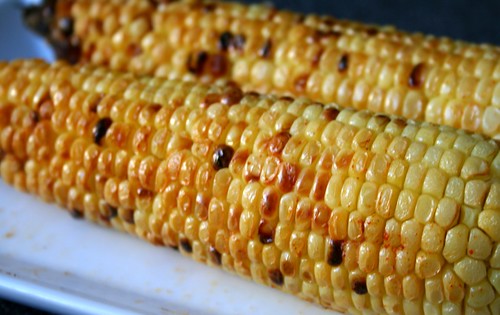
Bhutta: roasted corn

In India, corn or bhutta is usually eaten as a roadside snack, roasted over coal, and then sprinkled with lime and salt, sometimes with red chili powder or spices that would be the vendor's secret, and it is as blissful as it gets. Naturally that is my most favorite way to eat as well as cook corn. First, it needs to be roasted, grilled, or broiled to get evenly dark spots all around. In the meanwhile, in a small plate I take salt, red chili powder, some ghee, and wedges of lime. I dip a lime wedge into ghee, then into the salt and chili powder, and rub it all over the corn. Simple and elegant. Occasionally, I chhidkao (sprinkle) some chaat masala too.

In contrast in America, corn is usually a side as part of a meal or used as an ingredient. My introduction to it, of all places, was in the workplace cafeteria, where it was served alongside my entree. Boiled, and slathered with salted butter, it tasted like nothing I had eaten before. I was completely hooked. Corn here is indeed quite something - tender, succulent, sweet, delicious.

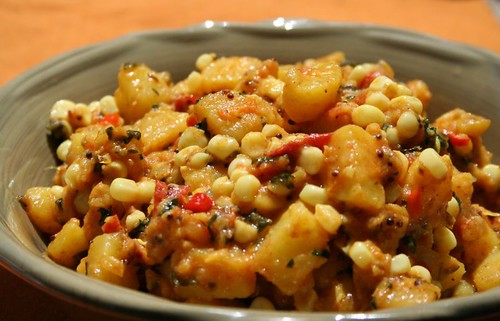
Usually every summer after I have had one corn on the cob too many, there are a couple of them in the fridge that need to be used up, and that is when I turn to one of my favorite dishes made with corn and potato. It is based on a recipe from the book 'Indian Cooking' written by Madhur Jaffrey and is called 'bhutta aur aloo ki mazedar tarkari', which roughly translates to 'a delicious corn and potato vegetable dish'. As with most of Jaffrey's recipes, I increase the amount of chili powder in it slightly. It can be served with rotis, or rice and dal, or eaten by itself.

Bhutta aur Aloo
Corn and Aloo Sabji

Serves 3-4

3 Tablespoons oil
1/2 teaspoon mustard seeds
1/2 teaspoon cumin seeds
1 clove of garlic, minced
1 medium potato, boiled and diced
1 medium tomato, chopped
4 Tablespoons chopped cilantro
3 Tablespoons chopped mint
1 green chili, chopped
2 cups of corn (roughly from two cobs)
about 1/2 cup coconut milk
salt to taste
3/4 teaspoon red chili powder
1 Tablespoon lime juice (about 1/2 a lime)
1/4 teaspoon ground black pepper
2 teaspoons ground roasted cumin

In a kadhai or wok, heat the oil and add the mustard seeds. When they start to pop, add the cumin seeds, followed by the garlic and potatoes. Stir fry till the potatoes start to turn golden brown. Add the tomato, cilantro, mint, and green chili. Stir around for a couple of minutes, and then add the corn and coconut milk. Stir it to make sure it doesn't stick to the pan. Lower the heat if needed and cook for a few minutes until the corn is cooked. Add the remaining ingredients one by one.

Notes

I don't always add the mint.

Sometime I substitute the coconut milk with whole milk or half and half.

Instead of using a regular potato, I sometimes use about four fingerling potatoes if I have them on hand, and it makes the dish even more wonderful.

Sunday, July 15, 2007

Broccoli and walnut salad with tadka

Flavorful, healthy, fresh, and simple are some of the qualities I strive for in everyday food, but do not like to sacrifice good taste towards that end. This is one of those dishes that meets these requirements very well and is unbelievably delicious as a bonus. It fits in with any kind of meal, from pairing with a sandwich to being a part of an elaborate Indian meal.

Even though this is a yogurt based dish served at room temperature, I hesitated over calling it a raita since a raita has no tadka, in the strictest sense of the word, and only has one or more ingredients mixed into yogurt that is seasoned with a few dry spices. I learned this from someone I consider very knowledgeable about food, North Indian cuisines being one of her areas of expertise. Calling it a 'salad' is a lot more inclusive, although the approach to putting this dish together is very Indian.

This is not a precise recipe, but more of a guideline.
Steam about a cup or two of broccoli florets for few minutes and then chop it into smaller pieces when cool. Mix it with about as much plain yogurt or dahi by volume. Add a handful of chopped walnuts to it. Season with salt to taste and pinch of sugar. In a small pan, heat a little oil, and to it, add one or two cloves of minced garlic, a crumbled dried red chili, and a pinch of sesame seeds. Take it off the heat when it starts to sizzle, and pour it over the prepared salad. Stir it together gently and serve.

Broccoli and Walnut raita

Broccoli and Walnut Salad with a tadka of red chilies, garlic, and sesame seeds drizzled on top; should be stirred together before eating.

Friday, May 25, 2007

Egg Biryani

Getting the carbs before a long run

Long distance running is not my thing; never was. Or short distance running, for that matter. However, some circumstances led to me running in the 'Bay to Breakers' race in San Francisco last weekend. It is a 12K or 7.6 mile course, and it was my longest run ever. If worst comes to worst, I could simply walk, I thought. This being the tamasha that the 'Bay to Breakers' is, there would be plenty of dawdlers. Thankfully, it wasn't so bad, and I had a fun run, and even managed to take a few pictures along the way.

When it comes to food, a run like this needs a nice carb loaded dinner on the previous evening, methinks, so what if this is not a marathon. Besides, who am I kidding, I often eat a carb loaded meal like this even otherwise. So I decided to make a simple egg biryani, more of an egg pulao to be precise, since there is no layering and no dum cooking. For some reason I have always called this egg biryani, so let it be! It is easy and comforting, and it gave me plenty of time to get my bib, chip, and attire ready for the next morning.

Egg Biryani

1-1/2 cups uncooked basmati rice
6 eggs
2 medium onions
4 Tablespoons of oil
1 bay leaf
1 black cardamom (moti elaichi)
1 stick of cassia bark or cinnamon
a few whole cloves
1/2 teaspoon turmeric
1 teaspoon red chili powder
2 teaspoons coriander powder
3 cups water
salt to taste
1 Tablespoon raisins
1-2 Tablespoons chopped cilantro
1-2 green chilies, whole or slit lengthwise (optional)

Hard boil the eggs. To do this, place them in a saucepan of cold water and bring to boil. Cook it for 10 minutes after that, and turn off the heat. Rinse the rice with cold water and let it soak in some water for about 20 minutes, and then drain it. Slice the onions thinly.

Heat the oil, in a large saucepan, and add half of the sliced onion to it. Fry the onion until it turns dark brown, and then remove from the oil with a slotted spoon. Keep it aside.

In the remaining oil, add the bay leaf, cardamom, cassia bark and cloves, wait till they start to change color and add the remaining onions. Saute on medium heat till the onion is golden brown in color. Reduce the heat, add the powdered dry spices, and then the rice. Stir it around until the rice is coated with the spices. Add the water, and increase the heat. When the water comes to a boil, add salt, and cook uncovered till the rice has absorbed most of the water.

While the rice cooks, shell the eggs. You can either cut them in half lengthwise, or leave them whole and pierce them slightly all over.

Add the raisins and the eggs to the rice, and turn down the heat to very low, or turn it off if the heating element on your stove stays hot for a long time (mine does). Cover with a lid for about 10 minutes.

Add the fried onion, chopped cilantro and green chilies towards the end.

Race Day Pictures

Elvis Lives
Bay to Breakers - Elvis

This costumed couple with stroller ran at my speed for most of the way
Bay to Breakers - Costumed Couple

Going up the Hayes Hill
Bay to Breakers - Hayes Hill

Passing by the Conservatory of Flowers in the Golden Gate Park
Bay to Breakers - Conservatory of Flowers

I can see the ocean, the end must be near!
Bay to Breakers - close to the finish

Friday, December 29, 2006

Deconstructed Pav Bhaji

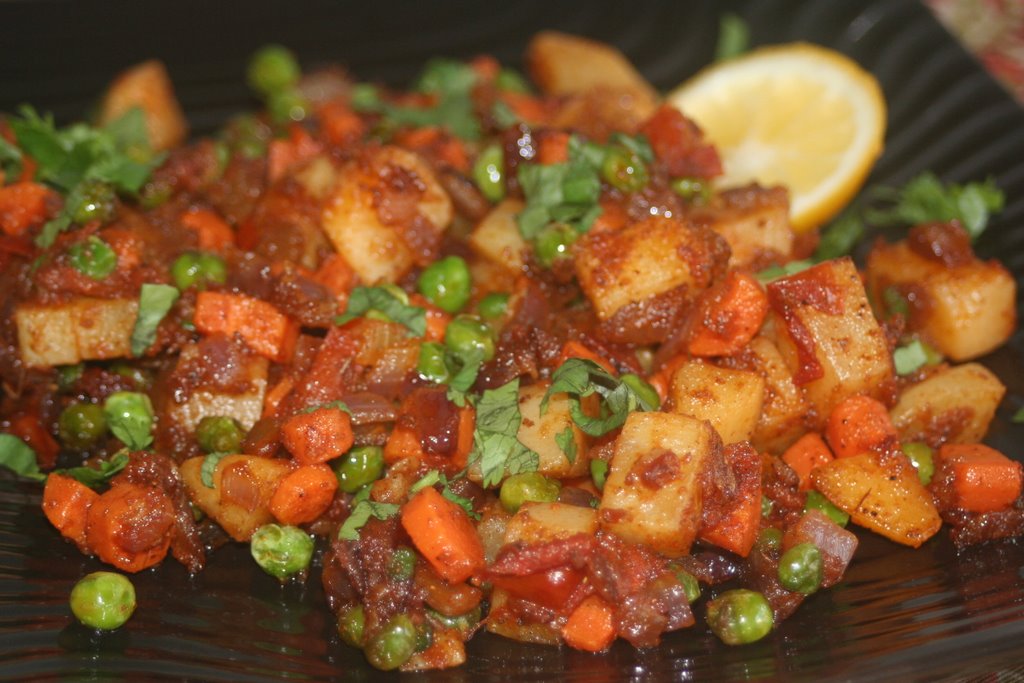
While this sounds like a fancy name, it could also be called the lazy person's route to the real thing by way of what is available at home. Bhaji literally means vegetables in Marathi, and pav is a yeast bread that accompanies it. Pav bhaji, which is a spicy reddish-orange mash of indiscrete vegetables served with the bread toasted in butter, has its humble beginnings as street food in Bombay, but is now found at many restaurants all over the city. I have made it many times now, but never ever have I been able to replicate the taste I remember. It could not be just the amount of fat the vendors use, because I have tried my darned best to cast aside all thoughts of calories and poured in rivers of butter into it, but it refuses to taste as authentic as I want.

I had just returned from a short trip over the Christmas weekend, and before I left, I had cleared most of the fridge. So here I was, getting hungry and with not many choices. It was gusty and rainy outside, so I did not want to go anywhere. There were two carrots in the crisper, plenty of potatoes and onions in the pantry, and green peas in the freezer. There was bread at home and tomatoes too. I chopped up a potato and the carrots and cooked them in boiling water. In the meanwhile, I started chopping up some onion and a couple of tomatoes. Heated some oil and butter in a large pan, added cumin seeds, onion, and tomatoes, and sauteed it till the tomatoes were cooked. Added some garam masala. Drained the other vegetables and added those too. Red chili powder, salt, pav bhaji masala, some more stirring and cooking, and it was done. Chopped cilantro for garnish and a slice of lemon on the side to adjust the tartness. What I did not do in this case was spend energy and time over mashing up the vegetable to a puree to achieve that glossy red effect, but that is why I can also give it a name like 'Deconstructed'.

Related Posts Plugin for WordPress, Blogger...