Showing posts with label from other blogs. Show all posts

Tuesday, July 20, 2010

Easy Mango Cake

Is there such a thing as 'too easy'?

One of my grandfather's friends has a small mango canning and preservation enterprise. They live in the middle of the best mango producing regions in India, and use some of the finest local mangoes in their products. They sell a lot of their products in their store locally, but also send it out to several cities in India, and perhaps abroad too.

If I or some of my relatives ever get a chance to get there, we stop by their house, which is right next to the store (or is it the other way around?) and usually buy a few things from them, especially their jars of mango pulp. These are glass jars, unlike the tin cans one sees commonly, and I prefer those for two reasons. One is that one can see what is inside, and secondly, I think there is a much lesser chance of any kind of strange stuff happening, such as something that could happen if the acid in the mango reacts with metal.

Other than those few jars, I rarely buy canned mango pulp. The jars are by and large savored by themselves as Aamras, particularly when pooris are on the menu. Hence I went back and forth over whether I should use up almost half of a precious jar just to try out something new. I can say now for sure that it was worth it. This cake is superb, in taste as well as texture. I have also yet to meet a cake recipe that was easier to whip up; it is literally "dump and stir". It is a complete keeper that I would definitely try again, and perhaps even buy some cans of mango pulp if needed!

Adapted from here.

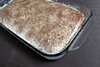
Mango Cake


Rava Mango Cake

Ingredients

1 cup fine rava (or semolina flour)
1 teaspoon baking powder
1/2 cup sugar
2 pods of green cardamom
1 cup canned mango pulp
1/4 cup oil
1 Tablespoon golden raisins (optional)
1 Tablespoon chopped almonds (optional)

Method

Preheat the oven to 375 degrees.

In a medium bowl, mix the rava, baking powder, and sugar. Using a flexible spatula, stir in the mango pulp, and the oil, until the rava absorbs the liquids completely to form a batter.

Powder the seeds of the cardamom in a mortar and pestle and add it to the batter.

Lightly grease a small loaf pan (8 X 4 inches would be fine, mine is 9 X 5).

Pour the batter into the pan. Sprinkle the raisins and almonds on top. Bake for 25 minutes. Insert a toothpick to check if done.

Notes

1. I actually forgot to add the cardamom powder, but it was not missed. I am eager to try it with it next time.

2. Most likely, the quantities can be increased by 1.5 times to fit a loaf pan better.

3. It can be made just as well with melted butter in place of oil, I think.

4. The dried fruit and nuts are optional, and can be played around with. Mix into the batter, or add on top like I did.

Entry Update

I recently made this cake again, with increased quantities, and baked it in a bundt pan. It took me 35 minutes to bake it. Since the mango pulp was quite sweet, I decreased the overall sugar quantity as well, and did not use any dried fruit or nuts. It was enough for 12-16 people. The process remains the same as above, but here is an update on the quantities.

2.5 cups fine rava (or semolina flour)
2.5 teaspoons baking powder
1 cup sugar
4-5 pods of green cardamom
2.5 cups canned mango pulp
1/2 cup + 2 Tablespoons vegetable oil
a few drops of oil for greasing pan
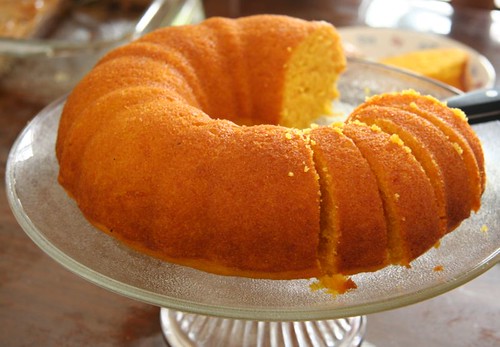
Mango Cake again

Sunday, January 31, 2010

Eggless Low-fat Lemon Loaf

It is about that time of the year when I start scouring my bookmarks, links, notes, and cookbooks for ideas to use lemon zest, lemon juice, or the whole lemon, as my Meyer lemon tree is heavy with fruit and ready to harvest. There will be plenty of citrusy salads and even a basic waran bhaat will get a generous squeeze of home grown lemons, but it is the baked goods that I look forward to experimenting with.

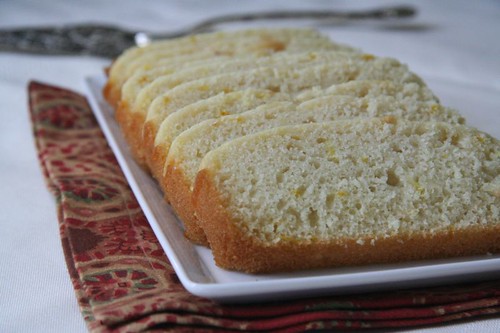
While many of the recipes I look through get pushed lower on the list if they are too daunting or time consuming, this snack cake looked easily adaptable. The fact that it is low-fat made it sound even better. I added plenty of lemon zest for flavor, and baked it in a loaf pan, turning it into a lemony loaf cake. I had to bake it a little longer which was probably due to the shape of the pan. I also de-veganized it because I didn't want to run out to buy a small amount of soy yogurt and soy milk, but using soy would make it truly vegan.

This is a lovely light cake that can be enjoyed without guilt as a snack, with tea, or for breakfast, and when dressed up with a fruit compote or puree it works as an elegant dessert too. I am sending it to this month's Grow Your Own event.

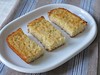
Lemon loaf cake

Here is my recipe, adapted from Susan's, with many thanks to her.

Meyer Lemon loaf Cake

Ingredients

1 3/4 cups cake flour
1/2 cup sugar
3/4 teaspoon baking soda
1/4 teaspoon baking powder
pinch of salt
1/4 cup yogurt (regular or soy)
1-1/2 Tablespoons oil, plus a little more for the pan
1/2 teaspoon vanilla extract
1/2 cup water
1/2 cup milk (regular or soy)
2 Tablespoons lemon juice
1 teaspoon lemon zest

Method

Pre-heat the oven to 350 degree F.

Grease a 9x5 inch pan well with oil.
In a medium bowl, sift together flour, sugar, baking soda, baking powder, and salt.

In a large bowl, blend the yogurt, oil, vanilla, water, soymilk, and lemon juice. Do not overmix. Stir in the lemon zest. Stir in the dry ingredients with a whisk or spatula.

Pour the batter into the greased pan.

Bake for about 35 minutes until a toothpick comes out clean. Remove and allow to cool completely. Loosen sides gently with a knife and remove from pan.


Serving suggestion

Mango Sauce: Mix together a few tablespoons of mango jam with equal amount of water, and heat for a few minutes until it forms a sauce.

Lemon cake with mango sauce

Thursday, August 28, 2008

Many greens, one formula

I was reading an article in a food magazine about a southern California food stylist who hosts the most perfect parties by her mansion poolside overlooking some of the most precious vistas. If you are wondering about my reading habits, let me explain that I was in need of a break from my other, ahem, more intellectual pursuits. To continue, her cooking style was emphasized by approximations and lack of precise recipes. I am supposed to find this charming. I do, but then, that is how most of the people I know cook, and so did the generations of people before me, even when cooking for a large number of people, so it isn't exactly ground breaking either.

Most of my everyday cooking would fall into this style - simple sabjees, dals, pastas, stir fries and salads. Even for the ones that do have a certain recipe behind it, the quantities are rarely measured, and yet they work just fine. The fallout of this for me is that there are so many posts languishing in the drafts because I don't have the exact (or good enough) measurements on them to write it up on the blog.

Greens: beet leaves, rainbow chard, radish greens, red chard
Top L-R: Beet Greens, Rainbow Chard
Bottom L-R: Icicle Radish Greens, Red Chard


One such is my favorite way to cook many greens, particularly chards, beet greens, and radish greens. A simple tadka, lots of onion, and a few spices is all it takes for the greens to shine through. Very easy and quick, it makes for a nutritious and delicious accompaniment to polis, or rice and dal, or can be a part of an array of other dishes. It has now become my touchstone combination when I find a new type of leafy green and I am not sure how to cook it or how it is supposed to taste. There is no need for much precision here, so here is the recipe, with a few approximations.

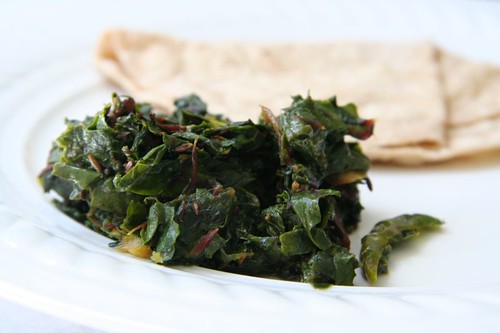
Greens: Cooked red chard

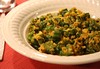
Chard chi bhaji

Ingredients

1 bunch of any type of chard (red, green, swiss, rainbow), about 6 cups when chopped
1 large red onion
2-3 Tablespoons of oil
1/2 teaspoon of mustard seeds
a big pinch of good asafoetida
1/2 teaspoon turmeric
salt to taste
1 teaspoon red chili powder
3/4 teaspoon cumin powder
3/4 teaspoon coriander powder

Method

Wash and clean the chard. Remove the tough stems and finely chop the leaves.

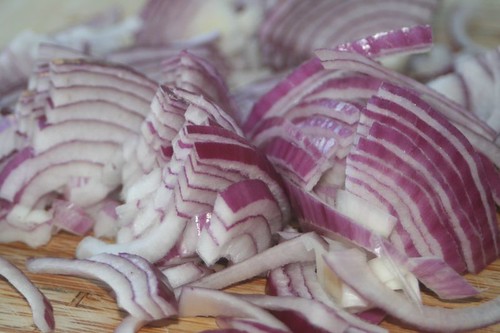
Onion: thinly slicedCut off the top and root end of the onion. Slice it through vertically, then slice it thinly crosswise. If the onion has a large diameter, cut the slices in half.

Heat the oil in a kadhai or wok. Add the mustard seeds. When they start to pop, add the asafoetida and turmeric, add the onion, and saute it on medium heat till it starts to soften. Add the chopped chard leaves. Add a little salt and red chili powder, and toss everything together till the leaves begin to wilt. Lower the heat, add the remaining spices, and cook the leaves through for another minute or two. Add a little more salt at the end.


A new favorite for Red Chard

After years of applying the same formula, change is good. Very very good in this case, and it comes from talented blogger Mints, who writes a lovely blog in Marathi. Her recipe for red chard is so delicious, that it has become my new favorite and I find myself turning to it a lot more than my onion-walla standard.

With this post, I also thank her for the awards that she has passed on to me. Right back at you, Mints.

With her permission, here is her recipe, as adapted by me.

Greens: Chard with garlic and green chilies

Lal Chard chi lasun mirchi chi bhaji

1 bunch of red chard leaves
3-4 cloves of garlic
2-3 green chilies
1 Tablespoon oil
1/2 teaspoon of mustard seeds
pinch of asafoetida
1/2 teaspoon turmeric
1/4 teaspoon cumin seeds
salt to taste

Wash and clean the chard. Remove the tough stems and finely chop the leaves. Peel the garlic, and remove the stems of the green chilies. Smash the garlic and the green chilies until they are flattened.

Heat the oil in a kadhai or wok. Add the mustard seeds. When they start to pop, add the asafoetida, turmeric and cumin seeds. Add the garlic and green chilies, followed by the chopped chard leaves. Add a little salt and toss everything together till the leaves begin to wilt. Lower the heat, and cook the leaves through for another minute or two. Add a little more salt at the end.

Notes

  • The smashed garlic and chilies add a wonderful touch to this dish, so make sure you don't chop or mince them, and use them as described. This action is called 'ThechNe' in marathi.
  • If you don't have green chilies on hand, try it with dried red chilies for an equally delicious variation.

Thursday, July 03, 2008

Were the brownies outrageous enough?

Two Sweet Reviews

One of the things I find hard to resist is a good brownie. Full of decadent, buttery, chocolate-y goodness, I usually save these for an occasional indulgence, and buy them by the piece, because even though they are fairly easy to make, there are not enough occasions to justify baking a pan full of them. I have a really long list of brownie recipes I would like to try, and I know a good brownie when I eat one, but how am I supposed to tell by just looking at the recipe? All those glamor shots that sometimes accompany them don't help either.

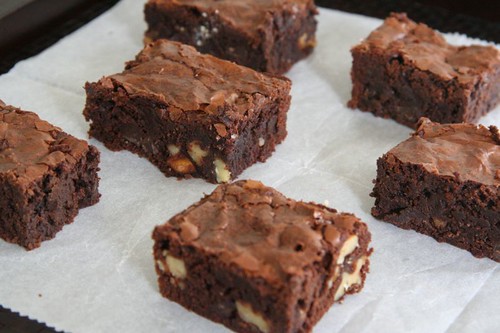
Outrageous Brownies

Not long ago, I mentioned having over a boatload of guests, with varied tastes, and thankfully a few of them were dessert people, so I ruffled through my list to see which one I should try first, and what a difficult decision it was. I settled on Ina Garten's Outrageous Brownies after reading high praise on the user reviews. I followed everything exactly, and they baked up beautifully. Great texture, and pretty good taste. The overall impression however was that the coffee flavor was too strong. The coffee is supposed to boost the chocolate flavor, not overtake it. It is quite possible that the particular coffee I used was too strong, but these brownies tasted good only on the first day and didn't quite hold that well by the next day, which can be a big plus if one is making a tonne of them. And they also didn't do well after freezing (and thawing). Ultimately, this is not the 'it' brownie recipe for me, and I am more likely to try some others in pursuit of the perfect one.

All is not lost in this post though. Here is a plug for a superb Mini Chocolate Cupcakes recipe from Nicole, a prolific blogger and baker. It took me all of 10 minutes to make the batter, and that included opening cupboards, jars, bottles, and sundry containers of ingredients. I needed a tad more milk than specified to get the batter to come together, but a taste of the batter promised great things to come, and these did not disappoint. I have never eaten chocolate cupcakes before. I am not kidding, I have never had an occasion to sample chocolate cupcakes, but these were incredible. I didn't even make the frosting, as I didn't have all the things on hand. I thought of drizzling some ganache over them, but they were mighty good as is. Moist, delicious, easy, eggless, and possibly easy to convert to a vegan version if needed. I can't wait to try them out again. There was a small catch, and even though it didn't matter, I thought I should mention that while I made half the recipe, it was just enough for only 12 mini-muffins. At first I thought I had filled the cups too much, but the cupcakes seem to have risen almost as much as they have in Nicole's pictures.

Mini chocolate cupcakes

Noting down the recipe for future reference.

Mini Chocolate Cupcakes

Makes 12

3/4 cups all purpose flour
1/4 cup cocoa powder
3/4 tsp instant coffee powder (optional)
1/2 cup sugar
1/2 teaspoon baking powder
1/4 teaspoon baking soda
big pinch of salt
3/8 cup milk, or a little more if needed
1/4 cup vegetable oil
1/2 teaspoon vanilla extract

Preheat oven to 350F. Line 12 mini muffin cups with paper liners.

In a large bowl, sift together flour, cocoa power, instant coffee powder, sugar, baking powder, baking soda and salt.

In a medium bowl, whisk together milk, vegetable oil and vanilla extract. Pour into dry ingredients and stir until just combined and no streaks of flour remain.

Distribute batter evenly into prepared muffin cups, filling each about 3/4th full.

Bake for 10-12 minutes, until a tester inserted into the center comes out clean.
Turn cupcakes out onto a wire rack to cool completely.

Monday, March 03, 2008

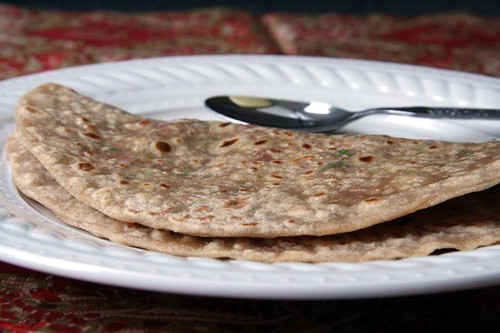
Watermelon Radish Parathas

mooli ke parathe

There were exactly three types of parathas made in our home - alu, methi, and gobi. If there had been any other types, then clearly I have forgotten. In contrast, I have been quite a rebel adventurer. Spinach, cabbage, paneer, beets, pumpkin, cheese, broccoli, peas, dals, mint, chutneys, molagaipodi, even leftover sabjees, have all had played a part in my parathas at some time or the other, with varied results. At this, Musical might just yawn and say, "So what? We make parathas with almost anything". Of course she does, but considering what I grew up with, this is quite a repertoire.

Stuffed Radish Parathas

A paratha related mini-obsession started recently when a friend was visiting our area during Christmas break last year. We met for lunch at a basic, almost divey, Indian restaurant where we could eat good food, and talk for a long time without being bothered. The meal included giant parathas - I had gobi and she had mooli, and of course we tasted both. I liked the gobi, but the mooli one with a generous filling of spiced radishes was so good that I wished that I had ordered that one instead.

Very soon I was hankering for it at home, and wanted to give it a try. It was further fueled when my friend and I reminisced about the parathas we had. I used to make mooli parathas years ago, but because I found it difficult to make the stuffed ones, (this was just for mooli, not other types of parathas) I used to go the lazy route and mix in grated daikon radish with flour and spices to make the dough for the parathas. In fact this was many times a quick weeknight dinner that didn't need much planning if there was a white radish in the fridge. Somewhere along the way, I stopped making these and had even forgotten about them, but after tasting the wonderful stuffed parathas at the restaurant I realized how much better they tasted, with the filling sandwiched between the dough, giving you a little crust and a little taste of the vegetable in each bite. Soon I was on a mission to find out how to get the stuffed ones right. Once again, I tried to roll them out by filling the radish mixture into a ball of dough but the shreds kept leaking out and making a mess on the board. A big salaam to those who are able to roll those out, but I have just not been able to do that well. That is when Musical's "two layered parathas" really came to the rescue by working as perfectly as she describes. So a big Thank You, Musical!

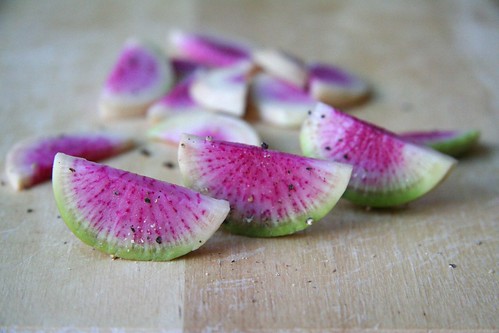
For my paratha experiments, I used watermelon radishes (see note at end) just because I happened to have a bunch of them, an added bonus of which is that the filling looks very pretty when the parathas is torn off. One can use any kind of radish, larger ones being better because they are easier to grate.

There are all kinds of recipes for the filling, with additions ranging from turmeric to grated onion, so I decided to try out a few. In the first batch I tried Musical's combination of garam masala and red chili powder, and in the second batch I used Saffronhut's combination of ginger, green chilies and cilantro. I preferred the heat of red chili powder over that of green chilies, but I enjoyed the flavor of ginger. I am neutral about the cilantro as it did not seem to add much but wasn't bad. What I have given below is what I tried in the third batch, and liked a lot, but I might try other versions in the future. Ultimately, there is not one right thing, so experiment, have fun, and let your taste buds and mood decide. Do you have a favorite combination that you would like to share?

In a paradoxical way, while on one hand this is free form cooking at its best, it needs lots of practice to get it just right.

Mooli Paratha: the making of

Stuffed Radish Parathas / Mooli Parathas

Ingredients

1-1/2 cups grated radish, not tightly packed
salt to taste
3/4 teaspoon red chili powder to taste
1/4 teaspoon mild garam masala
1 teaspoon finely grated ginger
2 cups atta
salt to taste
a little oil for the dough
oil or ghee for the parathas

Method

Place the grated radishes in a sieve or colander over a bowl, and add salt to it. Let it sit for about 30 minutes. The salt will draw out moisture from the radishes. Squeeze the radishes by hand, and collect the squeezed water in the bowl.

Use this water to knead the dough using flour and salt, adding more regular water as required. When the dough is kneaded smooth smear the ball of dough with a touch of oil. Divide the dough into 8 pieces of equal size.

Mix the grated radish with red chili powder, garam masala and grated ginger.

Start heating a tava.

Roll out one of the pieces of dough to about 6 inches round and keep it on a plate. Roll out another piece to about the same size. Spread about a fourth of the filling on it, leaving a small edge all around. Top with the previously rolled out roti, gently press the edges together, and roll lightly with the rolling pin just a little more until the 3 layers are held together. Put the paratha on the heated tava and cook on both sides. Drizzle a little oil around the edge if you like. I just like to brush some ghee on the paratha after it is done. Repeat this exercise with the rest of the dough and filling.

Serve with chutney, pickles, yogurt. For an added indulgence, try sour cream or crème fraîche.

Watermelon Radishes

In the last year or two I have been buying watermelon radishes from the farmers market whenever I see them. They taste very similar to regular radishes, maybe even a tad sweeter, but they look absolutely gorgeous. They have a greenish white skin, and inside they are a bright fuschia or deep red in color, and when sliced, they look like tiny watermelon wedges. For a simple but striking salad, I peel and slice them thin, and sprinkle a little coarse salt and ground black pepper which looks almost like seeds on them.

Watermelon Radishes: Farmers Market Find

Saturday, August 18, 2007

The Power of Sugar

Sweet!

It is time to celebrate, as Manisha of Indian Food Rocks, sent me this pretty pink 'Rockin' Girl Blogger' award, which is easily my first award in the world of blogging. Even though it would take a good stretch of the imagination to call me a girl anymore, I love it. I also really don't see myself so much as a blogger as much as someone who has a blog - is there a subtle difference? I still love it. Thanks, Manisha.

rockinggirlblogger

In the tradition of passing on the awards, I started making a list of people I would have liked to send it on to, and the list kept growing, so I pared it down a lot.

Even though both my favorite food blogs incidentally also have some guy power associated with them, this is specially for the women, Melissa of The Travelers Lunchbox and Nicky of Delicious Days.

With so much professional acclaim and press to their credit, I am a complete nobody to give them an award, but this is a token of my appreciation for the huge inspiration that they were to me, and for all the things I am continuously learning from their sites. So I am sending it over to them anyway.

This was also a perfect chance to sing their praises. Detailed crisp writing and the dreamy photographs are what drew me to 'The Travelers Lunchbox', and have kept me there, making me come back, again and again.

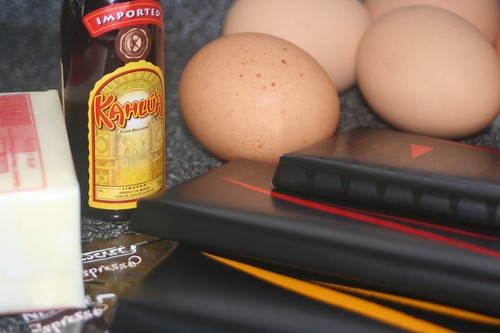
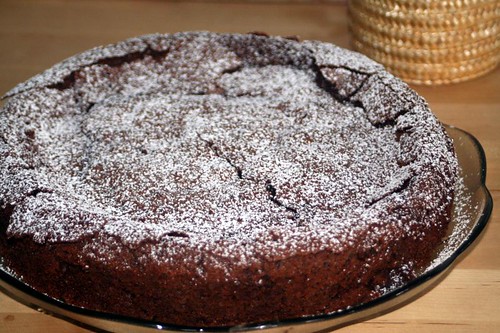
To add to all of this, her recipes are excellent. Like this flourless chocolate cake that I made for a potluck dinner that a friend had hosted. Luscious.

'mise en place' for Flourless chocolate cake

Flourless chocolate cake

Her Avocado Milkshake (you read that right) and Pesto Rosso are amazingly good too.

With Nicky's blog, first those photographs hooked me, but once I started reading her posts, it was her attempts to recreate German classics, including those from her grandma's kitchen, that struck a chord with me, as it resonated to a great extent to the way I sometimes try to reach out to my roots via food. From her site, I chose these Sponge Cake Rolls, that I made half with strawberry jam and half with an Alfonso mango jam.

Jam Rolls, still unrolled

Jam Rolls, just rolled and cut

Jam Rolls, finished

If you are not already lost in their site, I recommend this Bircher Müesli too.

Last but not least, I want to pass it to desiknitter, who doesn't yack about food like me, but instead knits knits knits and keeps a lively blog full of interesting episodes in her life. Although, sometimes she slips, and talks about food too. Try that raw mango chutney, it's the best.

kairichi chatni

Wednesday, August 08, 2007

Ma-po Tofu

Ma po tofu

Some things begin with a plan, and others happen at random. This time it started with a packet of tofu that was getting close to its expiration date. Tofu and I share a strange relation. When I see it in the store or in some recipe I feel very inspired but then it languishes in the fridge for a while before I start reminding myself to use it up in the intended recipe. Usually it lands up in a Thai curry with some other vegetables of choice, but this time, I had eaten Thai for lunch just the day before, so I wasn't feeling enthused about it.

While searching through my collection of favorites I decided on this 'Tofu stir-fried with basil' which I hadn't made in a long time and which I know is fantastic. On a whim, I thought I'd check if anything else catches my fancy on that site, which, by the way, has several really good Southeast Asian style recipes. When I saw the 'Ma Po Tofu', that was it. That gorgeous color in the photo of the dish caught my attention, and the recipe sounded so unbelievably simple that I had to try it. Plan changed, for the better. This recipe is just awesome, an absolute winner.

You could use the original recipe just as it is, with the chef's witty add-ons and informative notes. Sichuan pepper is called as tirphaL in Konkani and Marathi, and is not in any way related to the churna of the same name. If you have it, use it. This is what I did, following the recipe as closely as I could, which is why I have kept most of the instructions as they are.

Ingredients

Firm Tofu - 270 gm, about half of a standard block
3 Tablespoons oil
1.5 Tablespoons chili bean paste
2 teaspoons fermented (preserved) black beans
5-10 dried or fresh red chilies
(I used 5 fresh red Thai chilies, and that was decently spicy enough for me)
1/2 cup water or stock
pinch of sugar
1 teaspoon light soy sauce
2 teaspoons cornstarch mixed with a Tablespoon of water
white pepper to taste
1 or 2 spring onions (scallions), to yield about 2 Tablespoons

Method

Heat the oil in a non-stick skillet or wok.

Cut off about a fifth of the tofu, and crumble with fingers or fork. Add this to the oil and let it fry until golden brown in color.

In the meanwhile cut the remaining tofu into 1/2 to 1 inch pieces. Chop the scallion into rings, using the white and green portion.

Move the fried tofu to one side of the pan, so the oil can drain back into the middle of the wok. Turn the heat down to medium. Add the chili bean paste and stir-fry for 30 seconds. The oil should turn red. Add the fermented black beans and red chillies and stir-fry for another 30 seconds. Add the water or stock and stir it in.

As it starts to form a sauce, gently add the cut tofu to the liquid. Don't stir-fry this too much or the tofu could break apart. Try to hold the pan by its long handle and gently shake it back and forth.

Add the sugar and light soy sauce. Turn the heat down and simmer the mixture for about 5 minutes.

Depending on how thick the sauce is at this stage, stir in some of the cornstarch-water mixture and turn up the heat to medium. The sauce should start to thicken. Add more of the mixture and cook till the sauce has the consistency slightly more runny than tomato ketchup. It should cling to the tofu.

Stop the cooking at this stage, add some of the spring onions and white pepper. Serve with the remaining spring onions garnished on top.

The perfect accompaniment to this would be plain white or brown rice, and any type of sauteed greens, to add a vegetable component to the meal.

For that, here is a bonus recipe:

Sauteed Green Beans and Cashews

Stack together some tender green beans and trim off the ends. Heat oil in a wide skillet, add a couple of cloves of minced garlic, a broken dried red chili or two, a handful of cashews, the beans, salt, and cook for a few minutes. Add some soy sauce and toss together for another two minutes.

This dish might sound simple, but it tastes absolutely fabulous.


About Express Cooking

Spicy sauces for ma po tofu

If I have to cook while time is at a premium, I am most likely to turn to something that does not need a precise recipe, like pasta with whatever-is-in-the-fridge, or eggs, or something that I have made so many times that I know exactly what it involves. Trying out a new recipe for which I have to refer to something is best left for when there is plenty of time.

This Mapo tofu scores some more points because this was the first time I made it, I had to refer to the printout, and yet it took less than 20 minutes. As if that wasn't enough, it is made without using anything frozen, leftover, or canned. Just the tofu itself and the couple of sauces are ready-made.

By using multiple burners, all three components of this meal can be cooked together to create a healthy balanced meal for the Express Cooking event.

Thursday, April 12, 2007

A good basic eggless cake

One of the concerns I faced when I started this blog was what to do about recipes that I tried from other blogs. Just writing about recipes from some other blog seemed lame. Besides, not all recipes I try are superhits, so why write about something that did not turn out quite well. However, there are those things that I like a lot and sometimes make repeatedly, making them nearly my own. They surely deserve a mention, if only to spread the good word around. One of them is this simple cake from Shyamala's blog.

The first time I made it, it was perfect just the way it is in her recipe. The second time around, I did not have any lemon or lime around, so I used a tablespoon of yogurt instead, which is also acidic, and it was also lovely. Another time, I doubled the recipe, and used a 9-inch round pan, and used half candied cherries and half nuts. It was just as forgiving, and seen in the picture on the right. My most recent version had no nuts, but just some tutti fruiti that I had bought in India. In India, 'tutti fruiti' is synonymous with brilliantly multi-colored candied fruit pieces, of questionable ingredients but delightful taste. I wonder if it even has any fruit in it. It is also the name of an icecream that was very popular when I was growing up, but haven't heard much about recently. I sprinked these on top of the batter after it was poured into the pan. When it baked, the batter rose up around the chunks, which got embedded into it. I think this one has to be my most favorite version.

Since I know lots of people who do not eat eggs, this is a very good recipe to have on hand. And because it lends itself to such versatility, I am thinking of other variations too. Like orange zest and orange juice instead of lime, or cinnamon and raisins instead of vanilla and nuts, or tutti fruiti again, with rose instead of vanilla. Don't they sound good? I think honey could also be a subsitute for the maple syrup. I am also going to try to reduce the amount of leavening agents, and will update the blog with how that goes.

The best part about this cake is that it is really easy to make, and does not need any special equipment, other than a baking pan, and a whisk, which makes it great for novice bakers. It takes less than an hour from start to finish, but it is the time spent after that, waiting for it to cool that is the most difficult. So plan to go for a walk at that time, to avoid the temptation to dig in.

tutti fruiti cake

Here it is, for reference, with a few changes and notes.

Basic Eggless Cake

Ingredients

1-1/2 cups of cake flour
1 teaspoon baking powder
3/4 teaspoon baking soda
6 tablespoons granulated sugar
3 tablespoons pure maple syrup
1/2 cup chopped pecans
1/2 cup vegetable oil
1/2 teaspoon of vanilla extract
Juice of 1/2 lemon or lime, about 1-1/2 tablespoons
1/2 cup milk
Confectioners sugar for dusting (optional)

Method

Grease an 8" square baking pan. Preheat the oven to 180C/350F.

Mix the flour, sugar, baking powder, baking soda, salt and pecans thoroughly.

Mix all the remaining wet ingredients together with a whisk or hand held mixer, and stir it into the dry mixture until there are no lumps.

Pour the batter into the prepared pan and bake for 35 minutes. Check by inserting a toothpick in the centre to see if it comes out clean. Loosen the edges slightly by moving a knife between the cake and pan.

Let it cool in the pan for about 15-20 minutes, and only then turn it out onto a wire rack.

Dust it with confectioners sugar if you wish.

Some notes:

It is slighter dry and not very sweet, unlike the sweet, moist cakes that are more common in America. It is however relatively low in fat content, considering that there is no frosting, and that the above cake easily makes about 16 medium servings. Cake flour is not always available easily, but look for it just before a major holiday. I suppose one could use all purpose flour too.

Finally, Shyamala, you don't know me, but thanks a lot!
Related Posts Plugin for WordPress, Blogger...