Wednesday, May 30, 2007

Cherry Pickle

When life gives you cherries do you make pickle or jam?

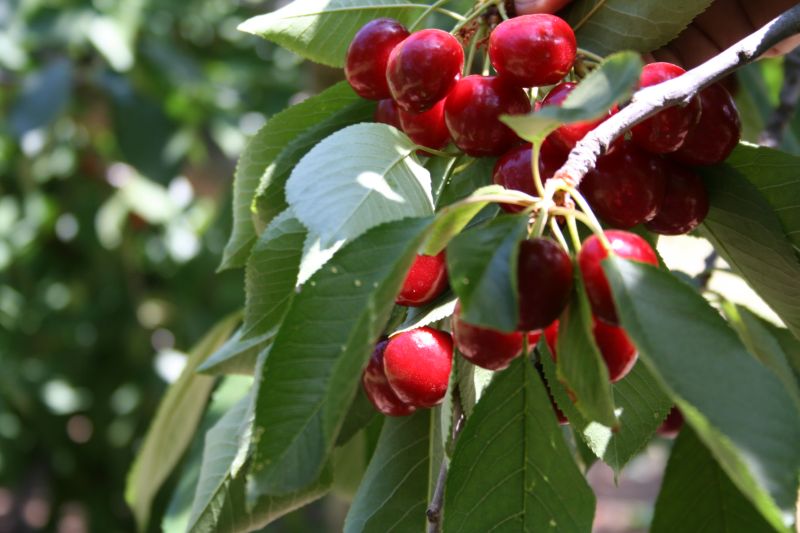
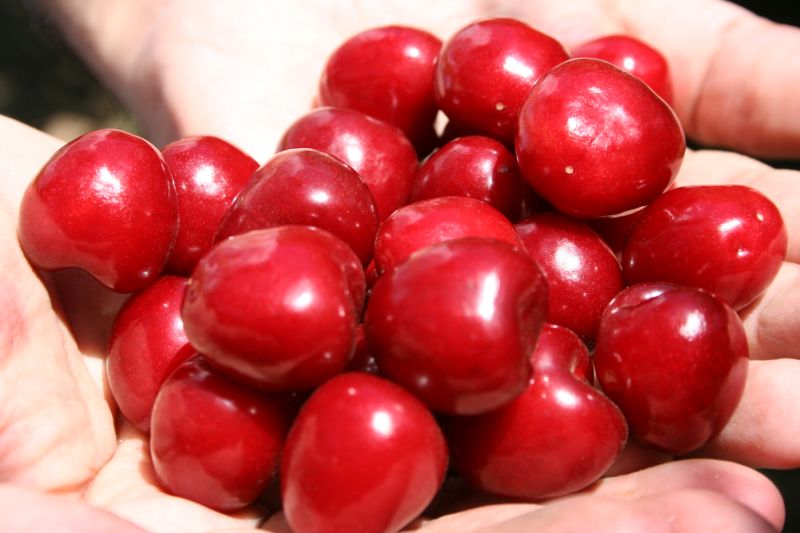
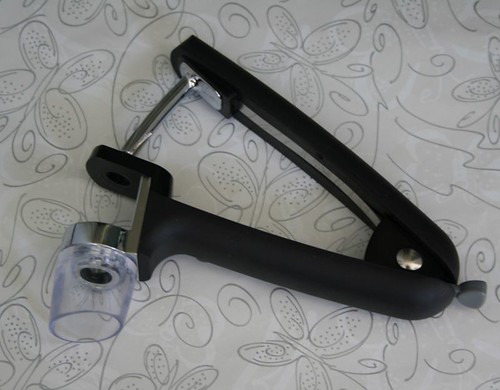
In either case, you first need to pit them. I always fancied buying a cherry pitter but never had the need to buy one. I usually eat cherries straight up, but last weekend I brought tons of fruit home, and I am quite sure that it would be impossible to finish it all by simply snacking. So, I have plans to preserve them a couple of different ways, and that means I would need to pit a whole lot of them. So, here comes the Cherry Pitter to the rescue! Phtk, phtk, phtk, one by one they popped out - hah, I am easily pleased.

One batch of it went into a pickle that I adapted from a recipe in 'Usha's Pickle Digest', written by Usha Prabakaran. More on that book sometime later.

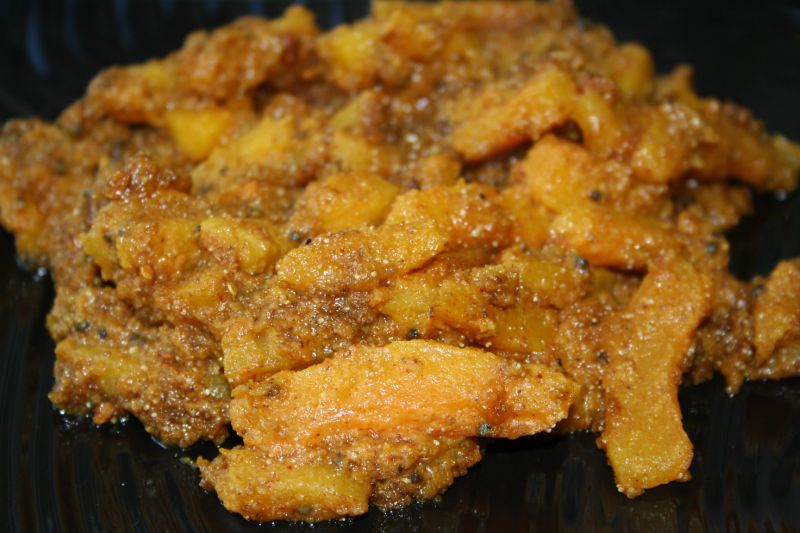
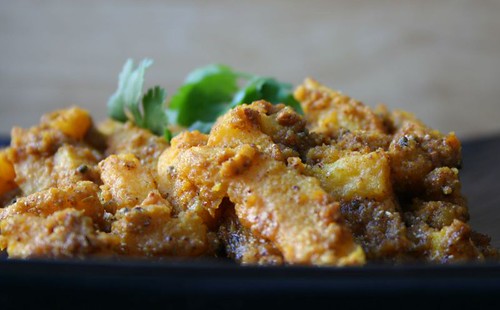
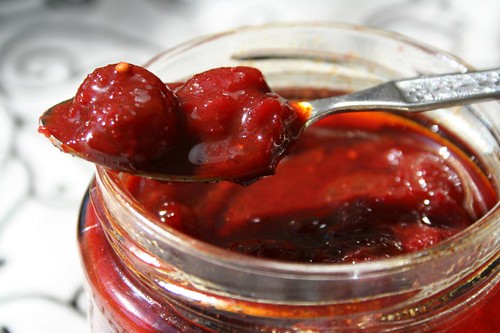
Although I started with the quantities given, I changed the quantities quite a bit when I started measuring out the ingredients because most of the spices seemed too much to me. The end result was really good. It is a pickle that will please people who like pickles. By that I mean that it has just the right amount of that salty, spicy and sour taste which is the hallmark of Indian pickles. This inspite of drastically reducing the amount of salt, spice and oil given in the recipe.

Apart from that joyful pitting activity, the recipe is quite simple. Here is what I did, with volumetric measurements instead of the orginal ones in grams, except for the cherries.

Cherry Pickle, close up

Ingredients:

500 grams cherries
1 teaspoon + 2 Tablespoons pickling salt, or kosher salt
1 teaspoon methi (fenugreek) seeds
1/4 teaspoon hing (asafoetida)
1 teaspoon + 4 Tablespoons of oil
1/2 teaspoon turmeric
2 Tablespoons jaggery
1 1/2 Tablespoon red chili powder
1 teaspoon mustard seeds
3 Tablespoons lime juice

Method:

Pit the cherries. This is also called stoning the cherries. Marinate the cherries in a teaspoon of salt for a day. Roast the methi and hing on medium heat for a few minutes and powder them together.

Heat one teaspoon oil, add mustard seeds, and when they start to pop, add turmeric, cherries, and jaggery. Stir it together for a few minutes until the cherries start to soften, and some of them break down.

Add the remaining salt, oil, and dry spices, and continue cooking until the oil starts to separate (I did not see this happening, but I knew it was done when the oil got really hot). Add the lime juice, and remove when the mixture starts to bubble.

It is ready to eat as soon as it is cool. The book says that this pickle can stay upto 2 months.

Tuesday, May 29, 2007

Cherry Picking

Around here, the cherries are starting to get ripe and ready. Which means thousands of people will be thronging to various orchards, especially on weekends, to eat some fruit off the trees and then pick some to take home. Last weekend, I was one among the many, and oh, what fun it was. The cherry trees were overflowing with fruit, and at one point I could see green orchards dotted with red as far as the eye could see.

These picture do not do justice to that joy of seeing such a sight, and the experience of picking the fruits off the tree.

Clustered on a branch

Cherries, closeup

A row of cherry trees

Cherry Orchard

Blindingly beautiful sweet Bing cherries, just picked

Picked beauties

Monday, May 28, 2007

A pumpkin recipe, on request

Baakar Bhaaji

butternut squash bakar bhaji 1

A while back, gudy2shuz asked me if I had a recipe for 'lal bhoplyachi bakar bhaji' with sesame seeds and peanuts. She even offered me her aaji's (grandmother's) recipe, which was:
"you dice the pumpkin, roast together some dry coconut, khus khus, peanuts and sesame seeds. grind the stuff into a coarse powder. make a phodni of mustard seeds, hing and haldi, saute the pumpkin in it for a bit, cover and cook, then add the powder, some jaggery, red chilli powder and salt. garnish with coriander powder."
She added:
"its easy enough, but getting the mixture of sweet/spicy/nutty is at the heart of the puzzle."
In my mind, this was already good enough, but she wanted to know the precise proportions. I would have happily given them to her if only I knew how the result is supposed to taste like. Suddenly I felt quite responsible. I searched through some of my cookbooks to see if there was anything like that, and there wasn't. So the next thing was to search around the web, and I found Anita's recipe, which looked very close to what 'gudy' had described. To complete my quest, I checked with a friend if she knew something, and she said that she hadn't heard the term 'baakar bhaji', but there was a recipe in Ruchira that was very similar. Sure enough, it looked like it might be just the thing.

Since pumpkin season is well over now, I was skeptical about how the squash bought in a grocery store out of season would taste, because I have found that winter squashes bought at the local farmers' market are way superlative in taste compared to the others. I found a butternut squash that was grown in Mexico, because waiting until next fall would have been too long. Butternut squash is usually my first choice for making Indian sabjis that call for pumpkin. Acorn squash follows closely, because it also takes to spices very well.

The result was fantastic! I made a few changes to the original, like peeling the skin off instead of keeping it on, and reducing the amount of hing (1/2 teaspoon!). Here is the adapted recipe.

butternut squash bakar bhaji 2

Ingredients:

500 gm butternut squash
3 Tablespoons khus khus (white poppy seeds)
3 Tablespoons dried grated coconut
3 Tablespoons charoli nuts (can use peanuts instead)
3-4 pieces of tamarind or 1 teaspoon tamarind paste
6 Tablespoons oil
1/2 teaspoon mustard seeds
2 pinches of asafoetida
1/4 teaspoon turmeric
1 teaspoon methi (fenugreek) seeds
3/4 teaspoon red chili powder
salt to taste
1-1/2 Tablespoon jaggery
3 teaspoons goda masala

Method:

Peel the butternut squash and chop it into large pieces, about 2 inches in length.

Dry roast the khus khus, coconut and nuts for a few minutes until they start to change color. Let it get cool, and grind to a powder. Make a solution with half cup of water and tamarind.

Heat the oil in a kadhai or wok, and add the mustard seeds. When they start to pop, add the asafoetida, turmeric, methi seeds, and the pieces of squash. Saute for a minute or two, and then cover with a lid for a few minutes or until the squash is almost done. Add 3/4th cup of water, and to it add the ground powder. Add red chili powder, salt, tamarind water, jaggery, and goda masala, and stir it so that all these ingredients form a sort of gravy. By then the squash should be fully cooked too. Best to serve with plain rotis, polis, or parathas.

Thanks gudy2shuz, for introducing me to a new dish which is so good that I will be definitely making it again.

Sunday, May 27, 2007

Ruchira

The Marathi cookbook

For someone who likes to cook, reading and buying cookbooks follows naturally. When it comes to Maharashtrian cooking, if you randomly survey some Marathi people and ask them to name one cookbook they know or use, I can predict the result quite accurately, if I say so. The answer has to be 'Ruchira'.


'Ruchira' is a Maharashtrian cookbook, written in Marathi by Kamalabai Ogle, and published in 1970, when she was sixty years old. According to the cover of the book, a record was established when more than 150000 copies of the book were sold within 20 years of its publication, unparalled by any other non-fiction book. As far as I know this is the oldest known documentation of Marathi recipes, but would definitely like to know if there is anything available that dates earlier.

Here is a link to a very nice old article that talks about the book and its author. In it, she is quoted about the encouragement she received from her husband, who wrote the recipes as she narrated them to him, so I am not sure whether she was able to write or not. Given that, it is easy to forgive the lack of quantities and precision in some of her recipes, which is a complaint I heard from someone about the book. In fact, most women I know from those days never prioritized quantities. They believed in 'this much' of this and that. However, many recipes actually have fairly accurate measurements, if only in terms of spoons and katoris and some archaic terms like 'ser'.

Honestly, I wasn't exactly thrilled with 'Ruchira' when it was probably the only cookbook or food resource I had to refer to. At that time, I did not possess the tools to make a ginger-garlic paste, or any other kind of paste, most ingredients in the book were hard to find, and I did not even know what some of the ingredients meant. Those were the dark ages - pre-search engines and even pre-browsers. It was all my fault, then, I realize.

While this is a book that is supposed to guide the novice cook, I warmed up to it only after I had honed my basic cooking skills. Over time, I came to rely on it to stir up something that took me closer to my roots, or to look up something old-fashioned. I have used Volumes 1 and 2 extensively now, making notes about what I should or should not do, what worked, and what quantities would be best for recipes where there are none.

The English translation

The same article I linked above mentions that the book was translated into English, and ever since I read that, I was in search of the English language book for several reasons. When I finally got a copy though, it was a bit of a letdown. The great thing about it is that it makes many common Marathi recipes accessible to those who do not read Marathi, and is overall well written. However, the English version has only around 100 recipes, which is a small fraction of the two original volumes. So while I would recommend it those interested in trying out Maharashtrian cooking, I would also add a note of caution of how it barely scratches the surface.

Since I will eventually write about dishes that were based on recipes from the original Ruchira, I felt it was only appropriate that I write about these books before I embark on those posts.


Adapted Recipes

Volume 1

Baakar bhaji (lal bhopLyAchi bhAjI)

Sweet coconut rice (nAraLI bhAt)

Methi DAL

Volume 2

Popped Rice Chiwda (lAhyAnchA chiwDA)

Friday, May 25, 2007

Egg Biryani

Getting the carbs before a long run

Long distance running is not my thing; never was. Or short distance running, for that matter. However, some circumstances led to me running in the 'Bay to Breakers' race in San Francisco last weekend. It is a 12K or 7.6 mile course, and it was my longest run ever. If worst comes to worst, I could simply walk, I thought. This being the tamasha that the 'Bay to Breakers' is, there would be plenty of dawdlers. Thankfully, it wasn't so bad, and I had a fun run, and even managed to take a few pictures along the way.

When it comes to food, a run like this needs a nice carb loaded dinner on the previous evening, methinks, so what if this is not a marathon. Besides, who am I kidding, I often eat a carb loaded meal like this even otherwise. So I decided to make a simple egg biryani, more of an egg pulao to be precise, since there is no layering and no dum cooking. For some reason I have always called this egg biryani, so let it be! It is easy and comforting, and it gave me plenty of time to get my bib, chip, and attire ready for the next morning.

Egg Biryani

1-1/2 cups uncooked basmati rice
6 eggs
2 medium onions
4 Tablespoons of oil
1 bay leaf
1 black cardamom (moti elaichi)
1 stick of cassia bark or cinnamon
a few whole cloves
1/2 teaspoon turmeric
1 teaspoon red chili powder
2 teaspoons coriander powder
3 cups water
salt to taste
1 Tablespoon raisins
1-2 Tablespoons chopped cilantro
1-2 green chilies, whole or slit lengthwise (optional)

Hard boil the eggs. To do this, place them in a saucepan of cold water and bring to boil. Cook it for 10 minutes after that, and turn off the heat. Rinse the rice with cold water and let it soak in some water for about 20 minutes, and then drain it. Slice the onions thinly.

Heat the oil, in a large saucepan, and add half of the sliced onion to it. Fry the onion until it turns dark brown, and then remove from the oil with a slotted spoon. Keep it aside.

In the remaining oil, add the bay leaf, cardamom, cassia bark and cloves, wait till they start to change color and add the remaining onions. Saute on medium heat till the onion is golden brown in color. Reduce the heat, add the powdered dry spices, and then the rice. Stir it around until the rice is coated with the spices. Add the water, and increase the heat. When the water comes to a boil, add salt, and cook uncovered till the rice has absorbed most of the water.

While the rice cooks, shell the eggs. You can either cut them in half lengthwise, or leave them whole and pierce them slightly all over.

Add the raisins and the eggs to the rice, and turn down the heat to very low, or turn it off if the heating element on your stove stays hot for a long time (mine does). Cover with a lid for about 10 minutes.

Add the fried onion, chopped cilantro and green chilies towards the end.

Race Day Pictures

Elvis Lives
Bay to Breakers - Elvis

This costumed couple with stroller ran at my speed for most of the way
Bay to Breakers - Costumed Couple

Going up the Hayes Hill
Bay to Breakers - Hayes Hill

Passing by the Conservatory of Flowers in the Golden Gate Park
Bay to Breakers - Conservatory of Flowers

I can see the ocean, the end must be near!
Bay to Breakers - close to the finish

Monday, May 21, 2007

Shrikhand Wadi

The next step

As a follow up to my previous post on shrikhand, I wanted to add a note about something that is made by processing it further. It is even lower or non-existent on my favoritism-meter, so this is only in the spirit of enlightening!

shrikhand vadi

These are called shrikhandachya wadya and they are made by cooking the chakka and sugar together until it comes together to a soft dough consistency. At that stage the flavors like cardamom and saffron are added to it and the dough is then rolled out onto a flat surface. Slivers of nuts are pressed onto it, and it is cut into diamond shapes, similar to burfis.

On a related note, waDI (singular) or waDyA (plural) is a food concept well entrenched in maharashtrian food. It is different from waDA (singular) or waDEy (plural) that are more well-known, and with which it sometimes gets confused. Geometrically, a wada is usually round, oblong, or spherical whereas a wadi is generally flat and shaped like a square, rectangle, diamond, or sometimes round. Wadis could be sweet, like naralachya wadya made of coconut, or savory, like kothimbir wadis made of cilantro, and wadas are typically savory and deep fried. Exceptions exist, as always.

Tuesday, May 15, 2007

Shrikhand poori and aloo, for a picnic in style

Picnic

Last week, a bunch of friends decided to take advantage of the perfect weather and do a picnic lunch in a local park. Over a hundred e-mails flew around before the perfect final menu was planned. I had it easy; I was to take shrikhand. Easy, hnnn? Well, yes, if you consider the people who agreed to fry pooris for twenty people or make four pounds of aloo ki sabji. Some other things that people brought included a delicious fusion chaat, cucumber sandwiches, yogurt rice, coconut cilantro chutney, and fresh fruit. The spread that resulted is one that I will remember for a long time. Did I mention some pink lemonade with gin?

Recently, I came across something interesting - in K T Achaya's 'Indian Food: A Historical Companion', there is a mention that shrikhand as we know it now, appeared in writings on food in Kannada as early as 1025 AD. It refers to 'Lokopakara' of Chavundaraya which says that it was known as shikarini at that time. After that 'Supa Shastra' by the poet Mangarasa refers to shrikhand in 1594 AD, so the new name seems to have caught on at least by then.

I would like to know how shrikhand eventually became such a popular Maharashtrian dessert. It used to be really common at wedding lunches. How I hated it then! It was usually served with great 'Agraha', basically a sweet form of force feeding, by the bride and groom and their family members. It has been so many years since I attended a wedding in India, and even longer where shrikhanduh (as it is pronounced) was served, but those memories still make me shudder. The other thing that was popular was jilebi, and I developed the same type of antipathy towards those too. Even now, these are nowhere near to becoming my favorites, but I eat them occasionally.

Shrikhand is best served cold, so it naturally lends itself to be made ahead of time. Here is how I make it, using the classic method and ingredients, and even a past shrikhand hater like me likes it this way.

The traditional version

Yogurt cartons2 lbs plain yogurt (refrain from the lower fat varieties)
1/2-3/4 cup confectioners sugar (upto 1 cup if you like it to be very sweet)
5 green cardamom pods (elaichi)
about 1/4 teaspoon saffron
1 Tablespoon milk
1-2 Tablespoons of chopped unsalted pistachios, slivered almonds, or charoli, or a combination of it


Pre-preparation for chakka

Make sure there is some place from where you can hang 2-10 lbs of weight, and allow the water to fall. I usually hang it on a hook on the patio and let it sit there overnight, preferably on cool nights. You also need a large piece of cotton or muslin cloth, about as thick as a dupatta. I have a large piece of 'flour sac' material that I have reserved specifically for shrikhand.

Working near the sink, lay the cloth in a large wide bowl, and empty the yogurt into it. Pull up the corners to make a bundle, over the bowl. Water from the yogurt will start streaming out. Tie a rubber band to secure the bundle if required. Squeeze gently to allow more water to fall. Now hang this bundle from the hook, keeping the bowl as close to it as possible. I have a net bag in which I place the bundle. I like to let this sit overnight. The end result of this is the residual yogurt with very little water and called 'chakka' in marathi.

Yogurt tied up to drain

Making the shrikhand

When you are ready to make the shrikhand next morning, gently heat the milk just enough to warm it, and stir in pinches of crumbled saffron into it. Let it sit for atleast half an hour. Peel the cardamom and powder the seeds finely using a mortar and pestle.

Squeeze out as much water as you can from the yogurt bundle. The more water you can get out, the better the consistency. Carefully open the bundle, and spoon out the creamy yogurt into a big bowl. Stir in the sugar into the yogurt, along with the cardamom and saffron milk. Stir everything with a large spoon to mix evenly.

Mixing saffron into shrikhand

Garnish with pistachios and almonds if you like. The saffron and nuts are optional, but I love to use both, and particularly pistachios.

A large batch packed up to be taken to the picnic.

Shrikhand

Variations with Fruits

The most popular variation on shrikhand is Amrakhand, which is made by mixing in a puree of ripe mangoes into the rest of the ingredients. Sometimes other types of fruit are also added but these versions are not as popular or common.

When I think of the abundance of fruit here, strawberry shrikhand and peach shrikhand come to my mind as variations. Almost any sweet fruit that can get slightly mushy when ripe could also be considered. Like the blackberry shrikhand that Manisha made recently. However, everytime I think of trying out a fruit variation, the majority vote goes in favor of the classic.

Kesar Shrikhand

Instead of using just 1/4th teaspoon saffron, use 1 teaspoon of it, for a shrikhand with a strong saffron flavor and lovely golden color.

Friday, May 04, 2007

Grains, Greens, and Grated Coconuts

Recipes and Remembrances of a Vegetarian Legacy.

Grains, Greens, and Grated CoconutsI have known Ammini online for over two years now, and ever since I found out that she was writing a book on vegetarian food from Kerala, I was practically standing in line for it. The book was published in February of this year, after long years of her hard work, and I had a copy in my hands almost immediately. It is called 'Grains, Greens, and Grated Coconuts'.

Well before that, I was able to try out some of her recipes that she had so generously shared. From a basic coconut chutney to a stuffed eggplant dish, they were flawless to execute and absolutely delicious. She maintained their authenticity and added precise measurements and directions, and I was not disappointed with any of them.

This post isn't a book review. It would be impossible for me to review it impartially having known about it and the author. Even then, it surpassed all my expectations, with over 300 pages of content, which included not just recipes, but the history, rituals, festivities, and anecdotes related to all aspects of cooking and eating in the part of Kerala that Ammini knows best.

All I can say is, take a look, and try it out for yourself. Here is the list of contents with some excerpts and photos from the book. I haven't read the whole book yet. Cookbooks are different from novels in that sense. It is nice to be able to dip into them every now and then. This is definitely one of them.

I have made a few things from the book, all of which received two thumbs up, and plan to try out several more. I will update the blog with how it goes. In the meanwhile, let me share one that I tried out last weekend, to accompany a brunch of idlis and sambar. This podi (the Malayalum word for powder) is a dry and spicy chutney that is served mixed with ghee or oil, with most breakfast dishes. I like to stir it into sesame oil until it reaches a runny paste consistency. It has a long shelf life since the ingredients are dry roasted. You might be taken aback by its simplicity, but it is fierce, in a good way. It is not overly spicy, but go easy on the chilies if you like your food mild. The original recipe calls for black sesame seeds, but I used the usual pale ones.

Chutney Podi Ingredients

Podi: Spice Powder Served with Dosa and Idli

1 cup urad dal (split, and without skin)
1/2 cup dried red chilies (cayenne, serrano, or Thai)
2 Tablespoons sesame seeds
1/4 teaspoon asafoetida (hing) powder
Salt to taste, about a teaspoon

Wash the urad dal and drain. Spread it out on a paper towel to dry thoroughly. In a heavy skillet, dry roast the dal over medium heat until it is evenly golden brown in color. Add the chilies and sesame seeds to the dal, and keep stirring until you hear the sesame seeds popping. Add the asafoetida and remove it from the stove. Add salt, and let it cool to room temperature. Using either a coffee grinder or other dry grinder, process the dal and spices to a fine powder.

Makes 1-1/2 to 2 cups.

Chutney Podi End Result

Other links:

Ammini's Website
The book on Amazon


Bookcover and recipe posted here with permission from Ammini Ramachandran.

Related Posts Plugin for WordPress, Blogger...