Saturday, May 31, 2008

The Lazy Judge

I mean, the busy judge

When the jugalbandits invite you over to be a judge at their prestigious food photography event called 'Click', you can proudly get the feeling of having truly arrived. Whether that is on the scene of blogging or photography. However, in the company of some really amazing photographers, all I felt was humbled. I cannot even hold a candle to these greats.

Now, from what I have seen around 'Click', there is a tradition of 'Judges' Entries', and these usually play tough with some of the best entries in the ring. Well folks, it is time for an exception. As you can see, my photo cannot be particularly held to those standards. As it never rains but pours, I had been swamped with things to do for most of the month of May, and I am using a picture which I had taken a while back.


Sauteed Matki/Moth Sprouts
Crunchy sauteed sprouted matki beans

My entry is called 'crunchy sauteed sprouted matki beans', for lack of a better title. This is a little different from the usual 'usaL', and was made regularly at home as a simple side dish and it is quite wonderful on its own as a healthy snack too. You can do this with either matki (also called moth) or moong sprouts, and it is as flexible as it gets. I use about 2 tablespoons onion for 1 cup sprouts, but the onion is optional. One can also add a few curry leaves in the oil.

In a little oil, add a pinch of mustard seeds and turmeric, and saute a little thinly sliced onion until it starts to soften and change color. Add the sprouts, and let these cook on a high heat for a few minutes until they are crunchy and cooked. Stir only occasionally, and add a few drops of water if they start to stick to the pan. Add salt to taste, and a little chili powder. You can also add a masala of your choice. A current favorite is 'usal masala' that is a little redolent of the East Indian bottle masala. Since it is has red chilies added to it, I skip the red chili powder when using it.

Look forward to all your entries for 'Click: Beans and Lentils'.

Monday, May 26, 2008

Arriving in the Arusuvai fashionably late

with DALimbyAchA masAle bhAt

The arusuvai link came to me from thecooker, a blogger whose posts always seem to be about just the kind of healthy and innovative, but playful and fuss free food that I like to eat. Naturally I was looking forward to what I would receive, and the contents of the package did not disappoint even one bit.

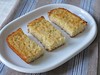
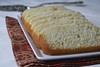
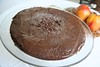
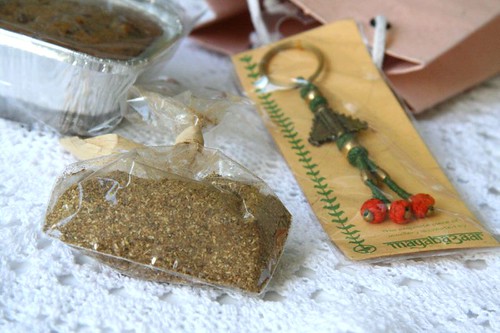
First, the obligatory photo of the goodies that arrived, taken in a hurry, left largely un-arranged. A nearly half gobbled date cake (no, it didn't come that way, it came whole), baked by the cooker, which was utterly delicious, a very pretty desi trinket, and of course the star, the masala in a packet.

Arusuvai Packet

The cooker kept things easy for me - no guessing games. She told me that the masala was called 'kaccha masala' (raw spices powder) that she had made using the recipe from the marathi cookbook 'Ruchira'. Now all this was well over two month ago. Umm, something like that. In the meanwhile, a gentle reminder came from her after what she must have thought a reasonable amount of time had passed, to check on whether I plan to post about it, and last week, she herself posted about the masala too. I had told her that the reason I hadn't blogged about it was because the thing I wanted to make required much planning and I wasn't getting around to that, which only piqued her curiosity further.

Since she had given me the details, I had looked up Ruchira, which mentioned that the 'kaccha masala' is particularly good in dishes like khichadi, masale bhaat and rassa. I got (somewhat unrealistically) ambitious, and instead of the usual masaale bhaat which is made with any one vegetable like eggplant or tondli, I thought of making the birde bhaat, also called DALimbyAchA bhAt, made with sprouted and peeled kadwe vaal, which I might have made possibly once before, and is quite a delicacy to savor. Making the rice isn't particularly daunting, but the prospect of spending an hour just peeling the beans was what was preventing me from taking any action.

Finally, I bit the bullet and soaked the beans. There was no option for looking back after that. Within about two days the beans had sprouted and were ready to be peeled. With the Obama-Clinton drama unfolding in the background, I spent a couple of hours, peeling these. Yes, it does take quite that long, and even longer with my unskilled fingers, hence my earlier procrastination which I had to get over.

Once the beans are peeled, and with the masala on hand, making the rice is as simple as, well, making rice. I adapted the recipe for 'dalimbyacha bhaat' from 
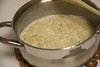
Ruchira, but since I was using 'kaccha masala', I added it to the oil first, letting the spices saute a bit before adding the rice. As I made the rice, the aroma that wafted was unmistakably that of a maharashtrian wedding hall, as described rather well by the cooker in her post. And since the masale bhaat is such a fixture at weddings and other occasions, that it is the highest compliment that can be paid to the masala. This masala is definitely a great one to use for getting just the 'right' taste of masale bhaat.

The arusuvai now travels over to Manisha of Indian Food Rocks.

From Val to Masaale Bhaat

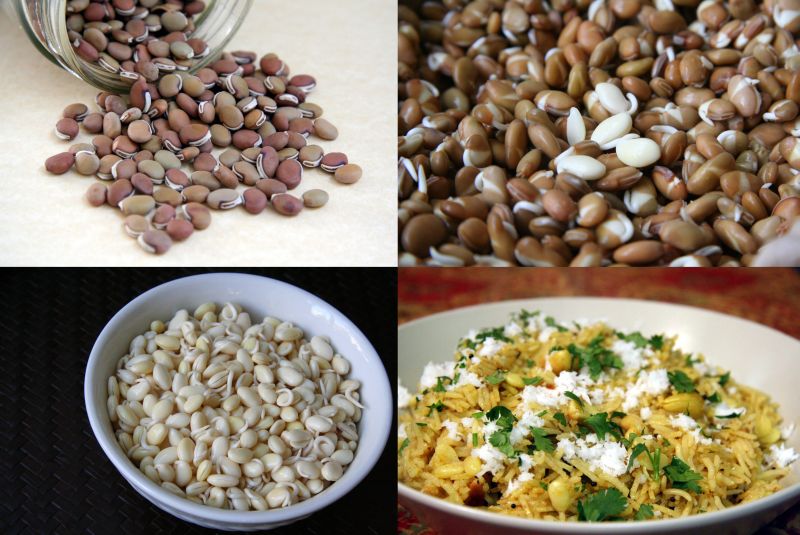
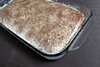
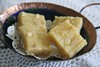
Top L-R: dried beans, sprouted beans
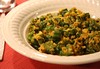
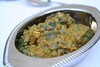
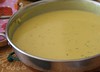
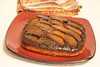
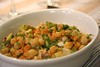
Bottom L-R: peeled beans, finished rice dish


Dalimbyacha bhaat

Serve this rice as part of any festive meal, or by itself for a treat.

Ingredients

1 cup basmati rice
1 cup sprouted and peeled kadwe vaal / Dalimbyaa / surti vaal
3-4 Tablespoons + 1 teaspoon oil
1/2 teaspoon mustard seeds
pinch of asafoetida (hing)
1/2-3/4 teaspoon turmeric
a few curry leaves
2 teaspoons kaccha masala
1/2-1 teaspoon chili powder
salt to taste
handful of cashews
1 Tablespoon crumbled jaggery
1/2 cup of coconut (or adjust to taste)
5-8 Tablespoons of chopped cilantro
ghee for serving

Method

Heat the oil in a wide and deep saucepan or dutch oven. Add the mustard seeds, and when they start to pop, add the asafoetida, turmeric, curry leaves, and the kaccha masala. Reduce heat, stir for a few seconds, and add the rice and the sprouted vaal. Stir everything together for about a minute, add 3-4 cups of water, and bring it to a boil. Add salt and chili powder, reduce the heat, and let cook until just a little water remains. At this point, add the jaggery, and stir once. Reduce the heat to very low, and cover the pan for 10-15, until the rice absorbs all the water. In the meanwhile, heat a teaspoon of oil in a small skillet and saute a handful of cashews in it until they turn golden brown. Add the cashews, coconut, and cilantro to the rice, reserving a little for garnishing. Drizzle a little ghee over the rice while serving.

Dalimbyacha Bhaat/Birdyacha Bhaat

Variations

Instead of using sprouted and peeled vaal, one can use the skinned and split dried val, by soaking it for a few hours before use. The flavor and texture is not quite the same as the sprouted ones, but comes close.

Instead of using beans, one can also use a chopped vegetable like eggplant or tondli, or shelled green peas, for an equally delicious and much less labor intensive rice dish.

Monday, May 05, 2008

Making Basundi, Mango Rabdi, and Glamming it up

The main premise and method for making baasundi might sound innocently simple, but those who have seen how it gets made or tried making it would be well aware of the fallacy. Instructions could just read something like reduce milk till it thickens, add sugar to taste, some cardamom, saffron, nutmeg (the classic kesar-elaichi-jaiphal trio) for flavor, and chopped nuts for garnishing, and while that is not at all difficult to achieve, it could become quite a trying experience.

Basundi: Maharashtrian dessertFor me, the reason to make some basundi recently was most ho-hum - the expiration date on a jug of whole milk was drawing close. Well, I think the printed date is the sell-by date and not the use-by date, but I am usually done with the milk in the jug by whichever date is printed on it, and have never had to test it out. If it is not used up in tea, cereal and other things, then I make paneer (rarely), some kind of kheer (sometimes), or set it to make yogurt (mostly).

This time, I had enough milk leftover to make basundi, and it had been a long time since I made it. This year for me, if anything, has been about minimizing the number of ingredients and maximizing flavors, and this fits right into that theme too. I started by heating the milk in a stainless steel saucepan, and when it came to a boil, I reduced the heat until the milk was at a constant simmer. Since I was doing other things around the house, I managed to stir it a little every ten to fifteen minutes, and kept doing this for about two hours, until the milk had thickened up considerably, and turned to a lovely light beige color. The result was more than satisfactory.

Basundi: Some like it with nuts, others like it plain

Basundi, Thickened Milk

Yields about 1 cup

Notes

This has so few ingredients that the taste of each one of them comes through, including the sugar. I like the taste of Indian sugar in this. Do use it if you have it.

Charoli is the more commonly used nut in Maharashtrian basundi.

The traditional way of using the nutmeg is by creating a nutmeg paste by rubbing the nutmeg in circular movements with a little water, on a round stone board. Here I have used freshly grated nutmeg.

Ingredients

4 cups whole milk
4-6 Tablespoons sugar
1 green cardamom pod
5-6 strands of saffron
a dash of grated nutmeg
chopped nuts like pistachios, almonds, or charoli, optional

Method

Bring the milk to a boil, then reduce the heat until it simmers and thickens up considerably, at least to a fourth of its original volume. This could take around two hours, depending on the heat source, size and thickness of pan, and amount of milk. Stir occasionally to make sure the milk does not scorch.

Add sugar to taste, starting with a smaller amount first. Peel the cardamom pod and powder the seeds with a mortar and pestle. Add the powder, grated nutmeg, and strands of crumbled saffron, and finally, chopped nuts. Basundi can be served warm, at room temperature or cold, depending on the type of meal and personal preferences.

The picture below shows the resulting thickness of the basundi I made. After being chilled in the fridge it thickened up further.

Basundi: Upclose

Adding Mango

Now, can a dessert like this be bettered or outdone? Well yes it can, by pairing it with a fabulous Alphonso mango. A long time ago I had read of a mithai store in Benares which served a seasonal sweet made of rabdi, saffron, and ripe mangoes, mixed together and served topped with chopped almonds, pistachios and a silver leaf. Even though I had never tasted anything like that, the description sounded nothing short of divine and was etched in my mind very firmly. So, here I was, with near-rabdi in the fridge, and a pretty good mango on hand, and the only thing I could think of was combining the two. I had for some reason set really high expectations for it, and was worried that the actual result might fall short of that, but it didn't. It was truly as amazing as I had imagined it to be.

In the first batch I pureed the mango in a food processor, but the end result got a little close to milk shake, so the next time I used a fork to mash up the mangoes, and that was definitely better in terms of texture. I used the flesh of one small mango for 1/2 cup of cold rabdi, then topped it with a tiny edible silver leaf and chopped pistachios.

Mango Rabdi: Dessert

Mango rabdi, dolled up in petite glasses, sashays down the red carpet for Meeta's Monthy Mingle.
Related Posts Plugin for WordPress, Blogger...