Sunday, January 27, 2008

Polenta Kheer

The first time I ever encountered polenta was on a plain jane PBS show one Saturday morning (in the days before Food Network!), and I was so fascinated by it that I had to seek it out. After I found it, I taught myself how to make it just based on the instructions on the back of the packet. Having never cooked with cornmeal of any kind before that and after having read a few onerous articles on the subject, I was concerned about the results, but I was lucky that the brand I started with was a good one, and it never gave me any problems. To be on the safer side I started with the oven method which makes a firmer polenta that can be cut into pieces, but later as I started feeling more comfortable with it I turned to cooking it directly in boiling water, and have never looked back. Even now, I come across writings that make it sound as though cooking polenta is rocket science, whereas it really is very simple.

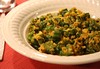
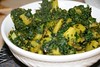
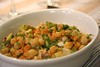
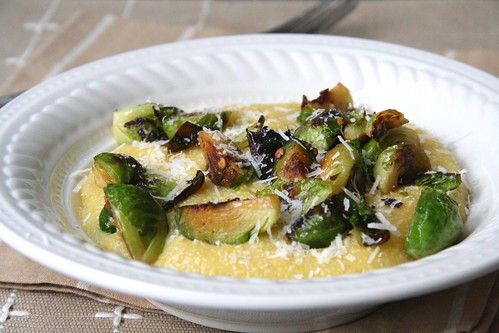
There is something inherently so warming about stirring a pot of polenta over the stove that it has now become a ritual I look forward to every winter, a few times at least. It is also a perfect blank canvas for numerous delicious accompaniments, and there is the comfort of favorite pairings and the joy of discovering some new ones. It is no co-incidence that the best polenta accompaniments are often perfectly suited for the winter season as well, and my current favorites are roasted vegetables, especially root veggies, pan fried brussel sprouts and grated parmesan cheese, and sauteed mushrooms, by themselves, or in a red wine sauce.

Polenta with Brussel Sprouts and Parmesan

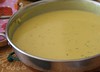
Soft, Creamy Polenta

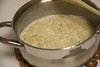
For making basic soft polenta, I start by heating 4 cups of water in a large pot, and when it starts boiling, add about 1 teaspoon of salt, 1-2 tablespoons of butter, and then the polenta, whisking continuously. When it starts to bubble, lower the heat and keep whisking occasionally until the polenta is fully cooked, and starts to become very soft and creamy. For more information, check out this link to the 'The Basics of Polenta Cookery' that covers it all, and even includes several recipes.

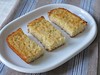
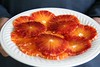
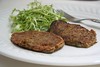
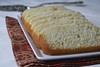
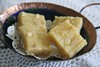
Perfectly Round Sliced Polenta

Once polenta is fully cooked and starting to thicken, it can be poured into a flat tray to cool. It will firm up and can be cut into shapes, but here is a tip if you want to eat or serve round slices of polenta but do not like the idea of having to waste all the pieces that would be leftover after cutting out the rounds - after the polenta has completely cooked and is starting to thicken, pour it into straight walled cups or glasses greased on the inside with a little butter. When cooled completely, run a knife around the polenta, and it will come out in one cylindrical piece that you can slice as thick as you like. These slices can be further baked or pan fried, and used with toppings of choice.
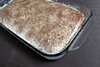
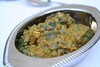
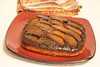
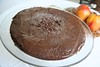
Polenta Sliced


Polenta as Dessert

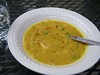
The idea for making polenta kheer just came out of nowhere, but I wouldn't be surprised if some enthusiastic home cook has tried it out already. At home, rawyachi kheer or kheer made out of coarse rawa (rawa in Marathi, sooji in Hindi, semolina in English) was more common than any other type of kheer. It was a simple and quick dessert for any night of the week, when the menu needed a little perk. It is forgiving on the amounts, and so the basic instructions would be to saute a little bit of coarse rawa in a little ghee, add milk, then let it cook for a little while to thicken, and then add sugar. Some cardamom and nuts can be added, time permitting, or it can be left plain. I always liked it at room temperature, or slightly warm.

So once the inspiration struck, I did the same with polenta, and what was most surprising about the end result was that it tasted a lot more like rawa kheer than like polenta.

Kheer is really pretty low on my dessert choices, but this is the stuff of childhood memories, and for a mid-week winter dessert that practically gets done on the literal back burner, this is perfect. It is as comforting as a blanket in the chill, and takes as much effort to make for a dozen as it does for one.

Polenta Kheer

The following proportions would make 2 generous portions, or can stretch out to 3 dainty portions.

Ingredients

1 teaspoon ghee
1/4 cup of medium grain polenta
2 cups plus more milk (whole milk would be nice)
2 green cardamom
4-6 Tablespoons sugar (I like about 5)
few strands of saffron
chopped almonds, pistachios or other nuts, about 2 tablespoons (optional)

Method

In a large wide pan, heat the ghee, and as soon as it starts to melt, add the polenta, and stir it around till it gets coated with the ghee. As soon as it starts to smell like it is being roasted (but do not wait until it changes color), add the milk, and start to whisk it using a wire whisk until it comes to a boil. Lower the heat considerably, and then let it simmer until the polenta cooks fully. This took me about 10 minutes, but polentas differ a lot in their coarseness. Stir occasionally to make sure it does not stick to the bottom of the pan.

In the meanwhile, remove the seeds of the cardamom and powder them finely. Chop the nuts and leave them aside.

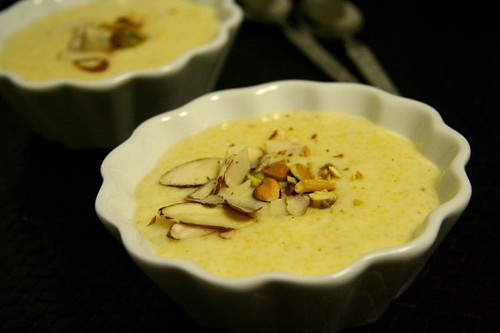
If the kheer starts to thicken too much, add a little more milk. Add the sugar, and let everything simmer on the low heat for another 5-10 minutes. After you turn off the heat add the cardamom and crumbled saffron, and let it sit with a lid on it, preferably on the still warm stove. Just before serving add the nuts.

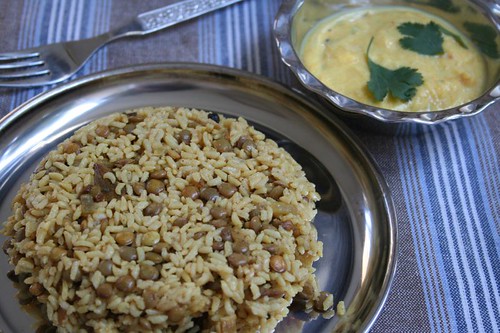
Picture of Polenta Kheer is my entry to the Click Event, where this month's theme is 'Liquid Comfort'.

Monday, January 21, 2008

Good ingredients can make a simple salad great

At this time, the only plant in the yard that produces anything edible is a small Meyer lemon tree, and around early winter, I usually harvest a small basket of them, after which begins the great quest on how to use them up before they turn bad, because I don't really need a lot of lemon juice in everyday cooking.

Meyer Lemons

I have made standard Indian pickles out of them in the past and they work just as wonderfully as regular lemons, but pickles last forever in our house, because we don't eat a lot of them, so I need other alternatives. There are several recipes for lemony cakes and breads but sometimes that seems a tad too much just to use up a few lemons, so instead I try to substitute these Meyer lemons in healthy everyday recipes that use lemons.

First up, this simple salad, versions of which you might have had before. It is a good example of how a few good quality ingredients can shine even when treated very simply, and give tired known combinations a refreshing lift.

The fresh mixed greens were an excellent base for the rest of the cast. The English cucumber was local and organic. Albeit hothouse, it was very sweet and tasty. The olives were from a fancy Italian store, and while I am not too knowledgeable about olives, I believe this is a store that takes pride in their quality, not to mention that everything there is rather pricey, so they have to be good, right? The feta was so-so, but it held its own in the mix, so I can only imagine what a good feta cheese would have done. A small chopped tomato or a few cherry tomatoes would be wonderful in this salad if they are in season, but I did not have any. The Meyer lemon in the dressing was from the backyard, of course, and it cannot get any more local than that.

Things made with few ingredients, where each one plays a standout role towards the final dish have become a hot favorite with me currently, and as I continue to explore the options, it is interesting to find many traditional Indian dishes that fit well into that category too.

Salad with mixed greens, cucumbers, olives, feta, and Meyer Lemon dressing

Simple salad, inspired by tired versions of the Greek or Mediterranean Salad


This would serve about 4 as a small side or starter salad. Precision is not very important here, and the following quantities are just guidelines.

Ingredients for Meyer Lemon Vinaigrette

1 Tablespoon lemon juice
2 Tablespoons extra virgin olive oil
a bit of salt and pepper to taste
dash of granulated sugar

Whisk the lemon juice and oil together for a couple of minutes until they are emulsified. Add the salt, pepper, sugar, and stir together until the sugar dissolves.


Ingredients for Salad

5-6 cups of mixed greens,
1 cucumber
a little bit of red onion (this is hard to quantify - I'd say about 20 thin rings, or to taste)
handful of olives
a few Tablespoons of feta cheese

Tossing it together

Wash and dry the greens, and place in a large bowl. Peel and slice the cucumber, or leave the skin on if you like. [I like to keep a striated skin]. Slice the red onion. Pit the olives - a cherry pitter works very well for smaller olives.

Just befere eating, toss the dressing with the greens, a few spoons at a time, using only as much as required to light coat the leaves. It is alright if there is leftover dressing. Add the rest of the ingredients, and toss just once or twice to distribute evenly.

Thursday, January 17, 2008

Fat Free Feta

The intentions were very good, but the outcome wasn't impressive. That was the case with a fat free feta cheese that shall remain unnamed. Yes, yes, I know that fat free cheese is a complete oxymoron, but it was the start of the year, the time when one is trying to curb calories, and sometimes ready to sacrifice taste.

The taste isn't bad, but isn't great. No tang, no texture, none of that saltiness that comes with a good feta. I am not discounting it completely, and will continue to use it in salads, which will appear here from time to time, but otherwise, it is a lesson learned, for sure.

Apple Chutney and Feta Spread

To see if it could be redeemed in some way I made a small amount of spread by processing the cheese together with some Apple Chutney, and it makes for a decent accompaniment to crackers for a small snack, but nothing to write home about.

Monday, January 14, 2008

tiLAchyA waDyA for Sankraant

Sesame Candies

I have lamented before that Indian festivals just don't seem the same here. It is simply not in the air, and not around you in a noticeable way. Makar Sankrant becomes just another day, something we see on our Kalnirnay, and then do nothing about it. I recall a time when 'sesame candies' used to appear in desi shops in January, and we would buy those for our token Sankrant celebration, but things have evolved now to a point where I can buy real marathi style tilgul ladoos, as well as revdis and gajak.

This year however, I had finally planned to make tiLAchyA waDyA at home, in part because of the festive spirit on the Indian blogs and in part because I had some time. I dug out the recipe that I had got from my mother years ago, but held back with trepidation because it involved making pakka pak, or sugar syrup that forms into a ball when dropped into water. Making syrups like this, with various 'string consistencies' attached to them, which is a staple of Indian sweets is something that has always daunted me, but these tiLwaDis were a huge favorite of mine, so I braced forth, and they turned out pretty good! While the Tilgul ladoos made of sesame seeds, peanuts, and jaggery were more traditional for exchanging with relatives and friends, and hence evoke more nostalgia, I always preferred the tiLwadis over them. They were also never made at our place at any time other than Makar Sankrant, making them even more precious and special. Another plus in their favor is that no one can make jokes about having to crack them with a hammer!

tiLAchyA vaDyA (tiLvaDyA)

tilachya vadya: sesame seed candy

Yields about 20-25 small squares

Ingredients

1 cup of regular (white) sesame seeds
1 teaspoon ghee
1 cup sugar
1 water
4 pods of green cardamom

Method

Pick over the sesame seeds, and roast them in a deep skillet or kadhai over gentle heat for a few minutes minutes, just until they start to change color. Do not get them too brown.

Grease a small cookie sheet with ghee.

When the sesame seeds are cool enough to handle, powder these in a food processor or dry grinder.

In a saucepan, heat 1 cup of water and 1 cup of sugar and bring it to a boil. Let it thicken. Keep aside a small bowl of water.

While the syrup cooks, peel the cardamom and finely powder the seeds in a mortar and pestle.

To check if the sugar syrup is done, add a drop of it to the small bowl of water. If it holds itself into a shiny ball, it is done. Switch off the heat immediately, and add the powdered cardamom powder and sesame seeds to it, stir quickly to mix, and spread it into the prepared cookie sheet using a spatula, starting in the middle of the sheet.

Immediately, while the mixture is still hot, mark lines into it with a knife for the wadis, and separate the wadis when completely cooled.


Related: A primer on the concept of maharashtrian style wadis.

Sunday, January 13, 2008

Whole Masoor Pulao

Trial Run with a Packaged Masala

A few weeks ago on a cold and rainy evening, when there were plenty of leftovers for dinner, and nothing great on television, I found myself with some rare time to go rummaging through the fridge, freezer, and pantry to take stock of all the spice powders that have been sitting idly in the kitchen, for months, perhaps longer. Out came packets, bottles, plastic containers, of odd shapes and sizes. I did not even know how some of these came into the house. I could take some reasonable guesses, but wasn't completely sure about some. Some probably came with guests, and some were gifts from relatives, but I know that a lot of them were the doing of my own greed for trying out different things.

Perhaps I should spare you the details, but there are no less than 26 of them right now, some of them highly suspect, like "Curry" Powder, some intriguing, like "Kitchen King" Masala, and some downright useless, like a branded Sambar Masala, which was bought when I was going to make sambar for guests and found out at the last minute that I had run out of my stock of mom's sambar masala.

Still, there is something innate to my Indian sensibilities because of which I found it rather difficult to just chuck these away. I thought that I must try using some of the unopened ones at least once, to see what they are like. The Biryani Pulao Masala was an easy choice, of which I had not one, but two packets, a Badshah, and an Everest, of which Everest had a mix of whole and powdered spices, and I settled on that, and used the recipe on the back as a rough guideline.

Masoor Pulao, Pumpkin raita

I soaked 1/2 a cup of whole masoor (similar to generic brown lentils) for about an hour, and 1 cup of basmati rice for about half an hour, and drained both of these before cooking. Sliced some onion, and sauted it a bit of oil and ghee, add the biryani-pulao masala, followed by the masoor dal, rice, pinch of turmeric and red chili powder. Added 3-4 cups of water, salt, and cooked everything like a pulao.

What did I think of it?

Eaten with a pumpkin raita, the pulao was definitely delicious, so the masala might be ok in a pinch for a quick weeknight rice dish, but nothing special that my own whole spices (bay leaf, cloves, cardamom, cinnamon stick) and ground garam masala couldn't do. It might be fine for someone who does not want to buy the usual whole spices used in a pulao and yet wants to make pulaos or biryanis frequently. The pumpkin raita, by the way, deserves its own post.

If more cold rainy nights persist, fun times lie ahead. I could do a dal count, flour count, or even grain count, and find interesting things hidden in my own kitchen.


Sending this to the Legume Affair at the Well Seasoned Cook.

Friday, January 11, 2008

Salad with Oranges, Tofu, and Soy Ginger Dressing

Wishing you all a happy and healthy year ahead!

Salad: Mixed Greens, Oranges, Tofu, Ginger-Soy dressing

As soon as a new year is around the corner, you hear people talking about eating lighter, better, healthier and so on. The media isn't one to be left behind either, and in January, one can hardly pick up a newspaper or magazine without an article about resolutions, sensible eating, and exercise. While all that is a good thing, it can get predictably boring. Besides, we all know what really happens as the year progresses.

That is why I had decided that my first post of the year would not be anything like that, because I know better than to make resolutions that don't ever work. However, I would be lying if I say that getting in shape has not been on my mind for a while now, particularly after packing those pounds during the trip to India over Diwali and while traveling during the week of Christmas.

So as the year began, I virtuously stocked up on a bag of mixed greens from the farmers' market, and since then, have already enjoyed a few different salads. Absolutely enjoyed, because I actually like salads a lot and eat them regularly and happily throughout the year. The trick is to keep it balanced and satisfying.

The salads that I make are not based on precise recipes, and usually depend on what is on hand besides the greens, but I like to include a small amount of protein as far as possible, and try to include different textures and colors. I don't like to crowd the salad with too many things, but a few well chosen things that are fresh and flavorful and that go well together never fail to please. While most of them are tossed together extempore, I do have a few favorite combinations that I make repeatedly, and the following is one of my cool weather favorites, put together with all local ingredients except the dressing.

Mixed Greens Salad with oranges, tofu and almonds, with soy-ginger dressing

Salad: Components and Result

These quantities are for 2 servings, and can be scaled easily.

Ingredients for the Soy-Ginger Dressing

1 Tablespoon soy sauce
1 Tablespoon rice vinegar
1 teaspoon honey
1 teaspoon finely grated ginger
1 teaspoon toasted sesame oil
2 Tablespoons light olive oil (or any favorite neutral salad oil)
salt and pepper to taste
5-6 sprigs of cilantro, finely chopped

Ingredients for salad

enough mixed greens for 2 (about 4-5 cups)
1 orange
1 cup of cubed tofu
2 Tablespoons of thinly sliced red onion or chopped scallions
2 Tablespoons slivered sliced almonds

Tossing it together

Whisk together all the dressing ingredients except cilantro, salt and pepper until emulsified together. That takes a couple of minutes. Add the cilantro, salt and pepper at the end and stir together.

Drizzle about a tablespoon of the dressing over the tofu so that it absorbs the flavor while you prep the other things.

Peel and slice the orange into segments [see notes]. Wash and dry the greens, and place in a large bowl. Drizzle the remaining dressing lightly over it and toss gently. Add the onion, orange segments, tofu, and almonds. Season with a little salt and pepper, and toss just once or twice before serving.

Notes

Slicing an orange into segments is a lot easier than it sounds and I learned it only a couple of years ago. Here is a beautiful pictorial guide that tells you how it can be done.
Related Posts Plugin for WordPress, Blogger...