Friday, March 28, 2008

An Aloo Tikki Factory

Potato Patties: Closeup

Good friends shouldn't need much of an excuse to get together, but with busy lives and global schedules it can get really difficult to get a bunch of people to meet for even one meal. I am referring to some old friends of mine - whenever we meet, we have such a fabulous time we wonder why we don't all get together more often, and then part with promises to meet soon, but before we know it another year has passed, or two.

Recently, when one of them decided to leave the land, it was a compelling reason for all to meet, as it would be our last chance to see the family for a while. Someone offered to host, and the planning for a spontaneous last minute potluck began, which meant quick decisions and even quicker work. The yeses and the nos, the headcount, and of course the menu.

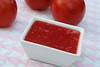
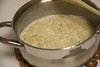
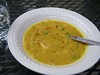
The host wanted grazing dishes, rather than the usual fare, so I offered the first thing that came to mind - potato patties, if someone could make ragda, so we could have ragda pattice. One friend immediately opted for it (got to love friends like these!).

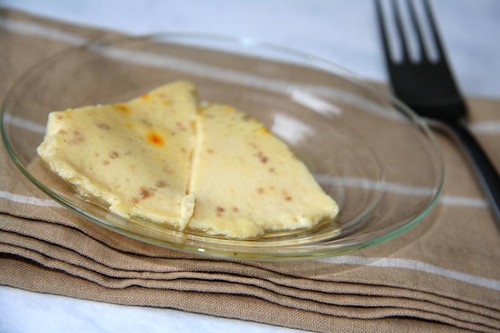
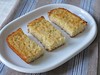
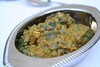
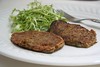
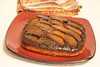
Making these potato patties seemed simple, but it can become fairly laborious and time consuming when one has to make almost 5 dozen of them. Unlike aloo tikkis, the potato patties that are served with ragda don't need to be deep fried, and they are crisped on the skillet with only a little oil. So, strictly speaking, these potato patties used in ragda pattice were not aloo tikkis, but that just gives the title a much better ring.

Potato Patties: before frying

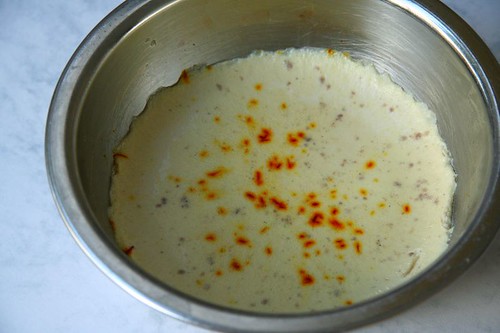
I boiled a dozen large russet potatoes in the pressure cooker. When cool enough to be handled, these were peeled, and roughly mashed in a large bowl, and seasoned with about 1/4th teaspoon turmeric, about 1 teaspoon red chili powder, and plenty of salt. To this mix, I added about 8 crumbled slices of good white bread, (the crusts were removed, left to dry in the fridge, and ground up later to make bread crumbs, but that is another story), and adjusted the seasoning.

Potato Patties: the batch

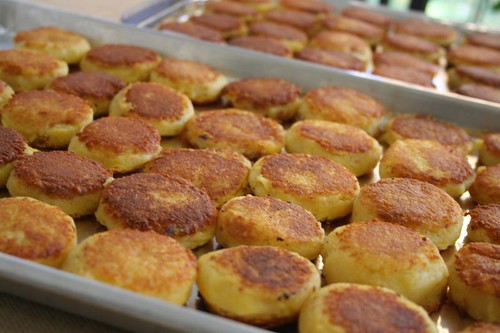
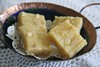
Then, the life saver came into play. To get the potatoes mashed up really smooth, I put the whole mixture through a potato ricer, creating a dough like consistency which could be formed into patties. These were shallow fried on a large skillet, on medium heat, for a few minutes on each side to get them evenly brown and crisp. Placed on large trays, these were ready to be taken to the party.

Cool Tool: Potato Ricer

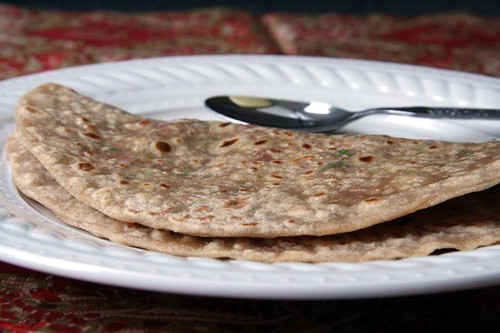
I had bought the ricer originally to make gnocchi, which I have yet to get around to make, but besides the patties, I have used it a few times to mash potatoes for alu parathas. The potatoes turn out really smooth, with no sticky bumps while rolling out the parathas.

Potato Ricer

Cool Tool: The picture of this nifty gadget goes to Click: Metal.

Monday, March 17, 2008

Pear, Apple and Cranberry Crisp

I was playing with the remote to see if anything interesting is going on when I found Barefoot Contessa. I stopped to watch a little, and then it happened again, and again, and eventually I really started enjoying the show. It helped that it came on at a time that was convenient for me.

It was easy to like Ina Garten. She is sophisticated and smart, and unlike many wannabe food stars, she has years in her stride, and a good deal of experience to boot. And when she talks, she sounds very convincing.

There are lots of things I like about her show. She cooks in her own kitchen, uses her own cookware, and serves the food in her own dishes, to her real friends. Sometimes her husband Jeffrey, who is quite charming and funny, appears on the show too. Wiki him to find out more, you might be surprised. She often has a few minutes dedicated to 'setting' the table and 'doing' the flowers, which is so not my thing, but I find it enjoyable anyway. She clearly also has a good team of photographers on her side, who make everything on her show look fabulous.

Sometimes I find it amusing that she thinks nothing of rolling out pastry crusts and piping meringues but uses canned tomatoes because life is too short to peel tomatoes. And if I ever met her, we could argue endlessly, amicably, over cilantro and parsley. But ultimately, even with her hoity toity Hampton ways, Ina seems accessible, and very American, including in her admiration of all things French.

Apple Pears Cranberry Crisps: Dig inNow on to her recipes. It is probably because of her background in the food business and catering that she always seems to make huge quantities of food, and one reason that held me back from trying anything was the serious scaling down of quantities that I would need to do. So even though I took ideas and inspirations from her shows, I had not followed any particular recipe of hers. That changed after I made the Pear, Apple and Cranberry Crisp that I had been eyeing this apple season. It has a long ingredient list, but when I recently happened to have each and every of the things on hand, I had to make these. On the show, she made individual ones in ramekins, so I did that too. The crisps were deliciously blog-worthy - with a crisp caramelly top giving way to the filling that was bursting with the sweetness of apples and pears and the heady scent of orange zest. Such a lovely, wintry (or fall-y) dessert to savor slowly after dinner.

Even the hint of cinnamon was wonderful. This comes from someone who is not overly fond of cinnamon in desserts. In fact I was highly tempted to use cardamom or vanilla, but I thought I'll stick to the original this time, and was amply rewarded. I was also tempted to reduce the amount of butter, and so I started with only two tablespoons, but the mixture finally came together only when the entire quantity was added. The recipe takes a bit of work, but not skill, and to borrow from Ina, the good news is, that it can be done in advance.

This could be eaten with ice-cream or whipped cream, but it was glorious on its own too. Here is the scaled down and adapted recipe.

Pear, Apple and Cranberry Crisp

Apple Pears Cranberry Crisps: Top View

Ingredients

1 pear
1-1/2 apples (or 2 small apples)
3 Tablespoons dried cranberries
1/4 teaspoon grated orange zest
1/4 teaspoon grated lemon zest
1/2 tablespoons freshly squeezed orange juice
1/2 tablespoons freshly squeezed lemon juice
1-1/2 Tablespoons granulated sugar
1 Tablespoons all-purpose flour
1/4 teaspoon ground cinnamon
1/8 teaspoon ground nutmeg

For the topping:
3/8 cups all-purpose flour
3 Tablespoons granulated sugar
3 Tablespoons light brown sugar, lightly packed
1/8 teaspoon kosher salt (or regular salt)
1/4 cup old-fashioned oats (not quick cooking)
1/2 stick (4 Tablespoons) cold unsalted butter, diced

Method

Preheat the oven to 350 degrees F.

Peel and core the pears and apples and cut them into large chunks. Place the fruit in a large bowl and toss with the cranberries, zests, juices, granulated sugar, flour, cinnamon, and nutmeg. Pour the mixture into a 8 by 8 by 2-inch baking dish, or distribute it in 4 ramekins of 3/4 cup capacity.

For the topping:

Combine the flour, sugars, salt, oatmeal, and cold butter in the bowl of an electric mixer fitted with a paddle attachment and mix on low speed for 1 to 2 minutes. Or use a fork to mix everything, until the mixture is in large crumbles. Sprinkle evenly over the fruit, covering the fruit completely.

Place the baking dish on a sheet pan and bake for 45 minutes (or longer), until the top is brown and the fruit is bubbly. Let it sit for a few minutes. Serve warm.

A few notes

  • Either the number of servings were out of whack or their serving sizes are humongous. The original recipe was meant for 8 servings, but a fourth of it serves 4 generously. So what the original says would serve 8, could actually serve 16.
  • Since the number of servings were twice of what I expected, I found that the crumble can be frozen by covering tightly with plastic wrap, and then baked straight from the freezer. It will thaw in the oven as it heats up to 350 degrees.
  • As is true of produce in general, good fruits will help to make the final result better, so remember to taste a little of the fruits before using.
  • If making a larger quantity, increase baking time.


Sending this to Raaga for AFAM: Pears.

Monday, March 10, 2008

Five-Lentils Panchmel Dal

Casting a critical eye over my blog I find that it severely lacks one of the most basic everyday fare that I make on a regular basis regardless of season, and one that has endless combinations. I even knew the reason for that, and have known it for a long time now.

The food I am talking about is 'dal', and the reason is that dals have been the most challenging to photograph for me. No matter what I do, they all end up looking almost the same after they are cooked - just a big yellow something in a bowl, which makes it rather difficult to convey some of the amazing nuances of flavor that each dal has, despite all of them looking alike.

Panchmel Dal: the five dals
The beautiful colors of the five dals, very photogenic before cooking.

I am not a fan of styling food just for the purpose of taking photographs, even though I admire those who can do it well. I prefer to take pictures of food as it is meant to be served or eaten. The drawback is that this isn't the best way to showcase the food, and after all, exhibiting food in all its glory is one of the objectives of a food blog. One of the lessons here is that looks are not the best judge of taste.

Undaunted, I am going to post about dals anyway, because I know I have waited too long to post some things just because I did not have a good picture to accompany. They might all look similar, but each one will have a strong character, a distinctive taste, and a lot more than what meets the eye.

This particular dal is one of my favorites, and yet I make it only once in a while, when I want a change from the usual dals. Panch means five, and hence the name, which approximately means 'five together'. The added flavors to this dal are simple, but its unique taste comes from the combination of dals, which is different from either of them cooked individually. There is also a barely noticeable variation in textures of each dal, which is interesting. Along with a good drizzle of fresh ghee at the end, and white rice to accompany, this is excellent comfort food that doesn't need anything else alongside.

Panchmel Dal: 5 bean dal

Minor styling with wedges of lime, which are not usually tucked into the dal, but served alongside to be squeezed over the dal. The sprig of cilantro is chopped fine and scattered into the dal, optionally.

panchmeL DAL

Number of servings can vary a lot, from 4-8 depending on whether the dal is eaten as a main dish with rice or whether it is a part of a meal with other dishes.

Ingredients

1/4th cup each of toor dal, masoor dal, moong dal, chana dal, and split urad dal
1/4th teaspoon turmeric

2 Tablespoons oil
big pinch of mustard seeds
pinch of asafoetida
1/2 teaspoon turmeric
1/2 teaspoon cumin seeds
1 teaspoon chili powder (or to taste)
1 teaspoon cumin powder
1 teaspoon coriander powder
2 Tablespoons jaggery
2-4 tablespoons chopped cilantro
1/4th lime, plus extra wedges

Method

Rinse and drain the dals together a few times until the water runs clear. Cook all the dals together with 1/4th teaspoon turmeric in 5 cups of water. I use a pressure cooker with my usual 3-whistle regulation. Let the pressure drop.

Stir the dals together with a whisk, and add salt to taste. Add more water if needed to make sure it is of a pouring consistency.

Heat the oil a large and wide saucepan, and add the mustard seeds. When they start to pop, add the asafoetida, turmeric, cumin seeds and the rest of the spices. Stir quickly, add the dal, and bring it to a gentle boil. Stir in jaggery until it dissolves. Add chopped cilantro and squeeze the lime on top just before serving.

Variations

Some of the variations I have tried are adding curry leaves, or a little bit of finely chopped onion, and using tamarind or lemon instead of lime. Somehow, I like the tartness of lime better in this case.

Wednesday, March 05, 2008

Kharwas, the real thing

A Decadent Treat

'Kharwas' is the marathi name of a sweet steamed pudding made out of milk given by a cow or buffalo within a day after she has calved. Cheek (in Hindi), Junnu (in Telugu), Seem Paal (in Tamil), Geen (in Konkani), Bari (in Gujarati) or anything else you call it, it evokes great nostalgia among those who have had it before but cannot seem to find it now. The same thing sounds very different when referred to as 'bovine colostrum', but that is the name for it nevertheless. Steam cooked in a water bath, it has the consistency of cream caramel or flan without the addition of any external coagulant. There are references to such colustrum puddings and custards being made in Scandinavian countries, Iceland, Ireland, and in the English countryside (where it is sometimes referred to as 'Beestings'), and I wouldn't be surprised if several other cultures have such traditions too.

Kharwas: with sugar
Kharwas made with sugar

In lieu of using colostrum milk, there are recipes for puddings made out of things like condensed milk and eggs, flavored with cardamom, made to resemble the texture and flavor of the real thing. These were most likely created by resourceful Indian expats who were yearning for it but were unable to find it. I know I went through a phase when I was looking for it everywhere, and even thought of calling some of the dairy farms a few hours away from where I live. Those who have experienced the real thing and know the joy of it would agree that I wasn't being unreasonable.

More than a year ago I heard that Whole Foods carries colostrum milk, but since I prefer to shop at farmers markets or small stores, I don't go to Whole Foods unless I have to get something very specific from there. On one such trip after ages I ambled over to their dairy section, saw the colostrum milk container and bought it right away. When I paid at the checkout, I muttered under my breath how expensive Whole Foods seems to be getting by the day, but it was only when I read the line items at home that I found out that it was only the colostrum milk that cost a bomb and it wasn't the store that was getting pricier. A pint of colostrum milk cost nearly as much as three gallons of regular milk, to put it in perspective, but I hadn't checked the cost when I bought it. That makes it fairly extravagant compared to standard grocery items, but this is an occasional treat. Besides, I hadn't eaten kharwas in so many years that the price wouldn't have stopped me anyway.

Right away, I got a recipe from my mother, which said to add sugar or jaggery to the milk, some cardamom powder, and then steam it like dhoklas. I faintly recalled that as a child I liked the version with sugar and did not like the one with jaggery, but knowing my taste now I was willing to bet which version I would like better this time. So first I had to test out both versions, and I tried half of the milk with sugar and the other half with jaggery. The outcomes were quite different both in taste and texture. In terms of the texture, the jaggery version was a winner because it was firmer, while the sugar melted and created more water, but also made the result slightly lacey, as can be seen from the photos. As for the taste, no prizes for guessing.

Kharwas: with jaggery
Kharwas made with jaggery

The aspect of humane practices towards animals surfaces in relation to using bovine colostrum for human consumption, but since the product I bought comes from an organic dairy farm that cares about their animals, I feel very confident that they are not selling it only for profit, and whatever they sell is what is leftover after the calves are taken care of.

Kharwas

Serves: 3-4 small dessert sized portions

2 cups bovine colostrum milk
1/2 cup (more or less to taste) grated jaggery, brown sugar, or granulated sugar
2 green cardamom
a few strands of saffron, optional

Dissolve the jaggery in the milk. Remove the seeds of the cardamom and finely powder them in a mortar and pestle. Add the cardamom powder and saffron to the milk.

Pour the milk in a container that will fit in a pressure cooker or other large pan, with enough water in the outer pan for steaming. Cover with a lid and steam for 15-20 minutes. If using a pressure cooker do not put the weight (whistle) on. Let cool completely or chill it in the refrigerator for a few hours before eating.

Kharwas: steamed
Kharwas: Steamed and Cooled

Monday, March 03, 2008

Watermelon Radish Parathas

mooli ke parathe

There were exactly three types of parathas made in our home - alu, methi, and gobi. If there had been any other types, then clearly I have forgotten. In contrast, I have been quite a rebel adventurer. Spinach, cabbage, paneer, beets, pumpkin, cheese, broccoli, peas, dals, mint, chutneys, molagaipodi, even leftover sabjees, have all had played a part in my parathas at some time or the other, with varied results. At this, Musical might just yawn and say, "So what? We make parathas with almost anything". Of course she does, but considering what I grew up with, this is quite a repertoire.

Stuffed Radish Parathas

A paratha related mini-obsession started recently when a friend was visiting our area during Christmas break last year. We met for lunch at a basic, almost divey, Indian restaurant where we could eat good food, and talk for a long time without being bothered. The meal included giant parathas - I had gobi and she had mooli, and of course we tasted both. I liked the gobi, but the mooli one with a generous filling of spiced radishes was so good that I wished that I had ordered that one instead.

Very soon I was hankering for it at home, and wanted to give it a try. It was further fueled when my friend and I reminisced about the parathas we had. I used to make mooli parathas years ago, but because I found it difficult to make the stuffed ones, (this was just for mooli, not other types of parathas) I used to go the lazy route and mix in grated daikon radish with flour and spices to make the dough for the parathas. In fact this was many times a quick weeknight dinner that didn't need much planning if there was a white radish in the fridge. Somewhere along the way, I stopped making these and had even forgotten about them, but after tasting the wonderful stuffed parathas at the restaurant I realized how much better they tasted, with the filling sandwiched between the dough, giving you a little crust and a little taste of the vegetable in each bite. Soon I was on a mission to find out how to get the stuffed ones right. Once again, I tried to roll them out by filling the radish mixture into a ball of dough but the shreds kept leaking out and making a mess on the board. A big salaam to those who are able to roll those out, but I have just not been able to do that well. That is when Musical's "two layered parathas" really came to the rescue by working as perfectly as she describes. So a big Thank You, Musical!

For my paratha experiments, I used watermelon radishes (see note at end) just because I happened to have a bunch of them, an added bonus of which is that the filling looks very pretty when the parathas is torn off. One can use any kind of radish, larger ones being better because they are easier to grate.

There are all kinds of recipes for the filling, with additions ranging from turmeric to grated onion, so I decided to try out a few. In the first batch I tried Musical's combination of garam masala and red chili powder, and in the second batch I used Saffronhut's combination of ginger, green chilies and cilantro. I preferred the heat of red chili powder over that of green chilies, but I enjoyed the flavor of ginger. I am neutral about the cilantro as it did not seem to add much but wasn't bad. What I have given below is what I tried in the third batch, and liked a lot, but I might try other versions in the future. Ultimately, there is not one right thing, so experiment, have fun, and let your taste buds and mood decide. Do you have a favorite combination that you would like to share?

In a paradoxical way, while on one hand this is free form cooking at its best, it needs lots of practice to get it just right.

Mooli Paratha: the making of

Stuffed Radish Parathas / Mooli Parathas

Ingredients

1-1/2 cups grated radish, not tightly packed
salt to taste
3/4 teaspoon red chili powder to taste
1/4 teaspoon mild garam masala
1 teaspoon finely grated ginger
2 cups atta
salt to taste
a little oil for the dough
oil or ghee for the parathas

Method

Place the grated radishes in a sieve or colander over a bowl, and add salt to it. Let it sit for about 30 minutes. The salt will draw out moisture from the radishes. Squeeze the radishes by hand, and collect the squeezed water in the bowl.

Use this water to knead the dough using flour and salt, adding more regular water as required. When the dough is kneaded smooth smear the ball of dough with a touch of oil. Divide the dough into 8 pieces of equal size.

Mix the grated radish with red chili powder, garam masala and grated ginger.

Start heating a tava.

Roll out one of the pieces of dough to about 6 inches round and keep it on a plate. Roll out another piece to about the same size. Spread about a fourth of the filling on it, leaving a small edge all around. Top with the previously rolled out roti, gently press the edges together, and roll lightly with the rolling pin just a little more until the 3 layers are held together. Put the paratha on the heated tava and cook on both sides. Drizzle a little oil around the edge if you like. I just like to brush some ghee on the paratha after it is done. Repeat this exercise with the rest of the dough and filling.

Serve with chutney, pickles, yogurt. For an added indulgence, try sour cream or crème fraîche.

Watermelon Radishes

In the last year or two I have been buying watermelon radishes from the farmers market whenever I see them. They taste very similar to regular radishes, maybe even a tad sweeter, but they look absolutely gorgeous. They have a greenish white skin, and inside they are a bright fuschia or deep red in color, and when sliced, they look like tiny watermelon wedges. For a simple but striking salad, I peel and slice them thin, and sprinkle a little coarse salt and ground black pepper which looks almost like seeds on them.

Watermelon Radishes: Farmers Market Find
Related Posts Plugin for WordPress, Blogger...