Friday, August 27, 2010

A Tomato Trick

Good local tomatoes are starting to come into the market now, and while the heirlooms and other colorful ones are excellent for using raw, the red ripe ones for me mean dishes that depend on the juicy tomato taste, such as gravy wallah sabjees, rajma, and many other things.

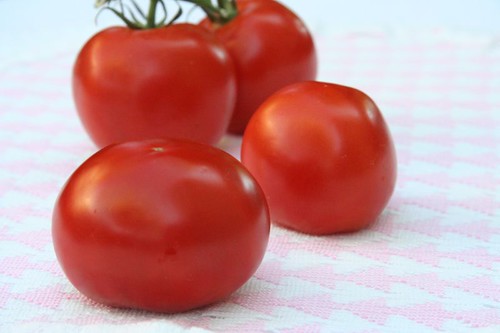
Tomatoes

I am quite a fan of silky smooth tomato puree in certain dishes, and even a bit finicky about large bits of tomato skin floating carelessly in some dishes. So naturally, I have to go the longer route to get the result. The best way to make a large batch of tomato puree is to bring a pot of water to boil, drop in the tomatoes for about a minute, then remove them with a slotted spoon. When they are cool enough to handle, they can be peeled off easily, then cored, chopped, and pureed in a food processor.

Sometimes, however, you don't need a lot of puree, perhaps just enough from a tomato or two, and so this process can get a bit cumbersome. For such times, turn to the wisdom of women like Madhur Jaffrey, Niloufer Ichaporia, and many knowledgeable home cooks. Just use a regular grater.

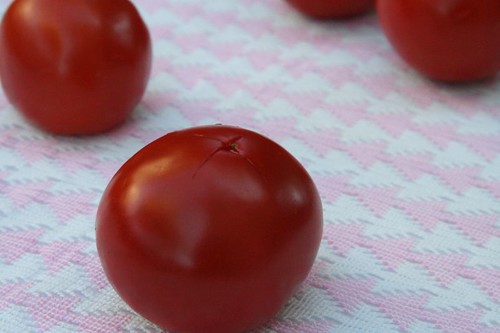
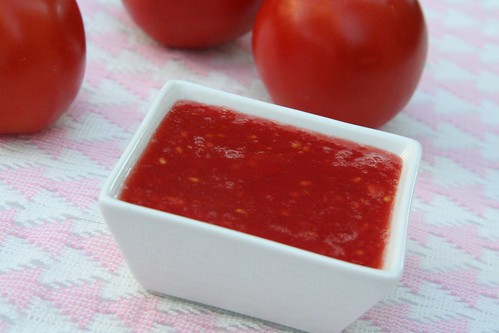
With a paring knife, make a small cross on the smooth end of the tomato. Hold the tomato at the stem end, and using the medium holes of the box grater, grate the tomato into a bowl. The skin will practically stay in your hand, and you will have fresh tomato puree in seconds, ready for use.

Illustrated below in pictures.

Tomato

Scoring an 'X' on the tomato before grating

Tomato puree

Resulting Tomato Puree after grating

This handy trick which I have been using for a long time now goes to the Back to Basics event. The event was started here.

Saturday, August 14, 2010

It's Strawmisu

I have been making versions of this dessert for a long time now. It is a simple and classic combination of a cake or cookie base, strawberries, and a decadent and creamy topping, and I find it just perfect for summer. It is easy to make and doesn't even need much of a recipe. You can make one or two small servings, or make a huge batch for a crowd with equal ease. Sometimes I make individual sized servings in small bowls which looks very pretty too. As always, use this as a guideline and make your own fun variations on it; I have yet to see this ever going wrong.

Now finally, I have also given it a name. I am calling it 'Strawmisu'. I searched on it to be doubly sure, and no such word exists, so I can say I have coined it, and it works!

Strawberry dessert

Ingredients

10-15 strawberries
3-4 tablespoons of Grand Marnier
1/4 teaspoon orange zest (optional)
2-3 teaspoons sugar (optional)

4 oz mascarpone cheese
1/2 cup whipping cream
2-3 Tablespoons sugar
a few drops of vanilla extract

8-12 Savoiardi or Italian style ladyfingers (you will need more or less depending on their size)

Method

Rinse the strawberries quickly, and place on a kitchen towel. Slice enough strawberries so that you have about 1 an 1/2 cups of slices. Use the rest for garnishing.

In a medium bowl, place the sliced strawberries. Add the Grand Marnier, 2-3 teaspoons of sugar, and orange zest. Let it sit for about an hour so that the juices and sugar create some syrup.

Whip together the mascarpone cheese, whipping cream, the rest of the sugar (or to taste), and vanilla extract, for a few minutes until it forms soft peaks.

In a pan about 8 X 8 inches in size, arrange the ladyfingers close to each other to create the base layer. You might need to break up some of them to make them fit the entire pan. Spoon the strawberries evenly over it. Drizzle the syrup evenly so that all the ladyfingers are evenly moistened.

Spread the cream and cheese mixture evenly over the strawberries. Cover and keep in the fridge for 2 hours or more.

Garnish or serve with additional sliced or whole strawberries.

Note:

If you do not want to use Grand Marnier, you can use freshly squeezed orange juice.

In place of the ladyfingers, you can also use thin slices of pound cake or something similar.

Thursday, August 05, 2010

My Bombay Kitchen

and other stories, including eggs on eggs

There are a few women that I would like to adopt as my aunts have adopted as my aunts, but they just don't know about it. Madhur Jaffrey, Ina Garten, and now, Niloufer Ichaporia-King.

The common connection to all these women is quite obvious. I came to follow Ina through her TV shows, Jaffrey through her books, and with Niloufer, it was first her book that drew me in, and it was capped off by getting to know her in person. Yes, some serious name dropping can now happen! They all write beautifully about the subject close to their heart, and best of all, give you a wealth of recipes that work every single time.

The first time I heard about "My Bombay Kitchen" was when a friend sang praises about a new book she had stumbled upon in the library. So I decided to check it out, and just fell in love with it. The writing is beautiful and evocative, erudite, but not stodgy, unexpectedly humorous, full of great advice, and always informative. While reading through it, I have literally tugged at the person next to me saying "Just listen to this ...".

The book is sub-titled "Traditional and Modern Parsi Home Cooking", and is based primarily on Niloufer's Parsi heritage, from her experiences growing up in India, and her continued research after she started living in the US. So a lot of the recipes in the book include family favorites, but since she is a big advocate of farmers markets and adapting local ingredients, there are many interesting variations, along with her discoveries in foreign lands, and interpretations from her über chef friends. With loads of wit and wisdom packed into its pages, and recipes that work perfectly, this soon became my favorite cookbook in recent years. Her husband David has done the most adorable illustrations throughout the book, which really pull everything together and complete the package. Over and above, the fact that Niloufer is such a charming person is just the jewel in the crown.

So far I have tried countless things from the book, each delicious, and many more are begging to be made. Her panir is quite a standout. I used her recipe to make regular paneer for cooking many times, but then I had the pleasure of having it served soft, with a warm flatbread with hints of ajwain and ever since I almost always have some fresh soft panir in the fridge. As Niloufer would say, we like to fool around with it.

Among other things that are on regular rotation in the Evolving kitchen are the Wafer Par Ida and Kasa Par Ida. The recipe is available on many sites, including here, so I will paraphrase just a bit.

Wafer per Ida (Eggs on Potato Chips)

Niloufer writes that for years she thought it was a joke recipe, a loony fantasy or a way of lampooning the Parsi love affair with eggs and potato chips, until she tried it and found it to be absolutely delicious. I agree about the deliciousness part! Very rarely do I buy potato chips, usually only when I have little kids around. Inevitably there are crushed up chips or pieces in the bottom of the bag, that no one eats, and the wafer par ida is the perfect use for them. I have used various different types of chips too, and it is always good.

Parsi Food: Wafer Par Ida

Ingredients

1 tablespoon ghee, clarified butter, or mixture of vegetable oil and butter
1 small onion, finely chopped
1/2 teaspoon ginger-garlic paste (optional)
2 to 3 hot green chiles, finely chopped
1/2 cup coarsely chopped fresh coriander (cilantro) leaves
4 good handfuls of plain potato chips from a just-opened bag
4 large eggs
1 tablespoon (about) water

Method

Heat the ghee over medium heat in a sturdy medium skillet.

Add the onion and let it soften, stirring occasionally, a few minutes. Before it browns, add the paste if you like and the green chiles, and as soon as the mixture looks cooked, add the fresh coriander. Crumble in the potato chips, tossing the contents of the pan to combine them thoroughly.

Make nests in the surface of the mixture, and crack an egg into each. Pour a tablespoon or so of water around the edges of the pan to generate some steam, cover the skillet tightly, and let the eggs cook just long enough to set the whites without turning the chips soggy. This usually takes me just about 3-4 minutes on very low heat.


Kasa par ida (Eggs on Anything)

Wafer per eda is almost like a corollary of kasa par eeda. I have literally taken the idea of the 'kasa' (anything) to heart and tried it many ways. It always works for me as a quick, satisfying, and comforting meal when I have completely run out of ideas and strength for anything else. Niloufer says that sometimes it's a hastily improvised dish that appears as part of the evening meal and what goes under the eggs is left to the imagination. Like a giddy child I told her some of the things I have done, and she approved with a slight nod and her majestic smile.

So, what have I put this on and enjoyed? Here are some from my list:
  • Slightly dried out good bread chopped into small little cubes, or day old chappatis, torn into bits, given the same treatment as wafers
  • Onion, ripe tomatoes, haldi, and malvani masala (other masala of choice would be good as well)
  • Asparagus and cannellini beans stir-fry
  • Sauteed onions and potatoes, with green chilies and cilantro stir fried into it
  • Thin red pohe, barely sprinkled with some water, given the wafer treatment as well

What Others Say

Here is what some of my favorite bloggers have to say about the book:

The Cooker: I knew I had to have it
Mints: Niloufer's writing style is very casual but very informative
Manisha: Favorite Parsi cookbook author
Melissa: I've made not one, not two, but seven spectacular dishes

Here are some more:

The Kitchen I Wish I Had Grown up in
One of my favorite new cookbooks
Her Bombay Kitchen

If you have a good blurb on your blog about 'My Bombay Kitchen', and want to list it here, just let me know at evolvingtastes[at]gmail[dot]com

Tuesday, July 20, 2010

Easy Mango Cake

Is there such a thing as 'too easy'?

One of my grandfather's friends has a small mango canning and preservation enterprise. They live in the middle of the best mango producing regions in India, and use some of the finest local mangoes in their products. They sell a lot of their products in their store locally, but also send it out to several cities in India, and perhaps abroad too.

If I or some of my relatives ever get a chance to get there, we stop by their house, which is right next to the store (or is it the other way around?) and usually buy a few things from them, especially their jars of mango pulp. These are glass jars, unlike the tin cans one sees commonly, and I prefer those for two reasons. One is that one can see what is inside, and secondly, I think there is a much lesser chance of any kind of strange stuff happening, such as something that could happen if the acid in the mango reacts with metal.

Other than those few jars, I rarely buy canned mango pulp. The jars are by and large savored by themselves as Aamras, particularly when pooris are on the menu. Hence I went back and forth over whether I should use up almost half of a precious jar just to try out something new. I can say now for sure that it was worth it. This cake is superb, in taste as well as texture. I have also yet to meet a cake recipe that was easier to whip up; it is literally "dump and stir". It is a complete keeper that I would definitely try again, and perhaps even buy some cans of mango pulp if needed!

Adapted from here.

Mango Cake


Rava Mango Cake

Ingredients

1 cup fine rava (or semolina flour)
1 teaspoon baking powder
1/2 cup sugar
2 pods of green cardamom
1 cup canned mango pulp
1/4 cup oil
1 Tablespoon golden raisins (optional)
1 Tablespoon chopped almonds (optional)

Method

Preheat the oven to 375 degrees.

In a medium bowl, mix the rava, baking powder, and sugar. Using a flexible spatula, stir in the mango pulp, and the oil, until the rava absorbs the liquids completely to form a batter.

Powder the seeds of the cardamom in a mortar and pestle and add it to the batter.

Lightly grease a small loaf pan (8 X 4 inches would be fine, mine is 9 X 5).

Pour the batter into the pan. Sprinkle the raisins and almonds on top. Bake for 25 minutes. Insert a toothpick to check if done.

Notes

1. I actually forgot to add the cardamom powder, but it was not missed. I am eager to try it with it next time.

2. Most likely, the quantities can be increased by 1.5 times to fit a loaf pan better.

3. It can be made just as well with melted butter in place of oil, I think.

4. The dried fruit and nuts are optional, and can be played around with. Mix into the batter, or add on top like I did.

Entry Update

I recently made this cake again, with increased quantities, and baked it in a bundt pan. It took me 35 minutes to bake it. Since the mango pulp was quite sweet, I decreased the overall sugar quantity as well, and did not use any dried fruit or nuts. It was enough for 12-16 people. The process remains the same as above, but here is an update on the quantities.

2.5 cups fine rava (or semolina flour)
2.5 teaspoons baking powder
1 cup sugar
4-5 pods of green cardamom
2.5 cups canned mango pulp
1/2 cup + 2 Tablespoons vegetable oil
a few drops of oil for greasing pan

Mango Cake again

Thursday, July 01, 2010

Khatte Meethe Baghari Baingain

Sweet and sour eggplants in creamy nut sauce

I said a big hurrah recently because it seems like 'baby eggplants' season has started now. Well, eggplant season in general, for which I have been waiting for several months. It has been a while since I bought much produce from a grocery store, so there are certain things that are just not in my purview if the farmers don't bring them in. Among the few things I miss are the eggplants. Fret no more, because hopefully they will go strong well into fall now. Which means there will be eggplants in the basket during each trip to the Farmers market, and it means that khatte meethe baingain will be devoured many times as well.

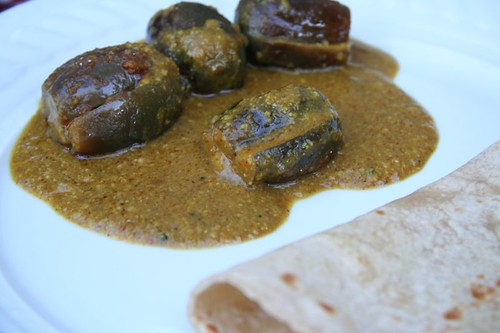
Khatte Meethe Baingain: Baby eggplant


Ever since I found this recipe, via Culinary Annotations, it has been a complete keeper and has turned into one of the many recipes that I barely have to look up because I have made it so many times. Like several others in my rep, it never made it to the blog because I never had a good photo to accompany it. The reason for that should be obvious too - could never wait long enough to take a photo after it was cooked, and there were never any leftovers to photograph!

One of the interesting bits in the recipe is cooking the eggplant partially in a microwave. While I do not use the microwave for any real cooking, I thought I could give this a try, and I have to say that it was a good thing to listen to the chef! The eggplants get just a little tender in the microwave first, and then get charred and crisp just right on the stovetop.

The other thing I like about this recipe is that it is a lot less complicated than the traditional Maharashtrian stuffed eggplant (bharli vangi), so it can be made even on a busy weeknight.

Khatte Meethe Baingain: Baby eggplant


Here is the paraphrased recipe with some tips, minor changes, and translations of ingredients to English.

Khatmitthe Baghari Baingan

Ingredients

Little baby eggplants 1/2 kg (about 12-15)
1-2 Tablespoons oil
1/4 cup peanuts
1 Tablespoon white poppy seeds (khus khus)
1 Tablespoon sesame seeds (beige)
1 teaspoon coriander powder
1 teaspoon red chili powder (cayenne)
1 teaspoon turmeric
1 teaspoon sambhar powder
2 teaspoons tamarind (not concentrate)
1 Tablespoon jaggery
1/2 teaspoon salt, or to taste

1/4 teaspoons fenugreek seeds (methi dana)
a few curry leaves
pinch of asafoetida
1-2 green chilies, slit lengthwise (optional)

Method

Dissolve the tamarind in 1/2 cup of hot water, and let is sit for 30 minutes or longer. Using a fork or your fingers, extract the pulp completely and strain it to get tamarind juice.

Wash the eggplants and pat them dry. Make two cross slits on them without separating the slices. I remove the tops, and make the slits from there, but you can keep the top and make the slits from the opposite end. Rub them with a few drops of oil, and place on a microwave safe plate. Microwave for four to five minutes.

Grind the poppy seeds and sesame seeds to a fine powder. Add the peanuts towards the end and grind them as well.

Heat about 1 Tablespoon oil in a large wide pan, and add in the eggplants with a pinch of salt. Cook the eggplants for a few minutes, turning them a few times until they are golden brown on all sides.

Add the spices, and the nut and seed powder, and saute everything together for a minute. Add the tamarind juice, jaggery, salt to taste, and bring it to a gentle boil. Cook for 5-10 minutes, making sure the sauce starts to seep into the eggplants. Add a little water if needed, by the tablespoon, if the sauce starts to thicken up.

In a separate tadka pan (or butter warmer, or small saucepan), heat about a teaspoon of oil, and add the asafoetida, fenugreek seeds, curry leaves, and green chilies. When they start to crackle, pour everything over the eggplants.

Monday, June 21, 2010

Naked Fruit

Some people have a sweet tooth. I think I have several. I was never one to say no to anything sweet, and it runs in the family, so it wasn't considered a bad thing either. As I grew older however (and somewhat wiser, I like to think), and concerns about consuming sugar increased, I tried to stay away from too much sweet stuff. It was hard though, considering that I always craved for something sweet after every meal, even if it was just a tiny bit.

Over time, an easy way for me to transition from sugar laden treats was to eat fresh fruit for dessert. They provided the perfect satisfaction to curb that 'need' for a little something sweet at the end of dinner.

Fortunately for me, I am able to get great local seasonal fruit throughout the year. After regularly shopping for produce, I have also learned to discern among the varieties available, and have mostly zoomed in on my favorite farmers for each type, so I have started to enjoy the best of the season even more.

I really look forward to Pomelos in winter, for instance, which I had ignored initially. It was one of the things that drove me to ask, "Where were you all these years?" I also know now which Apples and Oranges of the season I prefer. May is for Cherries, and late summer is for stone fruit and Strawberries. Incidentally, I have found that strawberries taste better in late summer or early fall even though they are always attributed to spring. Figs are fragile beauties that are seen rarely so I buy them when I see them, and of course nothing says fall like Persimmons and Pears. Good Pears have a really short season here, but certain fruit stands have Pears that are really outstanding.

When fresh fruit is prepared and served, it does feel more like a elegant dessert or its own course, rather than when it is grabbed hurriedly from the fruit basket or fridge. Since there are no recipes needed here, all I am going to do is post some photos of my favorite ways to prepare fruit, with some serving suggestions.

Strawberries and Icecream

Strawberries: Slice off the bottoms, then cut each strawberry in half, and slice into bit sized pieces. Serve in a bowl, over a small scoop of vanilla bean ice-cream, about half of the volume of strawberries.

Persimmon: sliced

Persimmons: Slice off the green top. Peel the persimmon, then very thinly slice along the latitude, and serve in a wide plate. This works for just ripe Fuyu persimmons. Chill for a bit before eating.


Apple: peeled


Apples: Peel the apple. This is optional, but I love it that way. Remove the core, then thinly slice the apple and fan out into a wide plate. If the apple is not top notch, drizzle a little honey and a touch of cream. (A friend was quite shocked when I told her that I like to eat peeled apples, but this is about eating fruit for dessert.)


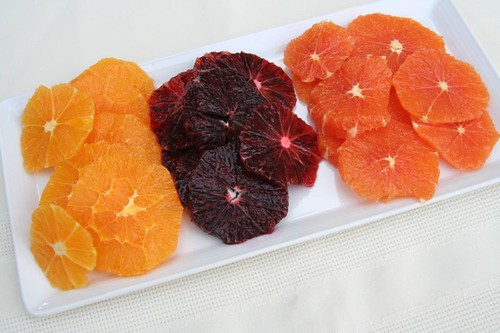
Oranges: three varietiesBlood Oranges

Oranges: Slice off the top and bottom end of the orange. Cut off the skin, cutting very closely to the flesh with a small paring knife until you have a bright orange ball left. Slice thinly along the latitude, or cut into segments.
L: Three type of oranges: navel, blood red, and fukumoto
R: Also blood oranges, but with many beautiful shades


Figs

Figs: Slice off the top and a bit of the bottom. Either serve whole or cut into halves.

Raspberries

Raspberries: Chill in the fridge and eat. Why mess with perfection.

Berries and Cream

Berries with orange scented whipped cream: Whip some heavy cream with a bit of sugar, and lots of orange zest. Serve it with strawberries, raspberries, or a combination.

Kumquats

Kumquats: If you are lucky enough to find them, remove the stems, wash, place in a bowl, and grab a few every time you pass the bowl.


Fruit for a picnic

Fruit Platter: I found this picture of fruit that I had prepared for a picnic a while back. Chunks of cantelope, sliced kiwi, strawberries with bottoms chopped off, and watermelon sliced into wedges. All you need is a fork.


While I was looking through pictures that I could use for posting here, I realized that I had already posted several pictures and to some extent even written about eating fruit on it own, proving my own point. See - cherries, mangoes, persimmons, pluots, strawberries, watermelon!

Extra Extra!

To redeem for the fact that I have a post with no recipe, I am going to let you in on a secret. I have been maintaining a parallel blog, which is a much untidier and more casual space. The main reason for having the other blog is that even though I try to make time to cook, many times there just isn't time to photograph the food, or to upload the photos, or to write about a dish in great detail. So that blog is where I keep notes, quick posts on what I cooked, what worked, what didn't, and many other things, and it is aptly called "Evolving Notes". If this main blog is the dining room, then think of the other one as the kitchen.

It is open by subscription, so if you would like to take a peek, just send me an email to evolvingtastes[at]gmail[dot]com, and I will add you to the list.

Saturday, March 20, 2010

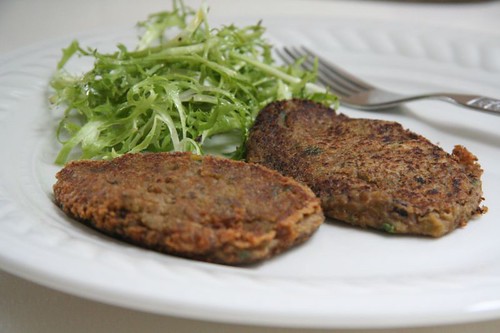
Hearty and Healthy Whole Bean Cutlets

In all these years, I can hardly recall having made 'cutlets'. I am referring to the very Indian 'vegetable cutlets', which you would be hard pressed to find much in the mainstream outside India. When I think about it, there are several probable theories to it. The main reason is probably because they usually involve frying, and they invariably involve potatoes. The other is that they were seldom made at home. This was something we ate occasionally as part of a large buffet, at tea time at someone's place or as a snack or appetizer at casual restaurants. So then I suppose I never thought about making them myself either.

However, after I tasted these lightly fried bean cutlets made by Mints, I made them twice in just the last two months. They are full of proteins, do not need much fat, and the best part is that most of the work is done by the pressure cooker and food processor. The type of beans you can use is also flexible - I used whole moong, matki, garbanzo beans, and whole dried peas. If shaped into larger sizes these would be perfect bean burgers too. Just be sure to salt the batter well as most beans have a tendency to absorb quite a bit of salt.

With this post, I am defying two norms of my usual cooking. First is the making of 'cutlets' itself. The other thing is freezing. I hardly ever freeze food but I found that these are really freezer-friendly. I make a large batch, then pop some of the cutlets, without frying, into a freezer bag or box, such that they lay flat in the freezer. Then I saute a few as needed, to add heft to a salad, to increase the protein quotient of a meal, or just to add some zip to leftovers. These can also be baked on a lightly oiled baking sheet, at about 400 degrees for 20 minutes, 10 minutes on each side. There is no need to thaw them out either.

Dal Cutlets

Another good thing about this post is that the recipe posted by Mints is perfect as is, and so it is on its way to the first edition of Blog Bites.

Sunday, February 21, 2010

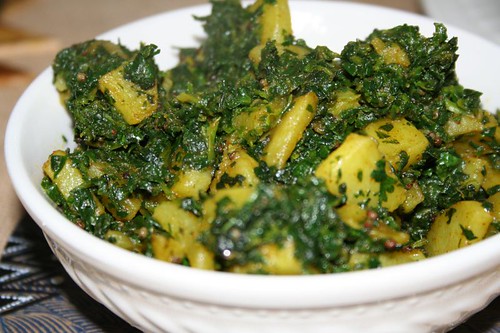
Very Simple Spinach and Potato bhaaji

pAlak BaTATA BhAjI

In Maharashtrian cooking, there is a not so uncommon practice of adding potatoes to anything, that sometimes drives me nuts. Flower-batata, bhendi-batata, farasbee-batata, pretty much any vegetable you can think of gets paired with potatoes. While I like each vegetable on its own, and I can have potato on its own, the fascination of these pairings escapes me. It is purely a personal preference, because they are quite popular, and I know so many people who really prefer the two together, even within my own family.

As always, there are exceptions, and one of them is this rather homey palak batata, which is how my mother makes it. I happened to learn it from her a few years ago during a trip back to India. It is just one example of the kind of food I am likely to cook on weekdays, even when I don't have any time at all. It doesn't need much measurement and precision, and has a low effort-to-nutrition ratio. I have tried some simple variations to this bhaaji like adding garlic or onion, but I much rather like this original version. A few warm chapatis or rice and plain dal are the perfect accompaniment for a delicious and comforting meal.

Spinach and potato

Spinach and Potato Bhaji

Ingredients

1 bunch of spinach (about 3-4 cups when chopped)
2-3 medium sized thin skinned potatoes

1-2 Tablespoons oil
1/2 teaspoon mustard seeds
a pinch of asafoetida
1/2 teaspoon turmeric powder
3/4-1 teaspoon red chili powder
1/2 teaspoon salt (or to taste)
10-12 (or more) sprigs of cilantro

Pluck the spinach leaves, discarding tough stems. Rinse the spinach leaves and leave them to drain in a colander or sieve or something like a salad spinner basket.

Wash the potatoes. Slice it along the length, and then slice each half along the length again. Slice each resulting quarter thinly along the width. If there is too much starch I rinse them off quickly and drain.

In a wide pan or wok, heat the oil, and add the mustard seeds. As they start to pop, add the asafoetida and turmeric, followed by the potato. Saute the potatoes until all the slices are coated with oil, then lower the heat to medium high and cook for a few minutes. Stir them around once more, turn the heat down a little more, place a lid on the pan, and let them cook until tender. You can use a fork to check.

While the potatoes cook, finely chop the spinach. Or give it a few quick pulses in the food processor. Finely chop the cilantro.

Add the spinach to the potatoes, the red chili powder, and salt. Toss everything together, add the cilantro, and place the lid back on to let everything cook for just a few minutes.

Sunday, January 31, 2010

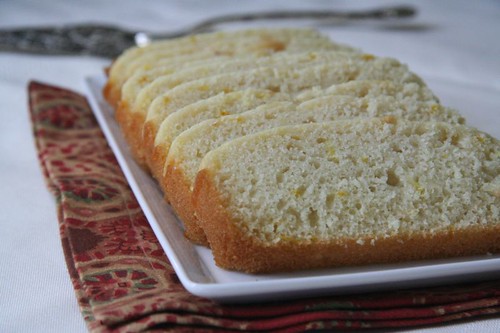
Eggless Low-fat Lemon Loaf

It is about that time of the year when I start scouring my bookmarks, links, notes, and cookbooks for ideas to use lemon zest, lemon juice, or the whole lemon, as my Meyer lemon tree is heavy with fruit and ready to harvest. There will be plenty of citrusy salads and even a basic waran bhaat will get a generous squeeze of home grown lemons, but it is the baked goods that I look forward to experimenting with.

While many of the recipes I look through get pushed lower on the list if they are too daunting or time consuming, this snack cake looked easily adaptable. The fact that it is low-fat made it sound even better. I added plenty of lemon zest for flavor, and baked it in a loaf pan, turning it into a lemony loaf cake. I had to bake it a little longer which was probably due to the shape of the pan. I also de-veganized it because I didn't want to run out to buy a small amount of soy yogurt and soy milk, but using soy would make it truly vegan.

This is a lovely light cake that can be enjoyed without guilt as a snack, with tea, or for breakfast, and when dressed up with a fruit compote or puree it works as an elegant dessert too. I am sending it to this month's Grow Your Own event.

Lemon loaf cake

Here is my recipe, adapted from Susan's, with many thanks to her.

Meyer Lemon loaf Cake

Ingredients

1 3/4 cups cake flour
1/2 cup sugar
3/4 teaspoon baking soda
1/4 teaspoon baking powder
pinch of salt
1/4 cup yogurt (regular or soy)
1-1/2 Tablespoons oil, plus a little more for the pan
1/2 teaspoon vanilla extract
1/2 cup water
1/2 cup milk (regular or soy)
2 Tablespoons lemon juice
1 teaspoon lemon zest

Method

Pre-heat the oven to 350 degree F.

Grease a 9x5 inch pan well with oil.

In a medium bowl, sift together flour, sugar, baking soda, baking powder, and salt.

In a large bowl, blend the yogurt, oil, vanilla, water, soymilk, and lemon juice. Do not overmix. Stir in the lemon zest. Stir in the dry ingredients with a whisk or spatula.

Pour the batter into the greased pan.

Bake for about 35 minutes until a toothpick comes out clean. Remove and allow to cool completely. Loosen sides gently with a knife and remove from pan.


Serving suggestion

Mango Sauce: Mix together a few tablespoons of mango jam with equal amount of water, and heat for a few minutes until it forms a sauce.

Lemon cake with mango sauce

Tuesday, January 12, 2010

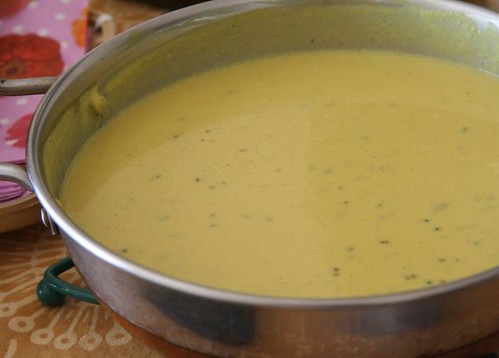
Soy Milk Kadhi

I have a niece who is lactose intolerant, and drinks soy milk everyday. So whenever she visits, I make sure soy milk is well stocked at home, but when she leaves, there is invariably some leftover. If it is a tiny quantity I add it to a shake or soup, but what does one do with a lot of soy milk if one doesn't consume it regularly?

The idea for this kadhi (for lack of a better name) was sown on one such occasion. This dish is neither a traditional kadhi, nor is it a substitute for the regular version made with yogurt, but came in handy recently when cooking for vegan and low carb-ing friends. For those not watching their carbohydrate intake, it goes rather well with plain white rice.

If you can find fresh soy milk, by all means use it rather than the carton variety.

Kadhi

Soy Milk Kadhi

Serves 4 as a main course

Ingredients

4 cups of unsweetened soy milk
1 teaspoon turmeric
4 Tablespoons besan
1 teaspoon ajwain seeds
1-2 Tablespoons oil
1 teaspoon mustard seeds
1 teaspoon cumin seeds
1 teaspoon fenugreek seeds
5-10 curry leaves
4 cloves garlic
1 inch piece of ginger
4 green chilies
1/4 cup of tamarind extract (not concentrate!)
1 Tablespoon jaggery (optional)
1 Tablespoon chopped cilantro leaves (optional)
salt to taste

Method

In a large bowl, stir together the soy milk, turmeric and besan with a whisk, until there are no lumps of flour. (Alternatively, you can add the turmeric later with the other ingredients in the hot oil.)

Pound the ajwain seeds to a coarse powder in a mortar and pestle. Mince the garlic, grate the ginger, and finely chop the green chilies.

Heat the oil in a large saucepan. Add the mustard seeds. As they start to pop, add the cumin and fenugreek seeds, curry leaves, garlic, ginger, chilies, and the ajwain powder. Stir and quickly add the soy milk and besan mixture. Keep whisking as it comes to a boil, and then turn it down to a simmer.

Stir in the tamarind paste, jaggery and salt. Cook for 5-10 minutes on low heat until the mixture starts to thicken, stirring occasionally.

Add the cilantro at the very end, just before serving.

Monday, December 28, 2009

Making burfi at home

is possible!

These days, it is fairly easy to find almost any kind of Indian food here in the United States - a lot of Indian vegetables, spices, condiments and snacks are available. However one thing that is nearly impossible to get is good mithai, the kind you get in India. In terms of quality, variety, freshness, and accessibility, what we have here is light years apart from what one would find 'back home'.

So it was only natural that some of us were driven to try and recreate some things at home. One thing I tried many times and failed miserably at was burfis, and that is because one of the main ingredients for it is often fresh khoya (also called mawa or khawa), which is made by evaporating milk to a point where all liquid has evaporated and only the milk solids remain behind. In India, one can practically walk to a corner sweet store to purchase some freshly made khoya as needed. Things have improved ever so gradually over the years here, and we can now buy khoya in the refrigerated section, though the date of manufacture is usually unknown, and the origin could be several hundred miles away. Despite all that, I went ahead and bought a block of khoya recently because I really wanted to try Tartlette's Cardamom Mava Cakes, but didn't want to go through the trouble of making the mava. The cakes are lovely and I made them twice, but I had a lot of remaining khoya.

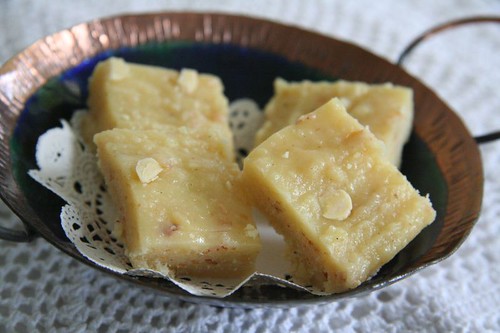
I went in search of recipes to use it up, and zoomed in on a Badam Burfi, in a Marathi book called "DiwALI ANI saNAsudiche padArth", written by Mangala Barve. The recipe sounded a bit simplistic to be true, but it actually worked quite well. It tasted delicious, creamy and rich. Here is the adapted version of the original recipe.

With this post I end the year on a sweet note, and also wish my little space a rather belated third bloggiversary!

Badam (Almond) Burfi

Almond Burfi / Badam Burfi

Ingredients

25 grams almonds
250 grams khoya/mawa/khawa
1 teaspoon ghee
1/2-3/4 cup of sugar
5-6 pods of green cardamom
a few strands of saffron (optional)
a few slivered almonds (optional)

Method

Soak the almonds in a bowl of water for 2-6 hours. Peel them, and process them finely in a food processor.

Peel the cardamom pods and powder them in a mortar and pestle.

Process the khoya in a food processor until it has completely crumbled.

In a wide pan or wok heat half the ghee just until it melts, and add the khoya to it until it starts to soften. Do not let it get brown. Add in the almond powder and sugar and stir everything together for a few minutes on low heat. Add the cardamom powder and saffron strands. The mixture will have the consistency of a thick paste.

Grease a small pan (about 6 inch square in size) with the remaining ghee, and pour the khoya mixture in it. Using an offset spatula, spread it in to one even layer. Top with additional slivered almonds, and press them firmly. Let it set and then chill it in the refrigerator for at least 2 hours till it gets firm. Cut it into shapes of your choice and remove from the pan.

You can bring the burfi to room temperature before eating.

Sunday, December 13, 2009

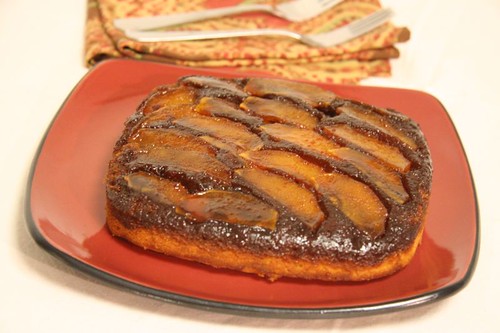
Apple Cake "Tatin"

Slightly Light Version

Ina Garten's recipe for Apple Cake "Tatin" is just perfection. A scoop of vanilla ice cream on the side doesn't hurt a bit. I really don't need to say anything more, but I'll add a few small notes:

1. Pull the caramel off the heat as soon as it hits warm amber, even if it isn't at 360 degrees, because even a few seconds can make a difference.

2. Make sure the caramel layer is completely cool before adding the batter on top.

Mine was just shy of getting bitter because of these two reasons, but the overall taste was a winner regardless.

Apple Cake "Tatin"

I halved the recipe and it still served 6 decent sized slices. I also used slightly drained yogurt instead of sour cream. Hence, light. See?

Wednesday, December 09, 2009

Shevayachi Kheer

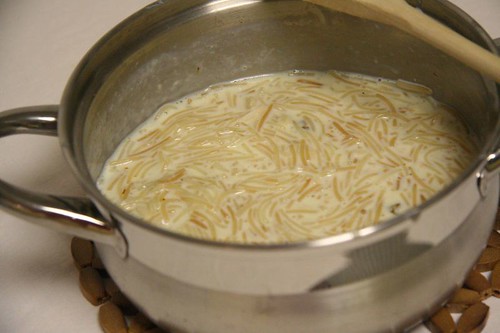
Vermicelli Pudding

During a recent pantry raid, I found a small jar of shevaya, also called semiya or sevia (in Hindi, Gujarati). These are labled as "vermicelli", but these are the Indian type, and much better suited to using in sevia pulao, upma, and of course kheer. Incidentally, vermicelli pasta works well too, if crumbled into small bits.

Made by toasting shevaya in a bit of ghee, and cooking them in milk, shevayachi kheer was never really considered a dessert when I grew up, but it always appeared during certain occasions that demanded a more formal meal, usually served on the left side of the plate in a small amount. Typically, we did not have the course style eating where dessert was served as the last course anyway, so I don't ever recall sitting with a bowl of it after a meal, but on a cold night recently, I did exactly that, and wondered aloud why I didn't make this more often. It is so easy and quick, and so good to eat.

Every once in a while, when one needs a comforting homey dessert, this one fits the bill perfectly.

Vermicelli Kheer

Shevayachi Kheer

Serves 2-3 small dessert portions

Ingredients

1/2 teaspoon ghee
1/2 cup shevaya (or broken vermicelli)
2-3 cups milk (see Note at end)
2-3 pods of green cardamom
5-6 Tablespoons sugar
2 Tablespoons golden raisins
2 Tablespoons slivered almonds

Method

In a medium sized pan heat the ghee, just enough until it forms a thin film on the bottom of the pan. Add the shevaya and stir them until they start to get golden brown. Add the milk, and when it comes to a boil, bring the heat down so that the milk simmers and reduces for about 15-20 minute.

In the meanwhile, powder the cardamom pods in a mortar and pestle.

Add the sugar and continue to cook for a few minutes more. Add the cardamom powder towards the end, along with the raisins and almonds.

Note:

If you intend to serve or eat the kheer soon after it is made, then use 2 cups of milk, but if making ahead by several hours, then increase the quantity of milk, as the shevaya will continue to absorb the milk and thicken the kheer. Ask me how I know.

You can add a bit of saffron if you like, but I prefer the singular flavor of cardamom in this kheer.

Saturday, November 21, 2009

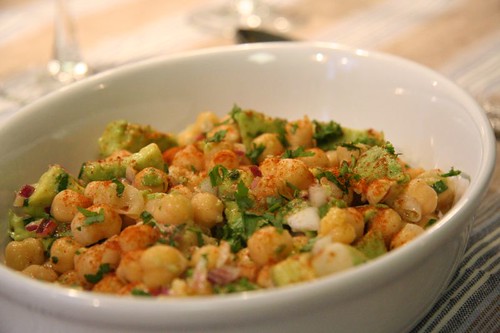
Chickpeas and Avocado Salad

We bonded over blogs online, and vicinity brought us together, but it was because of their dispositions that I enjoyed being with them, meeting after meeting. I am referring to a group of immensely talented, strong, independent women, who are also really fun to hang out with, and who I am happy to now call friends.

Food isn't always the focus of our conversations, but it is certainly wonderful to be able to discuss a certain cookbook, or a variation on a grandmother's recipe, or the source for an arcane ingredient.

So when I had them over for a casual lunch, the pressure was on. While on one hand I know they will politely eat anything I offer, I definitely wanted to make something that will win their approval.

As I mentally planned the menu, considering what was abundant in the market then and their dietary restrictions, one thing that I was very eager for them to try was this simple chickpeas and avocado salad. It was inspired by a side dish I ate at a lovely urban restaurant a long time ago. It was an explosion of flavors and textures, and it was one of those things that makes me wonder how something so simple can taste so voluptuous.

I tried to recreate it at home, and loved it as much as I had enjoyed it in the restaurant, and it quickly made its way into my regular repertoire. Of course I didn't have a recipe for it to begin with, so I had to go based on the quick analysis I had done of the main flavors - a bit of onion, lemon-oil vinaigrette, some finely chopped herbs, most likely parsley. The restaurant is firmly focused on seasonal, organic and local produce, and a few first rate ingredients had made all the difference.

The recipe is flexible, so adjust to suit your taste.

Chickpeas and Avocado Salad

Chickpeas and Avocado Salad

Ingredients

1/3 cup of dried chickpeas (garbanzo beans)
2 Tablespoons finely chopped red onion
1 firm ripe avocado

2 Tablespoons lemon juice
1-2 Tablespoons extra virgin olive oil
1/8th teaspoon red chili powder (or to taste)
salt to taste
2-3 Tablespoons of chopped cilantro (or parsley)
a bit of bold paprika (optional)

Method

Soak the garbanzo beans for 6-10 hours in plenty of water. Drain the soaking water and cook the beans until tender. (I use about 4 times water by volume, and cook the beans in a pressure cooker with my usual 3 whistle regulation.) Drain the beans completely and let them cool.

To make the dressing, whisk the lemon juice and oil till they emulsify. Add the salt, chili powder, and whisk some more. Add the cilantro.

Chop the avocado into small bite size pieces.

In a large bowl, gently toss together the chickpeas, avocado, onion, and the dressing. Sprinkle a bit of paprika on top.


Here is an amped up version with mangoes and bell peppers.

Saturday, November 07, 2009

Deliciousness has no name

Just a little dal, and some spices

For over a year now, I had been working on a project that kept me more busy that ever, with little time to spare for anything else. It used to be one crazy day after another, always racing against time. The good news is that even while I was extremely busy, I did manage to cook regularly. Perhaps more regularly than I did before, because sometimes even going out to eat was out of question.

As time was scarce, most of the cooking was simple fare that did not need me to look through recipes. There were everyday sabjis, dals, common sense pastas, rice dishes, eggs, and so on, where I could play with things on hand without having to worry about botching it up. Plenty of produce focused food, salads for lunch, fruit for dessert. Simple without skimping on flavor was always the goal. Occasional treats, recipes to try, and experiments were left for the weekend, if at all.

During this period, I also lost ten pounds, went to India, gained the ten pounds back (yes, in that order), and went to India again, but with no weight changes this time around.

I managed to make a post every few months, but when it came to reading my favorite blogs, checking feeds, or participating in events, I was hopelessly out of synch. Now I am waking up from a Rip Van Vinkle-ish sleep in the blog world. And wait, what's this I find - I have followers? Wow, who knew!

With this post I commemorate a recipe that has become a favorite in the last year or two. It just came together one day when I needed a quick and satisfying solo meal, but all I had was a scant cup of leftover plain waran, one solitary roti, and very little time or energy to do much. It was so out of this world that it got made again and again, and again, to the point where I made it my own.

The starting point is the Cooker's super duper Chincha Gulaachi Aamti, which is a very typical sweet sour dal from Maharashtra. While dals of all kinds are a common part of most Indian meals, they only rarely take center stage, and even more rarely are they paired with something other than rice.

Perhaps that is why the last part of her post caught my eye
"As children, we'd also eat amti with poli. Crumble a couple of polis in a bowl, a ladle full of amti and some toop."

That is exactly what I did, for a meal that kept me going all day. Naturally, with protein from the dal, and hardly any starch, it was the perfect lunch for a working day.

Using her original recipe, I usually add a dried red chili for a kick, and some cumin seeds to the phodni. Sometimes I replace tamarind with aamsul (dried kokum) if I don't have time to soak tamarind to make the paste.

This could be considered as a shortcut version of chakolya or waran phale, in which strips of dough are cooked in dal, similar to Dal Dhokli, for those familiar with it. Or a pasta in split pea sauce deal if you must. However, at this point, I don't have a real name for it, other than 'that dal dhokli like thing with aamti and polis, which is unbelievably comforting and tasty'.

Can two plain leftovers combine to produce something that delicious? Try it for yourself and decide. I had someone declare that they could eat this every day.

Aamti

Everyday Aamti with Poli

Serves 2

Ingredients

2 cups waran, or cooked toor dal
1 Tablespoons oil
1/2 teaspoon mustard seeds
pinch of asafetida powder
1/2 teaspoon turmeric
1/2 teaspoon fenugreek (methi) seeds
4-7 curry leaves
1-2 dried red chilies, broken into pieces
1/2 teaspoon cumin seeds
2 teaspoons tamarind paste or 2 pieces of aamsul
1-1/2 tsp goda masala
1 Tablespoon jaggery

2-3 polis (or rotis, chappatis, phulkas), leftover are fine

2 Tablespoons chopped cilantro (optional)
1 teaspoon of ghee (optional, but highly recommended)


Method

Whisk the cooked dal with a fork or whisk.

Cut the polis into 2 semicircles, stack them, and cut into 1/2 inch wide strips with kitchen scissors.

In a large wide pan, heat the oil. When hot, add the mustard seeds, and as they pop, follow with methi seeds, asafetida, turmeric, curry leaves, chili, and cumin seeds.

Add the cooked daal, tamarind paste, goda masala, jaggery, and salt.

Add a little water if necessary, and bring to a boil. It needs to be somewhat liquid-y at that this point, as the dal will thicken as it cooks. Turn off the heat after boiling for a couple of minutes when it starts to thicken.

Add in the pieces of poli and cilantro and stir gently.

Serve within minutes in wide bowls, with a swirl of homemade ghee on top. The ghee is not necessary, but makes a difference!


Sending this over to the fabulous Sra, who is hosting the Legume Love Affair. Here's how the affair carries on.


Glossary

I realized that I take a lot of terms in this post for granted, but might need explanation for some, so I decided to add this reference guide.

waran: plain toor dal, usually cooked with about 3-4 times water by volume and a pinch of turmeric. 1/2 cup of dried toor dal yields about 2 cups waran.

poLI: thinly rolled out chappatis, a standard component of every marathi meals, akin to whole wheat flour tortillas.

toop: ghee (in Hindi), clarified butter.

phoDNI: tempering of dry spices in hot oil.

goDA masAlA: a marathi spice blend that is usually made at home with scores of ingredients. These days it is even available in Indian stores in the US.

Friday, July 10, 2009

Flour, Butter, Sugar

and chocolate!

It had been a while since I baked. Even longer since I baked a cake. Truth be told, I couldn't even recall how many months ago I baked a cake. But when a certain special occasion came around, it couldn't be anything else. My list of recipes to try is long, but I had certain criteria for zooming in. It had to be round (go figure!), and the ingredients and equipment had to be all at home.

A simple classic chocolate cake made the cut. As a bonus, it comes from Ina Garten (you know I am a fan), and I had watched the show when she made it. She said she practically begged her friend Michael to give her the recipe, which is originally his grandmother's. Then she went on to make it as a surprise for him. How wonderful.

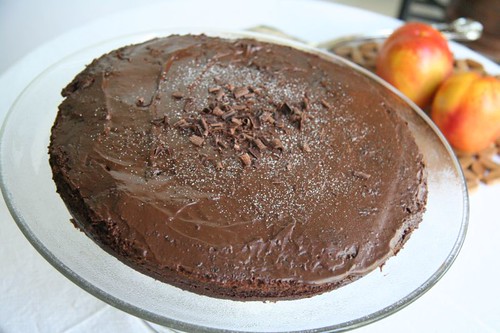
Chocolate Cake

Whole

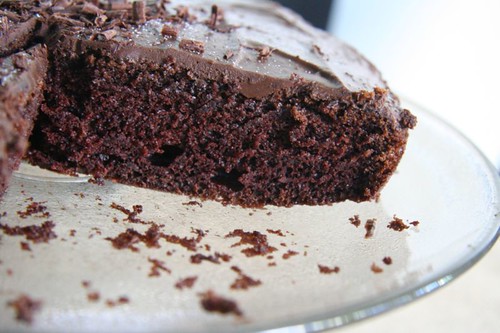
I am so glad I chose it. The texture alone makes this cake recipe a keeper, and the taste is pretty darn good too. Of course, I had to make changes. This wasn't a big party, so I cut the recipe by half, and went for a single layer cake. And that frosting? Oh gosh. I cut it down to a fourth, and went for a thin spread to cut down on the fat. Still very good.

All I am saying is I have to make it again. Soon.

Chocolate Cake: Slice

Slice

I do not have an electric stand mixer, so here is the adapted recipe using a hand mixer.

Chocolate Cake

Ingredients

Butter, for greasing the pan
3/4 cup + 2 Tablespoons all-purpose flour, plus more for dusting pan
1 cup (scant) sugar
3/8 cups cocoa powder
1 teaspoons baking soda
1/2 teaspoon baking powder
1/2 teaspoon kosher salt
1/2 cup buttermilk, shaken
1/4 cup vegetable oil
1 large egg, at room temperature
1/2 teaspoon pure vanilla extract
1/2 cup freshly brewed coffee (warm)


Directions

Preheat the oven to 350 degrees F. Butter an 8-inch round cake pan. Line with parchment paper, then butter and flour the pan.

Sift the flour, sugar, cocoa, baking soda, baking powder, and salt into a large bowl. In another bowl, combine the buttermilk, oil, eggs, and vanilla. Mix on low speed until combined. With the mixer on low speed, slowly add the dry ingredients to the wet. With mixer still on low, add the coffee and stir just to combine, scraping the bottom of the bowl with a rubber spatula. Pour the batter into the prepared pan and bake for 30 to 35 minutes, until a cake tester comes out clean. Cool in the pan for atleast 30 minutes, and then turn it out onto a cooling rack and cool completely.

Spread the frosting (recipe below) evenly on the cake.

For a richer, thicker coating, double the recipe. I don't think you will regret it.

Chocolate Buttercream Frosting

Ingredients

1.5 ounces semisweet chocolate
4 Tablespoons (1/2 stick) unsalted butter, at room temperature
1/2 teaspoon pure vanilla extract
1/2 cup + 2 Tablespoons sifted confectioners' sugar
1/2 teaspoon instant coffee powder

Directions

Chop the chocolate and place it in a heat-proof bowl set over a pan of simmering water. Stir until just melted and set aside until cooled to room temperature.

In the bowl of an electric mixer fitted with a paddle attachment (or with a hand mixer), beat the butter on medium-high speed until light yellow and fluffy. Add the vanilla and continue beating for 3 minutes. Gradually add the confectioners' sugar, then beat at medium speed, scraping down the bowl as necessary, until smooth and creamy. Dissolve the coffee powder in a few drops of hot tap water. Add the chocolate and coffee to the butter mixture and mix until blended. Don't whip. Spread immediately on the cooled cake.


Here is a review of the same recipe from one of my favorite baker bloggers, which gave me further impetus to go for it.

Note to all who have commented on past posts. Thank you all. I have been reading them, and I appreciate each and every one of them and I do hope to respond to you. Probably soon, but don't hold me to it. I have been madly busy.

Saturday, March 28, 2009

The lau of Bengali food

They came, they wrote, they vanished. That is the story of many a blogger. Understandably so, as most of us don't blog for a living, but do it as a creative outlet during our spare time. In my case too, as other things took over, the blog had to take a back seat, putting me dangerously into that vanishing zone, even though I have thought about hauling myself back several times.

Recently, a blogger who often writes lovely comments here said that the squash with Bengali seasoning is now her most favorite way to cook butternut squash, and that she particularly loves the flavor of kalonji. That reminded me of this bottle gourd sabji I make, which has kalonji (also called Nigella) as the predominant flavor.

The other ingredient that is predominant here is mustard oil, which is an essential flavor of several Indian regional cuisines. Although it is not one I grew up with, I have taken to it over the last few years, and really enjoy it in some dishes. Mustard oil is not a wimpy sort of oil and holds its own particularly well. Naturally, it has no substitutes. I even know of mustard oil devotees who can compare and discuss brands, types, and their qualities in great depth. I usually use half mustard and half light olive oil in this dish, but feel free to use all mustard oil.

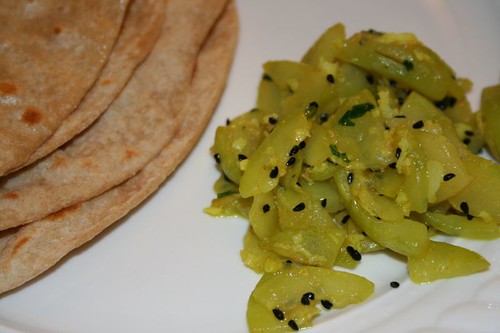
Bottle gourd is called dudhi in Marathi, lauki in Hindi, and lau in Bengali, which explains the cheesy post title. I find it in my local farmers' markets from spring through late summer, but I have seen it in Indian grocery stores almost all year round. This recipe comes via a full Bengali friend, and I am transcribing it here with his permission. I prefer to have it with soft rotis but it is equally wonderful with plain rice and dal. It also fits into my on going theme of favoring dishes that use only a few ingredients, and in this case they all just pull together, almost unexpectedly. For lack of a better title, I am calling it "Bengali Lau".

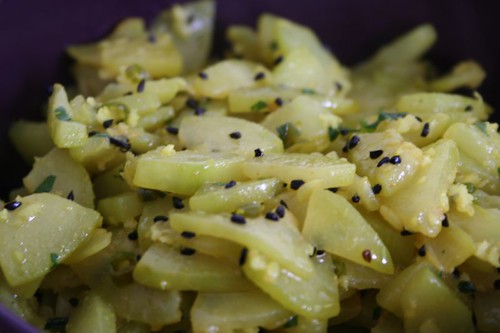
Lauki/Bottle Gourd with kalonji (Nigella)

Bengali Lau

Ingredients

1 medium sized bottle-gourd, usually 400-500gm
2 Tablespoons mustard oil (or a mix of mustard and olive oil)
1 teaspoon kalonji (nigella)
1/2 teaspoon turmeric
1-2 small green chilies, chopped fine
salt to taste
a small handful of grated fresh coconut
a few sprigs of cilantro, chopped fine

Method

Peel and de-seed the bottle gourd, and chop it into thin strips about an inch long, roughly like short and thick matchsticks.

In a large kadhai or wok, heat the oil, and add the kalonji. Unlike mustard or cumin seeds, these do not pop, but they release a wonderful aroma when heated, usually in a few seconds. As soon as that happens, add the chopped bottle gourd, turmeric, and green chili. Saute everything quickly, then turn down the heat. Add a little salt, and let the bottle gourd cook until tender, on medium high heat. Place a lid on the pan if required. This usually takes me 10-20 minutes, depending on the size of the slices, and total quantity. When done, the gourd should be fully cooked, and there will be some oil at the bottom of the pan as a result of the released moisture.

Add a little salt at the end, the coconut, and chopped cilantro, and stir once together.

Lauki/Bottle Gourd with kalonji, rotis

Wednesday, December 31, 2008

Carrot, Beet, and Jicama koshimbir

If I said that I have been busy for the last few months, that would be quite an understatement. The blog was started and nurtured in calmer times, but as other things took over, it fell aside. I did have things to write about at the back of my mind, but time wasn't in my favor.

A well-intentioned post for a friend's JFI event got delayed, and even my own 2nd blogiversary post couldn't be completed in time. Finally, I couldn't let the year end without one last post.

I have mentioned before that koshimbirs are a favorite of mine. These are usually dismissed as simple seasonal salads, but fortified with peanuts, and amped with seasonings, they are bright with flavor and texture.

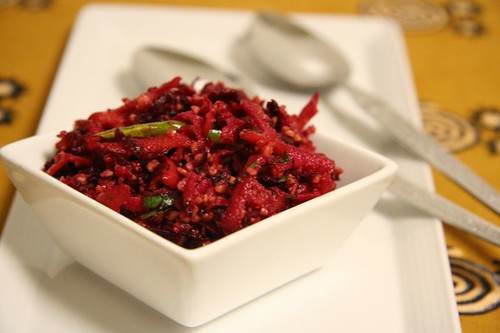
This combination came together one evening inspired by what was bought at the farmers' market, and based on my usual recipe for carrot koshimbir. The jicama added a crisp sweetness, and the beets added color and earthiness to create a completely new favorite which was deliciously addictive, and healthy to boot. I practically finished the entire bowlful.

This can be made with only carrots and will be called gajarachi koshimbir, the Maharashtrian carrot salad. As always, all seasonings can be adjusted to taste, but my preference is to have a good balance of heat, tang, and sweetness.

Carrot, Beet, and Jicama Salad / Koshimbir

Carrot, Beet, and Jicama koshimbir

Ingredients

1 medium carrot
1 small beetroot (raw is fine)
1 small jicama
1/4 cup crushed peanuts
3/4 teaspoon red chili powder
1 teaspoon sugar
1 teaspoon salt, or to taste

For phodni (tempering):
1 teaspoon oil
pinch of mustard seeds
pinch of asafoetida (hing)
1/4 teaspoon turmeric
1 green chili, slit lengthwise into 2

1 Tablespoon lemon juice
1 Tablespoon chopped cilantro

Method

Grate the carrot, beet, and jicama in a medium sized bowl. Add the peanuts, chili powder, salt, and sugar.

Heat the oil in a small pan. Add the mustard seeds, and when they start to pop, add the asafoetida, turmeric, and chili. When the chili starts to change color, pour the oil over the rest of the ingredients.

Add the lemon juice and cilantro, and stir everything together to mix.


Have a healthy and happy new year!

Sunday, September 28, 2008

Fruit Crisp For Any Season

Around where I live, September is usually gorgeous. Lovely warm days with mild evenings, with that feeling of looking forward to fall, but cannot let go of summer. The produce follows suit, with abundance from both seasons, and like the weather, a warm fruit dessert paired with something cold also seems just right.

While eating fruit out of hand is a favorite dessert, every so often one deserves a little something more. With the best fruits of the season and a few ingredients that are always at home, a Fruit Crisp, based on this recipe, can become a sweet antidote for me after a stressful work-week. I have the recipe of the crisp topping posted on the fridge door, and I just mix everything by hand, so it takes only minutes to put it together. The fruit filling does not need a recipe. After trying out various combinations, I have come to the conclusion that one can use almost any fruit, and come up with many winners. You can bake it in a large dish or in individual bowls, but the latter makes it seem more special.

Earlier in summer, when stone fruits were at their prime, I made a crisp with white and yellow peaches and a splash of amaretto, and then once with nectarines and blueberries. Both were outstanding. Recently, I made it with apple and banana, flavored with cardamom instead of vanilla, and nothing else, which was pure comfort in a bowl.

Fruit Crisp: just out of the oven

Fruit Crisp: still bubbling, right out of the oven

Fruit Crisp

This makes 2 generous servings, and can be very easily multiplied

Ingredients

For the filling:

About 1-1/2 cups of chopped fruit of choice, alone or in combination
1-2 Tablespoon of raisins or cranberries or other dried fruit (optional)
1 teaspoon of vanilla extract, or finely powdered cardamom, or a splash of liqueur that goes with the fruit of choice
a dash of lemon zest or orange zest (optional)
1/2 Tablespoon granulated sugar
1/2 Tablespoon all-purpose flour

For the topping:

2-1/2 Tablespoons all-purpose flour
2-1/2 Tablespoons rolled oats (regular or unflavored quick cooking)
1-1/2 Tablespoons granulated sugar
1-1/2 Tablespoons light brown sugar, lightly packed
small pinch of salt
2 Tablespoons cold unsalted butter, diced

Method

Preheat the oven to 350 degrees F.

Prepare the fruit, peeling and chopping as necessary into bite size pieces. Mix the fruit with the rest of the ingredients.

Place the mixture in a baking dish, or distribute it in 2 ramekins of 3/4 cup capacity.

For the topping:

Combine the flour, oats, sugars, salt, and cold butter in a small bowl, and using a fork or fingers, mix everything until the mixture is in large crumbles. For larger quantities, you could use an electric mixer fitted with a paddle attachment and mix on low speed for 1 to 2 minutes. Sprinkle evenly over the fruit, covering the fruit completely.

Place the baking dish on a sheet pan and bake for 45 minutes, until the top is brown and the fruit is bubbly. Let it sit for a few minutes. Serve warm. Increase baking time slightly for increased quantities.


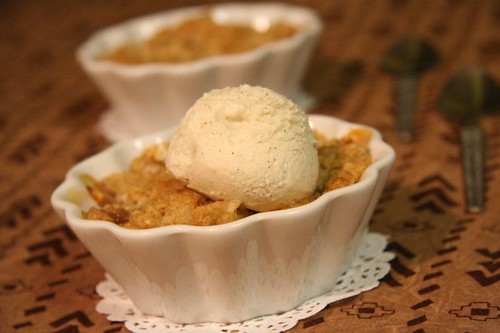
Fruit Crisp: with vanilla bean ice cream

Warm fruit crisp with a dollop of vanilla bean ice-cream. Near bliss.

Thursday, August 28, 2008

Many greens, one formula

I was reading an article in a food magazine about a southern California food stylist who hosts the most perfect parties by her mansion poolside overlooking some of the most precious vistas. If you are wondering about my reading habits, let me explain that I was in need of a break from my other, ahem, more intellectual pursuits. To continue, her cooking style was emphasized by approximations and lack of precise recipes. I am supposed to find this charming. I do, but then, that is how most of the people I know cook, and so did the generations of people before me, even when cooking for a large number of people, so it isn't exactly ground breaking either.

Most of my everyday cooking would fall into this style - simple sabjees, dals, pastas, stir fries and salads. Even for the ones that do have a certain recipe behind it, the quantities are rarely measured, and yet they work just fine. The fallout of this for me is that there are so many posts languishing in the drafts because I don't have the exact (or good enough) measurements on them to write it up on the blog.

Greens: beet leaves, rainbow chard, radish greens, red chard
Top L-R: Beet Greens, Rainbow Chard
Bottom L-R: Icicle Radish Greens, Red Chard


One such is my favorite way to cook many greens, particularly chards, beet greens, and radish greens. A simple tadka, lots of onion, and a few spices is all it takes for the greens to shine through. Very easy and quick, it makes for a nutritious and delicious accompaniment to polis, or rice and dal, or can be a part of an array of other dishes. It has now become my touchstone combination when I find a new type of leafy green and I am not sure how to cook it or how it is supposed to taste. There is no need for much precision here, so here is the recipe, with a few approximations.

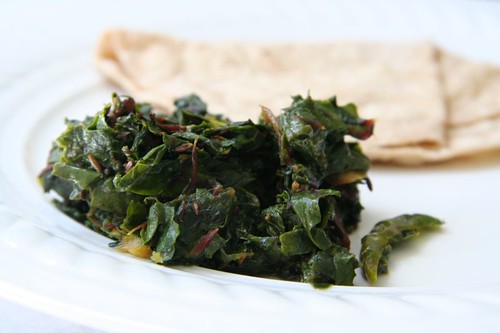
Greens: Cooked red chard

Chard chi bhaji

Ingredients

1 bunch of any type of chard (red, green, swiss, rainbow), about 6 cups when chopped
1 large red onion
2-3 Tablespoons of oil
1/2 teaspoon of mustard seeds
a big pinch of good asafoetida
1/2 teaspoon turmeric
salt to taste
1 teaspoon red chili powder
3/4 teaspoon cumin powder
3/4 teaspoon coriander powder

Method

Wash and clean the chard. Remove the tough stems and finely chop the leaves.

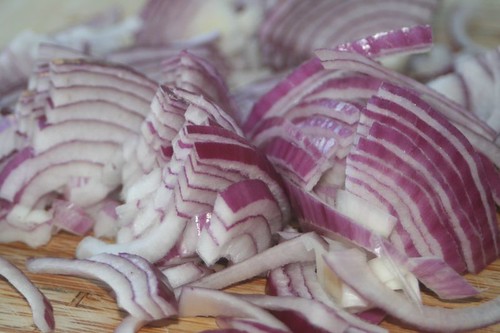
Onion: thinly slicedCut off the top and root end of the onion. Slice it through vertically, then slice it thinly crosswise. If the onion has a large diameter, cut the slices in half.

Heat the oil in a kadhai or wok. Add the mustard seeds. When they start to pop, add the asafoetida and turmeric, add the onion, and saute it on medium heat till it starts to soften. Add the chopped chard leaves. Add a little salt and red chili powder, and toss everything together till the leaves begin to wilt. Lower the heat, add the remaining spices, and cook the leaves through for another minute or two. Add a little more salt at the end.


A new favorite for Red Chard

After years of applying the same formula, change is good. Very very good in this case, and it comes from talented blogger Mints, who writes a lovely blog in Marathi. Her recipe for red chard is so delicious, that it has become my new favorite and I find myself turning to it a lot more than my onion-walla standard.

With this post, I also thank her for the awards that she has passed on to me. Right back at you, Mints.

With her permission, here is her recipe, as adapted by me.

Greens: Chard with garlic and green chilies

Lal Chard chi lasun mirchi chi bhaji

1 bunch of red chard leaves
3-4 cloves of garlic
2-3 green chilies
1 Tablespoon oil
1/2 teaspoon of mustard seeds
pinch of asafoetida
1/2 teaspoon turmeric
1/4 teaspoon cumin seeds
salt to taste

Wash and clean the chard. Remove the tough stems and finely chop the leaves. Peel the garlic, and remove the stems of the green chilies. Smash the garlic and the green chilies until they are flattened.

Heat the oil in a kadhai or wok. Add the mustard seeds. When they start to pop, add the asafoetida, turmeric and cumin seeds. Add the garlic and green chilies, followed by the chopped chard leaves. Add a little salt and toss everything together till the leaves begin to wilt. Lower the heat, and cook the leaves through for another minute or two. Add a little more salt at the end.

Notes

  • The smashed garlic and chilies add a wonderful touch to this dish, so make sure you don't chop or mince them, and use them as described. This action is called 'ThechNe' in marathi.
  • If you don't have green chilies on hand, try it with dried red chilies for an equally delicious variation.
Related Posts Plugin for WordPress, Blogger...