Showing posts with label dessert. Show all posts

Sunday, January 27, 2013

Tiramisu, and a belated bloggiversary

It has been a little over 6 years since I started blogging. So many things have changed during this time, in life and work, in the world of blogs, and in social media in general.

Back then, when I decided to start a blog, rather hesistantly, it was mainly to publish my favorite recipes; the ones that I would want to make again and again, the ones that I would want to share with family and friends. I had been documenting favorite recipes with my notes for a long time before that. However, blogging enabled so many things that an ordinary document on my computer couldn't. Adding pictures to show how the final dish looks was a good start. The ability to tag and categorize them, and view comments from others made it even more appealing. Friends were created. Like minded communities arose. For some, book deals, home businesses, and classes were spun off. Some bloggers just stopped posting, and some of them really ought to come back. Things really have changed so much since the time I started blogging, that these days, it can be sometimes difficult to tell if a blog is a labor of love or something created by an organization for profit.


On my blog, things haven't changed much. The frequency of posting went down to a lamentable average of four posts a year in the last two years. I still write about the food I cook and eat as part of my daily activities, but I have very little time now to take pictures of food. Taking pictures, uploading, and linking was taking up way more time than I had as I juggled work, commute and travel for the most part.

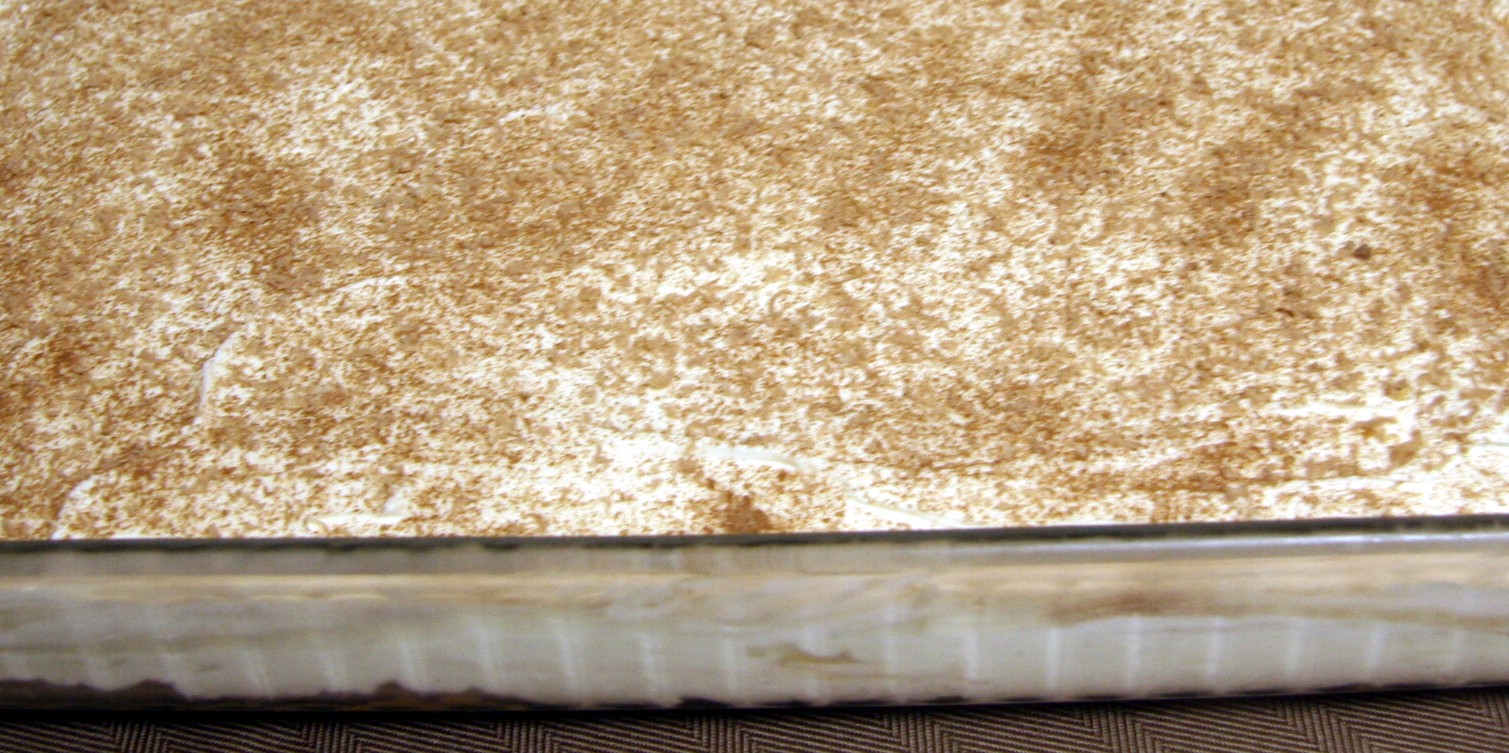
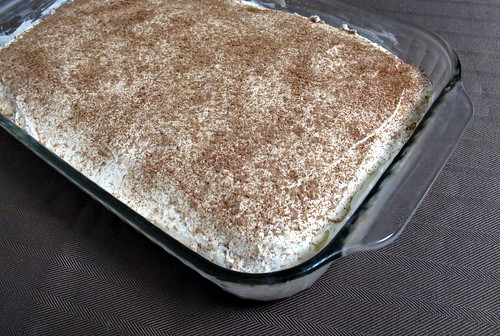
I started another blog to fill in the gaps and to keep track of things I tried, what worked, and  what didn't. It has become my handy reference for a lot of my cooking experiments. Some of the more successful ones should really see the light of the day and be here on the main blog with some pictures to match. Alas, my pictures haven't improved much in the last few years. If anything, I feel they have developed a "sameness" to them because of which I hesitate to publish them. Here is one example. I have been making this wonderful Tiramisu for nearly three years now. The recipe is as perfect as it gets. Other than the liqueur used, I hardly make any changes to it, because it works like a charm and never fails. It is an absolute crowd pleaser and receives raves every time I make it. Seriously, it tastes better than many a sad excuse for a Tiramisu that are served at times in restaurants. It has just the right amount of decadence, is not too sweet, and doesn't use raw eggs. However, I did not want to write about it because how do I prove it to you? I have tried, but could never take a picture that would do it justice. Most recently, I made a large batch for a potluck dinner, and before rushing out of the house, I tried to take a few pictures. The end results were just as blah as before. See for yourself.

Tiramisu

The tiramisu itself was demolished down to a few crumbs by everyone, and that gives me great joy and satisfaction. The visual proof is lacking, but take my word for it, and try the recipe. I will upload a glamor shot if I get one some day.

The Best Tiramisu Ever
Recipe adapted from Baking Bites, a dependable resource for many dessert recipes

Serves: about 8

Ingredients

8-oz mascarpone cheese
1/2 cup confectioners’ sugar
1 cup cold heavy cream
2 tsp vanilla extract
1 cup strong brewed coffee or espresso, room temperature
1/4 cup Baileys original, dark rum, coffee or chocolate liqueur
approx 30-36 ladyfingers
unsweetened cocoa powder, for finishing
a few spoonfuls of grated or shaved chocolate, optional 

Method

In a large mixing bowl, mix mascarpone, confectioners’ sugar, heavy cream and vanilla gently with a whisk or fork, and then beat the mixture at low to medium speed, increasing the speed if needed, until mixture is fluffy and very smooth.

In a small, shallow bowl, combine coffee and Baileys (or liqueur of choice). Dip each ladyfinger into the coffee mixture very quickly to let it soak up some of the liquid, a second on each side. Do not completely soak the ladyfingers in the coffee mixture. Place in the bottom of a 8×8 or 9×9-inch square glass or ceramic dish. Place the lady fingers snugly close to each other as you go. The bottom of the pan should be completely covered with the ladyfingers in a single layer. When there is a full layer of ladyfingers, spread half of the cream mixture on top of them. At this point, you can sprinkle some grated chocolate over the cream if you like.

Repeat with remaining ladyfingers and cream mixture. Dust with cocoa powder, grated chocolate, or both.

Cover the dish with plastic wrap, and refrigerate for 6-10 hours before serving.

Here is another lovely looking variation from the same blog, using dessert wine and raspberries.
 

Monday, March 26, 2012

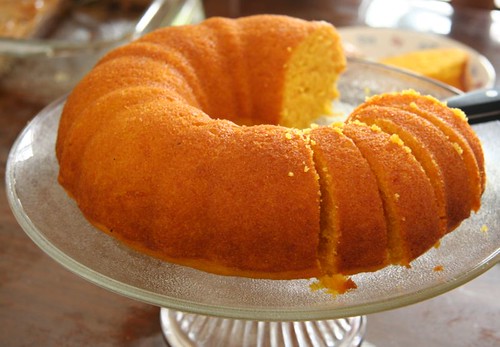
Rava Cake

I truly vanished from the blogging scene. If one can say that I was ever on the scene at all. The reason for not posting much wasn't any kind of a conscious decision. Those few who read Evolving Notes know that the kitchen is still buzzing with action, even though I have gotten busier and busier over the months. I am packing lunches, trying to squeeze in quick healthy dinners every weekday, and trying out new things or baking on the weekends. What I do not have any more time for is taking pictures, whether good, bad, or ugly. I hardly ever have the few seconds between preparing a meal and sitting down to eat it, as right away I need to continue meetings with the other half of the world that comes in to work by then. That is just how my life has been, thanks to work, commute, and travel.

Several weeks ago, I was driving in the dark, after just another busy day, when I thought about the "rawa cake" that my sitter used to make as an afternoon snack. To this day, I count her among the best cooks whose food I have had the pleasure of eating. On most afternoons she would make some kind of snacks for everyone who was around. Her ghavans were legendary, her chaklis are still the best, and thanks to her weekly upwas, she instilled in me a lifelong fondness for sabudana khichadi.

It is inexplicable why I thought of her rava cake though. It wasn't among my most favorite things back then, but suddenly the memory of the taste had gripped me, and I wanted to make it as soon as I could. I asked a few trusted friends, and they gave me their family recipes, but since it was a specific taste that I was going after, I had to go to the source and call up the lady whom I have always called Aatya. She said she used equal parts of rava, dahi (plain yogurt), and sugar by volume, and some LoNi (home made butter), adding that they do like things on the sweet side. "What about ghee or oil?", I asked. "Ghee is fine, but not oil". (See later how I flouted her rules anyway). I asked her if she added anything else for flavor, like cardamom. "I don't add anything else, but why would that taste bad. You can add anything you like".

I made the cake right away, reducing the sugar a little. The simplicity of the taste was astounding, and the best news was that it tasted just like Aatya's!

Later, I got creative and made other versions of the cake, adding cardamom and saffron, lemon zest and lemon, and even a vegan version with soy yogurt, oil, and orange zest, and they were all good. Within the last couple of months, I have made this cake five times.

It holds a special place for me, and I wanted to share it with others. It also meets my blogging criteria of posting something that I have made multiple times and would want to make again and again.

Rava Cake / Semolina Cake


Semolina cake / Rava Cake / Ravyacha Cake

Ingredients

1 cup unroasted medium coarse or fine rava (can also use semolina or farina)
1 cup yogurt (regular or soy yogurt)
3/4 cup sugar
3 Tablespoons softened butter, ghee, or oil
1/4 teaspoon baking soda
Optional : 2 cardamom pods powdered fine, and a small pinch of saffron

Method

In a large bowl, mix the rava, yogurt, sugar, and butter, and mix everything with a large spoon, until all the ingredients are mixed well and a batter is formed. Let it rest for 30 minutes to an hour. Add the baking soda, and flavoring ingredients of choice, and stir everything again until completely mixed.

Pre-heat the oven to 350 degrees. Grease an 8 X 8 inch square or 9 inch round glass or ceramic baking pan, and pour the batter evenly into it, using a spatula.

Bake for about 30 minutes, or until the top is just golden brown and springy to touch. Let it cool completely before turning it out of the pan.

Saturday, August 14, 2010

It's Strawmisu

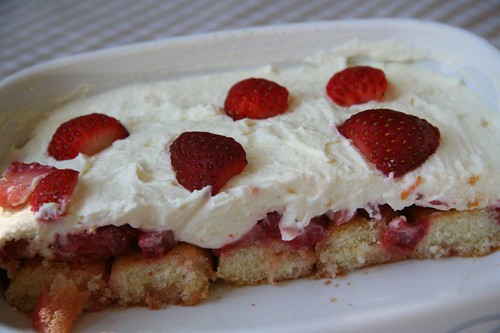
I have been making versions of this dessert for a long time now. It is a simple and classic combination of a cake or cookie base, strawberries, and a decadent and creamy topping, and I find it just perfect for summer. It is easy to make and doesn't even need much of a recipe. You can make one or two small servings, or make a huge batch for a crowd with equal ease. Sometimes I make individual sized servings in small bowls which looks very pretty too. As always, use this as a guideline and make your own fun variations on it; I have yet to see this ever going wrong.

Now finally, I have also given it a name. I am calling it 'Strawmisu'. I searched on it to be doubly sure, and no such word exists, so I can say I have coined it, and it works!

Strawberry dessert

Ingredients

10-15 strawberries
3-4 tablespoons of Grand Marnier
1/4 teaspoon orange zest (optional)
2-3 teaspoons sugar (optional)

4 oz mascarpone cheese
1/2 cup whipping cream
2-3 Tablespoons sugar
a few drops of vanilla extract

8-12 Savoiardi or Italian style ladyfingers (you will need more or less depending on their size)

Method

Rinse the strawberries quickly, and place on a kitchen towel. Slice enough strawberries so that you have about 1 an 1/2 cups of slices. Use the rest for garnishing.

In a medium bowl, place the sliced strawberries. Add the Grand Marnier, 2-3 teaspoons of sugar, and orange zest. Let it sit for about an hour so that the juices and sugar create some syrup.
Whip together the mascarpone cheese, whipping cream, the rest of the sugar (or to taste), and vanilla extract, for a few minutes until it forms soft peaks.

In a pan about 8 X 8 inches in size, arrange the ladyfingers close to each other to create the base layer. You might need to break up some of them to make them fit the entire pan. Spoon the strawberries evenly over it. Drizzle the syrup evenly so that all the ladyfingers are evenly moistened.

Spread the cream and cheese mixture evenly over the strawberries. Cover and keep in the fridge for 2 hours or more.

Garnish or serve with additional sliced or whole strawberries.

Note:

If you do not want to use Grand Marnier, you can use freshly squeezed orange juice.

In place of the ladyfingers, you can also use thin slices of pound cake or something similar.

Tuesday, July 20, 2010

Easy Mango Cake

Is there such a thing as 'too easy'?

One of my grandfather's friends has a small mango canning and preservation enterprise. They live in the middle of the best mango producing regions in India, and use some of the finest local mangoes in their products. They sell a lot of their products in their store locally, but also send it out to several cities in India, and perhaps abroad too.

If I or some of my relatives ever get a chance to get there, we stop by their house, which is right next to the store (or is it the other way around?) and usually buy a few things from them, especially their jars of mango pulp. These are glass jars, unlike the tin cans one sees commonly, and I prefer those for two reasons. One is that one can see what is inside, and secondly, I think there is a much lesser chance of any kind of strange stuff happening, such as something that could happen if the acid in the mango reacts with metal.

Other than those few jars, I rarely buy canned mango pulp. The jars are by and large savored by themselves as Aamras, particularly when pooris are on the menu. Hence I went back and forth over whether I should use up almost half of a precious jar just to try out something new. I can say now for sure that it was worth it. This cake is superb, in taste as well as texture. I have also yet to meet a cake recipe that was easier to whip up; it is literally "dump and stir". It is a complete keeper that I would definitely try again, and perhaps even buy some cans of mango pulp if needed!

Adapted from here.

Mango Cake


Rava Mango Cake

Ingredients

1 cup fine rava (or semolina flour)
1 teaspoon baking powder
1/2 cup sugar
2 pods of green cardamom
1 cup canned mango pulp
1/4 cup oil
1 Tablespoon golden raisins (optional)
1 Tablespoon chopped almonds (optional)

Method

Preheat the oven to 375 degrees.

In a medium bowl, mix the rava, baking powder, and sugar. Using a flexible spatula, stir in the mango pulp, and the oil, until the rava absorbs the liquids completely to form a batter.

Powder the seeds of the cardamom in a mortar and pestle and add it to the batter.

Lightly grease a small loaf pan (8 X 4 inches would be fine, mine is 9 X 5).

Pour the batter into the pan. Sprinkle the raisins and almonds on top. Bake for 25 minutes. Insert a toothpick to check if done.

Notes

1. I actually forgot to add the cardamom powder, but it was not missed. I am eager to try it with it next time.

2. Most likely, the quantities can be increased by 1.5 times to fit a loaf pan better.

3. It can be made just as well with melted butter in place of oil, I think.

4. The dried fruit and nuts are optional, and can be played around with. Mix into the batter, or add on top like I did.

Entry Update

I recently made this cake again, with increased quantities, and baked it in a bundt pan. It took me 35 minutes to bake it. Since the mango pulp was quite sweet, I decreased the overall sugar quantity as well, and did not use any dried fruit or nuts. It was enough for 12-16 people. The process remains the same as above, but here is an update on the quantities.

2.5 cups fine rava (or semolina flour)
2.5 teaspoons baking powder
1 cup sugar
4-5 pods of green cardamom
2.5 cups canned mango pulp
1/2 cup + 2 Tablespoons vegetable oil
a few drops of oil for greasing pan

Mango Cake again

Sunday, January 31, 2010

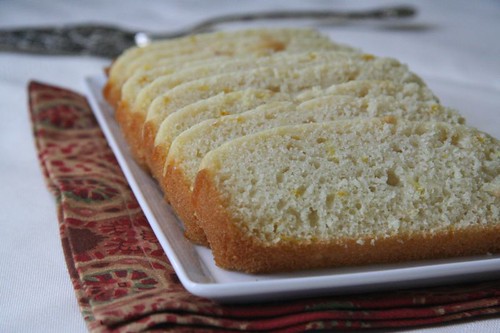
Eggless Low-fat Lemon Loaf

It is about that time of the year when I start scouring my bookmarks, links, notes, and cookbooks for ideas to use lemon zest, lemon juice, or the whole lemon, as my Meyer lemon tree is heavy with fruit and ready to harvest. There will be plenty of citrusy salads and even a basic waran bhaat will get a generous squeeze of home grown lemons, but it is the baked goods that I look forward to experimenting with.

While many of the recipes I look through get pushed lower on the list if they are too daunting or time consuming, this snack cake looked easily adaptable. The fact that it is low-fat made it sound even better. I added plenty of lemon zest for flavor, and baked it in a loaf pan, turning it into a lemony loaf cake. I had to bake it a little longer which was probably due to the shape of the pan. I also de-veganized it because I didn't want to run out to buy a small amount of soy yogurt and soy milk, but using soy would make it truly vegan.

This is a lovely light cake that can be enjoyed without guilt as a snack, with tea, or for breakfast, and when dressed up with a fruit compote or puree it works as an elegant dessert too. I am sending it to this month's Grow Your Own event.

Lemon loaf cake

Here is my recipe, adapted from Susan's, with many thanks to her.

Meyer Lemon loaf Cake

Ingredients

1 3/4 cups cake flour
1/2 cup sugar
3/4 teaspoon baking soda
1/4 teaspoon baking powder
pinch of salt
1/4 cup yogurt (regular or soy)
1-1/2 Tablespoons oil, plus a little more for the pan
1/2 teaspoon vanilla extract
1/2 cup water
1/2 cup milk (regular or soy)
2 Tablespoons lemon juice
1 teaspoon lemon zest

Method

Pre-heat the oven to 350 degree F.

Grease a 9x5 inch pan well with oil.

In a medium bowl, sift together flour, sugar, baking soda, baking powder, and salt.

In a large bowl, blend the yogurt, oil, vanilla, water, soymilk, and lemon juice. Do not overmix. Stir in the lemon zest. Stir in the dry ingredients with a whisk or spatula.

Pour the batter into the greased pan.

Bake for about 35 minutes until a toothpick comes out clean. Remove and allow to cool completely. Loosen sides gently with a knife and remove from pan.


Serving suggestion

Mango Sauce: Mix together a few tablespoons of mango jam with equal amount of water, and heat for a few minutes until it forms a sauce.

Lemon cake with mango sauce

Monday, December 28, 2009

Making burfi at home

is possible!

These days, it is fairly easy to find almost any kind of Indian food here in the United States - a lot of Indian vegetables, spices, condiments and snacks are available. However one thing that is nearly impossible to get is good mithai, the kind you get in India. In terms of quality, variety, freshness, and accessibility, what we have here is light years apart from what one would find 'back home'.

So it was only natural that some of us were driven to try and recreate some things at home. One thing I tried many times and failed miserably at was burfis, and that is because one of the main ingredients for it is often fresh khoya (also called mawa or khawa), which is made by evaporating milk to a point where all liquid has evaporated and only the milk solids remain behind. In India, one can practically walk to a corner sweet store to purchase some freshly made khoya as needed. Things have improved ever so gradually over the years here, and we can now buy khoya in the refrigerated section, though the date of manufacture is usually unknown, and the origin could be several hundred miles away. Despite all that, I went ahead and bought a block of khoya recently because I really wanted to try Tartlette's Cardamom Mava Cakes, but didn't want to go through the trouble of making the mava. The cakes are lovely and I made them twice, but I had a lot of remaining khoya.

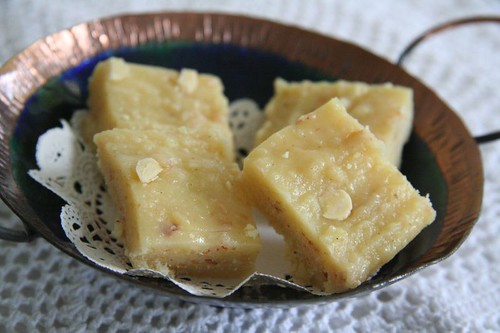
I went in search of recipes to use it up, and zoomed in on a Badam Burfi, in a Marathi book called "DiwALI ANI saNAsudiche padArth", written by Mangala Barve. The recipe sounded a bit simplistic to be true, but it actually worked quite well. It tasted delicious, creamy and rich. Here is the adapted version of the original recipe.

With this post I end the year on a sweet note, and also wish my little space a rather belated third bloggiversary!

Badam (Almond) Burfi

Almond Burfi / Badam Burfi

Ingredients

25 grams almonds
250 grams khoya/mawa/khawa
1 teaspoon ghee
1/2-3/4 cup of sugar
5-6 pods of green cardamom
a few strands of saffron (optional)
a few slivered almonds (optional)

Method

Soak the almonds in a bowl of water for 2-6 hours. Peel them, and process them finely in a food processor.

Peel the cardamom pods and powder them in a mortar and pestle.

Process the khoya in a food processor until it has completely crumbled.

In a wide pan or wok heat half the ghee just until it melts, and add the khoya to it until it starts to soften. Do not let it get brown. Add in the almond powder and sugar and stir everything together for a few minutes on low heat. Add the cardamom powder and saffron strands. The mixture will have the consistency of a thick paste.

Grease a small pan (about 6 inch square in size) with the remaining ghee, and pour the khoya mixture in it. Using an offset spatula, spread it in to one even layer. Top with additional slivered almonds, and press them firmly. Let it set and then chill it in the refrigerator for at least 2 hours till it gets firm. Cut it into shapes of your choice and remove from the pan.

You can bring the burfi to room temperature before eating.

Sunday, December 13, 2009

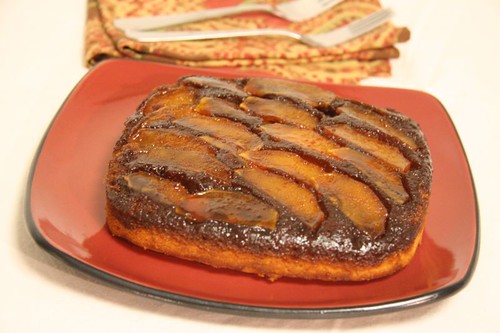
Apple Cake "Tatin"

Slightly Light Version

Ina Garten's recipe for Apple Cake "Tatin" is just perfection. A scoop of vanilla ice cream on the side doesn't hurt a bit. I really don't need to say anything more, but I'll add a few small notes:

1. Pull the caramel off the heat as soon as it hits warm amber, even if it isn't at 360 degrees, because even a few seconds can make a difference.

2. Make sure the caramel layer is completely cool before adding the batter on top.

Mine was just shy of getting bitter because of these two reasons, but the overall taste was a winner regardless.

Apple Cake "Tatin"

I halved the recipe and it still served 6 decent sized slices. I also used slightly drained yogurt instead of sour cream. Hence, light. See?

Wednesday, December 09, 2009

Shevayachi Kheer

Vermicelli Pudding

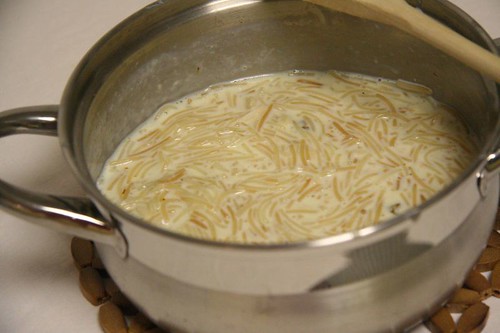
During a recent pantry raid, I found a small jar of shevaya, also called semiya or sevia (in Hindi, Gujarati). These are labled as "vermicelli", but these are the Indian type, and much better suited to using in sevia pulao, upma, and of course kheer. Incidentally, vermicelli pasta works well too, if crumbled into small bits.

Made by toasting shevaya in a bit of ghee, and cooking them in milk, shevayachi kheer was never really considered a dessert when I grew up, but it always appeared during certain occasions that demanded a more formal meal, usually served on the left side of the plate in a small amount. Typically, we did not have the course style eating where dessert was served as the last course anyway, so I don't ever recall sitting with a bowl of it after a meal, but on a cold night recently, I did exactly that, and wondered aloud why I didn't make this more often. It is so easy and quick, and so good to eat.

Every once in a while, when one needs a comforting homey dessert, this one fits the bill perfectly.

Vermicelli Kheer

Shevayachi Kheer

Serves 2-3 small dessert portions

Ingredients

1/2 teaspoon ghee
1/2 cup shevaya (or broken vermicelli)
2-3 cups milk (see Note at end)
2-3 pods of green cardamom
5-6 Tablespoons sugar
2 Tablespoons golden raisins
2 Tablespoons slivered almonds

Method

In a medium sized pan heat the ghee, just enough until it forms a thin film on the bottom of the pan. Add the shevaya and stir them until they start to get golden brown. Add the milk, and when it comes to a boil, bring the heat down so that the milk simmers and reduces for about 15-20 minute.

In the meanwhile, powder the cardamom pods in a mortar and pestle.

Add the sugar and continue to cook for a few minutes more. Add the cardamom powder towards the end, along with the raisins and almonds.

Note:

If you intend to serve or eat the kheer soon after it is made, then use 2 cups of milk, but if making ahead by several hours, then increase the quantity of milk, as the shevaya will continue to absorb the milk and thicken the kheer. Ask me how I know.

You can add a bit of saffron if you like, but I prefer the singular flavor of cardamom in this kheer.

Friday, July 10, 2009

Flour, Butter, Sugar

and chocolate!

It had been a while since I baked. Even longer since I baked a cake. Truth be told, I couldn't even recall how many months ago I baked a cake. But when a certain special occasion came around, it couldn't be anything else. My list of recipes to try is long, but I had certain criteria for zooming in. It had to be round (go figure!), and the ingredients and equipment had to be all at home.

A simple classic chocolate cake made the cut. As a bonus, it comes from Ina Garten (you know I am a fan), and I had watched the show when she made it. She said she practically begged her friend Michael to give her the recipe, which is originally his grandmother's. Then she went on to make it as a surprise for him. How wonderful.

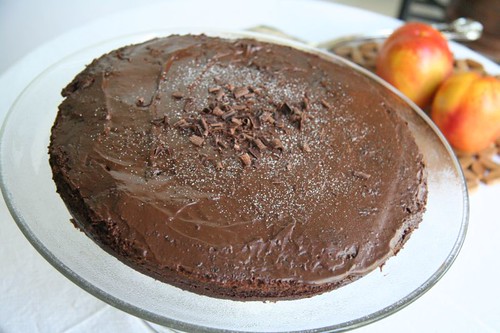
Chocolate Cake

Whole

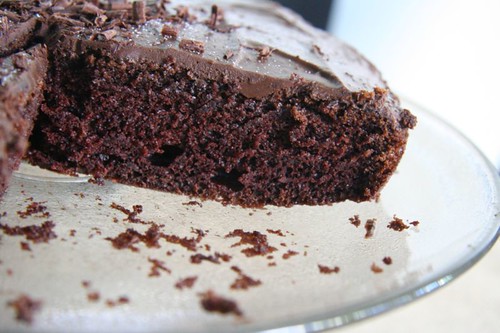
I am so glad I chose it. The texture alone makes this cake recipe a keeper, and the taste is pretty darn good too. Of course, I had to make changes. This wasn't a big party, so I cut the recipe by half, and went for a single layer cake. And that frosting? Oh gosh. I cut it down to a fourth, and went for a thin spread to cut down on the fat. Still very good.

All I am saying is I have to make it again. Soon.

Chocolate Cake: Slice

Slice

I do not have an electric stand mixer, so here is the adapted recipe using a hand mixer.

Chocolate Cake

Ingredients

Butter, for greasing the pan
3/4 cup + 2 Tablespoons all-purpose flour, plus more for dusting pan
1 cup (scant) sugar
3/8 cups cocoa powder
1 teaspoons baking soda
1/2 teaspoon baking powder
1/2 teaspoon kosher salt
1/2 cup buttermilk, shaken
1/4 cup vegetable oil
1 large egg, at room temperature
1/2 teaspoon pure vanilla extract
1/2 cup freshly brewed coffee (warm)


Directions

Preheat the oven to 350 degrees F. Butter an 8-inch round cake pan. Line with parchment paper, then butter and flour the pan.

Sift the flour, sugar, cocoa, baking soda, baking powder, and salt into a large bowl. In another bowl, combine the buttermilk, oil, eggs, and vanilla. Mix on low speed until combined. With the mixer on low speed, slowly add the dry ingredients to the wet. With mixer still on low, add the coffee and stir just to combine, scraping the bottom of the bowl with a rubber spatula. Pour the batter into the prepared pan and bake for 30 to 35 minutes, until a cake tester comes out clean. Cool in the pan for atleast 30 minutes, and then turn it out onto a cooling rack and cool completely.

Spread the frosting (recipe below) evenly on the cake.

For a richer, thicker coating, double the recipe. I don't think you will regret it.

Chocolate Buttercream Frosting

Ingredients

1.5 ounces semisweet chocolate
4 Tablespoons (1/2 stick) unsalted butter, at room temperature
1/2 teaspoon pure vanilla extract
1/2 cup + 2 Tablespoons sifted confectioners' sugar
1/2 teaspoon instant coffee powder

Directions

Chop the chocolate and place it in a heat-proof bowl set over a pan of simmering water. Stir until just melted and set aside until cooled to room temperature.

In the bowl of an electric mixer fitted with a paddle attachment (or with a hand mixer), beat the butter on medium-high speed until light yellow and fluffy. Add the vanilla and continue beating for 3 minutes. Gradually add the confectioners' sugar, then beat at medium speed, scraping down the bowl as necessary, until smooth and creamy. Dissolve the coffee powder in a few drops of hot tap water. Add the chocolate and coffee to the butter mixture and mix until blended. Don't whip. Spread immediately on the cooled cake.


Here is a review of the same recipe from one of my favorite baker bloggers, which gave me further impetus to go for it.

Note to all who have commented on past posts. Thank you all. I have been reading them, and I appreciate each and every one of them and I do hope to respond to you. Probably soon, but don't hold me to it. I have been madly busy.

Sunday, September 28, 2008

Fruit Crisp For Any Season

Around where I live, September is usually gorgeous. Lovely warm days with mild evenings, with that feeling of looking forward to fall, but cannot let go of summer. The produce follows suit, with abundance from both seasons, and like the weather, a warm fruit dessert paired with something cold also seems just right.

While eating fruit out of hand is a favorite dessert, every so often one deserves a little something more. With the best fruits of the season and a few ingredients that are always at home, a Fruit Crisp, based on this recipe, can become a sweet antidote for me after a stressful work-week. I have the recipe of the crisp topping posted on the fridge door, and I just mix everything by hand, so it takes only minutes to put it together. The fruit filling does not need a recipe. After trying out various combinations, I have come to the conclusion that one can use almost any fruit, and come up with many winners. You can bake it in a large dish or in individual bowls, but the latter makes it seem more special.

Earlier in summer, when stone fruits were at their prime, I made a crisp with white and yellow peaches and a splash of amaretto, and then once with nectarines and blueberries. Both were outstanding. Recently, I made it with apple and banana, flavored with cardamom instead of vanilla, and nothing else, which was pure comfort in a bowl.

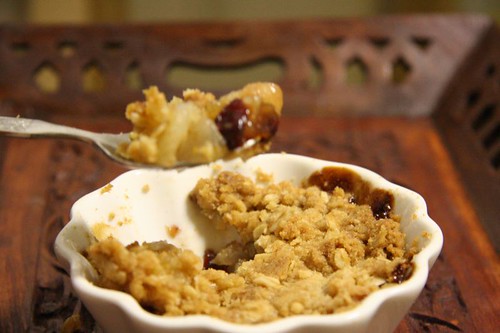
Fruit Crisp: just out of the oven

Fruit Crisp: still bubbling, right out of the oven

Fruit Crisp

This makes 2 generous servings, and can be very easily multiplied

Ingredients

For the filling:

About 1-1/2 cups of chopped fruit of choice, alone or in combination
1-2 Tablespoon of raisins or cranberries or other dried fruit (optional)
1 teaspoon of vanilla extract, or finely powdered cardamom, or a splash of liqueur that goes with the fruit of choice
a dash of lemon zest or orange zest (optional)
1/2 Tablespoon granulated sugar
1/2 Tablespoon all-purpose flour

For the topping:

2-1/2 Tablespoons all-purpose flour
2-1/2 Tablespoons rolled oats (regular or unflavored quick cooking)
1-1/2 Tablespoons granulated sugar
1-1/2 Tablespoons light brown sugar, lightly packed
small pinch of salt
2 Tablespoons cold unsalted butter, diced

Method

Preheat the oven to 350 degrees F.

Prepare the fruit, peeling and chopping as necessary into bite size pieces. Mix the fruit with the rest of the ingredients.

Place the mixture in a baking dish, or distribute it in 2 ramekins of 3/4 cup capacity.

For the topping:

Combine the flour, oats, sugars, salt, and cold butter in a small bowl, and using a fork or fingers, mix everything until the mixture is in large crumbles. For larger quantities, you could use an electric mixer fitted with a paddle attachment and mix on low speed for 1 to 2 minutes. Sprinkle evenly over the fruit, covering the fruit completely.

Place the baking dish on a sheet pan and bake for 45 minutes, until the top is brown and the fruit is bubbly. Let it sit for a few minutes. Serve warm. Increase baking time slightly for increased quantities.

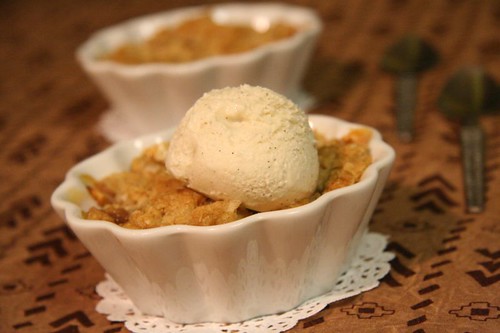
Fruit Crisp: with vanilla bean ice cream

Warm fruit crisp with a dollop of vanilla bean ice-cream. Near bliss.

Thursday, July 03, 2008

Were the brownies outrageous enough?

Two Sweet Reviews

One of the things I find hard to resist is a good brownie. Full of decadent, buttery, chocolate-y goodness, I usually save these for an occasional indulgence, and buy them by the piece, because even though they are fairly easy to make, there are not enough occasions to justify baking a pan full of them. I have a really long list of brownie recipes I would like to try, and I know a good brownie when I eat one, but how am I supposed to tell by just looking at the recipe? All those glamor shots that sometimes accompany them don't help either.

Outrageous Brownies

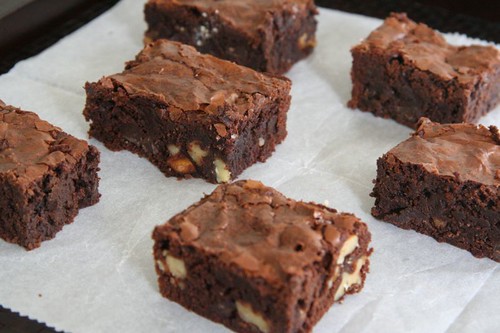
Not long ago, I mentioned having over a boatload of guests, with varied tastes, and thankfully a few of them were dessert people, so I ruffled through my list to see which one I should try first, and what a difficult decision it was. I settled on Ina Garten's Outrageous Brownies after reading high praise on the user reviews. I followed everything exactly, and they baked up beautifully. Great texture, and pretty good taste. The overall impression however was that the coffee flavor was too strong. The coffee is supposed to boost the chocolate flavor, not overtake it. It is quite possible that the particular coffee I used was too strong, but these brownies tasted good only on the first day and didn't quite hold that well by the next day, which can be a big plus if one is making a tonne of them. And they also didn't do well after freezing (and thawing). Ultimately, this is not the 'it' brownie recipe for me, and I am more likely to try some others in pursuit of the perfect one.

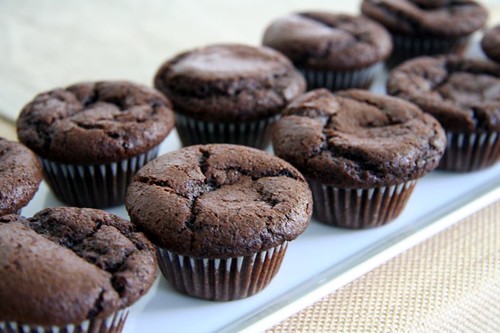
All is not lost in this post though. Here is a plug for a superb Mini Chocolate Cupcakes recipe from Nicole, a prolific blogger and baker. It took me all of 10 minutes to make the batter, and that included opening cupboards, jars, bottles, and sundry containers of ingredients. I needed a tad more milk than specified to get the batter to come together, but a taste of the batter promised great things to come, and these did not disappoint. I have never eaten chocolate cupcakes before. I am not kidding, I have never had an occasion to sample chocolate cupcakes, but these were incredible. I didn't even make the frosting, as I didn't have all the things on hand. I thought of drizzling some ganache over them, but they were mighty good as is. Moist, delicious, easy, eggless, and possibly easy to convert to a vegan version if needed. I can't wait to try them out again. There was a small catch, and even though it didn't matter, I thought I should mention that while I made half the recipe, it was just enough for only 12 mini-muffins. At first I thought I had filled the cups too much, but the cupcakes seem to have risen almost as much as they have in Nicole's pictures.
Mini chocolate cupcakes

Noting down the recipe for future reference.

Mini Chocolate Cupcakes

Makes 12

3/4 cups all purpose flour
1/4 cup cocoa powder
3/4 tsp instant coffee powder (optional)
1/2 cup sugar
1/2 teaspoon baking powder
1/4 teaspoon baking soda
big pinch of salt
3/8 cup milk, or a little more if needed
1/4 cup vegetable oil
1/2 teaspoon vanilla extract

Preheat oven to 350F. Line 12 mini muffin cups with paper liners.

In a large bowl, sift together flour, cocoa power, instant coffee powder, sugar, baking powder, baking soda and salt.

In a medium bowl, whisk together milk, vegetable oil and vanilla extract. Pour into dry ingredients and stir until just combined and no streaks of flour remain.

Distribute batter evenly into prepared muffin cups, filling each about 3/4th full.

Bake for 10-12 minutes, until a tester inserted into the center comes out clean.
Turn cupcakes out onto a wire rack to cool completely.

Monday, May 05, 2008

Making Basundi, Mango Rabdi, and Glamming it up

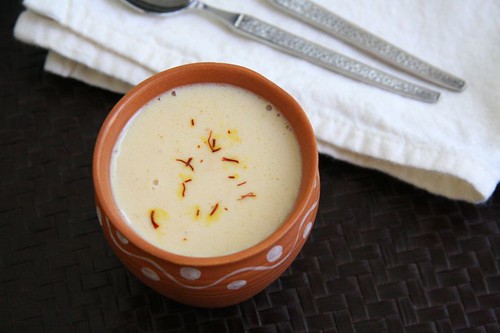
The main premise and method for making baasundi might sound innocently simple, but those who have seen how it gets made or tried making it would be well aware of the fallacy. Instructions could just read something like reduce milk till it thickens, add sugar to taste, some cardamom, saffron, nutmeg (the classic kesar-elaichi-jaiphal trio) for flavor, and chopped nuts for garnishing, and while that is not at all difficult to achieve, it could become quite a trying experience.

Basundi: Maharashtrian dessertFor me, the reason to make some basundi recently was most ho-hum - the expiration date on a jug of whole milk was drawing close. Well, I think the printed date is the sell-by date and not the use-by date, but I am usually done with the milk in the jug by whichever date is printed on it, and have never had to test it out. If it is not used up in tea, cereal and other things, then I make paneer (rarely), some kind of kheer (sometimes), or set it to make yogurt (mostly).

This time, I had enough milk leftover to make basundi, and it had been a long time since I made it. This year for me, if anything, has been about minimizing the number of ingredients and maximizing flavors, and this fits right into that theme too. I started by heating the milk in a stainless steel saucepan, and when it came to a boil, I reduced the heat until the milk was at a constant simmer. Since I was doing other things around the house, I managed to stir it a little every ten to fifteen minutes, and kept doing this for about two hours, until the milk had thickened up considerably, and turned to a lovely light beige color. The result was more than satisfactory.

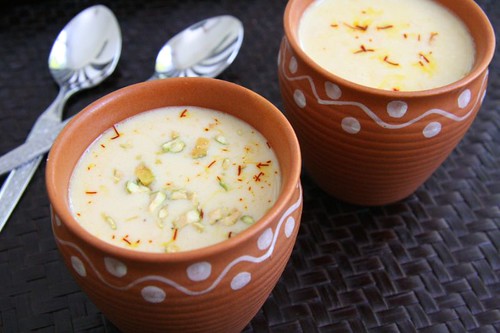
Basundi: Some like it with nuts, others like it plain

Basundi, Thickened Milk

Yields about 1 cup

Notes

This has so few ingredients that the taste of each one of them comes through, including the sugar. I like the taste of Indian sugar in this. Do use it if you have it.

Charoli is the more commonly used nut in Maharashtrian basundi.

The traditional way of using the nutmeg is by creating a nutmeg paste by rubbing the nutmeg in circular movements with a little water, on a round stone board. Here I have used freshly grated nutmeg.

Ingredients

4 cups whole milk
4-6 Tablespoons sugar
1 green cardamom pod
5-6 strands of saffron
a dash of grated nutmeg
chopped nuts like pistachios, almonds, or charoli, optional

Method

Bring the milk to a boil, then reduce the heat until it simmers and thickens up considerably, at least to a fourth of its original volume. This could take around two hours, depending on the heat source, size and thickness of pan, and amount of milk. Stir occasionally to make sure the milk does not scorch.

Add sugar to taste, starting with a smaller amount first. Peel the cardamom pod and powder the seeds with a mortar and pestle. Add the powder, grated nutmeg, and strands of crumbled saffron, and finally, chopped nuts. Basundi can be served warm, at room temperature or cold, depending on the type of meal and personal preferences.

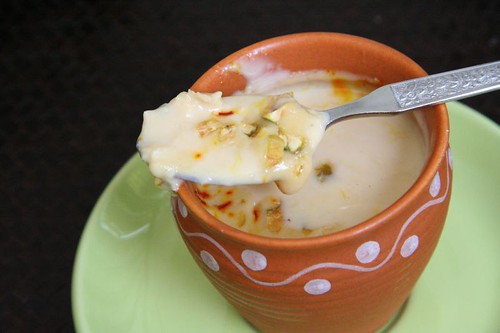
The picture below shows the resulting thickness of the basundi I made. After being chilled in the fridge it thickened up further.

Basundi: Upclose

Adding Mango

Now, can a dessert like this be bettered or outdone? Well yes it can, by pairing it with a fabulous Alphonso mango. A long time ago I had read of a mithai store in Benares which served a seasonal sweet made of rabdi, saffron, and ripe mangoes, mixed together and served topped with chopped almonds, pistachios and a silver leaf. Even though I had never tasted anything like that, the description sounded nothing short of divine and was etched in my mind very firmly. So, here I was, with near-rabdi in the fridge, and a pretty good mango on hand, and the only thing I could think of was combining the two. I had for some reason set really high expectations for it, and was worried that the actual result might fall short of that, but it didn't. It was truly as amazing as I had imagined it to be.

In the first batch I pureed the mango in a food processor, but the end result got a little close to milk shake, so the next time I used a fork to mash up the mangoes, and that was definitely better in terms of texture. I used the flesh of one small mango for 1/2 cup of cold rabdi, then topped it with a tiny edible silver leaf and chopped pistachios.

Mango Rabdi: Dessert

Mango rabdi, dolled up in petite glasses, sashays down the red carpet for Meeta's Monthy Mingle.

Monday, March 17, 2008

Pear, Apple and Cranberry Crisp

I was playing with the remote to see if anything interesting is going on when I found Barefoot Contessa. I stopped to watch a little, and then it happened again, and again, and eventually I really started enjoying the show. It helped that it came on at a time that was convenient for me.

It was easy to like Ina Garten. She is sophisticated and smart, and unlike many wannabe food stars, she has years in her stride, and a good deal of experience to boot. And when she talks, she sounds very convincing.

There are lots of things I like about her show. She cooks in her own kitchen, uses her own cookware, and serves the food in her own dishes, to her real friends. Sometimes her husband Jeffrey, who is quite charming and funny, appears on the show too. Wiki him to find out more, you might be surprised. She often has a few minutes dedicated to 'setting' the table and 'doing' the flowers, which is so not my thing, but I find it enjoyable anyway. She clearly also has a good team of photographers on her side, who make everything on her show look fabulous.

Sometimes I find it amusing that she thinks nothing of rolling out pastry crusts and piping meringues but uses canned tomatoes because life is too short to peel tomatoes. And if I ever met her, we could argue endlessly, amicably, over cilantro and parsley. But ultimately, even with her hoity toity Hampton ways, Ina seems accessible, and very American, including in her admiration of all things French.

Apple Pears Cranberry Crisps: Dig inNow on to her recipes. It is probably because of her background in the food business and catering that she always seems to make huge quantities of food, and one reason that held me back from trying anything was the serious scaling down of quantities that I would need to do. So even though I took ideas and inspirations from her shows, I had not followed any particular recipe of hers. That changed after I made the Pear, Apple and Cranberry Crisp that I had been eyeing this apple season. It has a long ingredient list, but when I recently happened to have each and every of the things on hand, I had to make these. On the show, she made individual ones in ramekins, so I did that too. The crisps were deliciously blog-worthy - with a crisp caramelly top giving way to the filling that was bursting with the sweetness of apples and pears and the heady scent of orange zest. Such a lovely, wintry (or fall-y) dessert to savor slowly after dinner.

Even the hint of cinnamon was wonderful. This comes from someone who is not overly fond of cinnamon in desserts. In fact I was highly tempted to use cardamom or vanilla, but I thought I'll stick to the original this time, and was amply rewarded. I was also tempted to reduce the amount of butter, and so I started with only two tablespoons, but the mixture finally came together only when the entire quantity was added. The recipe takes a bit of work, but not skill, and to borrow from Ina, the good news is, that it can be done in advance.

This could be eaten with ice-cream or whipped cream, but it was glorious on its own too. Here is the scaled down and adapted recipe.

Pear, Apple and Cranberry Crisp

Apple Pears Cranberry Crisps: Top View

Ingredients

1 pear
1-1/2 apples (or 2 small apples)
3 Tablespoons dried cranberries
1/4 teaspoon grated orange zest
1/4 teaspoon grated lemon zest
1/2 tablespoons freshly squeezed orange juice
1/2 tablespoons freshly squeezed lemon juice
1-1/2 Tablespoons granulated sugar
1 Tablespoons all-purpose flour
1/4 teaspoon ground cinnamon
1/8 teaspoon ground nutmeg

For the topping:
3/8 cups all-purpose flour
3 Tablespoons granulated sugar
3 Tablespoons light brown sugar, lightly packed
1/8 teaspoon kosher salt (or regular salt)
1/4 cup old-fashioned oats (not quick cooking)
1/2 stick (4 Tablespoons) cold unsalted butter, diced

Method

Preheat the oven to 350 degrees F.

Peel and core the pears and apples and cut them into large chunks. Place the fruit in a large bowl and toss with the cranberries, zests, juices, granulated sugar, flour, cinnamon, and nutmeg. Pour the mixture into a 8 by 8 by 2-inch baking dish, or distribute it in 4 ramekins of 3/4 cup capacity.

For the topping:

Combine the flour, sugars, salt, oatmeal, and cold butter in the bowl of an electric mixer fitted with a paddle attachment and mix on low speed for 1 to 2 minutes. Or use a fork to mix everything, until the mixture is in large crumbles. Sprinkle evenly over the fruit, covering the fruit completely.

Place the baking dish on a sheet pan and bake for 45 minutes (or longer), until the top is brown and the fruit is bubbly. Let it sit for a few minutes. Serve warm.

A few notes

  • Either the number of servings were out of whack or their serving sizes are humongous. The original recipe was meant for 8 servings, but a fourth of it serves 4 generously. So what the original says would serve 8, could actually serve 16.
  • Since the number of servings were twice of what I expected, I found that the crumble can be frozen by covering tightly with plastic wrap, and then baked straight from the freezer. It will thaw in the oven as it heats up to 350 degrees.
  • As is true of produce in general, good fruits will help to make the final result better, so remember to taste a little of the fruits before using.
  • If making a larger quantity, increase baking time.


Sending this to Raaga for AFAM: Pears.

Wednesday, March 05, 2008

Kharwas, the real thing

A Decadent Treat

'Kharwas' is the marathi name of a sweet steamed pudding made out of milk given by a cow or buffalo within a day after she has calved. Cheek (in Hindi), Junnu (in Telugu), Seem Paal (in Tamil), Geen (in Konkani), Bari (in Gujarati) or anything else you call it, it evokes great nostalgia among those who have had it before but cannot seem to find it now. The same thing sounds very different when referred to as 'bovine colostrum', but that is the name for it nevertheless. Steam cooked in a water bath, it has the consistency of cream caramel or flan without the addition of any external coagulant. There are references to such colustrum puddings and custards being made in Scandinavian countries, Iceland, Ireland, and in the English countryside (where it is sometimes referred to as 'Beestings'), and I wouldn't be surprised if several other cultures have such traditions too.

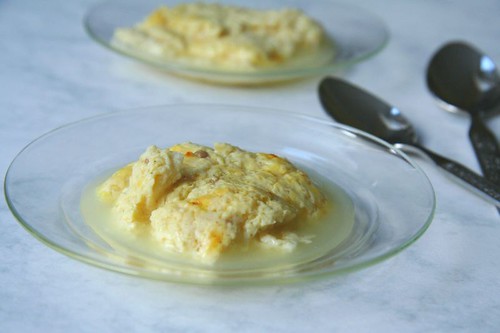
Kharwas: with sugar
Kharwas made with sugar

In lieu of using colostrum milk, there are recipes for puddings made out of things like condensed milk and eggs, flavored with cardamom, made to resemble the texture and flavor of the real thing. These were most likely created by resourceful Indian expats who were yearning for it but were unable to find it. I know I went through a phase when I was looking for it everywhere, and even thought of calling some of the dairy farms a few hours away from where I live. Those who have experienced the real thing and know the joy of it would agree that I wasn't being unreasonable.

More than a year ago I heard that Whole Foods carries colostrum milk, but since I prefer to shop at farmers markets or small stores, I don't go to Whole Foods unless I have to get something very specific from there. On one such trip after ages I ambled over to their dairy section, saw the colostrum milk container and bought it right away. When I paid at the checkout, I muttered under my breath how expensive Whole Foods seems to be getting by the day, but it was only when I read the line items at home that I found out that it was only the colostrum milk that cost a bomb and it wasn't the store that was getting pricier. A pint of colostrum milk cost nearly as much as three gallons of regular milk, to put it in perspective, but I hadn't checked the cost when I bought it. That makes it fairly extravagant compared to standard grocery items, but this is an occasional treat. Besides, I hadn't eaten kharwas in so many years that the price wouldn't have stopped me anyway.

Right away, I got a recipe from my mother, which said to add sugar or jaggery to the milk, some cardamom powder, and then steam it like dhoklas. I faintly recalled that as a child I liked the version with sugar and did not like the one with jaggery, but knowing my taste now I was willing to bet which version I would like better this time. So first I had to test out both versions, and I tried half of the milk with sugar and the other half with jaggery. The outcomes were quite different both in taste and texture. In terms of the texture, the jaggery version was a winner because it was firmer, while the sugar melted and created more water, but also made the result slightly lacey, as can be seen from the photos. As for the taste, no prizes for guessing.

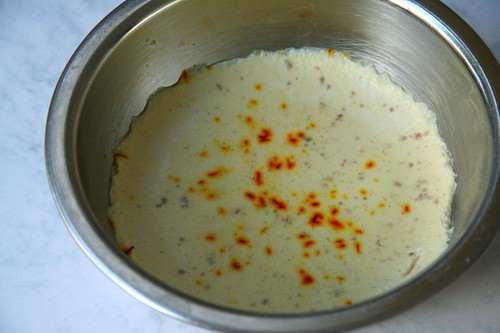
Kharwas: with jaggery
Kharwas made with jaggery

The aspect of humane practices towards animals surfaces in relation to using bovine colostrum for human consumption, but since the product I bought comes from an organic dairy farm that cares about their animals, I feel very confident that they are not selling it only for profit, and whatever they sell is what is leftover after the calves are taken care of.

Kharwas

Serves: 3-4 small dessert sized portions

2 cups bovine colostrum milk
1/2 cup (more or less to taste) grated jaggery, brown sugar, or granulated sugar
2 green cardamom
a few strands of saffron, optional

Dissolve the jaggery in the milk. Remove the seeds of the cardamom and finely powder them in a mortar and pestle. Add the cardamom powder and saffron to the milk.

Pour the milk in a container that will fit in a pressure cooker or other large pan, with enough water in the outer pan for steaming. Cover with a lid and steam for 15-20 minutes. If using a pressure cooker do not put the weight (whistle) on. Let cool completely or chill it in the refrigerator for a few hours before eating.

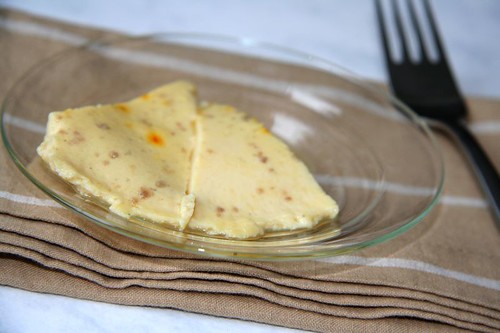
Kharwas: steamed
Kharwas: Steamed and Cooled

Sunday, January 27, 2008

Polenta Kheer

The first time I ever encountered polenta was on a plain jane PBS show one Saturday morning (in the days before Food Network!), and I was so fascinated by it that I had to seek it out. After I found it, I taught myself how to make it just based on the instructions on the back of the packet. Having never cooked with cornmeal of any kind before that and after having read a few onerous articles on the subject, I was concerned about the results, but I was lucky that the brand I started with was a good one, and it never gave me any problems. To be on the safer side I started with the oven method which makes a firmer polenta that can be cut into pieces, but later as I started feeling more comfortable with it I turned to cooking it directly in boiling water, and have never looked back. Even now, I come across writings that make it sound as though cooking polenta is rocket science, whereas it really is very simple.

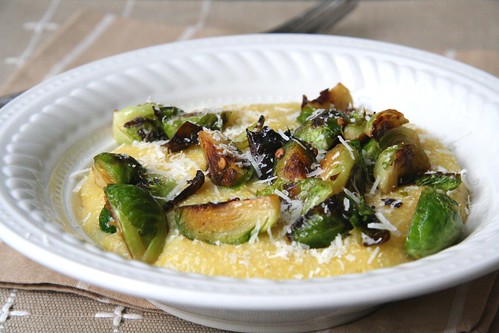
There is something inherently so warming about stirring a pot of polenta over the stove that it has now become a ritual I look forward to every winter, a few times at least. It is also a perfect blank canvas for numerous delicious accompaniments, and there is the comfort of favorite pairings and the joy of discovering some new ones. It is no co-incidence that the best polenta accompaniments are often perfectly suited for the winter season as well, and my current favorites are roasted vegetables, especially root veggies, pan fried brussel sprouts and grated parmesan cheese, and sauteed mushrooms, by themselves, or in a red wine sauce.

Polenta with Brussel Sprouts and Parmesan

Soft, Creamy Polenta

For making basic soft polenta, I start by heating 4 cups of water in a large pot, and when it starts boiling, add about 1 teaspoon of salt, 1-2 tablespoons of butter, and then the polenta, whisking continuously. When it starts to bubble, lower the heat and keep whisking occasionally until the polenta is fully cooked, and starts to become very soft and creamy. For more information, check out this link to the 'The Basics of Polenta Cookery' that covers it all, and even includes several recipes.

Perfectly Round Sliced Polenta

Once polenta is fully cooked and starting to thicken, it can be poured into a flat tray to cool. It will firm up and can be cut into shapes, but here is a tip if you want to eat or serve round slices of polenta but do not like the idea of having to waste all the pieces that would be leftover after cutting out the rounds - after the polenta has completely cooked and is starting to thicken, pour it into straight walled cups or glasses greased on the inside with a little butter. When cooled completely, run a knife around the polenta, and it will come out in one cylindrical piece that you can slice as thick as you like. These slices can be further baked or pan fried, and used with toppings of choice.

Polenta Sliced


Polenta as Dessert

The idea for making polenta kheer just came out of nowhere, but I wouldn't be surprised if some enthusiastic home cook has tried it out already. At home, rawyachi kheer or kheer made out of coarse rawa (rawa in Marathi, sooji in Hindi, semolina in English) was more common than any other type of kheer. It was a simple and quick dessert for any night of the week, when the menu needed a little perk. It is forgiving on the amounts, and so the basic instructions would be to saute a little bit of coarse rawa in a little ghee, add milk, then let it cook for a little while to thicken, and then add sugar. Some cardamom and nuts can be added, time permitting, or it can be left plain. I always liked it at room temperature, or slightly warm.

So once the inspiration struck, I did the same with polenta, and what was most surprising about the end result was that it tasted a lot more like rawa kheer than like polenta.

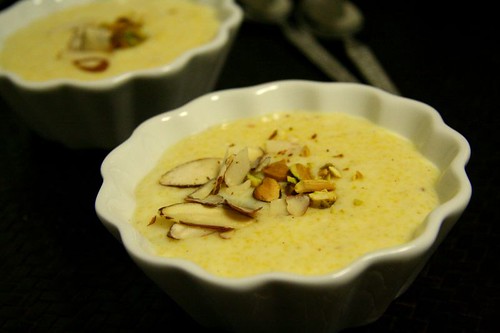
Kheer is really pretty low on my dessert choices, but this is the stuff of childhood memories, and for a mid-week winter dessert that practically gets done on the literal back burner, this is perfect. It is as comforting as a blanket in the chill, and takes as much effort to make for a dozen as it does for one.

Polenta Kheer

The following proportions would make 2 generous portions, or can stretch out to 3 dainty portions.

Ingredients

1 teaspoon ghee
1/4 cup of medium grain polenta
2 cups plus more milk (whole milk would be nice)
2 green cardamom
4-6 Tablespoons sugar (I like about 5)
few strands of saffron
chopped almonds, pistachios or other nuts, about 2 tablespoons (optional)

Method

In a large wide pan, heat the ghee, and as soon as it starts to melt, add the polenta, and stir it around till it gets coated with the ghee. As soon as it starts to smell like it is being roasted (but do not wait until it changes color), add the milk, and start to whisk it using a wire whisk until it comes to a boil. Lower the heat considerably, and then let it simmer until the polenta cooks fully. This took me about 10 minutes, but polentas differ a lot in their coarseness. Stir occasionally to make sure it does not stick to the bottom of the pan.

In the meanwhile, remove the seeds of the cardamom and powder them finely. Chop the nuts and leave them aside.

If the kheer starts to thicken too much, add a little more milk. Add the sugar, and let everything simmer on the low heat for another 5-10 minutes. After you turn off the heat add the cardamom and crumbled saffron, and let it sit with a lid on it, preferably on the still warm stove. Just before serving add the nuts.

Picture of Polenta Kheer is my entry to the Click Event, where this month's theme is 'Liquid Comfort'.

Friday, September 28, 2007

Peach Cobbler

Making the most of the last peaches of the season

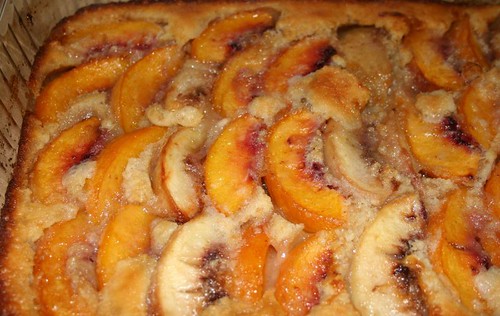
Peach Cobbler: Served

The peach stands were still around the last couple of weeks, and the aroma that wafts out of them was on the decline, but I couldn't resist buying a few good peaches before they stop showing up completely. Wise decision that, because these peaches were really tasty. While the temptation to eat them simply sliced was very strong, so was the pull to try them in a dessert. I especially wanted to try the cobbler that I had made earlier with cherries, to see whether it would work for peaches as well.

Peach Cobbler: Before Baking
Peach Cobbler: Before Baking, Yellow and White Peaches arranged alternately

Having used the recipe before, I made two substitutions, one healthy, and the other decadent. Instead of using all flour, I used quick cooking oats in the mix, and for a classic pairing with peaches, I used Amaretto instead of vanilla extract. The Amaretto vanished considerably upon baking, but the underlying flavor is wonderful, so use it if you have it. I also reduced the amount of sugar further down because the peaches were very sweet.

It all worked just fabulously, and the result was one delicious dessert. Served with ice-cream it is nothing short of bliss. It is going to be on my must-do list every summer from now on!


Peach Cobbler: After Baking

Peach and Amaretto Cobbler

Serves about 8-10 for dessert

Ingredients

3 firm ripe peaches (or enough to yield 2 cups when sliced)
1/2 cup butter

3 Tablespoons white sugar
1 Tablespoon all-purpose flour

3/4 cup all-purpose flour
1/4 cup quick cooking oats (or all-purpose flour)
3/4 cup - 1 cup white sugar (depending on how sweet the fruit is)
1 teaspoon baking powder
1 cup milk
1 Tablespoon Amaretto

Method

Bring water to a boil in a saucepan. Blanch the peaches for 1 minute and remove with a slotted spoon. Peel the peaches when cool enough to handle, and slice evenly.

Preheat the oven to 350 degrees F (175 degrees C). Place the butter in a 9x13 inch baking dish, and place in the oven to melt while the oven is preheating. Remove as soon as butter has melted, about 5 minutes.

In a medium bowl, toss the sliced peaches with the 3 Tablespoons of sugar and 1 tablespoon of flour.

In a medium bowl, stir together the rest of the flour, oats, sugar, and baking powder. Add the milk and Amaretto and whisk until well blended, then pour the batter into the pan over the butter. Do not stir.

Distribute the sliced peaches evenly over the batter.

Bake for about 45 minutes in the preheated oven, until golden brown. A toothpick inserted into the cobber should come out clean.

Buttery notes

This dessert is utterly butterly delicious, but I think it could do with a little less butter. My guess is that 6 Tablespoons would be good if the amount of sugar is being reduced as well, otherwise, keep it at 7 Tablespoons.

Peach Cobbler: Served

Wednesday, September 05, 2007

Sweet Coconut Rice

Living as an expat one realizes that festivals seem like festivals only because of the people and the surrounding atmosphere. In fact in the USofA, where I live, festivals are not even called as such, but are called holidays, and what we knew as holidays are strictly vacations.

Last week for example was raksha bandhan, which coincides with the nAraLI pournimA, which is celebrated along the coast of Maharashtra, but one wouldn't have known that by looking around. For the last several years, it has been just another day on the calendar for me, but this year things were different because of the presence of a brother and sister in the house. So naturally there was the rakhi ceremony, but the other visible sign was the traditional nAraLI bhAt or sweet coconut rice that is usually made on this day. Technically, this year nAraLI pournimA was a day before rakha bandhan as per the Hindu calendar, but that did not stop us from celebrating the tradition.

Based on the reactions of some people who were not familiar with this dish, I suspect that it could be an acquired taste. Well, more for me, because I thought it was just lovely and wondered why I hadn't ever made it before. If one likes rice, jaggery, and coconut, one is bound to like it.

I made it based on the recipe from the Marathi cookbook Ruchira, but have added more details and quantities here than in the original. There was also no saffron in the recipe, but I added some for luxury.

nAraLI bhAt
Sweet Coconut Rice


Sweet Coconut Rice

Serves 6-8 for dessert

Ingredients

2 Tablespoons milk
a pinch of saffron strands

1-1/2 cups rice
4 Tablespoons ghee
5-7 cloves
5-6 green cardamom pods
2 cups freshly shredded coconut
2 cups jaggery (not tightly packed)
2-3 T golden raisins
a few Tablespoons sliced almonds

Method

Heat the milk just enough to warm it, crumble in strands of saffron into it, and leave aside.

Wash the rice and leave it to soak in water for 30 minutes to an hour, and drain the water when ready to cook. Heat the ghee in a large saucepan, add the cloves, and then the rice, and stir it around till the rice is coated with the ghee. Add 3 cups of water, bring it to a boil. The turn the heat to medium, place a lid partially on top, and let the rice cook for about 10-15 minutes. Since it has been presoaked, it will take less than usual to cook.

In the meanwhile, peel the cardamom and powder the seeds in a mortar and pestle.

Take the jaggery and coconut in a large wok or kadhai, and cook it together on medium heat until the jaggery has melted. This will take about 10 minutes. Add the cooked rice to it and mix it together along with the cardamom, saffron, golden raisins, and almonds.

Saturday, August 18, 2007

The Power of Sugar

Sweet!

It is time to celebrate, as Manisha of Indian Food Rocks, sent me this pretty pink 'Rockin' Girl Blogger' award, which is easily my first award in the world of blogging. Even though it would take a good stretch of the imagination to call me a girl anymore, I love it. I also really don't see myself so much as a blogger as much as someone who has a blog - is there a subtle difference? I still love it. Thanks, Manisha.

rockinggirlblogger

In the tradition of passing on the awards, I started making a list of people I would have liked to send it on to, and the list kept growing, so I pared it down a lot.

Even though both my favorite food blogs incidentally also have some guy power associated with them, this is specially for the women, Melissa of The Travelers Lunchbox and Nicky of Delicious Days.

With so much professional acclaim and press to their credit, I am a complete nobody to give them an award, but this is a token of my appreciation for the huge inspiration that they were to me, and for all the things I am continuously learning from their sites. So I am sending it over to them anyway.

This was also a perfect chance to sing their praises. Detailed crisp writing and the dreamy photographs are what drew me to 'The Travelers Lunchbox', and have kept me there, making me come back, again and again.

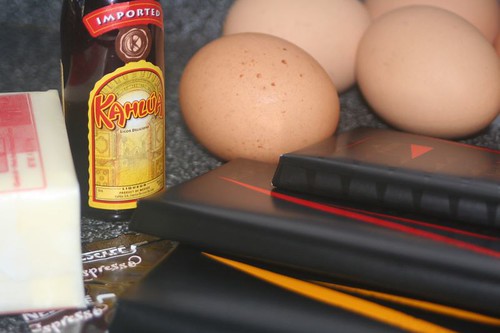
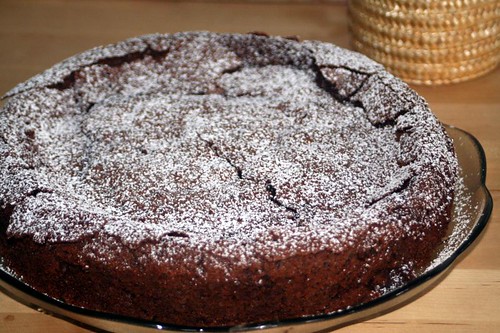
To add to all of this, her recipes are excellent. Like this flourless chocolate cake that I made for a potluck dinner that a friend had hosted. Luscious.

'mise en place' for Flourless chocolate cake

Flourless chocolate cake

Her Avocado Milkshake (you read that right) and Pesto Rosso are amazingly good too.

With Nicky's blog, first those photographs hooked me, but once I started reading her posts, it was her attempts to recreate German classics, including those from her grandma's kitchen, that struck a chord with me, as it resonated to a great extent to the way I sometimes try to reach out to my roots via food. From her site, I chose these Sponge Cake Rolls, that I made half with strawberry jam and half with an Alfonso mango jam.

Jam Rolls, still unrolled

Jam Rolls, just rolled and cut

Jam Rolls, finished

If you are not already lost in their site, I recommend this Bircher Müesli too.

Last but not least, I want to pass it to desiknitter, who doesn't yack about food like me, but instead knits knits knits and keeps a lively blog full of interesting episodes in her life. Although, sometimes she slips, and talks about food too. Try that raw mango chutney, it's the best.

kairichi chatni
Related Posts Plugin for WordPress, Blogger...