Wednesday, April 30, 2008

Roasted Asparagus and Baby Potatoes

A post waiting since early spring, but better late than never

When nature provides most of the flavor, all you need at the most is a little salt and pepper, and a perfect example of that is asparagus in springtime. A drizzle of olive oil clinches it further. Asparagus can be cooked in many different ways like lightly blanched, steamed, or sauteed, but my favorite method is roasting. And while roasted asparagus is wonderful on its own, there is something even better about pairing it with small or new potatoes.

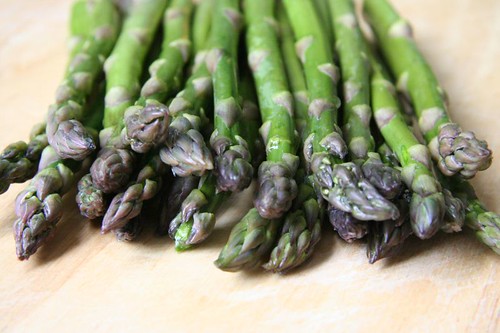
Asparagus: straight from the market

Seriously good eating with a minimalist approach, this is one of my favorite things to make right after I return from the farmers market on weekends in spring for a meal that doesn't require too much effort.

I start the potatoes first because they take longer to cook, and while I put away the purchases and trim the asparagus to remove the lower woody end, it is usually about time to send those in to the oven for their sojourn. Once those are in, I start working on the rest of the meal. That could be soft scrambled or poached eggs with toast, or capellini, which cooks pretty quickly, tossed with some pesto and grated parmesan. The latter is especially wonderful in early summer, when basil starts to come along and we are not yet spring-ed out on asparagus. Sometimes, just soft polenta works beautifully too. So many easy combinations, none of which demand much precision.

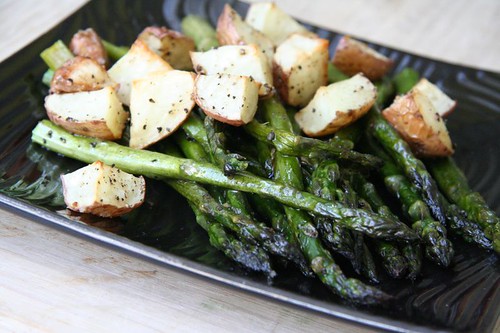
Asparagus and new potatoes: roasted

I realized after viewing the pictures that the plate should have been flipped since the light was coming in from the left, which would have highlighted the asparagus and the potatoes would have reflected less light. Always learning.

Roasted New Potatoes, Asparagus

Ingredients

new potatoes
a bunch of asparagus
coarse salt
black pepper, coarsely ground from the peppermill
a couple of tablespoons of olive oil

Method

Preheat oven to 375 degrees. If you are making a larger batch, then up it to 400 degrees.

Wash and clean the potatoes. If the potatoes are tiny, use them whole. If slightly larger, then halved, and if even larger, then quartered. You get the point. Rub them with olive oil, season with coarse salt and pepper, and place them skin side down on one side of a roasting pan or baking sheet.

After 20-25 minutes, repeat the oil, salt, and pepper for the asparagus, add them next to the potatoes, and continue baking for another 15-20 minutes depending on the thickness of the asparagus. For the ultra slim variety 10 minutes is enough. Roll them around once mid-way. Keep an eye on the roasting pan and adjust baking time accordingly. Ideally, but not necessarily, the potatoes and asparagus would be ready at the same time.

Friday, April 25, 2008

Stock up on dental floss

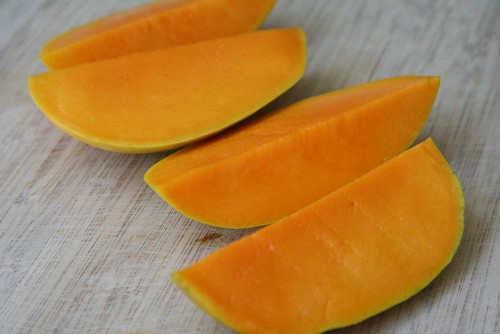
Alphonso/Haapoos: Finally in the US

The Alphonsos, also called Haapoos, are here for real this year. Not a patch on what we had back in the days in India, but some consolation. Enough said.

Click: Au Naturel

Tuesday, April 15, 2008

Come say 'Hello'

At a different kind of milestone

A few months ago, I completed a year of my blog, and many of you wished me then. However, there is another day that is also very important to me, and that is the day when the blog really became public, because Manisha announced and endorsed it on her very popular blog. Until then, I was writing in my own little corner. A few friends who knew about it perhaps read it, but after that day, I was out there for the world to see. I got new readers, some of whom stop by regularly, made some new friends, and found out about many fascinating blogs, but I also suspect that there are some people who might be reading along, but have stayed silent so far for whatever reason. I do that too. So, on this day, I offer you the chance to delurk. Treat this as an open house, and come stop by. If you prefer to stay anonymous, tell me something about yourself. Or not, of course.

Since the post that Manisha linked to was a take on sabudana khichadi, I thought it was only fitting that this post should be about the classic, authentic sabudana khichadi, the real deal. It is truly one of my favorites, but the main thing about getting it right is the quality of sabudana, and how much water it absorbs. I even had one batch that practically turned to powder the minute I added water to it. Ever since, I have been mostly getting sabudana from our regular grocer in India, for the last few years. It sounds like a stretch, but then, on an average, I make sabudana khichadi only a few times in a year, and I want it be as perfect as it can be.

To test the quality, wash about a teaspoon of sabudana, and let it soak in a very small bowl, with just enough water for it to absorb. Cover, and let it sit for a few hours. Then separate the grains and press one of them gently to check. It should be soft and swollen, there should be no leftover water, and minimal powdery stuff. If not, you can use the batch to make sabudana wadas, thalipeeth, kheer, dahi sabudana, or something like that, which can be a lot more forgiving. With these parameters at hand, go ahead and soak a larger batch. Rinse the grains once, and then add just enough water to cover the grains, and not any more.

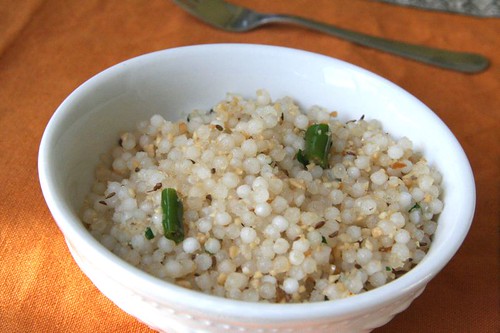
Sabudana Khichadi

Sabudana Khichadi

Ingredients

1 cup sabudana, soaked for several hours (or overnight) in minimal amount of water
1/2 cup of peanuts, coarsely powdered in a food processor
2 Tablespoons of grated coconut (optional)
salt to taste
1/2 teaspoon sugar
2-3 Tablespoons ghee
1 teaspoon of cumin seeds
2-4 small green chilies
1 small boiled potato (optional)
4 stalks of cilantro, finely chopped (optional)

Method

In a wide bowl, separate the sabudana gently with fork or finger. If there is too much powdery residue, shake off the sabudana in a sieve, and pour it back into the bowl. Add the peanuts, coconut, salt and sugar to the sabudana, and mix evenly.

Chop the chilies, about 1/2 inch wide. If using the potato, chop it into small pieces.

In a large and wide pan, heat the ghee, and add the cumin seeds. When they start to sizzle, add the chilies and stir for a few seconds. Add the potato and stir it around till it gets coated with ghee. Add the sabudana mix, and stir together until the grains get coated too. Keep stirring occasionally for about 10-15 minutes on medium high heat, until the sabudana is well cooked. The stirring is necessary to make sure that the grains do no clump together. If needed, you can add a little more ghee. When completely done, add in the cilantro. Best eaten right away.

Tuesday, April 08, 2008

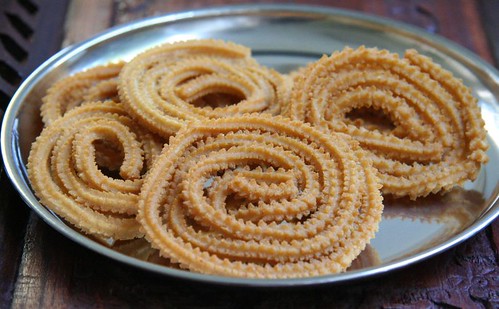
Chaklis, the first attempt

Chaklis, the ultimate snack

Ingredients

chakli bhaazani
water
red chili powder, hing, salt
oil


Method

Visit the person who you think makes the best chaklis in the whole wide world, during Diwali. Eat chaklis, and start asking questions. Whip out small diary from bag as they talk, and take notes.

Steer the conversation gently until they offer you some of their freshly ground chakli bhaazani. They love you anyway, so that won't be too difficult. In addition, they might also give you their thalipeeth bhaazani, which is not a bad thing at all.

Return home, put the packet in the freezer. After a few months you will hear from them and they will ask whether you got around to making chaklis. Be shameful that you haven't. Put it on a priority list. Wait for a day when the weather is cool but not damp.

Take out the sorya (chakli press) that has been lying unused for a couple of years. Whip out diary again, and follow instructions for making chaklis. Within twenty minutes, gorgeous looking chaklis will be coming out of the frying oil. Go against most instructions and don't wait until they are cool because that is impossible. Check each chakli for optimum crispness. Wonder why some are slightly softer than others. Jump joyously at the ones that have just the right crispness and color. Suddenly remember that pictures of the beauties have to be taken.

Feel confident about a second attempt.

Thursday, April 03, 2008

Green Tomato Rassa

hirvyaa tomatochi bhaaji

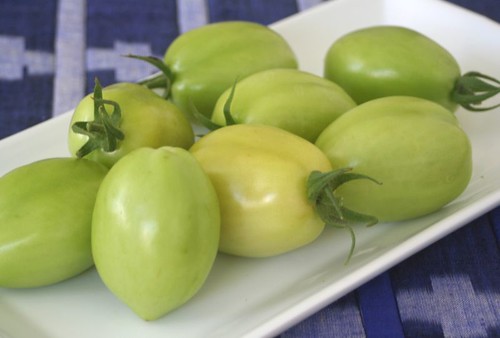
Green tomatoes are something I have not seen in supermarkets here, and only rarely in farmers markets, so the only time I have had access to a lot of green tomatoes was when I had planted tomatoes one year and got a bumper crop all throughout summer. While I let most of the tomatoes ripen on the vines, occasionally some of the green ones fell to the ground, and once, an entire branch full of them fell down because of the weight.

Green Tomatoes

Red ripe tomatoes have started showing up at our markets in the last couple of weeks, and one of the farmers even had a small basket of green tomatoes. I grabbed a bunch right away. I didn't even have to think about what I would do with them - it had to be the green tomato rassa style bhaji that was one of my absolute favorites while growing up. Whenever it was made at home, I ate more than usual.

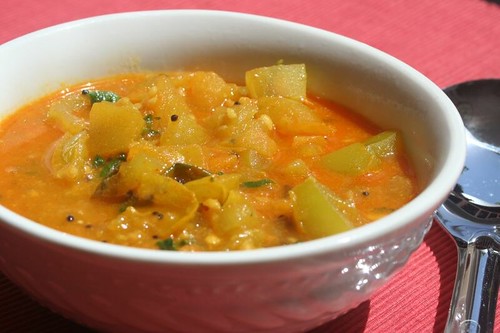
I always use my mother's recipe for this, but naturally, when I make it, it only comes close, and doesn't taste exactly the same. This simple homey side dish is best served with good polis, or thin soft rotis, brushed with a touch of ghee if you like.

Green Tomato Rassa bhaji

Green Tomato Rassa Bhaji

Ingredients

6 medium sized green tomatoes
1-2 Tablespoons oil
1/2 teaspoon mustard seeds
pinch of asafoetida (hing)
1/2 teaspoon turmeric
3/4 teaspoon chili powder (or to taste)
3/4 teaspoon salt (or to taste)
1 teaspoon sugar or jaggery
1 teaspoon goda masala
1 Tablespoon crushed peanuts
1 Tablespoon freshly grated coconut (optional)
2-4 Tablespoons chopped cilantro


Method

Core the tomatoes and chop them into roughly 1 inch sized pieces.

Heat the oil in a saucepan and add mustard seeds. When the seeds start to pop, reduce the heat, add the asafoetida and turmeric. Add the tomatoes, and stir around for a minute or two. Add chili powder and salt. Bring the heat back up, add about a cup (or more as required) of water, and when it comes to a boil, turn the heat down again, and let it simmer until the tomatoes are well cooked and soft but not falling apart. You can place a lid on it, partially, to speed up the cooking.

Since this is a rassa style bhaji, a fair amount of gravy is desirable, which means you can add more water if it gets too thick or too dry.

Finally, add the rest of the ingredients, and let it cook for just a few minutes more until the rassa starts to thicken. After the heat is turned off, let it sit for a few more minutes before serving. This really helps all the flavors to come together.

Variations

Curry leaves can be added just before the tomatoes are added. This wasn't in the original family recipe, but I love the flavor it adds.

Coconut is optional, I usually don't add it.

Friday, March 28, 2008

An Aloo Tikki Factory

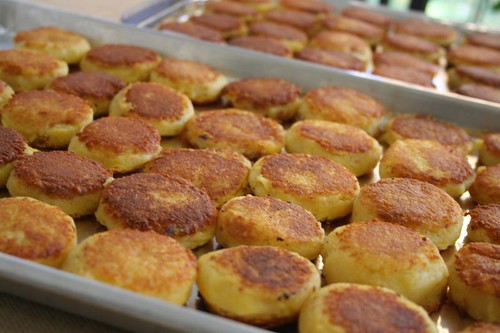
Potato Patties: Closeup

Good friends shouldn't need much of an excuse to get together, but with busy lives and global schedules it can get really difficult to get a bunch of people to meet for even one meal. I am referring to some old friends of mine - whenever we meet, we have such a fabulous time we wonder why we don't all get together more often, and then part with promises to meet soon, but before we know it another year has passed, or two.

Recently, when one of them decided to leave the land, it was a compelling reason for all to meet, as it would be our last chance to see the family for a while. Someone offered to host, and the planning for a spontaneous last minute potluck began, which meant quick decisions and even quicker work. The yeses and the nos, the headcount, and of course the menu.

The host wanted grazing dishes, rather than the usual fare, so I offered the first thing that came to mind - potato patties, if someone could make ragda, so we could have ragda pattice. One friend immediately opted for it (got to love friends like these!).

Making these potato patties seemed simple, but it can become fairly laborious and time consuming when one has to make almost 5 dozen of them. Unlike aloo tikkis, the potato patties that are served with ragda don't need to be deep fried, and they are crisped on the skillet with only a little oil. So, strictly speaking, these potato patties used in ragda pattice were not aloo tikkis, but that just gives the title a much better ring.

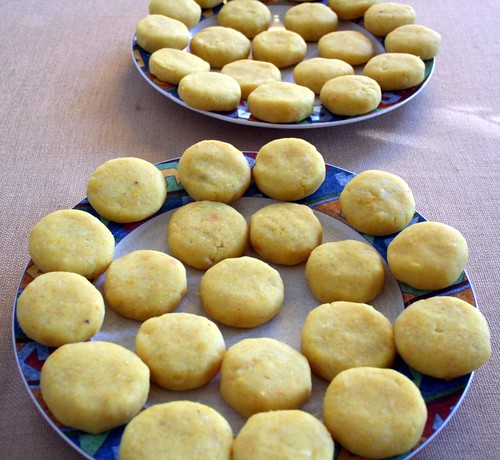
Potato Patties: before frying

I boiled a dozen large russet potatoes in the pressure cooker. When cool enough to be handled, these were peeled, and roughly mashed in a large bowl, and seasoned with about 1/4th teaspoon turmeric, about 1 teaspoon red chili powder, and plenty of salt. To this mix, I added about 8 crumbled slices of good white bread, (the crusts were removed, left to dry in the fridge, and ground up later to make bread crumbs, but that is another story), and adjusted the seasoning.

Potato Patties: the batch

Then, the life saver came into play. To get the potatoes mashed up really smooth, I put the whole mixture through a potato ricer, creating a dough like consistency which could be formed into patties. These were shallow fried on a large skillet, on medium heat, for a few minutes on each side to get them evenly brown and crisp. Placed on large trays, these were ready to be taken to the party.

Cool Tool: Potato Ricer

I had bought the ricer originally to make gnocchi, which I have yet to get around to make, but besides the patties, I have used it a few times to mash potatoes for alu parathas. The potatoes turn out really smooth, with no sticky bumps while rolling out the parathas.

Potato Ricer

Cool Tool: The picture of this nifty gadget goes to Click: Metal.

Monday, March 17, 2008

Pear, Apple and Cranberry Crisp

I was playing with the remote to see if anything interesting is going on when I found Barefoot Contessa. I stopped to watch a little, and then it happened again, and again, and eventually I really started enjoying the show. It helped that it came on at a time that was convenient for me.

It was easy to like Ina Garten. She is sophisticated and smart, and unlike many wannabe food stars, she has years in her stride, and a good deal of experience to boot. And when she talks, she sounds very convincing.

There are lots of things I like about her show. She cooks in her own kitchen, uses her own cookware, and serves the food in her own dishes, to her real friends. Sometimes her husband Jeffrey, who is quite charming and funny, appears on the show too. Wiki him to find out more, you might be surprised. She often has a few minutes dedicated to 'setting' the table and 'doing' the flowers, which is so not my thing, but I find it enjoyable anyway. She clearly also has a good team of photographers on her side, who make everything on her show look fabulous.

Sometimes I find it amusing that she thinks nothing of rolling out pastry crusts and piping meringues but uses canned tomatoes because life is too short to peel tomatoes. And if I ever met her, we could argue endlessly, amicably, over cilantro and parsley. But ultimately, even with her hoity toity Hampton ways, Ina seems accessible, and very American, including in her admiration of all things French.

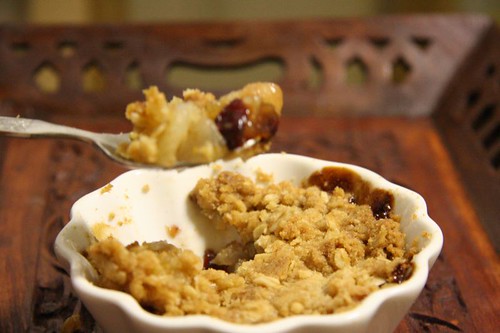
Apple Pears Cranberry Crisps: Dig inNow on to her recipes. It is probably because of her background in the food business and catering that she always seems to make huge quantities of food, and one reason that held me back from trying anything was the serious scaling down of quantities that I would need to do. So even though I took ideas and inspirations from her shows, I had not followed any particular recipe of hers. That changed after I made the Pear, Apple and Cranberry Crisp that I had been eyeing this apple season. It has a long ingredient list, but when I recently happened to have each and every of the things on hand, I had to make these. On the show, she made individual ones in ramekins, so I did that too. The crisps were deliciously blog-worthy - with a crisp caramelly top giving way to the filling that was bursting with the sweetness of apples and pears and the heady scent of orange zest. Such a lovely, wintry (or fall-y) dessert to savor slowly after dinner.

Even the hint of cinnamon was wonderful. This comes from someone who is not overly fond of cinnamon in desserts. In fact I was highly tempted to use cardamom or vanilla, but I thought I'll stick to the original this time, and was amply rewarded. I was also tempted to reduce the amount of butter, and so I started with only two tablespoons, but the mixture finally came together only when the entire quantity was added. The recipe takes a bit of work, but not skill, and to borrow from Ina, the good news is, that it can be done in advance.

This could be eaten with ice-cream or whipped cream, but it was glorious on its own too. Here is the scaled down and adapted recipe.

Pear, Apple and Cranberry Crisp

Apple Pears Cranberry Crisps: Top View

Ingredients

1 pear
1-1/2 apples (or 2 small apples)
3 Tablespoons dried cranberries
1/4 teaspoon grated orange zest
1/4 teaspoon grated lemon zest
1/2 tablespoons freshly squeezed orange juice
1/2 tablespoons freshly squeezed lemon juice
1-1/2 Tablespoons granulated sugar
1 Tablespoons all-purpose flour
1/4 teaspoon ground cinnamon
1/8 teaspoon ground nutmeg

For the topping:
3/8 cups all-purpose flour
3 Tablespoons granulated sugar
3 Tablespoons light brown sugar, lightly packed
1/8 teaspoon kosher salt (or regular salt)
1/4 cup old-fashioned oats (not quick cooking)
1/2 stick (4 Tablespoons) cold unsalted butter, diced

Method

Preheat the oven to 350 degrees F.

Peel and core the pears and apples and cut them into large chunks. Place the fruit in a large bowl and toss with the cranberries, zests, juices, granulated sugar, flour, cinnamon, and nutmeg. Pour the mixture into a 8 by 8 by 2-inch baking dish, or distribute it in 4 ramekins of 3/4 cup capacity.

For the topping:

Combine the flour, sugars, salt, oatmeal, and cold butter in the bowl of an electric mixer fitted with a paddle attachment and mix on low speed for 1 to 2 minutes. Or use a fork to mix everything, until the mixture is in large crumbles. Sprinkle evenly over the fruit, covering the fruit completely.

Place the baking dish on a sheet pan and bake for 45 minutes (or longer), until the top is brown and the fruit is bubbly. Let it sit for a few minutes. Serve warm.

A few notes

  • Either the number of servings were out of whack or their serving sizes are humongous. The original recipe was meant for 8 servings, but a fourth of it serves 4 generously. So what the original says would serve 8, could actually serve 16.
  • Since the number of servings were twice of what I expected, I found that the crumble can be frozen by covering tightly with plastic wrap, and then baked straight from the freezer. It will thaw in the oven as it heats up to 350 degrees.
  • As is true of produce in general, good fruits will help to make the final result better, so remember to taste a little of the fruits before using.
  • If making a larger quantity, increase baking time.


Sending this to Raaga for AFAM: Pears.

Monday, March 10, 2008

Five-Lentils Panchmel Dal

Casting a critical eye over my blog I find that it severely lacks one of the most basic everyday fare that I make on a regular basis regardless of season, and one that has endless combinations. I even knew the reason for that, and have known it for a long time now.

The food I am talking about is 'dal', and the reason is that dals have been the most challenging to photograph for me. No matter what I do, they all end up looking almost the same after they are cooked - just a big yellow something in a bowl, which makes it rather difficult to convey some of the amazing nuances of flavor that each dal has, despite all of them looking alike.

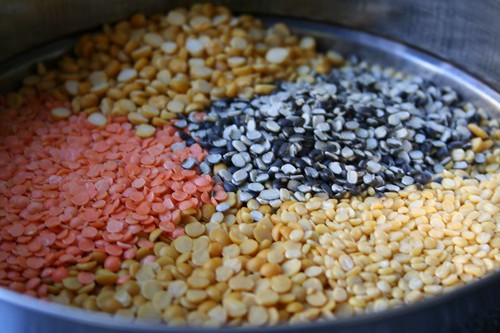
Panchmel Dal: the five dals
The beautiful colors of the five dals, very photogenic before cooking.

I am not a fan of styling food just for the purpose of taking photographs, even though I admire those who can do it well. I prefer to take pictures of food as it is meant to be served or eaten. The drawback is that this isn't the best way to showcase the food, and after all, exhibiting food in all its glory is one of the objectives of a food blog. One of the lessons here is that looks are not the best judge of taste.

Undaunted, I am going to post about dals anyway, because I know I have waited too long to post some things just because I did not have a good picture to accompany. They might all look similar, but each one will have a strong character, a distinctive taste, and a lot more than what meets the eye.

This particular dal is one of my favorites, and yet I make it only once in a while, when I want a change from the usual dals. Panch means five, and hence the name, which approximately means 'five together'. The added flavors to this dal are simple, but its unique taste comes from the combination of dals, which is different from either of them cooked individually. There is also a barely noticeable variation in textures of each dal, which is interesting. Along with a good drizzle of fresh ghee at the end, and white rice to accompany, this is excellent comfort food that doesn't need anything else alongside.

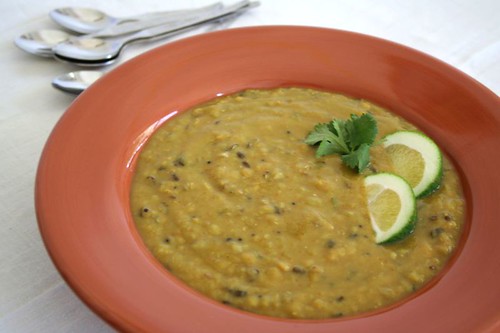
Panchmel Dal: 5 bean dal

Minor styling with wedges of lime, which are not usually tucked into the dal, but served alongside to be squeezed over the dal. The sprig of cilantro is chopped fine and scattered into the dal, optionally.

panchmeL DAL

Number of servings can vary a lot, from 4-8 depending on whether the dal is eaten as a main dish with rice or whether it is a part of a meal with other dishes.

Ingredients

1/4th cup each of toor dal, masoor dal, moong dal, chana dal, and split urad dal
1/4th teaspoon turmeric

2 Tablespoons oil
big pinch of mustard seeds
pinch of asafoetida
1/2 teaspoon turmeric
1/2 teaspoon cumin seeds
1 teaspoon chili powder (or to taste)
1 teaspoon cumin powder
1 teaspoon coriander powder
2 Tablespoons jaggery
2-4 tablespoons chopped cilantro
1/4th lime, plus extra wedges

Method

Rinse and drain the dals together a few times until the water runs clear. Cook all the dals together with 1/4th teaspoon turmeric in 5 cups of water. I use a pressure cooker with my usual 3-whistle regulation. Let the pressure drop.

Stir the dals together with a whisk, and add salt to taste. Add more water if needed to make sure it is of a pouring consistency.

Heat the oil a large and wide saucepan, and add the mustard seeds. When they start to pop, add the asafoetida, turmeric, cumin seeds and the rest of the spices. Stir quickly, add the dal, and bring it to a gentle boil. Stir in jaggery until it dissolves. Add chopped cilantro and squeeze the lime on top just before serving.

Variations

Some of the variations I have tried are adding curry leaves, or a little bit of finely chopped onion, and using tamarind or lemon instead of lime. Somehow, I like the tartness of lime better in this case.

Wednesday, March 05, 2008

Kharwas, the real thing

A Decadent Treat

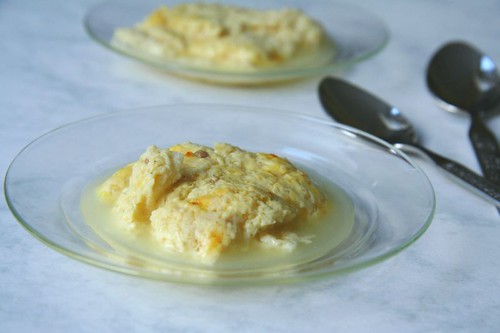
'Kharwas' is the marathi name of a sweet steamed pudding made out of milk given by a cow or buffalo within a day after she has calved. Cheek (in Hindi), Junnu (in Telugu), Seem Paal (in Tamil), Geen (in Konkani), Bari (in Gujarati) or anything else you call it, it evokes great nostalgia among those who have had it before but cannot seem to find it now. The same thing sounds very different when referred to as 'bovine colostrum', but that is the name for it nevertheless. Steam cooked in a water bath, it has the consistency of cream caramel or flan without the addition of any external coagulant. There are references to such colustrum puddings and custards being made in Scandinavian countries, Iceland, Ireland, and in the English countryside (where it is sometimes referred to as 'Beestings'), and I wouldn't be surprised if several other cultures have such traditions too.

Kharwas: with sugar
Kharwas made with sugar

In lieu of using colostrum milk, there are recipes for puddings made out of things like condensed milk and eggs, flavored with cardamom, made to resemble the texture and flavor of the real thing. These were most likely created by resourceful Indian expats who were yearning for it but were unable to find it. I know I went through a phase when I was looking for it everywhere, and even thought of calling some of the dairy farms a few hours away from where I live. Those who have experienced the real thing and know the joy of it would agree that I wasn't being unreasonable.

More than a year ago I heard that Whole Foods carries colostrum milk, but since I prefer to shop at farmers markets or small stores, I don't go to Whole Foods unless I have to get something very specific from there. On one such trip after ages I ambled over to their dairy section, saw the colostrum milk container and bought it right away. When I paid at the checkout, I muttered under my breath how expensive Whole Foods seems to be getting by the day, but it was only when I read the line items at home that I found out that it was only the colostrum milk that cost a bomb and it wasn't the store that was getting pricier. A pint of colostrum milk cost nearly as much as three gallons of regular milk, to put it in perspective, but I hadn't checked the cost when I bought it. That makes it fairly extravagant compared to standard grocery items, but this is an occasional treat. Besides, I hadn't eaten kharwas in so many years that the price wouldn't have stopped me anyway.

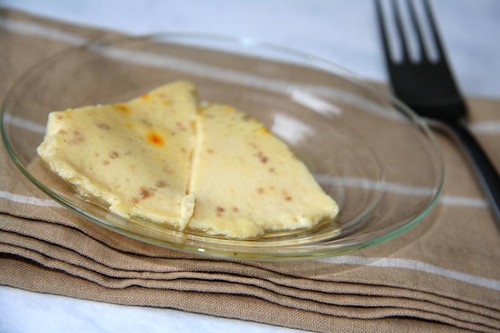
Right away, I got a recipe from my mother, which said to add sugar or jaggery to the milk, some cardamom powder, and then steam it like dhoklas. I faintly recalled that as a child I liked the version with sugar and did not like the one with jaggery, but knowing my taste now I was willing to bet which version I would like better this time. So first I had to test out both versions, and I tried half of the milk with sugar and the other half with jaggery. The outcomes were quite different both in taste and texture. In terms of the texture, the jaggery version was a winner because it was firmer, while the sugar melted and created more water, but also made the result slightly lacey, as can be seen from the photos. As for the taste, no prizes for guessing.

Kharwas: with jaggery
Kharwas made with jaggery

The aspect of humane practices towards animals surfaces in relation to using bovine colostrum for human consumption, but since the product I bought comes from an organic dairy farm that cares about their animals, I feel very confident that they are not selling it only for profit, and whatever they sell is what is leftover after the calves are taken care of.

Kharwas

Serves: 3-4 small dessert sized portions

2 cups bovine colostrum milk
1/2 cup (more or less to taste) grated jaggery, brown sugar, or granulated sugar
2 green cardamom
a few strands of saffron, optional

Dissolve the jaggery in the milk. Remove the seeds of the cardamom and finely powder them in a mortar and pestle. Add the cardamom powder and saffron to the milk.

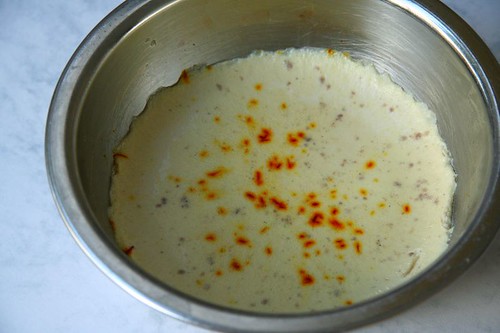
Pour the milk in a container that will fit in a pressure cooker or other large pan, with enough water in the outer pan for steaming. Cover with a lid and steam for 15-20 minutes. If using a pressure cooker do not put the weight (whistle) on. Let cool completely or chill it in the refrigerator for a few hours before eating.

Kharwas: steamed
Kharwas: Steamed and Cooled

Monday, March 03, 2008

Watermelon Radish Parathas

mooli ke parathe

There were exactly three types of parathas made in our home - alu, methi, and gobi. If there had been any other types, then clearly I have forgotten. In contrast, I have been quite a rebel adventurer. Spinach, cabbage, paneer, beets, pumpkin, cheese, broccoli, peas, dals, mint, chutneys, molagaipodi, even leftover sabjees, have all had played a part in my parathas at some time or the other, with varied results. At this, Musical might just yawn and say, "So what? We make parathas with almost anything". Of course she does, but considering what I grew up with, this is quite a repertoire.

Stuffed Radish Parathas

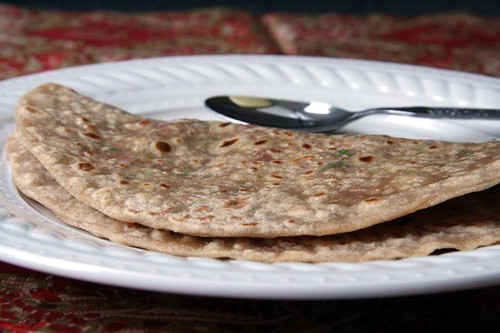
A paratha related mini-obsession started recently when a friend was visiting our area during Christmas break last year. We met for lunch at a basic, almost divey, Indian restaurant where we could eat good food, and talk for a long time without being bothered. The meal included giant parathas - I had gobi and she had mooli, and of course we tasted both. I liked the gobi, but the mooli one with a generous filling of spiced radishes was so good that I wished that I had ordered that one instead.

Very soon I was hankering for it at home, and wanted to give it a try. It was further fueled when my friend and I reminisced about the parathas we had. I used to make mooli parathas years ago, but because I found it difficult to make the stuffed ones, (this was just for mooli, not other types of parathas) I used to go the lazy route and mix in grated daikon radish with flour and spices to make the dough for the parathas. In fact this was many times a quick weeknight dinner that didn't need much planning if there was a white radish in the fridge. Somewhere along the way, I stopped making these and had even forgotten about them, but after tasting the wonderful stuffed parathas at the restaurant I realized how much better they tasted, with the filling sandwiched between the dough, giving you a little crust and a little taste of the vegetable in each bite. Soon I was on a mission to find out how to get the stuffed ones right. Once again, I tried to roll them out by filling the radish mixture into a ball of dough but the shreds kept leaking out and making a mess on the board. A big salaam to those who are able to roll those out, but I have just not been able to do that well. That is when Musical's "two layered parathas" really came to the rescue by working as perfectly as she describes. So a big Thank You, Musical!

For my paratha experiments, I used watermelon radishes (see note at end) just because I happened to have a bunch of them, an added bonus of which is that the filling looks very pretty when the parathas is torn off. One can use any kind of radish, larger ones being better because they are easier to grate.

There are all kinds of recipes for the filling, with additions ranging from turmeric to grated onion, so I decided to try out a few. In the first batch I tried Musical's combination of garam masala and red chili powder, and in the second batch I used Saffronhut's combination of ginger, green chilies and cilantro. I preferred the heat of red chili powder over that of green chilies, but I enjoyed the flavor of ginger. I am neutral about the cilantro as it did not seem to add much but wasn't bad. What I have given below is what I tried in the third batch, and liked a lot, but I might try other versions in the future. Ultimately, there is not one right thing, so experiment, have fun, and let your taste buds and mood decide. Do you have a favorite combination that you would like to share?

In a paradoxical way, while on one hand this is free form cooking at its best, it needs lots of practice to get it just right.

Mooli Paratha: the making of

Stuffed Radish Parathas / Mooli Parathas

Ingredients

1-1/2 cups grated radish, not tightly packed
salt to taste
3/4 teaspoon red chili powder to taste
1/4 teaspoon mild garam masala
1 teaspoon finely grated ginger
2 cups atta
salt to taste
a little oil for the dough
oil or ghee for the parathas

Method

Place the grated radishes in a sieve or colander over a bowl, and add salt to it. Let it sit for about 30 minutes. The salt will draw out moisture from the radishes. Squeeze the radishes by hand, and collect the squeezed water in the bowl.

Use this water to knead the dough using flour and salt, adding more regular water as required. When the dough is kneaded smooth smear the ball of dough with a touch of oil. Divide the dough into 8 pieces of equal size.

Mix the grated radish with red chili powder, garam masala and grated ginger.

Start heating a tava.

Roll out one of the pieces of dough to about 6 inches round and keep it on a plate. Roll out another piece to about the same size. Spread about a fourth of the filling on it, leaving a small edge all around. Top with the previously rolled out roti, gently press the edges together, and roll lightly with the rolling pin just a little more until the 3 layers are held together. Put the paratha on the heated tava and cook on both sides. Drizzle a little oil around the edge if you like. I just like to brush some ghee on the paratha after it is done. Repeat this exercise with the rest of the dough and filling.

Serve with chutney, pickles, yogurt. For an added indulgence, try sour cream or crème fraîche.

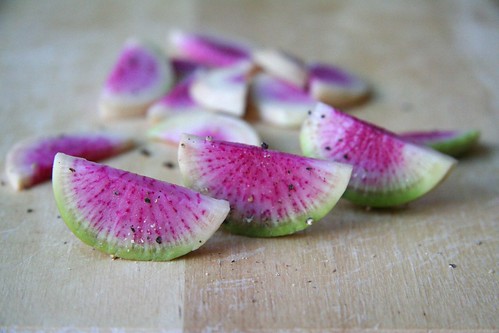
Watermelon Radishes

In the last year or two I have been buying watermelon radishes from the farmers market whenever I see them. They taste very similar to regular radishes, maybe even a tad sweeter, but they look absolutely gorgeous. They have a greenish white skin, and inside they are a bright fuschia or deep red in color, and when sliced, they look like tiny watermelon wedges. For a simple but striking salad, I peel and slice them thin, and sprinkle a little coarse salt and ground black pepper which looks almost like seeds on them.

Watermelon Radishes: Farmers Market Find

Wednesday, February 27, 2008

Seasonal Salad with Apples, Pecans, and Cheese

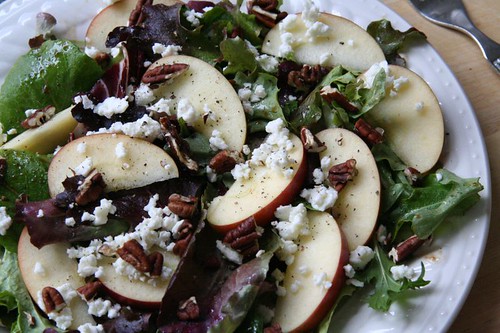
Mixed Greens Salad with Apples and Pecans, Balsamic Vinaigrette
Mixed Greens, Apples, Pecans, Goat Cheese, and Balsamic Vinaigrette

There is hardly any story here. This salad is a cafe classic that became a favorite at home for two main reasons - it tastes good, and it is immensely satisfying. It is great as a first course salad but works just as well as a light main dish by increasing the quantities or by adding an egg or other protein on the side. It also follows my current mantra of making something using few stellar ingredients each of which contributes towards a great end result.

The crunch of sweet apples is offset by the tangy creaminess of the cheese and the nutty pecans, all providing great character to the basic green salad. When local apples start showing up in the farmers market in fall and winter, this is a salad I look forward to. The dressing is my all time favorite too, one that I must've made over a hundred times by now. Sometimes even when I eat outside I choose a salad just because I see the words 'balsamic vinaigrette' on the menu.

A note on the mustard

Even though the mustard is used in such a tiny amount here, its taste really comes through, so use a good mustard that you really like, or leave it out. I absolutely do not mean to be a snob, but at the risk of sounding like one I have to say that the best prepared mustard I have had is a champagne mustard I bought a couple of years back in Paris, at La grande épicerie. It was seriously good stuff, and a regular Dijon mustard also bought there is a close second. Sadly, I have yet to find anything like either of those here.

Mixed Greens Salad with Apples and Pecans, Balsamic Vinaigrette

Like most salads, the following quantities should be used only as a general guideline and not as a precise recipe. These are for 2 servings, and can be scaled very easily.

Ingredients for Balsamic Vinaigrette

1/4 teaspoon Dijon mustard
1/2 teaspoon honey
1 T balsamic vinegar
2 T extra virgin olive oil
a bit of coarse salt and pepper to taste

Ingredients for salad

mixed geeens, about 4 cups
1 small apple
big handful of pecans, or walnuts
4 Tablespoons feta cheese, goat cheese, or any type of blue cheese
salt and pepper

Tossing it together

To make the vinaigrette, whisk together the mustard, honey, and vinegar, and slowly add the olive oil, whisking until everything emulsifies together. Add coarse salt and ground pepper.

Heat a medium sized skillet and toast the pecans for a few minutes just until they start to turn a shade darker. Keep an eye on them, they take turn bitter if roasted too much. Let them cool.

Rinse and dry the salad greens. Core the apple and slice it thin.

Spoon the dressing over the greens a little at a time, and toss until the leaves are light coated with the dressing. Add the apples, pecans, and cheese, and a little salt and pepper to taste.

Sending this over to Andrew for his event 'Waiter, there is something in my Seasonal Salad'.

Sunday, February 24, 2008

Baroda Dal Dhokli

Considering that I was fairly familiar with Gujarati food throughout my life, I found out about Dal Dhokli very very late, and when I did, my first reaction was 'whoa, this is like fresh pasta, on steroids!'. As soon as I tasted it, it was such a revelation that something so simple could taste so good, that I had to immediately ask the person who made it, for the recipe, and ever since I have made it several times myself. Dal Dhokli consists of two main parts, the dhoklis which are pieces of thinly rolled out dough, and the thin dal in which they are boiled until cooked. The overall result is thicker than soup, and substantial enough to be eaten as a main dish. This is a very comforting sort of meal, and even good to eat when one is under the weather (like I am right now, unfortunately). A crudites style salad rounds off the meal very nicely. For those not familiar with the dish, I should add that these 'dhoklis' bear no relation to the more popular and accessible 'dhoklas'.

Even though I like my usual recipe a lot, I wanted to try out something different for a change, and I found one that looked good in 'Rotis and Naans of India' by Purobi Babbar which happens to be quite a favorite cookbook of mine. This book is low on contextual information but it is a solid compilation of recipes that always work really well, or at least have worked really well for me so far. Even though the book has recipes for things besides rotis and naans that look very promising, that is the only section I have used.

In this particular case, I don't know why the title in the book says 'Baroda' Dal Dhokli and what it is (if there is anything) that distinguishes it from the Dal Dhokli made in other parts of Gujarat. Perhaps someone like Priyanka might know. Even though I made several changes to the original, I was rather pleased with the result. Pleased enough to want to use this recipe until I decide to fall back on the old favorite. I did not add any garlic in the tadka as specified, used brown sugar instead of white, and instead of amchoor, the choice of acid was (you guessed it) Meyer lemon juice, squeezed over the dal at the very end. Another thing I did this time (and was left wondering why I didn't think of it before) was to make a double batch of the dhoklis and freeze them, so that next time around I only need to make some dal and pop in the dhoklis.

Gujarati Dal Dhokli
Photo taken in a small window of opportunity right before dinner, with the squeezed lemon landing fortuitously in the background.

Here is my recipe, adapted. The book says it serves 6, but based on experience, I'd say not more than 4.

For the dhoklis

1 cup wheat flour (chappati flour, atta)
1/2 teaspoon turmeric
1/2 teaspoon chili powder
1 teaspoon salt
2 teaspoon oil
water for mixing.

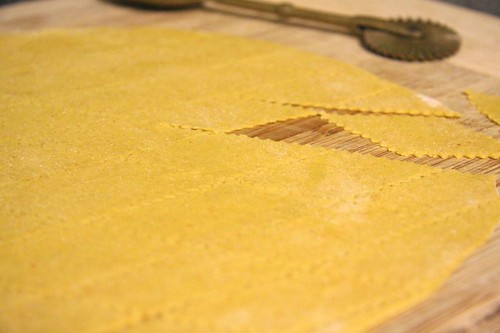
Sift the flour and add the spices and salt to it. Rub the oil into the flour, and slowly add water to make a stiff and smooth dough. Divide the dough into 4 or 5 pieces, and roll out each piece into a rectangle about as thick as a chappati. Using a sharp knife or pizza cutter, cut into pieces about 2" X 2" in size.

Dhoklis: Rolled and Cut
Making the dhoklis

For the dal

1 cup (or 160 grams) toor dal
1/2 of a medium yellow onion
1 teaspoon turmeric
1-2 teaspoons salt (or to taste)
2 teaspoon brown sugar
1/2 teaspoon garam masala (I used rajwadi)
1 teaspoon amchoor (or lemon juice)

1 Tablespoon oil or ghee
1/2 teaspoon mustard seeds
1/2 teaspoon cumin seeds
5-6 cloves
2-3 dried red chilies (boriya or small round chilies)
10-12 curry leaves
pinch of asafoetida (hing)
2-3 Tablespoons of chopped cilantro
ghee, optional

Chop the onion fine. Cook the dal with turmeric and onion using 5 cups of water, in a pressure cooker or directly on stove top. When it is fully cooked, whisk together until smooth, and add salt and sugar. Bring the dal to a boil, add the rajwadi garam masala. If using amchoor, add it as well. Add the dhokli pieces to the dal, and cook for a few minutes.

In the meanwhile, heat the oil in a small pan for the tempering (vaghaar) to be poured on top. Add the mustard seeds and when they start to pop, add cumin seeds, cloves, chilies, curry leaves and asafoetida, and pour the mixture on the dal. Add the chopped cilantro leaves, and if using lemon juice, squeeze it on top. Add a little ghee, if you like. Tastes best if served immediately.


The old favorite

I am also adding here the usual dal dhokli recipe I have used until now.

For 2-3

For the Dhoklis

3/4 cup chappati flour (atta)
1/4 cup besan
1 tsp ajwain
1/2 teaspoon red chili powder (or to taste)
1/2 teaspoon salt (or to taste)

Mix the atta, besan, ajwain, chili powder, and salt, and add enough water to it to make a stiff dough. Roll out the dough, cut it into pieces, separate the individual pieces and leave them on a large tray to dry out for 1-2 hours.

For the dal

3/4 cup toor dal
1/2 teaspoon turmeric
2 green chilies
1 inch piece of ginger
about 10 sprigs of cilantro, chopped

1 Tablespoon oil
1/2 teaspoon mustard seeds
1/2 teaspoon cumin seeds
5-10 curry leaves
pinch of fenugreek (methi) seeds
pinch of urad dal
pinch of asafoetida (hing)

1/4 teaspoon cumin powder
1/2 teaspoon coriander powder
salt to taste

Cook dal with turmeric in a pressure cooker. Whisk it to make sure it is smooth. Make a paste of the chilies, ginger, cilantro.

In a large and deep pan, heat the oil, and add the mustard seeds. When they start to pop, add cumin seeds, curry leaves, fenugreek seeds, urad dal, asafoetida, and finally add the cooked dal. Add the ground paste, and plenty of water. Add the cumin and coriander powders and salt. Bring it to a boil. Add the dhokli pieces to the dal and cook it for a few minutes on medium heat until the dal starts to thicken and the dhoklis have softened and cooked.

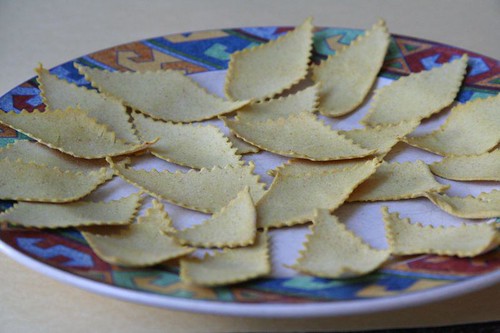
Freezing Dhoklis
Dhoklis: Frozen
If you wish to freeze dhoklis, lay out the individual dhoklis without crowding on a tray and keep it in the freezer for a few hours, and then transfer to a freezer bag or container and put it back in the freezer. When you are ready to use them, they can be put directly into boiling dal without thawing.

Sending this entry to RCI: Gujarat.

Tuesday, February 12, 2008

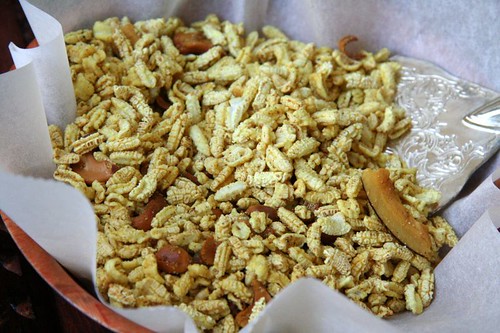
Popped Rice Chiwda

lahyancha chiwda

A recent invitation to a housewarming party said 'no gifts please'. While I appreciate the sentiment, I have known the hosting family for a long time, and hadn't met them in a while, so I just didn't feel it was right to go there empty handed. I decided on taking an edible gift instead, in place of an unwanted trinket that they were probably trying to avoid.

I thought of muffins or some kind of breakfast bread that they could have the next day, but wasn't sure if they ate eggs, so dropped that idea. They would also in all likelihood have some food leftover from the party that day, so I thought perhaps something that would last a little longer would be better. Something old-fashioned, but familiar, something healthy, but delicious, and with this list of criteria, I zeroed in on chiwda, more specifically lahyancha chiwda. It is much quicker to make than the traditional Diwali chiwda that I make annually for Diwali (of course) and all the ingredients needed for this chiwda were already at home.

Chiwda: of Lahya

Lahya (plural) is the marathi term for popped grains. The original recipe called for popped jowar (jondhalyacha lahya), but I have not seen those here. The popped rice lahya on the other hand are found quite easily in Indian grocery stores, and in giant big bags too, referred to as puffed paddy. This nomenclature doesn't sound right to me, because puffed paddy could also apply to regular kurmure that are used to make bhel, but that doesn't bother me. It is the store strategy of packing things in giant bags and thus forcing me to buy more of what I need that is actually very annoying.

This chiwda is adapted from a recipe in Ruchira, and needs two uniquely maharashtrian ingredients - goda masala and metkut, that together impart a wonderful taste distinct from the regular chiwda. Metkut is a multi-purpose powder made out of various grains and spices, and is one of the many things that I have never made myself. I bring a packet of metkut made at home every time I go to India, and it usually lasts in the fridge well until my next trip back. Metkut is also increasingly available now in well stocked Indian grocery stores in the US. If you cannot find it here, of course, you can look for it when you travel to Maharashtra. In Bombay, you will need to head to a store that is geared towards a more niche marathi clientele.

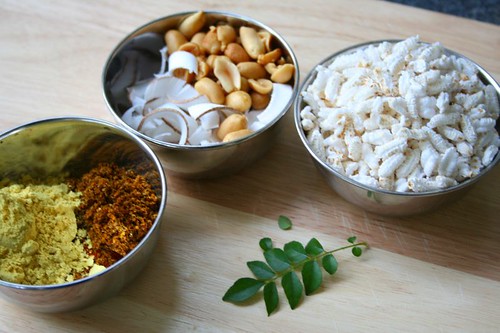
Chiwda: Ingredients
Spices, Nuts, Lahya, Curry Leaves

Before making the chiwda, check to see if the popped rice is crisp and crumbly. If not, spread it out on a cookie sheet and keep in a low temperature oven (between 150 and 170) for about 15 minutes, until the grains can be crumbled by just pressing it between a finger and thumb. This method works for me, but the grains available here could vary in quality.

Ingredients

6 cups of lahya (popped rice or jowar), crisped in the oven if required

4 Tablespoons oil
1/2 teaspoon mustard seeds
pinch of asafoetida (hing)
1/2 teaspoon turmeric
10-12 curry leaves
1/2 cup peanuts (or cashewnuts, or a mix of both)
1/2 cup coconut curls

1 teaspoon red chili powder (or to taste)
1 teaspoon coriander powder
1 teaspoon cumin powder
2 teaspoons goda masala
4 teaspoons metkut
2 teaspoons granulated sugar
1 teaspoon salt (or to taste)

Method


Mix the chili powder, coriander powder, cumin powder, goda masala, metkut, sugar and salt in a small bowl.

Heat the oil in a large wok, kadhai, or Dutch oven. Add the mustard seeds, and when they start to pop, add the asafoetida, turmeric, curry leaves, and the peanuts. When the peanuts are almost fried in the oil, add the coconut curls, and when they start to turn golden brown, take the wok off from the heat, and let the oil cool slightly.

Stir in the remaining dry spices into the oil, and then add the popped rice to it, and using a large spoon mix until the grains are coated with the spice and oil mix.

Let cool completely before eating, and store the remaining in an air tight containers. It can last for several days.


Notes

  • This is a moderately spicy chiwda, so reduce the amount of chili powder if you like it mild.
  • Keep the chiwda slightly undersalted when you make it, as it tends to absorb the salt in about a day.
  • Metkut often has salt added to it, so make sure you adjust the quantity of salt according to how salty the metkut is.


An Alternative to Popped Rice

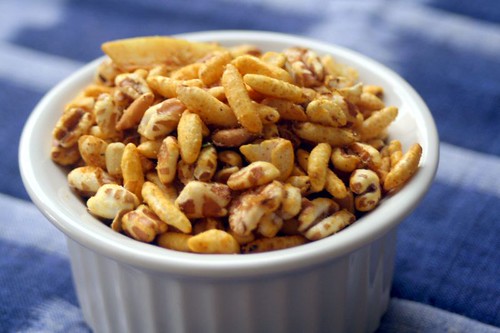
I have also made this chiwda using Kashi Wholegrain Puffs, and it tastes just as good. The story goes that I bought the cereal while on a virtuous eating mission, but did not like it at all as a regular cereal with milk. So something had to be done with it, and turned to this chiwda formula to take it from blah to ah!

Chiwda: Of Kashi Wholegrain Puffs

Wednesday, February 06, 2008

Lemon Scented Shortbread

For full flavor minus tartness

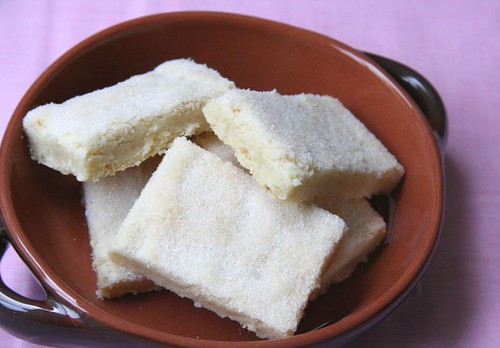
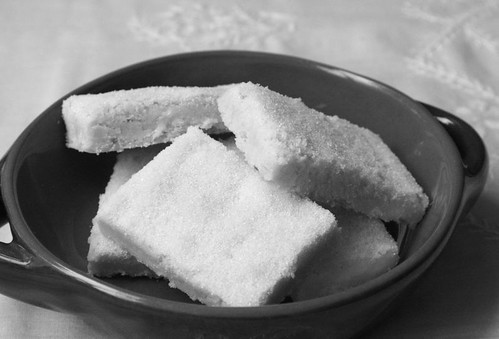
Meyer Lemon Shortbread

The urge to use the Meyer Lemons in a dessert had been quite strong for a while, even though I was trying very hard to use them in healthy(ier) everyday things that use lemons anyway. A good squeeze flavored a batch of hummus, some went into guacamole, in dal, in rasam, in all good things that need a little tartness. However, other than some lemon zest in a pasta with broccoli, the zest had been largely neglected. It had also been a long time since I baked anything with just good old flour, sugar, and butter. So finally, I gave in, and decided to do something sweet with the lemons.

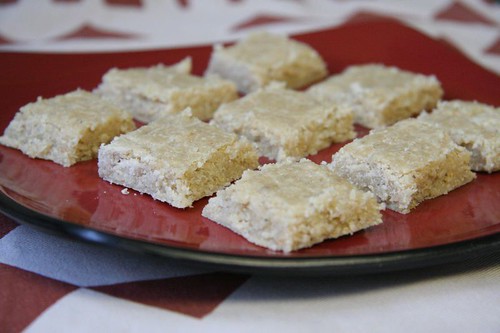
I used a recipe for Lavender Shortbread from pastry chef Gale Gand, but used Meyer lemon zest instead of dried lavender. Very tender, flaky, and pleasantly lemon flavored, these were delightful to bake, and even more so to eat. I have made shortbread cookies before, but this was the first time I used a recipe that calls for cornstarch, and I don't know if that was the reason but these were one of the best I have ever eaten. Dare I say, even better than some of those special packages of black and red tartan that come from countries yonder.
They are also likely to be easily adaptable to other flavors, as long it is something that can provide big flavor in small doses. Orange zest for sure, but I think cardamom, which is a huge favorite of mine, would also do well.

The recipe is perfect as it is but I used a food processor with the dough blade instead of a stand mixer. I thought that 1/4th teaspoon salt would be too much, and that just a pinch would suffice. I am noting the recipe here for future use, along with some changes that might make it more useful.

As an aside, this was easily the most distracting photo session I have had with food. At every moment I wanted to grab one of those cookies, making it very difficult to focus. Yes, pun intended.

Meyer Lemon Shortbread: b&w


Meyer Lemon Shortbread

Tender, flaky, and not too sweet

Ingredients

8 tablespoons (1 stick) cool unsalted butter, cut into pieces
1/4 cup plus 2 tablespoons sugar
1 cup all-purpose flour
1/4 cup cornstarch
pinch of salt
zest of two lemons, about 1 teaspoon

Method

Heat the oven to 350 degrees F. Line an 8 by 8-inch square baking pan with parchment paper.

Stir together the flour, cornstarch, and salt in a medium bowl.

Cream the butter until soft in a mixer fitted with a paddle attachment or in a food processor with the dough blade. Add 1/4 cup sugar and mix until incorporated.

Add the dry ingredients to the butter mixture and mix at low speed just until the ingredients are almost incorporated, then add the lemon zest, and mix until the dough starts to come together.

Flour a work surface, turn the dough onto it, and knead it 5 to 10 times, to bring the dough together and smooth it out. Reflour the work surface. With a rolling pin, roll the dough out to a little less than 1/4-inch thick to fit the 8 by 8-inch pan.
To transfer to the pan, roll the dough up onto the rolling pin, lift it up, and unroll into the pan. Or, press the dough thoroughly into the pan with your fingers. Prick the shortbread all over with a fork, to prevent any buckling or shrinking. Sprinkle the surface evenly with 1 tablespoon of the remaining sugar.

Bake for 15 minutes. After 15 minutes, deflate the dough by knocking the pan once against the oven rack then rotate the pan to ensure even cooking and a flat surface. Bake 10 to 15 minutes more, until golden all over and very lightly browned. As soon as it comes out of the oven, sprinkle the surface evenly with the remaining tablespoon of sugar. Let cool about 5 minutes. Using a very sharp knife, cut into 3 rows by 5 rows making about 1 1/2-inch by 3-inch bars.

Let cool completely in the pan. Remove from the pan and store in an airtight container for up to 1 week.

Sending this to Jhiva - Lime and Lemon.

Monday, February 04, 2008

Moong Dal Khichadi with Potatoes

Comfort Food

There is an old marathi adage, that goes 'vyakti titkyaa prakruti', which means 'there are as many personalities as there are people', and the food extension of it might be that there are as many khichadis too. Some like it soft, almost mashed, some prefer it more pulao like, with all grains intact. Some like it mild, others prefer it spiced. Either way, it is a quick and easy one pot meal of rice and dal that is comforting to eat and effortless to make, and almost everyone who grew up with tends to recall fondly. The rice in it adds the starch, which has to somewhat magically mean comfort in any language, and the dal adds a good source of protein which is easy to digest. It is also a dish that is found throughout the country in some form or the other - khichdi, khichri, khichuri, venn pongal, even kedgeree, which was adopted by the colonials, are all variations on the same theme, and just some of the names by which I know it.

I recall a friend in school who said that she disliked khichadi because it reminded her of the times when she was sick, and I just couldn't relate to that, because at our house, khichadi was always a Sunday dinner feast. It was never bland, always delicious, and served with several simple accompaniments, making it a warm, hearty meal to wrap up the weekend before we all started another rigorous week. I saw the friend's point later in life, after I heard about the mild, very soft khichadi that some people make when in need of some kind of recuperation, which also confirmed how two people who lived within minutes of each other saw the same thing so differently.

The general rule I follow when making khichadi is to use 2 parts rice to 1 part of dal, usually moong dal. If there is some time, I like to soak the dal for about an hour and the rice for about half an hour, as the dal gets softer and it helps to speed up the cooking. If there are any vegetables on hand, those can be added to it too.

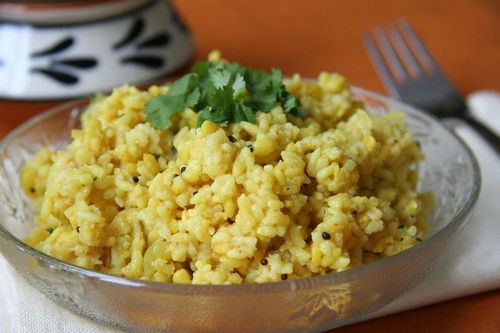
Moong Dal Khichadi

Moong Dal Khichadi with Potatoes

The basic, simple maharashtrian moogachi khichadi can be made in several ways. This is a version I made once after returning from a long and tiring trip, and it turned out really good, so I had to make a note of it. What I do usually is more or less the same, with variations. The potato is a great addition if one believes that there is no such thing as starch redundancy, but other vegetables like cauliflower and peas are also very good in this khichadi. Goda masala is the main flavor component here and it has no substitutes. Any other compatible masala could be used here, but that will change the taste accordingly.

The usual accompaniments to it at home were yogurt, fried sandga mirchi (dried chilies stuffed with spices), roasted papad, pickles, thinly sliced onion, and extra grated coconut and chopped cilantro. A good spoonful of ghee used to be poured over the khichadi itself.

Ingredients

1 cup of rice
1/2 cup of moong dal
1/2 medium red onion
2 Tablespoons oil
1/2 teaspoon mustard seeds
pinch of asafoetida
4-5 cloves (optional)
4-5 whole peppercorns (optional)
1/2 tsp turmeric
1 tsp chili powder
1-1/2 tsp goda masala
1-1/2 tsp salt

1 medium potato
1 teaspoon oil
1 Tablepoon of grated coconut
2-3 Tablepoons of chopped cilantro

Method

Soak the rice and moong dal in water for about an hour and drain. Slice the onion.

In a large wide pan, heat the oil and add the mustard seeds. When they start to pop, add asafoetida, cloves, and peppercorns. Add the onion, and stir fry till it changes color. Add turmeric, and the grains. Stir everything together, and add 4-1/2 cups of water. When the water starts boiling, lower the heat, add chili powder and goda masala, and cook covered on medium heat for 15-20 mins.

While the khichadi is cooking, chop the potato into small fries. In a wide saute pan, heat a teaspoon of oil and saute the potato on medium-high heat until it is golden brown outside and tender inside. Add a little salt. When the khichadi is done, add the potatoes to it.

Garnish with coconut and cilantro.

Serve with the accompaniments suggested above.


Sending this over to the Monthly Mingle, where the theme this month is Comfort Foods.

Friday, February 01, 2008

Kancha Moong Dal with Meyer Lemon

In praise of 'Bengali Cooking: Seasons and Festivals'

A lot of cookbooks pass through my hands - at bookstores, in libraries, and through the virtual world of amazon's 'search inside' feature. While there are plenty of books I love, and even more that I want to buy, very rarely do I come across a book that makes me want to jump and evangelize! Chitrita Banerji's 'Bengali Cooking: Seasons and Festivals' did just that, very recently.

This is a fairly old book, first published in 1997, divided into four main sections called Basanta-Grishma (Spring and Summer), Barsha (Monsoon), Sharat-Hemanta (Early and Late Autumn), and Sheet (Winter), and each section delves into details about the food of that season, the whys and the hows of it, and how it relates to the produce, the beliefs, stories, fables, festivals, and so much more, that it is difficult to describe it in a few words. The book talks about the differences and contrasts in food between the various regions in Bengal, of Ghotis and Bangals, of Hindus and Muslims, of rich and poor, of the past and the present, along with plenty of recipes interspersed within the narrative. And yet, as it tries to cover so much ground it never feels as though it is meandering. The fact that Bengali cuisines is among those more unfamiliar to me says even more about the book. As Deborah Madison says in her foreword, this book reminds us that food is not separate from people, history, geography, and culture - in short, life itself. What I also love about the book is that it makes no concessions, and the author does not simplify the writing at any point for popularity's sake.

There are no photographs in the book, but the writing is so evocative that it paints enough pictures with words. Sometimes, the descriptions are so beautiful that I want to rush to the kitchen to rustle up some luchis with alur dom and chholar dal. What I do instead is run through page after page of the book, traipsing through West Bengal and Bangladesh, taking my time, dipping into the book every now and then.

If someone is looking for a book of Bengali recipes, then this is probably not the book for them. However, if you are not deterred by recipes that are not divided into neat sections of 'ingredients' and 'methods', and that do not necessarily give you exact amounts of everything, if you are intrepid enough about looking for a few unknown words, if you are not a new cook and do not need every step explained to you, if you are familiar with Indian food, and would like to know more about the context of Bengali food, you will love this book, regardless of whether you have eaten Bengali food before or not. This is evidently a book based on extensive research and personal experience.

The book has a glossary, but I was left fumbling with some names that weren't given in English. Knowing Hindi and Marathi, I could guess some of them, and with friends who know Bengali, translation help for the rest will be at hand if I need it.

So far, I haven't tried out a lot of things from the book, but like I said, the joy of this book is in the vivid descriptions, not necessarily in trying out recipes from it. The Kancha Moong Dal that I tried was simply stellar, with an amazing flavor using only a few ingredients that came together just right, and convinced me that the other recipes in the book would also be up to par, not that I ever doubted that anyway.

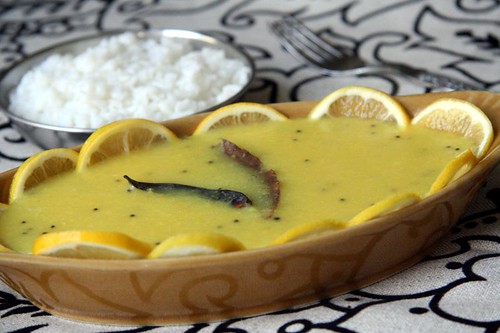
There is also a recipe in the book for a Bangladeshi Lemon dal, and I loved the way it described how thin slices of lemon are used to flavor the dal, so I used the leftover Kancha moong dal and turned it into Lemon dal, which was a wonderful way to use some of the Meyer Lemons from the yard, and the presentation looked beautiful.

The following introduction to the Kancha Moong Dal in an extract, and the recipe that follows is paraphrased, and uses the same style of recipe writing as used in the book.
In summer, the common dals in our house are moong and kalai rather than lentils, yellow split peas or pigeon peas. And while in winter the moong dal may be roasted in a frying pan before cooking, in summer it is preferred kancha or unroasted, because it is easier to digest and does not heat the system.

Kancha Moong Dal

Take 1 cup of moong dal and rinse the dal under running water for 3-4 miutes. Then it describes how to cook the dal in boiling water, but I cooked the dal with 4 cups of water and a pinch of turmeric in a pressure cooker.

Finely chop or grate a small piece of ginger, enough to make 2 teaspoons.

Heat about 1 tablespoon of oil, add 1 teaspoon whole mustard seeds, 2 dried red chilies, and when the mustard starts to pop, add the ginger, and 2 bay leaves. Stir for a minute, add a teaspoon of ghee, and pour the dal over it. Add a little sugar and salt to taste, and heat the dal through for a few minutes.

It then goes on to describe another type of phoron (tadka) that can be used instead of the above seasoning, and in a blink of an eye you have another recipe right there.

Lemon / Kancha Moong Dal

Lemon Dal

This is an extract from the book, keeping in mind the guidelines for fair use of copyrighted material, that illustrates how even a simple dal recipe sounds wonderful in the book.
Once, in Dhaka, a good friend of mine, Salma Sobhan, was talking to me about Muslim Bengali cooking. She explained that among its intricacies were a few simple dishes, like lemon dal, that amazed one with their taste. What was that, I asked, and she was taken aback at such ignorance.

For Lemon dal, it is the same kancha moong dal that is used. Once cooked with a little salt and water, it is sieved through a cheesecloth so that it comes out as a thick, creamy soup, without the fibres. Then a large porcelain or earthenware (never metal) serving bowl is taken and the bottom and sides lined with thin slices of lemon or lime. Bengalis prefer to use the fragrant kagaji or gondhi lemon, if they are available. Once the slices are in place, the sieved dal is put back on the stove, brought to a boil, and kept there for two or three minutes, then poured into the lemon-lined basin and kept covered for about five minutes to absorbe the taste and flavor of the lemon. This needs to be served with plain rice, preferably an atap (non-parboiled) rice like Basmati. The problem with this dal is that it can neither be reheated, nor kept overnight, for it tends to turn bitter.

Sunday, January 27, 2008

Polenta Kheer

The first time I ever encountered polenta was on a plain jane PBS show one Saturday morning (in the days before Food Network!), and I was so fascinated by it that I had to seek it out. After I found it, I taught myself how to make it just based on the instructions on the back of the packet. Having never cooked with cornmeal of any kind before that and after having read a few onerous articles on the subject, I was concerned about the results, but I was lucky that the brand I started with was a good one, and it never gave me any problems. To be on the safer side I started with the oven method which makes a firmer polenta that can be cut into pieces, but later as I started feeling more comfortable with it I turned to cooking it directly in boiling water, and have never looked back. Even now, I come across writings that make it sound as though cooking polenta is rocket science, whereas it really is very simple.

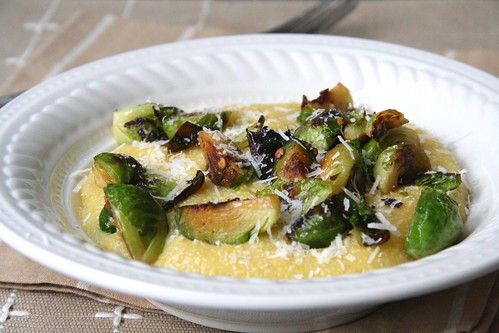
There is something inherently so warming about stirring a pot of polenta over the stove that it has now become a ritual I look forward to every winter, a few times at least. It is also a perfect blank canvas for numerous delicious accompaniments, and there is the comfort of favorite pairings and the joy of discovering some new ones. It is no co-incidence that the best polenta accompaniments are often perfectly suited for the winter season as well, and my current favorites are roasted vegetables, especially root veggies, pan fried brussel sprouts and grated parmesan cheese, and sauteed mushrooms, by themselves, or in a red wine sauce.

Polenta with Brussel Sprouts and Parmesan

Soft, Creamy Polenta

For making basic soft polenta, I start by heating 4 cups of water in a large pot, and when it starts boiling, add about 1 teaspoon of salt, 1-2 tablespoons of butter, and then the polenta, whisking continuously. When it starts to bubble, lower the heat and keep whisking occasionally until the polenta is fully cooked, and starts to become very soft and creamy. For more information, check out this link to the 'The Basics of Polenta Cookery' that covers it all, and even includes several recipes.

Perfectly Round Sliced Polenta

Once polenta is fully cooked and starting to thicken, it can be poured into a flat tray to cool. It will firm up and can be cut into shapes, but here is a tip if you want to eat or serve round slices of polenta but do not like the idea of having to waste all the pieces that would be leftover after cutting out the rounds - after the polenta has completely cooked and is starting to thicken, pour it into straight walled cups or glasses greased on the inside with a little butter. When cooled completely, run a knife around the polenta, and it will come out in one cylindrical piece that you can slice as thick as you like. These slices can be further baked or pan fried, and used with toppings of choice.

Polenta Sliced


Polenta as Dessert

The idea for making polenta kheer just came out of nowhere, but I wouldn't be surprised if some enthusiastic home cook has tried it out already. At home, rawyachi kheer or kheer made out of coarse rawa (rawa in Marathi, sooji in Hindi, semolina in English) was more common than any other type of kheer. It was a simple and quick dessert for any night of the week, when the menu needed a little perk. It is forgiving on the amounts, and so the basic instructions would be to saute a little bit of coarse rawa in a little ghee, add milk, then let it cook for a little while to thicken, and then add sugar. Some cardamom and nuts can be added, time permitting, or it can be left plain. I always liked it at room temperature, or slightly warm.

So once the inspiration struck, I did the same with polenta, and what was most surprising about the end result was that it tasted a lot more like rawa kheer than like polenta.

Kheer is really pretty low on my dessert choices, but this is the stuff of childhood memories, and for a mid-week winter dessert that practically gets done on the literal back burner, this is perfect. It is as comforting as a blanket in the chill, and takes as much effort to make for a dozen as it does for one.

Polenta Kheer

The following proportions would make 2 generous portions, or can stretch out to 3 dainty portions.

Ingredients

1 teaspoon ghee
1/4 cup of medium grain polenta
2 cups plus more milk (whole milk would be nice)
2 green cardamom
4-6 Tablespoons sugar (I like about 5)
few strands of saffron
chopped almonds, pistachios or other nuts, about 2 tablespoons (optional)

Method

In a large wide pan, heat the ghee, and as soon as it starts to melt, add the polenta, and stir it around till it gets coated with the ghee. As soon as it starts to smell like it is being roasted (but do not wait until it changes color), add the milk, and start to whisk it using a wire whisk until it comes to a boil. Lower the heat considerably, and then let it simmer until the polenta cooks fully. This took me about 10 minutes, but polentas differ a lot in their coarseness. Stir occasionally to make sure it does not stick to the bottom of the pan.

In the meanwhile, remove the seeds of the cardamom and powder them finely. Chop the nuts and leave them aside.

If the kheer starts to thicken too much, add a little more milk. Add the sugar, and let everything simmer on the low heat for another 5-10 minutes. After you turn off the heat add the cardamom and crumbled saffron, and let it sit with a lid on it, preferably on the still warm stove. Just before serving add the nuts.

Picture of Polenta Kheer is my entry to the Click Event, where this month's theme is 'Liquid Comfort'.

Monday, January 21, 2008

Good ingredients can make a simple salad great

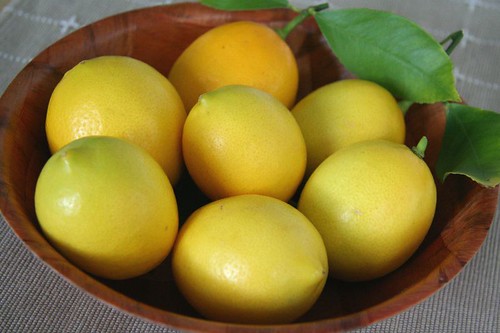
At this time, the only plant in the yard that produces anything edible is a small Meyer lemon tree, and around early winter, I usually harvest a small basket of them, after which begins the great quest on how to use them up before they turn bad, because I don't really need a lot of lemon juice in everyday cooking.

Meyer Lemons

I have made standard Indian pickles out of them in the past and they work just as wonderfully as regular lemons, but pickles last forever in our house, because we don't eat a lot of them, so I need other alternatives. There are several recipes for lemony cakes and breads but sometimes that seems a tad too much just to use up a few lemons, so instead I try to substitute these Meyer lemons in healthy everyday recipes that use lemons.

First up, this simple salad, versions of which you might have had before. It is a good example of how a few good quality ingredients can shine even when treated very simply, and give tired known combinations a refreshing lift.

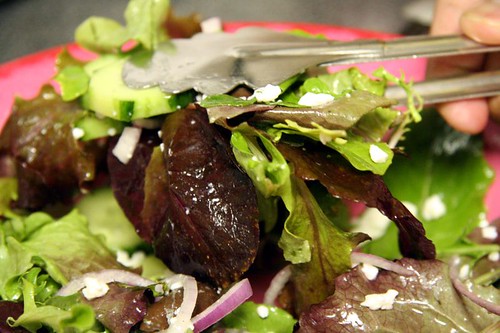
The fresh mixed greens were an excellent base for the rest of the cast. The English cucumber was local and organic. Albeit hothouse, it was very sweet and tasty. The olives were from a fancy Italian store, and while I am not too knowledgeable about olives, I believe this is a store that takes pride in their quality, not to mention that everything there is rather pricey, so they have to be good, right? The feta was so-so, but it held its own in the mix, so I can only imagine what a good feta cheese would have done. A small chopped tomato or a few cherry tomatoes would be wonderful in this salad if they are in season, but I did not have any. The Meyer lemon in the dressing was from the backyard, of course, and it cannot get any more local than that.

Things made with few ingredients, where each one plays a standout role towards the final dish have become a hot favorite with me currently, and as I continue to explore the options, it is interesting to find many traditional Indian dishes that fit well into that category too.

Salad with mixed greens, cucumbers, olives, feta, and Meyer Lemon dressing

Simple salad, inspired by tired versions of the Greek or Mediterranean Salad


This would serve about 4 as a small side or starter salad. Precision is not very important here, and the following quantities are just guidelines.

Ingredients for Meyer Lemon Vinaigrette

1 Tablespoon lemon juice
2 Tablespoons extra virgin olive oil
a bit of salt and pepper to taste
dash of granulated sugar

Whisk the lemon juice and oil together for a couple of minutes until they are emulsified. Add the salt, pepper, sugar, and stir together until the sugar dissolves.


Ingredients for Salad

5-6 cups of mixed greens,
1 cucumber
a little bit of red onion (this is hard to quantify - I'd say about 20 thin rings, or to taste)
handful of olives
a few Tablespoons of feta cheese

Tossing it together

Wash and dry the greens, and place in a large bowl. Peel and slice the cucumber, or leave the skin on if you like. [I like to keep a striated skin]. Slice the red onion. Pit the olives - a cherry pitter works very well for smaller olives.

Just befere eating, toss the dressing with the greens, a few spoons at a time, using only as much as required to light coat the leaves. It is alright if there is leftover dressing. Add the rest of the ingredients, and toss just once or twice to distribute evenly.

Thursday, January 17, 2008

Fat Free Feta

The intentions were very good, but the outcome wasn't impressive. That was the case with a fat free feta cheese that shall remain unnamed. Yes, yes, I know that fat free cheese is a complete oxymoron, but it was the start of the year, the time when one is trying to curb calories, and sometimes ready to sacrifice taste.

The taste isn't bad, but isn't great. No tang, no texture, none of that saltiness that comes with a good feta. I am not discounting it completely, and will continue to use it in salads, which will appear here from time to time, but otherwise, it is a lesson learned, for sure.

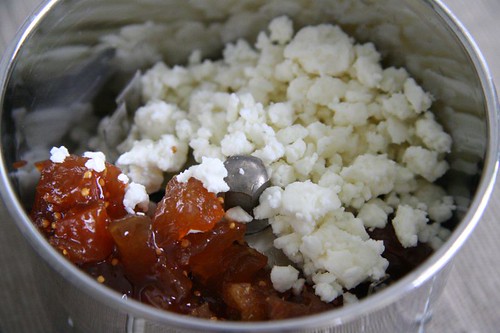
Apple Chutney and Feta Spread

To see if it could be redeemed in some way I made a small amount of spread by processing the cheese together with some Apple Chutney, and it makes for a decent accompaniment to crackers for a small snack, but nothing to write home about.

Monday, January 14, 2008

tiLAchyA waDyA for Sankraant

Sesame Candies

I have lamented before that Indian festivals just don't seem the same here. It is simply not in the air, and not around you in a noticeable way. Makar Sankrant becomes just another day, something we see on our Kalnirnay, and then do nothing about it. I recall a time when 'sesame candies' used to appear in desi shops in January, and we would buy those for our token Sankrant celebration, but things have evolved now to a point where I can buy real marathi style tilgul ladoos, as well as revdis and gajak.

This year however, I had finally planned to make tiLAchyA waDyA at home, in part because of the festive spirit on the Indian blogs and in part because I had some time. I dug out the recipe that I had got from my mother years ago, but held back with trepidation because it involved making pakka pak, or sugar syrup that forms into a ball when dropped into water. Making syrups like this, with various 'string consistencies' attached to them, which is a staple of Indian sweets is something that has always daunted me, but these tiLwaDis were a huge favorite of mine, so I braced forth, and they turned out pretty good! While the Tilgul ladoos made of sesame seeds, peanuts, and jaggery were more traditional for exchanging with relatives and friends, and hence evoke more nostalgia, I always preferred the tiLwadis over them. They were also never made at our place at any time other than Makar Sankrant, making them even more precious and special. Another plus in their favor is that no one can make jokes about having to crack them with a hammer!

tiLAchyA vaDyA (tiLvaDyA)

tilachya vadya: sesame seed candy

Yields about 20-25 small squares

Ingredients

1 cup of regular (white) sesame seeds
1 teaspoon ghee
1 cup sugar
1 water
4 pods of green cardamom

Method

Pick over the sesame seeds, and roast them in a deep skillet or kadhai over gentle heat for a few minutes minutes, just until they start to change color. Do not get them too brown.

Grease a small cookie sheet with ghee.

When the sesame seeds are cool enough to handle, powder these in a food processor or dry grinder.

In a saucepan, heat 1 cup of water and 1 cup of sugar and bring it to a boil. Let it thicken. Keep aside a small bowl of water.

While the syrup cooks, peel the cardamom and finely powder the seeds in a mortar and pestle.

To check if the sugar syrup is done, add a drop of it to the small bowl of water. If it holds itself into a shiny ball, it is done. Switch off the heat immediately, and add the powdered cardamom powder and sesame seeds to it, stir quickly to mix, and spread it into the prepared cookie sheet using a spatula, starting in the middle of the sheet.

Immediately, while the mixture is still hot, mark lines into it with a knife for the wadis, and separate the wadis when completely cooled.


Related: A primer on the concept of maharashtrian style wadis.
Related Posts Plugin for WordPress, Blogger...