Wednesday, February 27, 2008

Seasonal Salad with Apples, Pecans, and Cheese

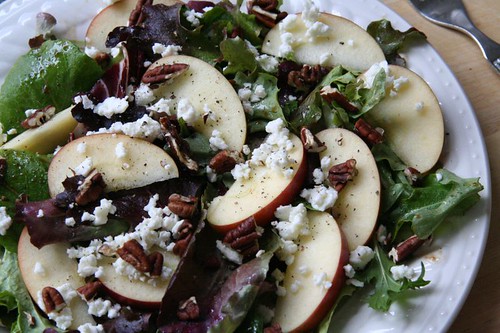
Mixed Greens Salad with Apples and Pecans, Balsamic Vinaigrette
Mixed Greens, Apples, Pecans, Goat Cheese, and Balsamic Vinaigrette

There is hardly any story here. This salad is a cafe classic that became a favorite at home for two main reasons - it tastes good, and it is immensely satisfying. It is great as a first course salad but works just as well as a light main dish by increasing the quantities or by adding an egg or other protein on the side. It also follows my current mantra of making something using few stellar ingredients each of which contributes towards a great end result.

The crunch of sweet apples is offset by the tangy creaminess of the cheese and the nutty pecans, all providing great character to the basic green salad. When local apples start showing up in the farmers market in fall and winter, this is a salad I look forward to. The dressing is my all time favorite too, one that I must've made over a hundred times by now. Sometimes even when I eat outside I choose a salad just because I see the words 'balsamic vinaigrette' on the menu.

A note on the mustard

Even though the mustard is used in such a tiny amount here, its taste really comes through, so use a good mustard that you really like, or leave it out. I absolutely do not mean to be a snob, but at the risk of sounding like one I have to say that the best prepared mustard I have had is a champagne mustard I bought a couple of years back in Paris, at La grande épicerie. It was seriously good stuff, and a regular Dijon mustard also bought there is a close second. Sadly, I have yet to find anything like either of those here.

Mixed Greens Salad with Apples and Pecans, Balsamic Vinaigrette

Like most salads, the following quantities should be used only as a general guideline and not as a precise recipe. These are for 2 servings, and can be scaled very easily.

Ingredients for Balsamic Vinaigrette

1/4 teaspoon Dijon mustard
1/2 teaspoon honey
1 T balsamic vinegar
2 T extra virgin olive oil
a bit of coarse salt and pepper to taste

Ingredients for salad

mixed geeens, about 4 cups
1 small apple
big handful of pecans, or walnuts
4 Tablespoons feta cheese, goat cheese, or any type of blue cheese
salt and pepper

Tossing it together

To make the vinaigrette, whisk together the mustard, honey, and vinegar, and slowly add the olive oil, whisking until everything emulsifies together. Add coarse salt and ground pepper.

Heat a medium sized skillet and toast the pecans for a few minutes just until they start to turn a shade darker. Keep an eye on them, they take turn bitter if roasted too much. Let them cool.

Rinse and dry the salad greens. Core the apple and slice it thin.

Spoon the dressing over the greens a little at a time, and toss until the leaves are light coated with the dressing. Add the apples, pecans, and cheese, and a little salt and pepper to taste.

Sending this over to Andrew for his event 'Waiter, there is something in my Seasonal Salad'.

Sunday, February 24, 2008

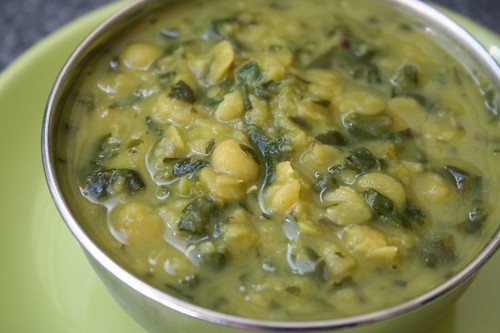
Baroda Dal Dhokli

Considering that I was fairly familiar with Gujarati food throughout my life, I found out about Dal Dhokli very very late, and when I did, my first reaction was 'whoa, this is like fresh pasta, on steroids!'. As soon as I tasted it, it was such a revelation that something so simple could taste so good, that I had to immediately ask the person who made it, for the recipe, and ever since I have made it several times myself. Dal Dhokli consists of two main parts, the dhoklis which are pieces of thinly rolled out dough, and the thin dal in which they are boiled until cooked. The overall result is thicker than soup, and substantial enough to be eaten as a main dish. This is a very comforting sort of meal, and even good to eat when one is under the weather (like I am right now, unfortunately). A crudites style salad rounds off the meal very nicely. For those not familiar with the dish, I should add that these 'dhoklis' bear no relation to the more popular and accessible 'dhoklas'.

Even though I like my usual recipe a lot, I wanted to try out something different for a change, and I found one that looked good in 'Rotis and Naans of India' by Purobi Babbar which happens to be quite a favorite cookbook of mine. This book is low on contextual information but it is a solid compilation of recipes that always work really well, or at least have worked really well for me so far. Even though the book has recipes for things besides rotis and naans that look very promising, that is the only section I have used.

In this particular case, I don't know why the title in the book says 'Baroda' Dal Dhokli and what it is (if there is anything) that distinguishes it from the Dal Dhokli made in other parts of Gujarat. Perhaps someone like Priyanka might know. Even though I made several changes to the original, I was rather pleased with the result. Pleased enough to want to use this recipe until I decide to fall back on the old favorite. I did not add any garlic in the tadka as specified, used brown sugar instead of white, and instead of amchoor, the choice of acid was (you guessed it) Meyer lemon juice, squeezed over the dal at the very end. Another thing I did this time (and was left wondering why I didn't think of it before) was to make a double batch of the dhoklis and freeze them, so that next time around I only need to make some dal and pop in the dhoklis.

Gujarati Dal Dhokli
Photo taken in a small window of opportunity right before dinner, with the squeezed lemon landing fortuitously in the background.

Here is my recipe, adapted. The book says it serves 6, but based on experience, I'd say not more than 4.

For the dhoklis

1 cup wheat flour (chappati flour, atta)
1/2 teaspoon turmeric
1/2 teaspoon chili powder
1 teaspoon salt
2 teaspoon oil
water for mixing.

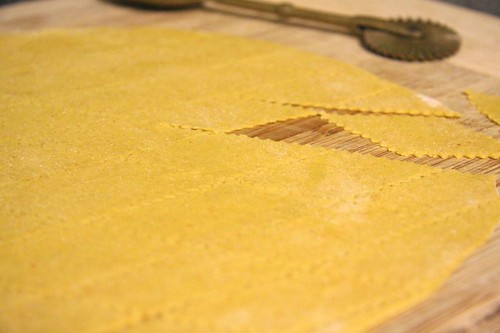
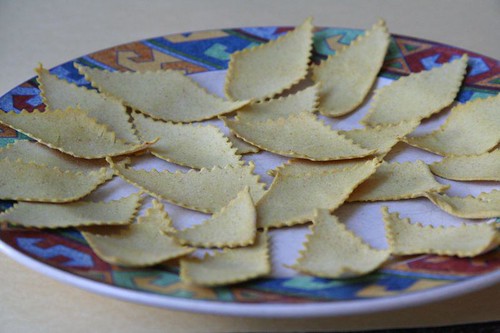
Sift the flour and add the spices and salt to it. Rub the oil into the flour, and slowly add water to make a stiff and smooth dough. Divide the dough into 4 or 5 pieces, and roll out each piece into a rectangle about as thick as a chappati. Using a sharp knife or pizza cutter, cut into pieces about 2" X 2" in size.

Dhoklis: Rolled and Cut
Making the dhoklis

For the dal

1 cup (or 160 grams) toor dal
1/2 of a medium yellow onion
1 teaspoon turmeric
1-2 teaspoons salt (or to taste)
2 teaspoon brown sugar
1/2 teaspoon garam masala (I used rajwadi)
1 teaspoon amchoor (or lemon juice)

1 Tablespoon oil or ghee
1/2 teaspoon mustard seeds
1/2 teaspoon cumin seeds
5-6 cloves
2-3 dried red chilies (boriya or small round chilies)
10-12 curry leaves
pinch of asafoetida (hing)
2-3 Tablespoons of chopped cilantro
ghee, optional

Chop the onion fine. Cook the dal with turmeric and onion using 5 cups of water, in a pressure cooker or directly on stove top. When it is fully cooked, whisk together until smooth, and add salt and sugar. Bring the dal to a boil, add the rajwadi garam masala. If using amchoor, add it as well. Add the dhokli pieces to the dal, and cook for a few minutes.

In the meanwhile, heat the oil in a small pan for the tempering (vaghaar) to be poured on top. Add the mustard seeds and when they start to pop, add cumin seeds, cloves, chilies, curry leaves and asafoetida, and pour the mixture on the dal. Add the chopped cilantro leaves, and if using lemon juice, squeeze it on top. Add a little ghee, if you like. Tastes best if served immediately.


The old favorite

I am also adding here the usual dal dhokli recipe I have used until now.

For 2-3

For the Dhoklis

3/4 cup chappati flour (atta)
1/4 cup besan
1 tsp ajwain
1/2 teaspoon red chili powder (or to taste)
1/2 teaspoon salt (or to taste)

Mix the atta, besan, ajwain, chili powder, and salt, and add enough water to it to make a stiff dough. Roll out the dough, cut it into pieces, separate the individual pieces and leave them on a large tray to dry out for 1-2 hours.

For the dal

3/4 cup toor dal
1/2 teaspoon turmeric
2 green chilies
1 inch piece of ginger
about 10 sprigs of cilantro, chopped

1 Tablespoon oil
1/2 teaspoon mustard seeds
1/2 teaspoon cumin seeds
5-10 curry leaves
pinch of fenugreek (methi) seeds
pinch of urad dal
pinch of asafoetida (hing)

1/4 teaspoon cumin powder
1/2 teaspoon coriander powder
salt to taste

Cook dal with turmeric in a pressure cooker. Whisk it to make sure it is smooth. Make a paste of the chilies, ginger, cilantro.

In a large and deep pan, heat the oil, and add the mustard seeds. When they start to pop, add cumin seeds, curry leaves, fenugreek seeds, urad dal, asafoetida, and finally add the cooked dal. Add the ground paste, and plenty of water. Add the cumin and coriander powders and salt. Bring it to a boil. Add the dhokli pieces to the dal and cook it for a few minutes on medium heat until the dal starts to thicken and the dhoklis have softened and cooked.

Freezing Dhoklis
Dhoklis: Frozen
If you wish to freeze dhoklis, lay out the individual dhoklis without crowding on a tray and keep it in the freezer for a few hours, and then transfer to a freezer bag or container and put it back in the freezer. When you are ready to use them, they can be put directly into boiling dal without thawing.

Sending this entry to RCI: Gujarat.

Tuesday, February 12, 2008

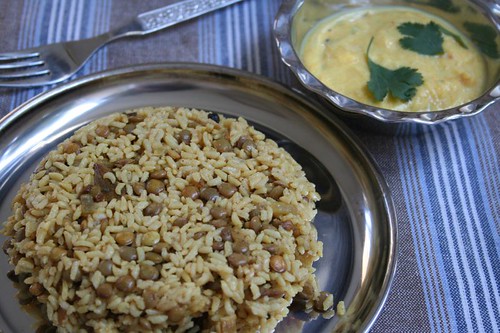
Popped Rice Chiwda

lahyancha chiwda

A recent invitation to a housewarming party said 'no gifts please'. While I appreciate the sentiment, I have known the hosting family for a long time, and hadn't met them in a while, so I just didn't feel it was right to go there empty handed. I decided on taking an edible gift instead, in place of an unwanted trinket that they were probably trying to avoid.

I thought of muffins or some kind of breakfast bread that they could have the next day, but wasn't sure if they ate eggs, so dropped that idea. They would also in all likelihood have some food leftover from the party that day, so I thought perhaps something that would last a little longer would be better. Something old-fashioned, but familiar, something healthy, but delicious, and with this list of criteria, I zeroed in on chiwda, more specifically lahyancha chiwda. It is much quicker to make than the traditional Diwali chiwda that I make annually for Diwali (of course) and all the ingredients needed for this chiwda were already at home.

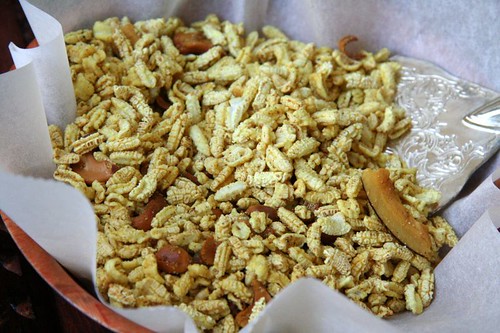
Chiwda: of Lahya

Lahya (plural) is the marathi term for popped grains. The original recipe called for popped jowar (jondhalyacha lahya), but I have not seen those here. The popped rice lahya on the other hand are found quite easily in Indian grocery stores, and in giant big bags too, referred to as puffed paddy. This nomenclature doesn't sound right to me, because puffed paddy could also apply to regular kurmure that are used to make bhel, but that doesn't bother me. It is the store strategy of packing things in giant bags and thus forcing me to buy more of what I need that is actually very annoying.

This chiwda is adapted from a recipe in Ruchira, and needs two uniquely maharashtrian ingredients - goda masala and metkut, that together impart a wonderful taste distinct from the regular chiwda. Metkut is a multi-purpose powder made out of various grains and spices, and is one of the many things that I have never made myself. I bring a packet of metkut made at home every time I go to India, and it usually lasts in the fridge well until my next trip back. Metkut is also increasingly available now in well stocked Indian grocery stores in the US. If you cannot find it here, of course, you can look for it when you travel to Maharashtra. In Bombay, you will need to head to a store that is geared towards a more niche marathi clientele.

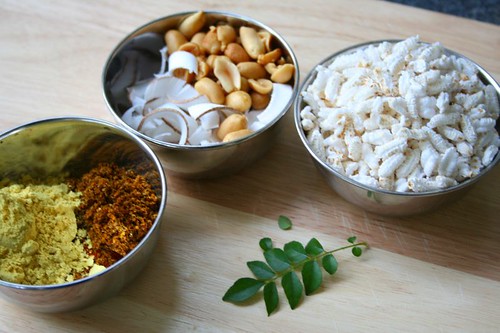
Chiwda: Ingredients
Spices, Nuts, Lahya, Curry Leaves

Before making the chiwda, check to see if the popped rice is crisp and crumbly. If not, spread it out on a cookie sheet and keep in a low temperature oven (between 150 and 170) for about 15 minutes, until the grains can be crumbled by just pressing it between a finger and thumb. This method works for me, but the grains available here could vary in quality.

Ingredients

6 cups of lahya (popped rice or jowar), crisped in the oven if required

4 Tablespoons oil
1/2 teaspoon mustard seeds
pinch of asafoetida (hing)
1/2 teaspoon turmeric
10-12 curry leaves
1/2 cup peanuts (or cashewnuts, or a mix of both)
1/2 cup coconut curls

1 teaspoon red chili powder (or to taste)
1 teaspoon coriander powder
1 teaspoon cumin powder
2 teaspoons goda masala
4 teaspoons metkut
2 teaspoons granulated sugar
1 teaspoon salt (or to taste)

Method


Mix the chili powder, coriander powder, cumin powder, goda masala, metkut, sugar and salt in a small bowl.

Heat the oil in a large wok, kadhai, or Dutch oven. Add the mustard seeds, and when they start to pop, add the asafoetida, turmeric, curry leaves, and the peanuts. When the peanuts are almost fried in the oil, add the coconut curls, and when they start to turn golden brown, take the wok off from the heat, and let the oil cool slightly.

Stir in the remaining dry spices into the oil, and then add the popped rice to it, and using a large spoon mix until the grains are coated with the spice and oil mix.

Let cool completely before eating, and store the remaining in an air tight containers. It can last for several days.


Notes

  • This is a moderately spicy chiwda, so reduce the amount of chili powder if you like it mild.
  • Keep the chiwda slightly undersalted when you make it, as it tends to absorb the salt in about a day.
  • Metkut often has salt added to it, so make sure you adjust the quantity of salt according to how salty the metkut is.


An Alternative to Popped Rice

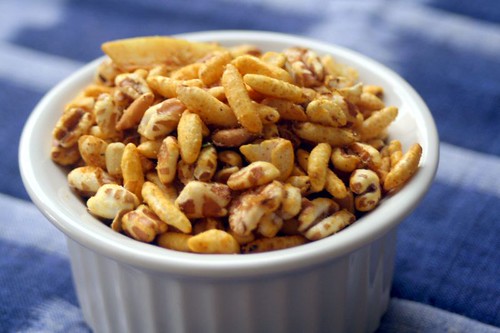
I have also made this chiwda using Kashi Wholegrain Puffs, and it tastes just as good. The story goes that I bought the cereal while on a virtuous eating mission, but did not like it at all as a regular cereal with milk. So something had to be done with it, and turned to this chiwda formula to take it from blah to ah!

Chiwda: Of Kashi Wholegrain Puffs

Wednesday, February 06, 2008

Lemon Scented Shortbread

For full flavor minus tartness

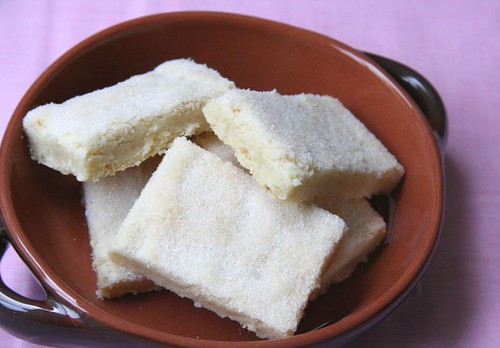
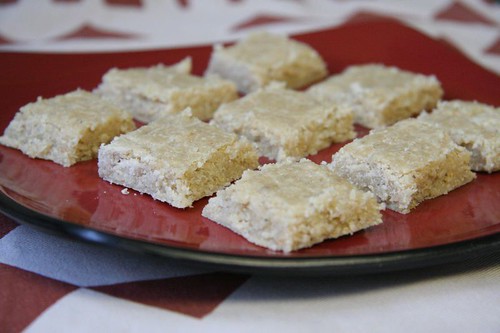
Meyer Lemon Shortbread

The urge to use the Meyer Lemons in a dessert had been quite strong for a while, even though I was trying very hard to use them in healthy(ier) everyday things that use lemons anyway. A good squeeze flavored a batch of hummus, some went into guacamole, in dal, in rasam, in all good things that need a little tartness. However, other than some lemon zest in a pasta with broccoli, the zest had been largely neglected. It had also been a long time since I baked anything with just good old flour, sugar, and butter. So finally, I gave in, and decided to do something sweet with the lemons.

I used a recipe for Lavender Shortbread from pastry chef Gale Gand, but used Meyer lemon zest instead of dried lavender. Very tender, flaky, and pleasantly lemon flavored, these were delightful to bake, and even more so to eat. I have made shortbread cookies before, but this was the first time I used a recipe that calls for cornstarch, and I don't know if that was the reason but these were one of the best I have ever eaten. Dare I say, even better than some of those special packages of black and red tartan that come from countries yonder.
They are also likely to be easily adaptable to other flavors, as long it is something that can provide big flavor in small doses. Orange zest for sure, but I think cardamom, which is a huge favorite of mine, would also do well.

The recipe is perfect as it is but I used a food processor with the dough blade instead of a stand mixer. I thought that 1/4th teaspoon salt would be too much, and that just a pinch would suffice. I am noting the recipe here for future use, along with some changes that might make it more useful.

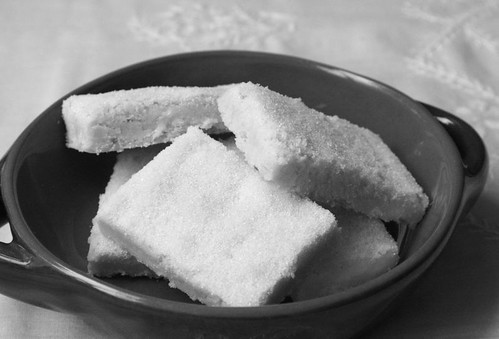
As an aside, this was easily the most distracting photo session I have had with food. At every moment I wanted to grab one of those cookies, making it very difficult to focus. Yes, pun intended.

Meyer Lemon Shortbread: b&w


Meyer Lemon Shortbread

Tender, flaky, and not too sweet

Ingredients

8 tablespoons (1 stick) cool unsalted butter, cut into pieces
1/4 cup plus 2 tablespoons sugar
1 cup all-purpose flour
1/4 cup cornstarch
pinch of salt
zest of two lemons, about 1 teaspoon

Method

Heat the oven to 350 degrees F. Line an 8 by 8-inch square baking pan with parchment paper.

Stir together the flour, cornstarch, and salt in a medium bowl.

Cream the butter until soft in a mixer fitted with a paddle attachment or in a food processor with the dough blade. Add 1/4 cup sugar and mix until incorporated.

Add the dry ingredients to the butter mixture and mix at low speed just until the ingredients are almost incorporated, then add the lemon zest, and mix until the dough starts to come together.

Flour a work surface, turn the dough onto it, and knead it 5 to 10 times, to bring the dough together and smooth it out. Reflour the work surface. With a rolling pin, roll the dough out to a little less than 1/4-inch thick to fit the 8 by 8-inch pan.

To transfer to the pan, roll the dough up onto the rolling pin, lift it up, and unroll into the pan. Or, press the dough thoroughly into the pan with your fingers. Prick the shortbread all over with a fork, to prevent any buckling or shrinking. Sprinkle the surface evenly with 1 tablespoon of the remaining sugar.

Bake for 15 minutes. After 15 minutes, deflate the dough by knocking the pan once against the oven rack then rotate the pan to ensure even cooking and a flat surface. Bake 10 to 15 minutes more, until golden all over and very lightly browned. As soon as it comes out of the oven, sprinkle the surface evenly with the remaining tablespoon of sugar. Let cool about 5 minutes. Using a very sharp knife, cut into 3 rows by 5 rows making about 1 1/2-inch by 3-inch bars.

Let cool completely in the pan. Remove from the pan and store in an airtight container for up to 1 week.

Sending this to Jhiva - Lime and Lemon.

Monday, February 04, 2008

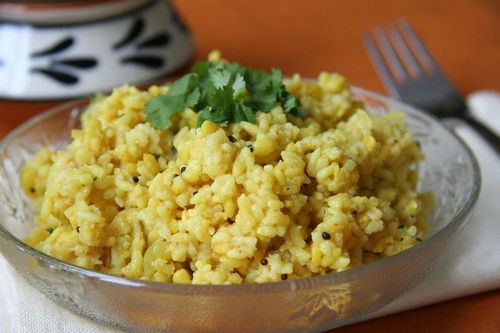
Moong Dal Khichadi with Potatoes

Comfort Food

There is an old marathi adage, that goes 'vyakti titkyaa prakruti', which means 'there are as many personalities as there are people', and the food extension of it might be that there are as many khichadis too. Some like it soft, almost mashed, some prefer it more pulao like, with all grains intact. Some like it mild, others prefer it spiced. Either way, it is a quick and easy one pot meal of rice and dal that is comforting to eat and effortless to make, and almost everyone who grew up with tends to recall fondly. The rice in it adds the starch, which has to somewhat magically mean comfort in any language, and the dal adds a good source of protein which is easy to digest. It is also a dish that is found throughout the country in some form or the other - khichdi, khichri, khichuri, venn pongal, even kedgeree, which was adopted by the colonials, are all variations on the same theme, and just some of the names by which I know it.

I recall a friend in school who said that she disliked khichadi because it reminded her of the times when she was sick, and I just couldn't relate to that, because at our house, khichadi was always a Sunday dinner feast. It was never bland, always delicious, and served with several simple accompaniments, making it a warm, hearty meal to wrap up the weekend before we all started another rigorous week. I saw the friend's point later in life, after I heard about the mild, very soft khichadi that some people make when in need of some kind of recuperation, which also confirmed how two people who lived within minutes of each other saw the same thing so differently.

The general rule I follow when making khichadi is to use 2 parts rice to 1 part of dal, usually moong dal. If there is some time, I like to soak the dal for about an hour and the rice for about half an hour, as the dal gets softer and it helps to speed up the cooking. If there are any vegetables on hand, those can be added to it too.

Moong Dal Khichadi

Moong Dal Khichadi with Potatoes

The basic, simple maharashtrian moogachi khichadi can be made in several ways. This is a version I made once after returning from a long and tiring trip, and it turned out really good, so I had to make a note of it. What I do usually is more or less the same, with variations. The potato is a great addition if one believes that there is no such thing as starch redundancy, but other vegetables like cauliflower and peas are also very good in this khichadi. Goda masala is the main flavor component here and it has no substitutes. Any other compatible masala could be used here, but that will change the taste accordingly.

The usual accompaniments to it at home were yogurt, fried sandga mirchi (dried chilies stuffed with spices), roasted papad, pickles, thinly sliced onion, and extra grated coconut and chopped cilantro. A good spoonful of ghee used to be poured over the khichadi itself.

Ingredients

1 cup of rice
1/2 cup of moong dal
1/2 medium red onion
2 Tablespoons oil
1/2 teaspoon mustard seeds
pinch of asafoetida
4-5 cloves (optional)
4-5 whole peppercorns (optional)
1/2 tsp turmeric
1 tsp chili powder
1-1/2 tsp goda masala
1-1/2 tsp salt

1 medium potato
1 teaspoon oil
1 Tablepoon of grated coconut
2-3 Tablepoons of chopped cilantro

Method

Soak the rice and moong dal in water for about an hour and drain. Slice the onion.

In a large wide pan, heat the oil and add the mustard seeds. When they start to pop, add asafoetida, cloves, and peppercorns. Add the onion, and stir fry till it changes color. Add turmeric, and the grains. Stir everything together, and add 4-1/2 cups of water. When the water starts boiling, lower the heat, add chili powder and goda masala, and cook covered on medium heat for 15-20 mins.

While the khichadi is cooking, chop the potato into small fries. In a wide saute pan, heat a teaspoon of oil and saute the potato on medium-high heat until it is golden brown outside and tender inside. Add a little salt. When the khichadi is done, add the potatoes to it.

Garnish with coconut and cilantro.

Serve with the accompaniments suggested above.


Sending this over to the Monthly Mingle, where the theme this month is Comfort Foods.

Friday, February 01, 2008

Kancha Moong Dal with Meyer Lemon

In praise of 'Bengali Cooking: Seasons and Festivals'

A lot of cookbooks pass through my hands - at bookstores, in libraries, and through the virtual world of amazon's 'search inside' feature. While there are plenty of books I love, and even more that I want to buy, very rarely do I come across a book that makes me want to jump and evangelize! Chitrita Banerji's 'Bengali Cooking: Seasons and Festivals' did just that, very recently.

This is a fairly old book, first published in 1997, divided into four main sections called Basanta-Grishma (Spring and Summer), Barsha (Monsoon), Sharat-Hemanta (Early and Late Autumn), and Sheet (Winter), and each section delves into details about the food of that season, the whys and the hows of it, and how it relates to the produce, the beliefs, stories, fables, festivals, and so much more, that it is difficult to describe it in a few words. The book talks about the differences and contrasts in food between the various regions in Bengal, of Ghotis and Bangals, of Hindus and Muslims, of rich and poor, of the past and the present, along with plenty of recipes interspersed within the narrative. And yet, as it tries to cover so much ground it never feels as though it is meandering. The fact that Bengali cuisines is among those more unfamiliar to me says even more about the book. As Deborah Madison says in her foreword, this book reminds us that food is not separate from people, history, geography, and culture - in short, life itself. What I also love about the book is that it makes no concessions, and the author does not simplify the writing at any point for popularity's sake.

There are no photographs in the book, but the writing is so evocative that it paints enough pictures with words. Sometimes, the descriptions are so beautiful that I want to rush to the kitchen to rustle up some luchis with alur dom and chholar dal. What I do instead is run through page after page of the book, traipsing through West Bengal and Bangladesh, taking my time, dipping into the book every now and then.

If someone is looking for a book of Bengali recipes, then this is probably not the book for them. However, if you are not deterred by recipes that are not divided into neat sections of 'ingredients' and 'methods', and that do not necessarily give you exact amounts of everything, if you are intrepid enough about looking for a few unknown words, if you are not a new cook and do not need every step explained to you, if you are familiar with Indian food, and would like to know more about the context of Bengali food, you will love this book, regardless of whether you have eaten Bengali food before or not. This is evidently a book based on extensive research and personal experience.

The book has a glossary, but I was left fumbling with some names that weren't given in English. Knowing Hindi and Marathi, I could guess some of them, and with friends who know Bengali, translation help for the rest will be at hand if I need it.

So far, I haven't tried out a lot of things from the book, but like I said, the joy of this book is in the vivid descriptions, not necessarily in trying out recipes from it. The Kancha Moong Dal that I tried was simply stellar, with an amazing flavor using only a few ingredients that came together just right, and convinced me that the other recipes in the book would also be up to par, not that I ever doubted that anyway.

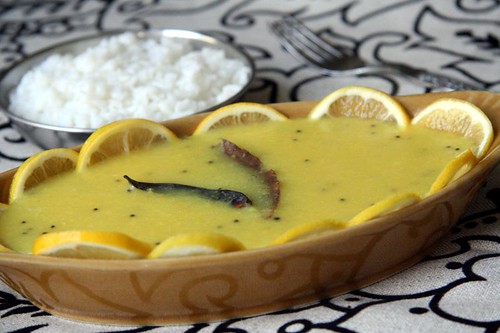
There is also a recipe in the book for a Bangladeshi Lemon dal, and I loved the way it described how thin slices of lemon are used to flavor the dal, so I used the leftover Kancha moong dal and turned it into Lemon dal, which was a wonderful way to use some of the Meyer Lemons from the yard, and the presentation looked beautiful.

The following introduction to the Kancha Moong Dal in an extract, and the recipe that follows is paraphrased, and uses the same style of recipe writing as used in the book.
In summer, the common dals in our house are moong and kalai rather than lentils, yellow split peas or pigeon peas. And while in winter the moong dal may be roasted in a frying pan before cooking, in summer it is preferred kancha or unroasted, because it is easier to digest and does not heat the system.

Kancha Moong Dal

Take 1 cup of moong dal and rinse the dal under running water for 3-4 miutes. Then it describes how to cook the dal in boiling water, but I cooked the dal with 4 cups of water and a pinch of turmeric in a pressure cooker.

Finely chop or grate a small piece of ginger, enough to make 2 teaspoons.

Heat about 1 tablespoon of oil, add 1 teaspoon whole mustard seeds, 2 dried red chilies, and when the mustard starts to pop, add the ginger, and 2 bay leaves. Stir for a minute, add a teaspoon of ghee, and pour the dal over it. Add a little sugar and salt to taste, and heat the dal through for a few minutes.

It then goes on to describe another type of phoron (tadka) that can be used instead of the above seasoning, and in a blink of an eye you have another recipe right there.

Lemon / Kancha Moong Dal

Lemon Dal

This is an extract from the book, keeping in mind the guidelines for fair use of copyrighted material, that illustrates how even a simple dal recipe sounds wonderful in the book.
Once, in Dhaka, a good friend of mine, Salma Sobhan, was talking to me about Muslim Bengali cooking. She explained that among its intricacies were a few simple dishes, like lemon dal, that amazed one with their taste. What was that, I asked, and she was taken aback at such ignorance.

For Lemon dal, it is the same kancha moong dal that is used. Once cooked with a little salt and water, it is sieved through a cheesecloth so that it comes out as a thick, creamy soup, without the fibres. Then a large porcelain or earthenware (never metal) serving bowl is taken and the bottom and sides lined with thin slices of lemon or lime. Bengalis prefer to use the fragrant kagaji or gondhi lemon, if they are available. Once the slices are in place, the sieved dal is put back on the stove, brought to a boil, and kept there for two or three minutes, then poured into the lemon-lined basin and kept covered for about five minutes to absorbe the taste and flavor of the lemon. This needs to be served with plain rice, preferably an atap (non-parboiled) rice like Basmati. The problem with this dal is that it can neither be reheated, nor kept overnight, for it tends to turn bitter.

Sunday, January 27, 2008

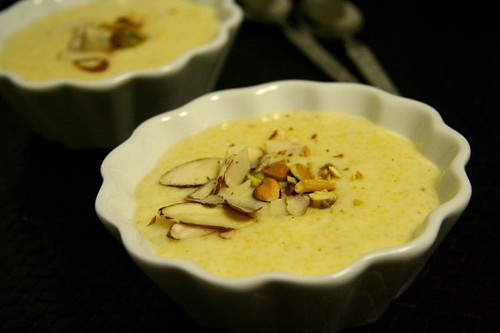
Polenta Kheer

The first time I ever encountered polenta was on a plain jane PBS show one Saturday morning (in the days before Food Network!), and I was so fascinated by it that I had to seek it out. After I found it, I taught myself how to make it just based on the instructions on the back of the packet. Having never cooked with cornmeal of any kind before that and after having read a few onerous articles on the subject, I was concerned about the results, but I was lucky that the brand I started with was a good one, and it never gave me any problems. To be on the safer side I started with the oven method which makes a firmer polenta that can be cut into pieces, but later as I started feeling more comfortable with it I turned to cooking it directly in boiling water, and have never looked back. Even now, I come across writings that make it sound as though cooking polenta is rocket science, whereas it really is very simple.

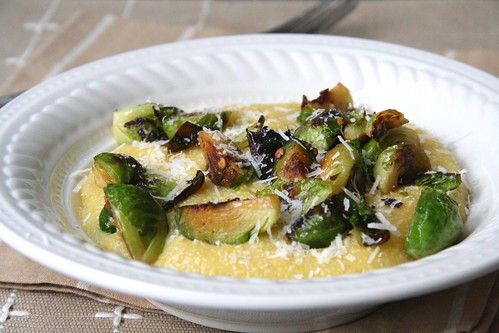
There is something inherently so warming about stirring a pot of polenta over the stove that it has now become a ritual I look forward to every winter, a few times at least. It is also a perfect blank canvas for numerous delicious accompaniments, and there is the comfort of favorite pairings and the joy of discovering some new ones. It is no co-incidence that the best polenta accompaniments are often perfectly suited for the winter season as well, and my current favorites are roasted vegetables, especially root veggies, pan fried brussel sprouts and grated parmesan cheese, and sauteed mushrooms, by themselves, or in a red wine sauce.

Polenta with Brussel Sprouts and Parmesan

Soft, Creamy Polenta

For making basic soft polenta, I start by heating 4 cups of water in a large pot, and when it starts boiling, add about 1 teaspoon of salt, 1-2 tablespoons of butter, and then the polenta, whisking continuously. When it starts to bubble, lower the heat and keep whisking occasionally until the polenta is fully cooked, and starts to become very soft and creamy. For more information, check out this link to the 'The Basics of Polenta Cookery' that covers it all, and even includes several recipes.

Perfectly Round Sliced Polenta

Once polenta is fully cooked and starting to thicken, it can be poured into a flat tray to cool. It will firm up and can be cut into shapes, but here is a tip if you want to eat or serve round slices of polenta but do not like the idea of having to waste all the pieces that would be leftover after cutting out the rounds - after the polenta has completely cooked and is starting to thicken, pour it into straight walled cups or glasses greased on the inside with a little butter. When cooled completely, run a knife around the polenta, and it will come out in one cylindrical piece that you can slice as thick as you like. These slices can be further baked or pan fried, and used with toppings of choice.

Polenta Sliced


Polenta as Dessert

The idea for making polenta kheer just came out of nowhere, but I wouldn't be surprised if some enthusiastic home cook has tried it out already. At home, rawyachi kheer or kheer made out of coarse rawa (rawa in Marathi, sooji in Hindi, semolina in English) was more common than any other type of kheer. It was a simple and quick dessert for any night of the week, when the menu needed a little perk. It is forgiving on the amounts, and so the basic instructions would be to saute a little bit of coarse rawa in a little ghee, add milk, then let it cook for a little while to thicken, and then add sugar. Some cardamom and nuts can be added, time permitting, or it can be left plain. I always liked it at room temperature, or slightly warm.

So once the inspiration struck, I did the same with polenta, and what was most surprising about the end result was that it tasted a lot more like rawa kheer than like polenta.

Kheer is really pretty low on my dessert choices, but this is the stuff of childhood memories, and for a mid-week winter dessert that practically gets done on the literal back burner, this is perfect. It is as comforting as a blanket in the chill, and takes as much effort to make for a dozen as it does for one.

Polenta Kheer

The following proportions would make 2 generous portions, or can stretch out to 3 dainty portions.

Ingredients

1 teaspoon ghee
1/4 cup of medium grain polenta
2 cups plus more milk (whole milk would be nice)
2 green cardamom
4-6 Tablespoons sugar (I like about 5)
few strands of saffron
chopped almonds, pistachios or other nuts, about 2 tablespoons (optional)

Method

In a large wide pan, heat the ghee, and as soon as it starts to melt, add the polenta, and stir it around till it gets coated with the ghee. As soon as it starts to smell like it is being roasted (but do not wait until it changes color), add the milk, and start to whisk it using a wire whisk until it comes to a boil. Lower the heat considerably, and then let it simmer until the polenta cooks fully. This took me about 10 minutes, but polentas differ a lot in their coarseness. Stir occasionally to make sure it does not stick to the bottom of the pan.

In the meanwhile, remove the seeds of the cardamom and powder them finely. Chop the nuts and leave them aside.

If the kheer starts to thicken too much, add a little more milk. Add the sugar, and let everything simmer on the low heat for another 5-10 minutes. After you turn off the heat add the cardamom and crumbled saffron, and let it sit with a lid on it, preferably on the still warm stove. Just before serving add the nuts.

Picture of Polenta Kheer is my entry to the Click Event, where this month's theme is 'Liquid Comfort'.

Monday, January 21, 2008

Good ingredients can make a simple salad great

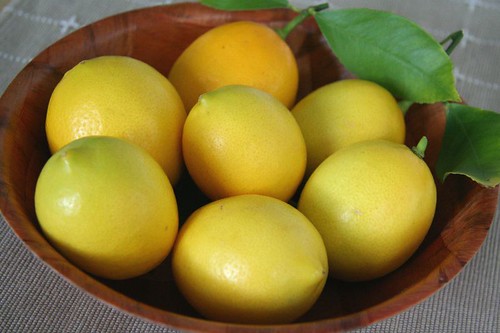
At this time, the only plant in the yard that produces anything edible is a small Meyer lemon tree, and around early winter, I usually harvest a small basket of them, after which begins the great quest on how to use them up before they turn bad, because I don't really need a lot of lemon juice in everyday cooking.

Meyer Lemons

I have made standard Indian pickles out of them in the past and they work just as wonderfully as regular lemons, but pickles last forever in our house, because we don't eat a lot of them, so I need other alternatives. There are several recipes for lemony cakes and breads but sometimes that seems a tad too much just to use up a few lemons, so instead I try to substitute these Meyer lemons in healthy everyday recipes that use lemons.

First up, this simple salad, versions of which you might have had before. It is a good example of how a few good quality ingredients can shine even when treated very simply, and give tired known combinations a refreshing lift.

The fresh mixed greens were an excellent base for the rest of the cast. The English cucumber was local and organic. Albeit hothouse, it was very sweet and tasty. The olives were from a fancy Italian store, and while I am not too knowledgeable about olives, I believe this is a store that takes pride in their quality, not to mention that everything there is rather pricey, so they have to be good, right? The feta was so-so, but it held its own in the mix, so I can only imagine what a good feta cheese would have done. A small chopped tomato or a few cherry tomatoes would be wonderful in this salad if they are in season, but I did not have any. The Meyer lemon in the dressing was from the backyard, of course, and it cannot get any more local than that.

Things made with few ingredients, where each one plays a standout role towards the final dish have become a hot favorite with me currently, and as I continue to explore the options, it is interesting to find many traditional Indian dishes that fit well into that category too.

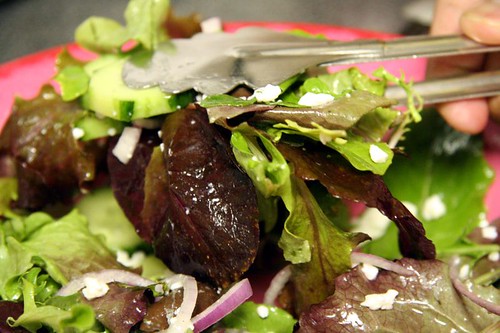
Salad with mixed greens, cucumbers, olives, feta, and Meyer Lemon dressing

Simple salad, inspired by tired versions of the Greek or Mediterranean Salad


This would serve about 4 as a small side or starter salad. Precision is not very important here, and the following quantities are just guidelines.

Ingredients for Meyer Lemon Vinaigrette

1 Tablespoon lemon juice
2 Tablespoons extra virgin olive oil
a bit of salt and pepper to taste
dash of granulated sugar

Whisk the lemon juice and oil together for a couple of minutes until they are emulsified. Add the salt, pepper, sugar, and stir together until the sugar dissolves.


Ingredients for Salad

5-6 cups of mixed greens,
1 cucumber
a little bit of red onion (this is hard to quantify - I'd say about 20 thin rings, or to taste)
handful of olives
a few Tablespoons of feta cheese

Tossing it together

Wash and dry the greens, and place in a large bowl. Peel and slice the cucumber, or leave the skin on if you like. [I like to keep a striated skin]. Slice the red onion. Pit the olives - a cherry pitter works very well for smaller olives.

Just befere eating, toss the dressing with the greens, a few spoons at a time, using only as much as required to light coat the leaves. It is alright if there is leftover dressing. Add the rest of the ingredients, and toss just once or twice to distribute evenly.

Thursday, January 17, 2008

Fat Free Feta

The intentions were very good, but the outcome wasn't impressive. That was the case with a fat free feta cheese that shall remain unnamed. Yes, yes, I know that fat free cheese is a complete oxymoron, but it was the start of the year, the time when one is trying to curb calories, and sometimes ready to sacrifice taste.

The taste isn't bad, but isn't great. No tang, no texture, none of that saltiness that comes with a good feta. I am not discounting it completely, and will continue to use it in salads, which will appear here from time to time, but otherwise, it is a lesson learned, for sure.

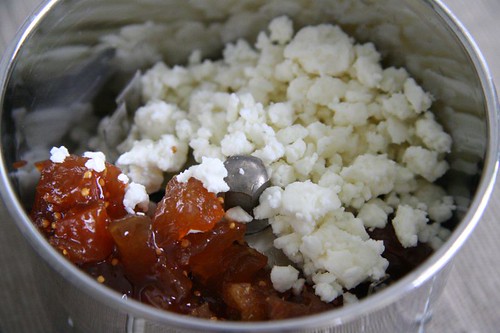
Apple Chutney and Feta Spread

To see if it could be redeemed in some way I made a small amount of spread by processing the cheese together with some Apple Chutney, and it makes for a decent accompaniment to crackers for a small snack, but nothing to write home about.

Monday, January 14, 2008

tiLAchyA waDyA for Sankraant

Sesame Candies

I have lamented before that Indian festivals just don't seem the same here. It is simply not in the air, and not around you in a noticeable way. Makar Sankrant becomes just another day, something we see on our Kalnirnay, and then do nothing about it. I recall a time when 'sesame candies' used to appear in desi shops in January, and we would buy those for our token Sankrant celebration, but things have evolved now to a point where I can buy real marathi style tilgul ladoos, as well as revdis and gajak.

This year however, I had finally planned to make tiLAchyA waDyA at home, in part because of the festive spirit on the Indian blogs and in part because I had some time. I dug out the recipe that I had got from my mother years ago, but held back with trepidation because it involved making pakka pak, or sugar syrup that forms into a ball when dropped into water. Making syrups like this, with various 'string consistencies' attached to them, which is a staple of Indian sweets is something that has always daunted me, but these tiLwaDis were a huge favorite of mine, so I braced forth, and they turned out pretty good! While the Tilgul ladoos made of sesame seeds, peanuts, and jaggery were more traditional for exchanging with relatives and friends, and hence evoke more nostalgia, I always preferred the tiLwadis over them. They were also never made at our place at any time other than Makar Sankrant, making them even more precious and special. Another plus in their favor is that no one can make jokes about having to crack them with a hammer!

tiLAchyA vaDyA (tiLvaDyA)

tilachya vadya: sesame seed candy

Yields about 20-25 small squares

Ingredients

1 cup of regular (white) sesame seeds
1 teaspoon ghee
1 cup sugar
1 water
4 pods of green cardamom

Method

Pick over the sesame seeds, and roast them in a deep skillet or kadhai over gentle heat for a few minutes minutes, just until they start to change color. Do not get them too brown.

Grease a small cookie sheet with ghee.

When the sesame seeds are cool enough to handle, powder these in a food processor or dry grinder.

In a saucepan, heat 1 cup of water and 1 cup of sugar and bring it to a boil. Let it thicken. Keep aside a small bowl of water.

While the syrup cooks, peel the cardamom and finely powder the seeds in a mortar and pestle.

To check if the sugar syrup is done, add a drop of it to the small bowl of water. If it holds itself into a shiny ball, it is done. Switch off the heat immediately, and add the powdered cardamom powder and sesame seeds to it, stir quickly to mix, and spread it into the prepared cookie sheet using a spatula, starting in the middle of the sheet.

Immediately, while the mixture is still hot, mark lines into it with a knife for the wadis, and separate the wadis when completely cooled.


Related: A primer on the concept of maharashtrian style wadis.

Sunday, January 13, 2008

Whole Masoor Pulao

Trial Run with a Packaged Masala

A few weeks ago on a cold and rainy evening, when there were plenty of leftovers for dinner, and nothing great on television, I found myself with some rare time to go rummaging through the fridge, freezer, and pantry to take stock of all the spice powders that have been sitting idly in the kitchen, for months, perhaps longer. Out came packets, bottles, plastic containers, of odd shapes and sizes. I did not even know how some of these came into the house. I could take some reasonable guesses, but wasn't completely sure about some. Some probably came with guests, and some were gifts from relatives, but I know that a lot of them were the doing of my own greed for trying out different things.

Perhaps I should spare you the details, but there are no less than 26 of them right now, some of them highly suspect, like "Curry" Powder, some intriguing, like "Kitchen King" Masala, and some downright useless, like a branded Sambar Masala, which was bought when I was going to make sambar for guests and found out at the last minute that I had run out of my stock of mom's sambar masala.

Still, there is something innate to my Indian sensibilities because of which I found it rather difficult to just chuck these away. I thought that I must try using some of the unopened ones at least once, to see what they are like. The Biryani Pulao Masala was an easy choice, of which I had not one, but two packets, a Badshah, and an Everest, of which Everest had a mix of whole and powdered spices, and I settled on that, and used the recipe on the back as a rough guideline.

Masoor Pulao, Pumpkin raita

I soaked 1/2 a cup of whole masoor (similar to generic brown lentils) for about an hour, and 1 cup of basmati rice for about half an hour, and drained both of these before cooking. Sliced some onion, and sauted it a bit of oil and ghee, add the biryani-pulao masala, followed by the masoor dal, rice, pinch of turmeric and red chili powder. Added 3-4 cups of water, salt, and cooked everything like a pulao.

What did I think of it?

Eaten with a pumpkin raita, the pulao was definitely delicious, so the masala might be ok in a pinch for a quick weeknight rice dish, but nothing special that my own whole spices (bay leaf, cloves, cardamom, cinnamon stick) and ground garam masala couldn't do. It might be fine for someone who does not want to buy the usual whole spices used in a pulao and yet wants to make pulaos or biryanis frequently. The pumpkin raita, by the way, deserves its own post.

If more cold rainy nights persist, fun times lie ahead. I could do a dal count, flour count, or even grain count, and find interesting things hidden in my own kitchen.


Sending this to the Legume Affair at the Well Seasoned Cook.

Friday, January 11, 2008

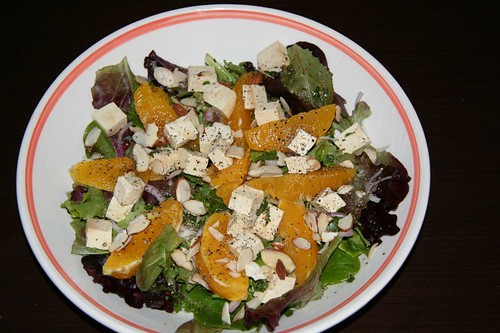
Salad with Oranges, Tofu, and Soy Ginger Dressing

Wishing you all a happy and healthy year ahead!

Salad: Mixed Greens, Oranges, Tofu, Ginger-Soy dressing

As soon as a new year is around the corner, you hear people talking about eating lighter, better, healthier and so on. The media isn't one to be left behind either, and in January, one can hardly pick up a newspaper or magazine without an article about resolutions, sensible eating, and exercise. While all that is a good thing, it can get predictably boring. Besides, we all know what really happens as the year progresses.

That is why I had decided that my first post of the year would not be anything like that, because I know better than to make resolutions that don't ever work. However, I would be lying if I say that getting in shape has not been on my mind for a while now, particularly after packing those pounds during the trip to India over Diwali and while traveling during the week of Christmas.

So as the year began, I virtuously stocked up on a bag of mixed greens from the farmers' market, and since then, have already enjoyed a few different salads. Absolutely enjoyed, because I actually like salads a lot and eat them regularly and happily throughout the year. The trick is to keep it balanced and satisfying.

The salads that I make are not based on precise recipes, and usually depend on what is on hand besides the greens, but I like to include a small amount of protein as far as possible, and try to include different textures and colors. I don't like to crowd the salad with too many things, but a few well chosen things that are fresh and flavorful and that go well together never fail to please. While most of them are tossed together extempore, I do have a few favorite combinations that I make repeatedly, and the following is one of my cool weather favorites, put together with all local ingredients except the dressing.

Mixed Greens Salad with oranges, tofu and almonds, with soy-ginger dressing

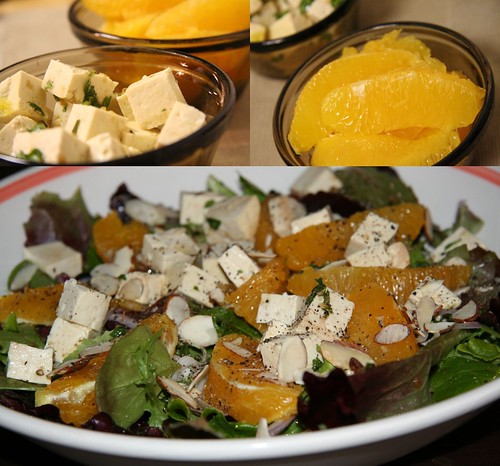
Salad: Components and Result

These quantities are for 2 servings, and can be scaled easily.

Ingredients for the Soy-Ginger Dressing

1 Tablespoon soy sauce
1 Tablespoon rice vinegar
1 teaspoon honey
1 teaspoon finely grated ginger
1 teaspoon toasted sesame oil
2 Tablespoons light olive oil (or any favorite neutral salad oil)
salt and pepper to taste
5-6 sprigs of cilantro, finely chopped

Ingredients for salad

enough mixed greens for 2 (about 4-5 cups)
1 orange
1 cup of cubed tofu
2 Tablespoons of thinly sliced red onion or chopped scallions
2 Tablespoons slivered sliced almonds

Tossing it together

Whisk together all the dressing ingredients except cilantro, salt and pepper until emulsified together. That takes a couple of minutes. Add the cilantro, salt and pepper at the end and stir together.

Drizzle about a tablespoon of the dressing over the tofu so that it absorbs the flavor while you prep the other things.

Peel and slice the orange into segments [see notes]. Wash and dry the greens, and place in a large bowl. Drizzle the remaining dressing lightly over it and toss gently. Add the onion, orange segments, tofu, and almonds. Season with a little salt and pepper, and toss just once or twice before serving.

Notes

Slicing an orange into segments is a lot easier than it sounds and I learned it only a couple of years ago. Here is a beautiful pictorial guide that tells you how it can be done.

Sunday, December 30, 2007

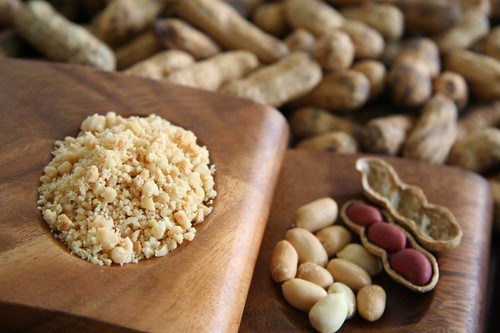
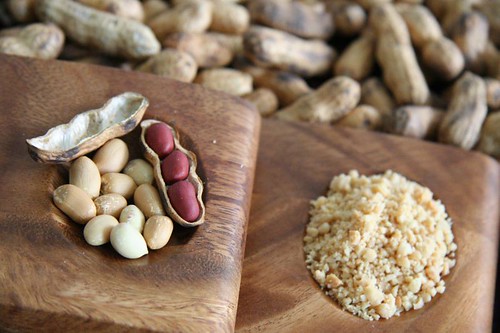
Crushed Peanuts

dANyAcha kUT

Focus on Crushed Peanuts
This picture is my entry to the Click event: Powdered peanuts ready for cooking are the focus here, with the peanuts a step below, and peanuts in their shell in the bokeh.

Peanuts are a staple in Marathi food and in a few other regional Indian cuisines as well, in many different forms, but the most common way of using them is either crushed or powdered. They are used in koshimbirs and salads, (a few recipes should be coming up), sabudana khichadi (a quick version of which is already a favorite) and other food that is eaten for fasts, for stuffings and gravies (not of the Thanksgiving variety!), in various snacks like besan coated, spiced and fried peanuts, and even in sweets. The list can go on.

In India, we used to buy the peanuts with the skin on them, which were then roasted at home in a thick kadhai. This caused the skin to blister and get brittle. When cooled, the peanuts were rubbed between palms to remove the skin, and then the skin could be separated from the nuts and discarded. The peanuts were then ready to be used for cooking. In the days before electrical gadgets, a large batch of the peanuts were pounded in a stone mortar to get a coarse powder which was then stored to be used.

Here, I buy roasted peanuts, which I quickly pulse a few times in the food processor as required. I rarely make a large batch to keep, just because it is so convenient to make some when I need it.

For times when you don't have a food processor, or might be too bothered to wash the bowls, there comes a tip from a friend who often reads this blog and sometimes comments. She says that you can put the requisite amount of peanuts in a strong 'ziplock' style plastic bag, close the bag after removing any excess air, lay it flat, and use a rolling pin to crush the peanuts inside the bag as coarse or fine as you like. Voila, powdered peanuts ready to be used in Maharashtrian and other dishes. I have tried it, and it really works well.

Focus on Peanuts
This is a picture with the peanuts in focus, and is not an entry to the Click event.

Tuesday, December 18, 2007

First Blogiversary

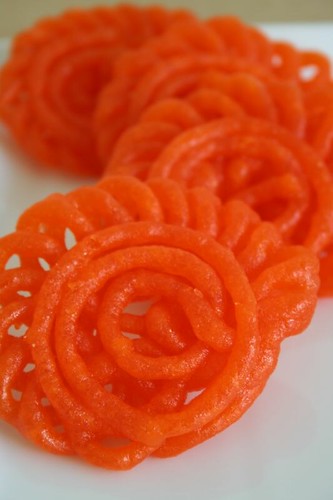
Jangiri in the South, Imarti in the North

A year ago I took the first step towards making this blog a reality by writing my first post. For months before that, I had several ideas on what I wanted to write, and had even registered the blog name, but as days and weeks went by, I wasn't sure if I should really write what I wanted to. Then finally, I decided that could just try it out and see how it goes, and before I knew it, a year has already flown by.

I have to thank everyone who has been associated with the blog in any way, especially those who stop by with comments, and those who spread the word via links, and last but not least, my non-blogging friends who use the recipes from here and are always sweet enough to let me know when they do.

Monday, December 17, 2007

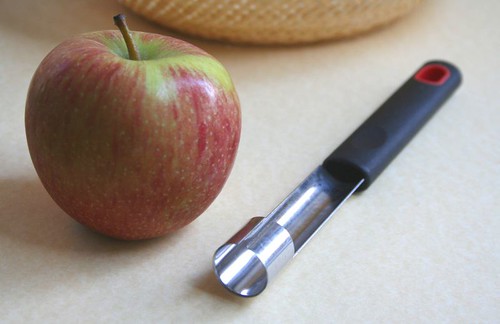
Apple Corer

Apple Corer

The 'Apple Corer' was among the first single function kitchen items I bought, purely for its novelty value more than anything else. Yet, I find myself reaching for this little tool so often that I thought I should do a post about it, especially now that apple season is upon us. The corer is to be held vertically, with sharp side down, to core out the seedy middle that is generally not eaten or used. After that, the apple can be peeled if needed, and sliced or chopped as required.

I make this Apple Chutney, and also an Apple Pickle about once a year. Other than that, I use apples in various salads, and sometimes for baking, but primarily for eating on their own, sliced. It might look as though it is one additional thing to wash, but it it not that significant an effort, and so well worth it.

There are also tools that core and wedge apples at the same time, that are likely to be just as useful, but I have not convinced myself yet that I need one of those. In the meanwhile, this works!

Sunday, December 16, 2007

Apple Apricot and Fig Chutney

One good substitution deserves another

Food bloggers can be admirably observant at times. For instance, consider the picture of a plateful of food, with poori and bhaji as stars of the post, and yet, what two of my favorite bloggers, Richa and Bee asked me was about the tiny speck of Apple Chutney, which was nearly hidden under a papad! Giving them the recipe was the easy part, but if I had to post it, then an unwritten requirement was to take a halfway decent photo of it, and that meant I needed a fresh batch of it, since I was already out of it.

The original recipe is from Madhur Jaffrey's Indian Cooking, and called 'Apple, Peach and Apricot Chutney' translated into Hindi as 'sev, aroo, aur kubani ki chutney'. Even though one should not judge food by looks alone, it was the orange hued picture of the chutney in a silver bowl that first caught my attention and made me want to try it out. I checked how many apples it called for, and set two aside to make a half batch of it. It was when I was ready to start cooking that I realized that I did not have any dried peaches. Dried apricots are usually in the pantry, but dried peaches, never. Ever so resourceful, I used dried papaya instead and proceeded, and it was a hit. It was absolutely easy to make, and it was evident that the quantities of the seasonings could be easily adjusted according to taste.

The next time, I didn't have any dried papaya, so I used dried figs from India, you know, those types that come in the form of discs on some sort of a string, most often seen in the Diwali dry fruit boxes wrapped with yellow cellophane? I don't particularly like those, and don't remember how they landed home, but they were sitting for a long time, so they were put to good use in the chutney in place of the dried papaya, I mean, peaches. So that's the story of the chutney that the ladies spotted in the picture.

Now with the bounty of delicious local fall and winter apples here, that is what I decided to make, but this time, I didn't have any dried figs on hand either! So I went to buy some and was staring at the Black Mission and Calimyrna, thinking what a difficult choice this was, did a eena-meena-mina-mo on them, and went for the Calimyrnas. The apples I used were Jonagolds, but nearly any type of apple works here just fine.

Apple Chutney with Apricots, Raisins, and Figs

Apple Apricot and Fig (or Peach or Papaya) Chutney

Yields
About 4 cups chutney

Ingredients

1/2 kg apples (4-5 medium sized apples)
3/4 cup dried apricots
3/4 cup dried figs
1/2 cup golden raisins
4 cloves garlic
2 X 1 inch cube ginger
1-1/2 cups white vinegar
1-1/2 cups granulated sugar
2 teaspoons salt
1 teaspoon cayenne pepper

Method

Core, peel, and chop the apples. Chop the dried figs and apricots into pieces as large or small as you like. Mince the garlic, and grate the ginger.

Combine all the ingredients in a medium sized stainless steel pan, and bring to a boil. Turn the heat to medium-low and cook for about 30-40 minutes until it reaches a thick consistency similar to jam. Stir occasionally if required to prevent sticking.

Let it cool in the pan for some time. It will thicken slightly more as it cools. Let cool completely before filling into a jar.

Notes, Substitutions

  • The above recipe is what I have made, with changes to the original. I have reduced the amount of garlic a little, and increased the amount of cayenne pepper.
  • The original recipe uses white wine vinegar, but I use white distilled vinegar or apple cider vinegar. The vinegar could fume during cooking, so make sure to turn on the exhaust or keep a window open.
  • I have reduced the amount of sugar significantly from the original, and yet it is somewhat sweet in taste, but the sugar is required for preserving the chutney for a longer period. I have been able to keep the chutney in good condition for a few months without having to refrigerate it.

Taking a cue from a certain new cookbook title, this chutney is tangy, tart, hot and sweet! It should also come with a warning that there is a danger that this chutney might be consumed in side dish quantities rather than as a condiment, but that should be alright, considering that it contains things that are mostly good for you.

Friday, December 07, 2007

'That' Methi Dal

Trying to recreate something from the past

It all started when a friend and I were talking and sharing our memories of hiking in the Sahyadris. Anyone who has ever hiked there knows of the joys - of walking through the hills in the rains, through the lush green grass, and the chipik chipik mud, of the smell of the pure air, the cool monsoon breezes, and of the rush of reaching the end of a trail or the top of a peak, or fort. Even though we did not know each other during our hiking days it turned out that we had been to many of the same trails and forts. So on we talked, of the people, the camaraderie, and of course the food, or lack thereof. I usually took food from home, as did most other people, and we usually shared it with our co-hikers, sometimes stopping whenever we were hungry, and sometimes waiting for everyone to get to the top to share our dabbas.

My friend spoke with great nostalgia about a spicy methi with dal and lots of green chilies that she had eaten with bhakris on one such trip. Even though it had been several years since then, she called it one of the best methichi bhaaji she had ever had. The person who had brought it happened to be a peon at her workplace, so there was not a chance of getting the recipe. It wasn't something I could relate to immediately, but started to have faint recollections of having eaten something similar somewhere too. Couldn't place it, and yet it seemed familiar.

Sometime after that conversation, I went to Bangalore during a visit to India, and friends of mine who live there took us out to eat a bhakri meal, or jolada roti as they called it, which is common in the northern parts of Karnataka close to the border with Maharashtra. The traditional meal came served on a banana leaf, and one of the things on it was what I thought could have been the dal-methi my friend had talked about! Here it is in the picture below, in the top right corner.

Northern Karnataka meal on banana leaf

After I came back here, I had more clues as to what to expect in terms of the taste, with the experience still fresh in my mind. I looked through some of my cookbooks to see if they had anything and Ruchira, the marathi cookbook had a recipe for something similar that used moong dal, but what I recalled was toor. So I decided to give it a try with toor dal and see if it tastes like it, and it pretty much did! I send the recipe to my friend to see what she thought, and when she gave it the thumbs up, I knew it was a success.

This dish is somewhere between a dal and a bhaji and is a very basic, rustic dish. It is neither runny nor dry and tastes great with bhakris. My guess is that it tastes best when made on a slow coal fire, and is probably cooked when methi is plentiful and in season, but cannot go far enough, which is why the dal is used to make it more substantial and economical.

Methi Dal

Methi and toor dal bhaaji

Serves 2 as a side, but can be scaled easily.

1/2 cup toor dal
1 big bunch of methi
2-4 green chilies (depending on size of chili and desired spiciness)
2 tablespoons of oil
salt to taste
pinch of sugar (optional)

Rinse the dal a few times and soak it in warm water for 5-6 hours.

Split the chilies into 2 along the length.

Just before cooking, drain the dal. In a large pan or wok, heat the oil, and add the chilies to it. Add the dal, stir it around in the oil, add 1 cup of water, and bring it to a boil. Place a lid on the pan and lower the heat. Let the dal cook until it is tender, adding more water as required. This could take somewhere between 30-40 minutes.

In the meanwhile, clean the methi, plucking the leaves and throwing away the stalks. Wash, spin, and chop the leaves fine.

When the dal is cooked, and has absorbed all the water, add the chopped methi, salt to taste, and sugar. Let it cook for another 10-15 minutes on moderate heat, without the lid.

Notes
The dal could be cooked in a pressure cooker too, but that would make it very soft like varan, which is not the desired consistency here.

One could also add mustard seeds and turmeric in the tadka, but I like the simplicity of the few strong ingredients.


Now 'this' humble methi dal goes to Linda, who is hosting Jihva: Toor Dal.

If any of you know what my friend could have been talking about, or have a different recipe for this, I would definitely love to hear about it.

Tuesday, December 04, 2007

Baby vegetables in Cilantro Lemongrass broth

The only herb that is nearly always in my fridge, and most likely in other Indian fridges too, is cilantro. The first thing I do after getting cilantro home is trim off the hard stalk portion, then wrap the leafy part in a paper towel, and this package then goes off into a plastic box, to be used as required. The cilantro stays fine for a couple of weeks.

If the stalks are particularly healthy and fresh, and if I have even a few additional minutes, one of the things I like to do instead of throwing the stalks away is to drop them into a large pan of water and bring the water to a boil. Add a few chunks of ginger either bruised by a pestle or grated, a few crushed peppercorns, some salt, and within about 15-20 minutes, a rather delicious cilantro-ginger broth is ready. Once strained, it can be sipped just by itself, or used as a base for soups, dal, or noodle dishes.

Making broth

The variations on this simple basic are endless. Sometimes I add slices of lime or lemon to it, sometimes, a bay leaf. This time I used a couple of stalks of lemongrass, roughly cut into pieces and smashed, and let those boil with everything else, infusing the broth with the characteristic flavor of lemongrass.

Baby Vegetables

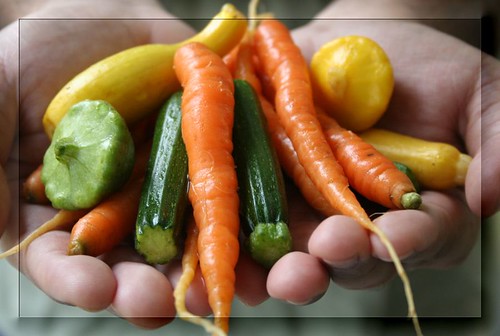
To it, I added some fresh baby vegetables, such as baby carrots small enough to fit in the palm of one's hand, along with various baby squashes like zucchini, yellow crookneck, sunburst and pattypan, all so tiny that they barely needed to be halved. I let the vegetables cook in the clear stock for a few minutes until they were fork tender, garnished with a bit of finely chopped cilantro, and an austerely beautiful and surprisingly satisfying first course was ladled out.

Soup

Wednesday, November 28, 2007

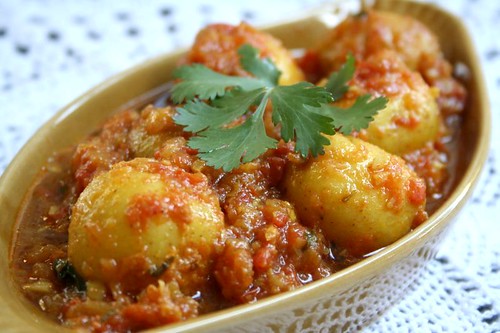
Oven cooked Baby potatoes in Tomato gravy

Arguably, some of the best chefs in the world are men, but I know very few men who cook regularly. Among Indian men, it is practically a rarity, and even rarer are those who are actually interested in cooking. So much for all the fights for parity, the daily cooking grind is most often borne by women. I don't want to turn this post into one with shades of feminism, but instead acknowledge a friend, who is among the few men who enjoy not just cooking and eating, but also discerning and discussing all about it. He has several superb recipes, and now I have his permission to blog a few of them which are among my favorites. You are in for a treat. Here's to men who cook!

From my own experience, this is a great dish to make for large gathering for several reasons. First of all, it scales up very easily. The dish can be put together slightly ahead of time, and the cooking can be finished in the last one hour. By finishing the cooking of the potatoes in the oven, one gains space on the stove top, which is very useful when cooking several things together. If not, that time could be used to clear up the counter or do something else. To top it all, it looks gorgeous, tastes delicious, and is a perfect accompaniment to almost any type of meal.

In this recipe I used the list of ingredients from the base recipe, but modified the technique a couple of ways and even made it more elaborate. Usually people simplify recipes, but here, I added steps. I blanch and peel the tomatoes before pureeing, whereas the original recipe just calls for blending the onion, ginger, garlic, and tomatoes all together. Feel free to do that, but I like the texture of the gravy to be smooth and silky, so I don't mind the extra effort.

Baby potatoes in tomato gravy

Oven cooked baby potatoes in tomato gravy

about 15 baby potatoes (see notes)
2-3 cloves garlic
1 inch piece ginger
1 medium onion
2-3 ripe medium tomatoes (I like lots of gravy in this, so I use 3)
1-2 tablespoons oil
3-4 cloves
1 stick cinnamon

1/2 teaspoon turmeric
1/2-3/4 teaspoon chili powder
salt
pinch of sugar (optional)
pinch of garam masala powder(optional)
chopped cilantro for garnish

To make tomato puree

Bring a pot of water to a boil. Drop the tomatoes into the water, each for about a minute, and take them out using a slotted spoon. When cool, peel the tomatoes and puree them.

Other prep work

Wash and scrub the potatoes.

Process ginger and garlic to a paste, and chop the onion very fine. You can do that in a mini-processor or chopper.

Pre-heat the oven to 350°F.

The first part on the stove top

Heat the oil in a large saute pan, and add the cloves and cinnamon. As soon as they become fragrant, or as the bark starts to uncurl, add the onion, ginger, garlic, and sauté it together until it starts to change color to golden. Add the tomato puree, salt, sugar, turmeric and chili powder, and saute until the tomatoes start to soften.

Add the potatoes, mix thoroughly, and put everything into a baking dish. Add about 1/2 cup or more of water into the pan to get bits of gravy out, and pour it into the dish.

Finishing the cooking in the oven

Cover the dish with an oven proof lid or a piece of foil with a few slits, and place it in the oven and cook for 40 minutes. Uncover the dish and pierce one of the potatoes with a fork to check if it is tender. If not, let it cook for another 10 minutes or until done.

Sprinkle garam masala and chopped cilantro.

Notes

* I like to use the most teeny tiny new potatoes I can find; usually not more than 1-1/2 inches in diameter. I have used regular as well as red new potatoes and they are both equally good.

* I like to use true cinnamon in this recipe, not cassia bark, which is commonly used in many Indian recipes

* You can add 1 tsp of cumin seeds along with the cloves and cinnamon if you like

* It has never taken me more than 40-45 minutes for the potatoes to cook in the oven, but potatoes and ovens could differ, so please check to see if they are done.

* I don't always add garam masala, and it tastes just as good without it.

This dish is naturally vegan and goes to Suganya's Vegan Ventures.

Wednesday, November 21, 2007

Back, and yet not back

Yawning at 10am

4pm stomach growls

Need to take a nap at 6pm

Up at 2am

Sleepless at 5am

All the signs of jet lag, after the long and tiring flights from India, that play havoc with me each time I return. Each time I hope it will be better this time, mind over body, and all that, but no. I succumb. Over the last few days this has slowly diminished, but I am not yet back to cooking anything exciting or new.

So I forced myself out on the weekend to the farmers market, to load up on fresh fruits and vegetables to supplement all the rice and dal eating, and it was raining persimmons! Perfectly sweet for eating out of hand, and a good antidote to that dwindling bag of baakarwadis.

Persimmons in India

Amarphal, aka persimmons in India

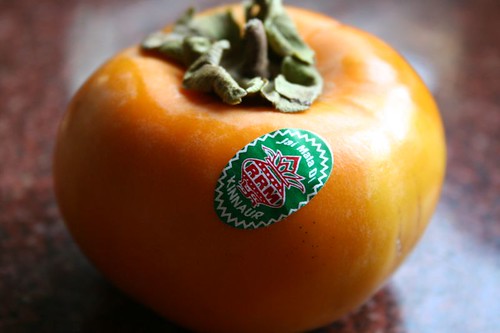
In the meanwhile, I am happy to report that persimmons are available in India too. Not necessarily in speciality stores, but even at the regular corner fruitwallah. He called it 'Amarphal', and carried both the Hachiya and Fuyu varieties, though he didn't call them as such. He even knew about that paper-y feeling of Hachiyas. That was a pleasant surprise for me, because growing up I don't recall eating them. He said it came from Kashmir, but look, the sticker on it says 'Kinnaur', which is in Himachal Pradesh.

Fruitwallah

The corner fruit stand where I often stopped by had a great selection of seasonal fruits, including persimmons and fresh figs. My favorite things there were sitaphal and chickoos, both of which I cannot get here.
Related Posts Plugin for WordPress, Blogger...