Tuesday, August 14, 2007

Celebrating with Poori and Batata bhaaji

baTATyAchi bhAji ANI pUri

Last year, I was in Delhi for several days under some trying circumstances. Since the reason for being there was grim and important, meals were the least of our priorities, and we ate as and when there was time.

The only constant in the day used to be the breakfast in the hotel. The spread was average fare like cereals, toast, fruit, and hah, poori and potato bhaji, or sabji. When I saw that on the first day, I was shocked. Poori bhaji for breakfast? I ate cereal and some toast with orange marmalade. The next day it was alu paratha, and that is only half as bad, but it looked too good to resist, so I ate one. The following day, the poori bhaji appeared again, and we soon found out that these two things alternated there recurrently. I made peace with the alu paratha, but never really got used to the idea of having poori bhaji for breakfast.

For me, poori bhaji has associations of being as part of a meal, usually a festive one, when the dessert is most likely to be shreekhand, or basundi, or aamras in mango season.

BaTaTyachi bhAji

This type of bhaji is made very commonly as part of an everyday meal, and would be outright comfort food with some varan bhaat, but when accompanied by pooris it becomes something special.
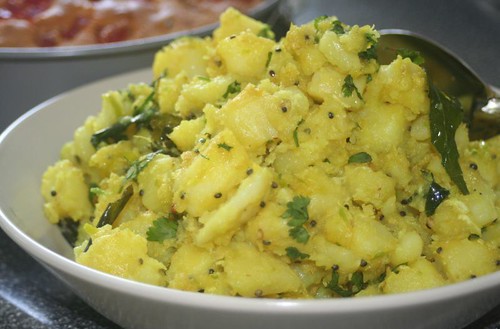
Just batata bhaji

I like to use Yukon gold potatoes for this. Just because this is a traditional recipe and precious to me, I wouldn't use red skinned or other fancy potatoes in this one, but I don't see why that wouldn't work either. Sometimes the garlic is omitted, especially if following some religious restrictions, and at other times some chopped onion is added to the bhaji as well.

For 2-3 side servings

Ingredients

4-5 medium sized potatoes
4 cloves of garlic
an inch long piece of garlic
4-5 small green chilies (adjust depending on size of chili or preferred degree of heat)
3-4 Tablespoons oil
1/2 to 1 teaspoon mustard seeds
good pinch of asafoetida
1/2 teaspoon turmeric
10-15 curry leaves
salt to taste, about 1-1/2 teaspoons
3/4 teaspoon sugar
2-5 Tablespoons of fresh grated coconut (about a handful)
4 Tablespoons of chopped cilantro leaves

Method

Boil the potatoes. This can be done in a pressure cooker too. Peel and chop them into medium sized chunks. Grind the ginger, garlic and green chilies together without to form a rough paste.

Heat the oil, and add the mustard seeds. When they start to pop, add the asafoetida, turmeric, curry leaves, potatoes, the paste, salt, and sugar. Stir everything together, lowering the heat if required. Since the potatoes are already fully cooked, stir it just enough to coat it with the spices and heat through. Sprinkle the coconut and cilantro on top.

Poori thali

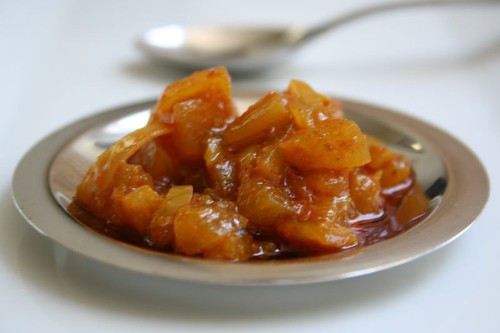
Poori bhaji served with varan, bhaat and tuup, along with a cool and crunchy gajarachi koshimbir (carrot and peanut salad), apple and figs chutney, and fried poha papad. Rest assured that in the Indian style of eating this is only the first serving, and depending on what one likes, there are seconds, and thirds even.

With this version from our part of the country, I join the Mad Tea Party's Poori Bhaji fest, which already has a good recipe for the pooris too.

Wednesday, August 08, 2007

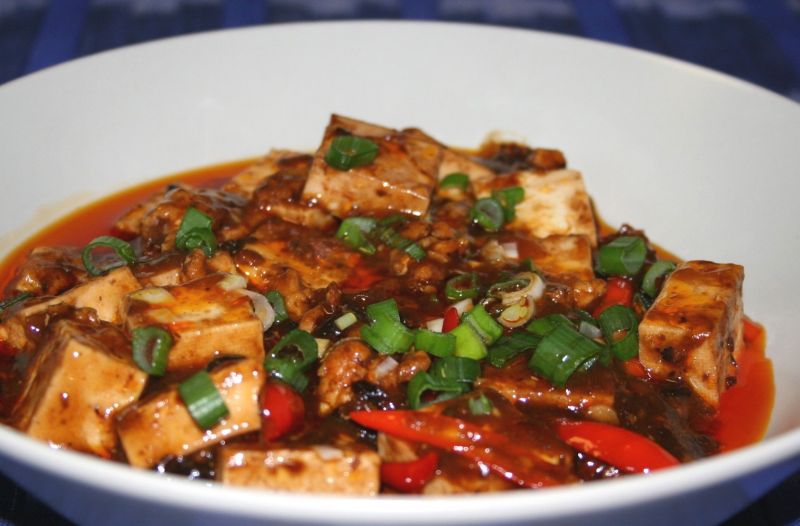
Ma-po Tofu

Ma po tofu

Some things begin with a plan, and others happen at random. This time it started with a packet of tofu that was getting close to its expiration date. Tofu and I share a strange relation. When I see it in the store or in some recipe I feel very inspired but then it languishes in the fridge for a while before I start reminding myself to use it up in the intended recipe. Usually it lands up in a Thai curry with some other vegetables of choice, but this time, I had eaten Thai for lunch just the day before, so I wasn't feeling enthused about it.

While searching through my collection of favorites I decided on this 'Tofu stir-fried with basil' which I hadn't made in a long time and which I know is fantastic. On a whim, I thought I'd check if anything else catches my fancy on that site, which, by the way, has several really good Southeast Asian style recipes. When I saw the 'Ma Po Tofu', that was it. That gorgeous color in the photo of the dish caught my attention, and the recipe sounded so unbelievably simple that I had to try it. Plan changed, for the better. This recipe is just awesome, an absolute winner.

You could use the original recipe just as it is, with the chef's witty add-ons and informative notes. Sichuan pepper is called as tirphaL in Konkani and Marathi, and is not in any way related to the churna of the same name. If you have it, use it. This is what I did, following the recipe as closely as I could, which is why I have kept most of the instructions as they are.

Ingredients

Firm Tofu - 270 gm, about half of a standard block
3 Tablespoons oil
1.5 Tablespoons chili bean paste
2 teaspoons fermented (preserved) black beans
5-10 dried or fresh red chilies
(I used 5 fresh red Thai chilies, and that was decently spicy enough for me)
1/2 cup water or stock
pinch of sugar
1 teaspoon light soy sauce
2 teaspoons cornstarch mixed with a Tablespoon of water
white pepper to taste
1 or 2 spring onions (scallions), to yield about 2 Tablespoons

Method

Heat the oil in a non-stick skillet or wok.

Cut off about a fifth of the tofu, and crumble with fingers or fork. Add this to the oil and let it fry until golden brown in color.

In the meanwhile cut the remaining tofu into 1/2 to 1 inch pieces. Chop the scallion into rings, using the white and green portion.

Move the fried tofu to one side of the pan, so the oil can drain back into the middle of the wok. Turn the heat down to medium. Add the chili bean paste and stir-fry for 30 seconds. The oil should turn red. Add the fermented black beans and red chillies and stir-fry for another 30 seconds. Add the water or stock and stir it in.

As it starts to form a sauce, gently add the cut tofu to the liquid. Don't stir-fry this too much or the tofu could break apart. Try to hold the pan by its long handle and gently shake it back and forth.

Add the sugar and light soy sauce. Turn the heat down and simmer the mixture for about 5 minutes.

Depending on how thick the sauce is at this stage, stir in some of the cornstarch-water mixture and turn up the heat to medium. The sauce should start to thicken. Add more of the mixture and cook till the sauce has the consistency slightly more runny than tomato ketchup. It should cling to the tofu.

Stop the cooking at this stage, add some of the spring onions and white pepper. Serve with the remaining spring onions garnished on top.

The perfect accompaniment to this would be plain white or brown rice, and any type of sauteed greens, to add a vegetable component to the meal.

For that, here is a bonus recipe:

Sauteed Green Beans and Cashews

Stack together some tender green beans and trim off the ends. Heat oil in a wide skillet, add a couple of cloves of minced garlic, a broken dried red chili or two, a handful of cashews, the beans, salt, and cook for a few minutes. Add some soy sauce and toss together for another two minutes.

This dish might sound simple, but it tastes absolutely fabulous.


About Express Cooking

Spicy sauces for ma po tofu

If I have to cook while time is at a premium, I am most likely to turn to something that does not need a precise recipe, like pasta with whatever-is-in-the-fridge, or eggs, or something that I have made so many times that I know exactly what it involves. Trying out a new recipe for which I have to refer to something is best left for when there is plenty of time.

This Mapo tofu scores some more points because this was the first time I made it, I had to refer to the printout, and yet it took less than 20 minutes. As if that wasn't enough, it is made without using anything frozen, leftover, or canned. Just the tofu itself and the couple of sauces are ready-made.

By using multiple burners, all three components of this meal can be cooked together to create a healthy balanced meal for the Express Cooking event.

Monday, August 06, 2007

Among my favorite tools

Serrated Bread Knife

Serrated bread knifeA good bread deserves a good bread knife. This is such a simple little thing, that I was hesitant to create a post just for it. I am however often surprised at how many people do not have a bread knife or even know about it, so I thought it deserves a mention. It is not something I grew up with, because bread did not play a big role in our food in India, unsliced loaves even more so, and I am sure there are innumerable people for whom that is true too.
If you like artisan bread or bake your own bread, you probably have one already. If not, it is something I would highly recommend. It is a superb tool that will serve you for a long time. In my case, it is one of those things that I bought without knowing how much use I would get out of it, but looking back it has been an excellent functional purchase.

There, I told you this post didn't have much else.

Tuesday, July 31, 2007

Roasted Eggplant, Red Peppers and Goat Cheese Sandwich

Saying 'Cheese' Again

The path to getting my blood calcium to a normal level was arduous and painful, but hopefully behind me now. One of the things I missed a lot during this time was 'cheese', and it was something I was waiting to get back to. So I went a little crazy last week and bought no less than five types of cheeses, which will now be savored with some good bread or crackers, or alone, and as an ingredient in various things, inspirations for which are already gushing forth - but first, I had to make this favorite sandwich, which is based on a fairly common vegetarian offering in cafes and restaurants. I never seem to tire of it; it is that delicious.

This sandwich relies a lot on the flavor and freshness of the main ingredients, and is perfect in summer when farmers' markets are overflowing with some terrific eggplants, peppers, and basil. In fact, our local farmers' markets have some amazing bread and goat cheese too, so nearly all the ingredients can be bought there. Naturally, this is a great choice to take for summer picnics, and I have found it to be quite a crowd pleaser, whether the people are vegetarians or not. Even kids have loved it, much to the disbelief of their parents. There is usually atleast one person who asks me how 'exactly' I make it, which I am only happy to tell. Here I have given the details of the main components of the sandwich, which involves cooking the eggplant, roasting the peppers, and making the pesto.

Roasting Peppers

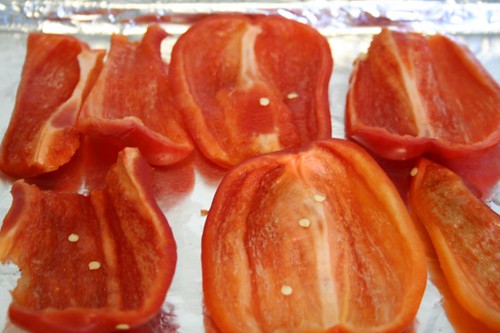
You can do this with either red or yellow peppers or both. Preheat the oven to 425°F. Slice the top and bottom off the peppers and then cut the "walls" of the peppers. Rub them with a little bit of olive oil. Lay these peppers skin side down on a baking sheet, and roast for 20-25 minutes. Sometimes I also put some slices of red onions drizzled with olive oil right next to the peppers. While the peppers are still hot, pick them up with tongs, put them in a bowl, and cover the bowl tightly with plastic wrap. This causes the peppers to steam, and when they are cool, it is easy to peel the skin right off.

Roasted red peppers

Preparing the Eggplant

The eggplant can be either grilled, pan fried, or baked, and the pan fried one is by far my favorite, since the eggplant stays moist, and you can control each slice to be cooked evenly. The advantange of the oven baked version is that it does not need any attention.

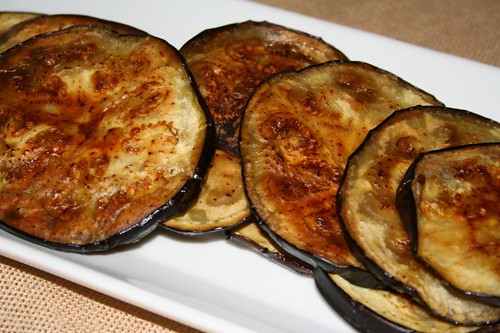
For that, pour 3-4 Tablespoons of oil in a cookie sheet and put the tray in the oven while the oven preheats to 425°F. Use a firm globe eggplant, and slice it about 1/4 inch thick. Place these slices in a pot of salted water, and place a weight (like a saucer) on top, so that they do not float up. When the oven is heated, drain the eggplant well, and place each slice on the cookie sheet without overlapping. Cook for 15 minutes, flip the slices, and let cook for another 15 minutes. At this point the eggplant slices should be cooked golden brown on both sides. If they seem dry, brush a little olive oil on it.

Roasted Eggplant

Basil Pesto

Make a simple pesto with a bunch of basil leaves, several cloves of garlic, salt, pepper, a handful of pinenuts, a few tablespoons of extra virgin olive oil, and if you like, some grated parmesan cheese. Put all these things together into a food processor and puree.

Bread

I usually use a flattish loaf like ciabatta or herb slab, to make a giant sandwich that I slice into four or six, but this time I used ciabatta rolls to make individual sandwiches.

Putting the sandwich together

Slice the bread horizontally. Spread pesto on the bottom part of the bread. Top with eggplant, peppers, onions (optional), and sprinkle salt to taste and some paprika. Spread the goat cheese thickly on the inside of the top half of the bread, and cover. Press tightly. Slice if required.

Sandwich with goat cheese

Update on the state of the machine
As promised the pictures are up! I managed to recover my data, but will need to do reinstalls of a lot of software. So, it will be an uphill climb for a while.

Tuesday, July 24, 2007

Watermelon Rind Pickle

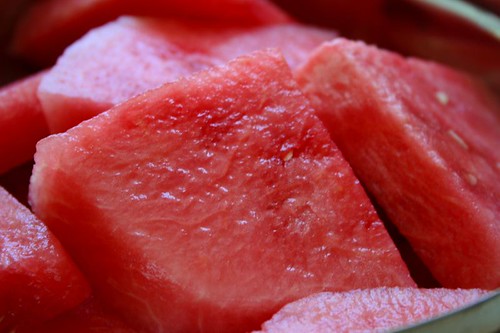
Watermelon has been a ritual of summer for me, ever since I was a child. I loved the drama of going to the corner kalingadwallah, first with parents, then later by myself, poking around to find the best looking one, tapping and thumping it, and finally asking the guy to slice off a chunk to see how red it is inside. Perfect at the art of cutting it, he would pierce the knife exactly so as to pull out the center, where the watermelon is the crispest, reddest, and tastiest. How could we complain? After proudly showing us how perfect it was he would snap the cut slice in place again, for us to carry it back home. Then lovingly it would be cut into even wedges, placed in a bowl and refrigerated for a few hours to chill. Something always happened in the fridge, the flavors concentrated and the watermelon got sweeter. It still does. And a watermelon still always brings back these memories for me.

I know many people slice a watermelon with the skin on, and then nibble at the red and throw off the rest. We rarely did that. The rind and peel was always removed and discarded off before eating. The only thing lacking was the tiny forks meant for eating fruit.

Watermelon slices

When I read about watermelon rind used in pickling and cooking in Chinese and Japanese cuisines, I was curious about where else it is used and found that watermelon rind pickles are quite common in America too, particularly in the South. Then, while browsing through 'Usha's Pickle Digest' last year I checked if she had anything on watermelon in her comprehensive book. I found not one, but four recipes for pickling watermelon rind. All of these involved cooking the rind, thereby making them 'instant' or ready to eat. Since I am quite stocked on pickles at the moment, it wasn't something I wanted to try, but the AFAM event provided just the opportunity.

I chose one of the four recipes for which I had all ingredients on hand and the flavors of which appealed to me. I used the recipe as a guideline for the main ingredients but tweaked it heavily otherwise. The result is pretty good, and getting better as it sits. It is supposed to stay good for a month but I don't think it will last that long.

I used the rind of half a large watermelon. After peeling off the green outer skin it was roughly 500 gm.

Watermelon Rind Pickle

Watermelon (rind) pickle

500 gm watermelon rind (the white part between the red flesh and green skin)
1 large shallot (100 gm)
2 teaspoons urad dal
5-6 dried red chilies
pinch of methi (fenugreek) seeds
1 Tablespoon + 5 Tablespoons oil
1/2 teaspoon mustard seeds
2 teaspoons salt (or more)
1 teaspoon turmeric
1 Tablespoon thick tamarind extract
2 Tablespoons sugar

Chop the watermelon rind and shallots into fine pieces.

In a small skillet, roast the urad dal, chilies, and methi seeds until the seeds start to turn golden brown. Let it cool and powder it completely.

In a large pan, heat a tablespoon of oil, add the mustard seeds, and when they start to pop add the chopped shallot and watermelon rind, and cook it together. Add salt, turmeric, tamarind extract, spice powder, sugar and remaining oil, and cook it on low heat until the rind softens, stirring occasionally to make sure it doesn't stick to the pan. [It took me about 25 minutes to get it to this consistency]. Check for salt and add more if needed. Let it cool completely before filling into a jar.

Note: I didn't care much for the taste of shallot in this pickle. If I had to make it again, I would leave it out without altering anything else.

Friday, July 20, 2007

Random Masala

Two wonderful bloggers tagged me simultaneously for the 7-random-facts meme. When Komal tagged me, I had never seen her blog before, so it was a revelation, though out of the blue. The other person to tag me was the Cooker, who always has wonderful informative posts whether she is doing something innovative or traditional. I won't deny that I was fazed about this at first, and also wondered how random random should be, but I thought it would be fun to play along.

To keep food in the mix, I am also posting seven random dishes, none of which are likely to get their own posts.


Although I have always been a good student I used to be frozen when it came to writing essays in Hindi. More than once I tried to get my mother to do my hindi homework for me, but she did not comply.

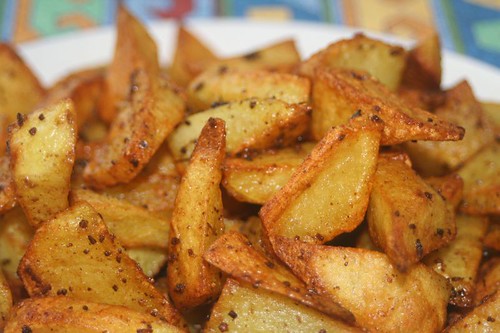
potatoes
Pan fried potatoes with a dry spice rub

I know many people who do not like their hair, but I absolutely hate mine.

chaat1
Phyllo shells with chaat inspired filling

When I was young and footloose, I once went hiking by myself in an unknown area and was utterly terrified for the forty-five minutes stretch where I did not see any other humans.

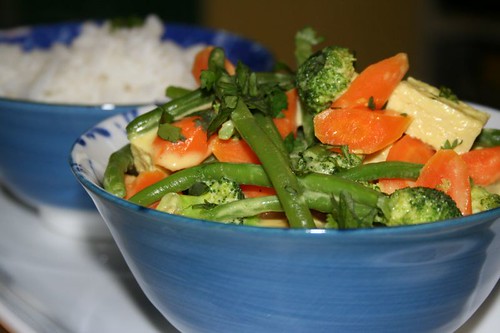
thaicurry
Vegetarian thai green curry with tofu, broccoli, green beans, and carrots

I have lived in three countries in three continents, and visited seven others, in the same three.

puffpastries
Baked turnovers filled with spicy vegetables

I starting speaking my first words before I was a year old, or atleast that is what I am told.

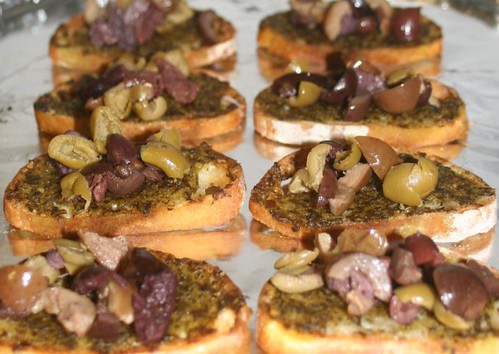
crostini
Mixed Olive and basil pesto crostini

Between a blisteringly hot summer and chilly winter I would chose summer.

Dessert
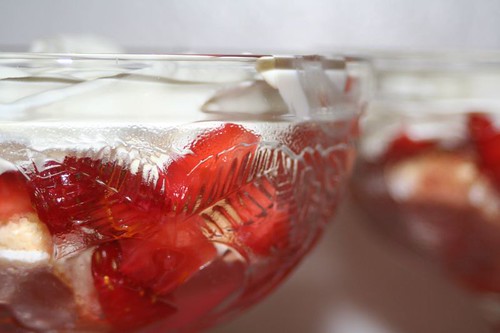
Ladyfingers, Grand Marnier soaked strawberries, mascarpone cheese and whipped cream

I bumped into a NFL quarterback in a store, a day after he was inducted into the Hall of Fame; I graciously congratulated him about it, and he was just as gracious in return.

ricotta burfi
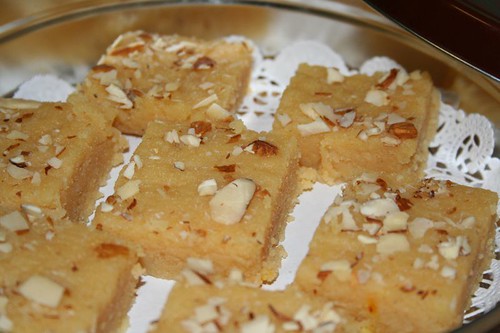
Ricotta cheese burfis with almonds


I am tagging Shami and Musical.

Wednesday, July 18, 2007

Translating India, Sometimes Fluently


The New York Times Praises Ammini's book

(Free registration required to read the article)

This article written by Anne Mendelson appeared today in the New York Times, full of praise for the book "Grains, Greens and Grated Coconuts", written by Ammini Ramachandran. Makes me feel so proud to have known Ammini. Please join me in congratulating her on this achievement!

Here is what part of the article has to say about the book:

"Grains, Greens and Grated Coconuts," a self-published volume sold almost exclusively online, is a much more consistent work whose virtues are the direct opposite of those in "The Calcutta Kitchen." Expect no photographic tours or colorful reportorial vignettes. The purpose of this modest no-frills book is to place a region, its history, and its family and cultural heritages into a coherent context for understanding food.

Instead of trying to cover all menu bases that an editor might insist on, Ms. Ramachandran is free to concentrate on unorthodox categories, including amazingly diverse “curries” (sauced vegetable combinations), pickles and preserves, breakfast specialties, rice dishes associated with sacred observances and temple or rite-of-passage offerings.

Other books have ably explored India’s far southern territory, but Ms. Ramachandran reveals amazing range and depth in Kerala’s Hindu vegetarian traditions. And American home cooks should find her introductions to ingredients, techniques and equipment accessible.


You can purchase the book directly from Ammini's Website or on Amazon

More reviews of the book at

Jugalbandi
RP's Workshop
Indian Food Rocks

Tuesday, July 17, 2007

Oats a la Pongal

It is an irony of fate that soon after I wrote my post declaring my favorite breakfast to be oats, brown sugar and raisins, I received two blows. First, I was told by my doctor to watch my carbs. I wasn't at a point where I had to bring it down, but where it would be better to keep an eye on it. The bigger blow however was that my blood calcium was found to be too high, and that had to be addressed more urgently. As investigations continued, I practically gave up paneer, cheese, and mithai, and switched from milk to soymilk for the most part.

This double whammy was what really led to my search for an alternative to my regular breakfast of cereal or oats with milk; something lower in sugar as well as calcium and ready to make in minutes. Since I like oats a lot, I didn't want to give it up, and thought that something made with it would really fit the bill.

Inspiration Strikes

Earlier this year I did a 5K run, at the end of which runners were rewarded to a nourishing Pongal breakfast sponsored by a local restaurant. The soft, well cooked runny rice and dal seasoned with whole black peppers, curry leaves and cashews, with a river of ghee flowing through it was a delicious way to replenish spent calories, and then some.

That was the source of inspiration to try making such a pongal at home for breafast, not with rice, but oats. I turned to my favorite book of Tamilian cooking, 'Dakshin', knowing that it had a pongal recipe. I substituted the rice and moong dal with an equivalent amount of oats by volume, and used just a teaspoon of ghee, brought way down from the stated amount. I absolutely loved the result and I am quite hooked to it now.

Oats Pongal

Method to make Pongal Style Oats

Cook about a cup of steel-cut Irish oats with four cups of water. You can even do this in a pressure cooker. When you are ready to make the pongal, make a coarse powder with a pinch of cumin seeds and a few black peppercorns in a mortal and pestle. Grate a little ginger to yield about half a teaspoon. In a sauce pan, heat a little ghee, add the powder to it, along with a few fresh leaves of curry patta, a tablespoon of chopped cashews, hing, grated ginger, and stir it together, followed immediately by the cooked oats. Add a pinch of salt, and some water as required, a little at a time, to keep the oats mixture to a runny consistency.

You could also add a tiny pinch of turmeric to the oats, and additional ghee if you like.

I am sending this to WBB #13 : Oats.

Sunday, July 15, 2007

Broccoli and walnut salad with tadka

Flavorful, healthy, fresh, and simple are some of the qualities I strive for in everyday food, but do not like to sacrifice good taste towards that end. This is one of those dishes that meets these requirements very well and is unbelievably delicious as a bonus. It fits in with any kind of meal, from pairing with a sandwich to being a part of an elaborate Indian meal.

Even though this is a yogurt based dish served at room temperature, I hesitated over calling it a raita since a raita has no tadka, in the strictest sense of the word, and only has one or more ingredients mixed into yogurt that is seasoned with a few dry spices. I learned this from someone I consider very knowledgeable about food, North Indian cuisines being one of her areas of expertise. Calling it a 'salad' is a lot more inclusive, although the approach to putting this dish together is very Indian.

This is not a precise recipe, but more of a guideline.
Steam about a cup or two of broccoli florets for few minutes and then chop it into smaller pieces when cool. Mix it with about as much plain yogurt or dahi by volume. Add a handful of chopped walnuts to it. Season with salt to taste and pinch of sugar. In a small pan, heat a little oil, and to it, add one or two cloves of minced garlic, a crumbled dried red chili, and a pinch of sesame seeds. Take it off the heat when it starts to sizzle, and pour it over the prepared salad. Stir it together gently and serve.

Broccoli and Walnut raita

Broccoli and Walnut Salad with a tadka of red chilies, garlic, and sesame seeds drizzled on top; should be stirred together before eating.

Friday, July 13, 2007

Very Forgiving Banana Nut Bread

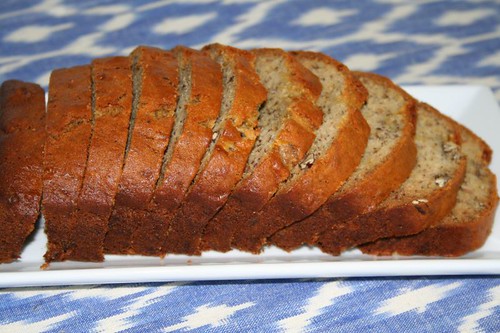
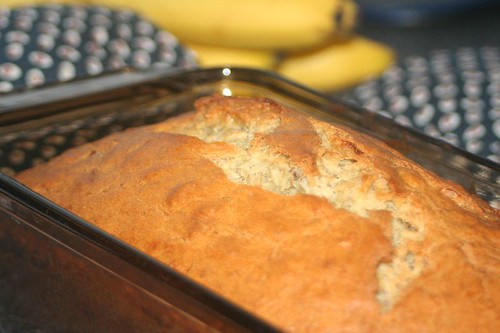
Banana Nut Bread: Sliced

As I write this post, a google search for 'banana nut bread' gives me 1,290,000 results. I am curious to know how many results were available when I did the exact same search on yahoo roughly ten years ago, but one of the recipes that showed up on the first page was this one and for that I am immensely thankful.

I printed out the recipe because it looked too simple to be true, and tried it out, and it turned out wonderful. I never again looked for another one. I have made it countless times since, and given it to people who liked it, and then they have continued to make it.

This is among the very few recipes that I can bake with at any time without having to look it up even one bit. If all the ingredients are around, then it takes only minutes to stir up the batter, and usually it is the three ripe bananas that are the most difficult to come by. About halfway through the baking time a most amazing aroma starts to waft around, and it continues till the timer goes off. Then an exercise in patience begins. 'Wait till it cools' is easier said than done, but the reward is great. This bread is soft and moist, full of banana flavor, and sweet enough to be called a 'banana cake'.

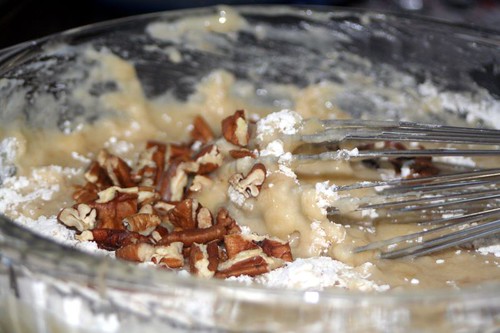
Banana Nut Bread: batter

The recipe is called the 'Best Ever Banana Nut Bread', and that name does sufficient justice to it.

Ingredients

1 stick (8 Tablespoons) butter, melted in oven in a large oven proof bowl
1 cup sugar
1 egg, well beaten
2 cups all purpose flour
1 tsp baking soda
pinch of salt
3 large very ripe bananas, mashed
1 tsp pure vanilla extract
1/2 cup chopped pecans


Method

Preheat the oven to 350 F°. Grease a 9x5x4 inch (approximately) loaf pan with a little butter.

In a medium bowl, stir together the flour, baking soda, and salt.

Add the sugar to the melted butter and mix together. Add the egg and vanilla extract and continue mixing. Add the bananas, flour mixture, and nuts one by one, and keep mixing until all the ingredients are combined. Pour the batter into the greased loaf pan. Bake at 350 F° for one hour.

Let it cool in the pan. Loosen the edges with a knife and remove from pan.

Banana Nut Bread: In loaf pan

Now let me count the ways in which it is forgiving. First of all, it doesn't need any specialized equipment. A hand-mixer is fine, but a whisk or large spoon will do just as well. Don't like pecans? Use any other kind of nuts, like walnuts or macadamias, or leave out the nuts altogether. Don't like it too sweet? Use 3/4th cup of sugar. Feeling virtuous? Substitute half the flour with whole wheat flour, or upto 2 tablespoons of the flour with flax seed meal, which is a good source of Omega 3 Fatty Acids and high in fiber. Looking to cut down fat? Substitute half of the butter with applesauce. Or try your own variation and have fun with it. It will not betray.

To end with a disclaimer, I am not fond of bananas at all, but this bread I love.

Wednesday, July 04, 2007

Yellow Sanza.. the traditional and the adapted

'A sanza is always yellow', is the first thing I am likely to hear when I mention yellow sanza. Yes, yes, I know that 'sanza' is yellow because it has turmeric in it, but why I started calling it so as a kid has to do with the degree of bright yellowness of the sanza that one of my Maushis made, as opposed to the one my mother made.

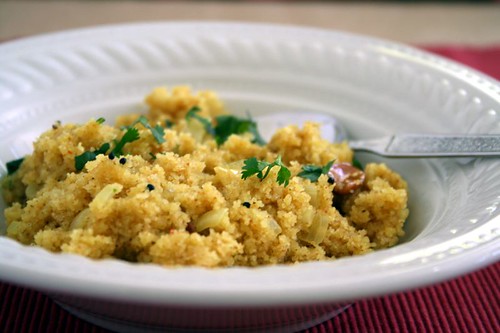
Regular rawa Sanza

Before I go ahead, let me introduce Maushi M, my mother's older sister, famous for her 'aagraha'. Yup, the same force-feeding-with-love that I mentioned once before. People were known to make all kinds of excuses when they visited her - "I just had lunch", "I am on my way to dinner", and so on, but nothing worked. Her mission seemed incomplete until people left her home groaning under the amount of food she brought out.

I had many reasons to visit or stay over at her house, because her daughters were my friends and their house was minutes away from ours. So there were numerous occasions when I fell under her 'aagraha', and I have tried all ways to finagle my way out of it, with no success. She is a great cook of everyday food, but one of the things I have eaten umpteen times at her house is sanza, and she makes the best one I have ever eaten. Never lumpy or sticky, and always delicious. It was something she would make in minutes, practically in the same time that tea was prepared on the next stove, or a 'limbu sarbat' (lemonade) was stirred up if it was a hot afternoon.

After I left home and started cooking, I asked my mother to get me her recipe, with no secrets withheld. One of those secrets was that she always kept a jar of roasted rawa ready, so that she could conjure up the sanza anytime. I still have the original copy of the recipe, even though I do not need it anymore because I know it so well by now, and have always meant to convert it to standard measurements and translate it, but never got around to doing that. Here it is.

Ingredients

1 cup of coarse rawa (semolina or farina)
1 small yellow onion
2-3 Tablespoons oil
3-4 Tablespoons of peanuts (or as much as you like)
1/4 teaspoon mustard seeds
pinch of hing (asafoetida)
1/4 teaspoon turmeric (or a little more if the turmeric is pale)
8-10 curry leaves
1-1/2 teaspoons salt (or to taste)
1 teaspoon chili powder
1 teaspoon sugar
some chopped cilantro, grated coconut, and wedges of lemon or lime for serving

Method

Pour the rawa into a deep skillet, and roast on medium high heat until it gets evenly golden brown in color and keep it aside to cool. This roughly takes 5-10 minutes.

Dice the onion. Heat the oil in a kadhai or wok. When it gets hot, fry the peanuts in it, and remove them with a slotted spoon to a small bowl.

Let the temperature of the oil come down a little, and then add the mustard seeds (they will pop right away since the oil is hot), hing, turmeric, curry leaves and onion. Saute it for a few minutes until the onion softens, and add 2 cups of water.

When the water comes to a boil, add the salt and chili powder. Start adding in the roasted rawa in a steady stream with one hand, while stirring it together with the other. Reduce the heat, add sugar and fried peanuts and stir through completely until the rawa has absorbed all the water. [At this point, the original recipe says to take a teaspoon of oil and drizzle it around the edge of the pan, but I don't do that.] Serve it right away, with a little bit of cilantro and coconut on top and a wedge of lemon or lime on the side.

Is it like Upma?

In terms of technique, it is very similar to its famous sibling 'upma', and is usually eaten for breakfast, or at tea time in Maharashtra, but I'll keep the spotlight on the lesser known one in this post. The seasoning is different, and naturally, so is the taste. It is also not as moist as upma, in fact in a good sanza the grains of rawa can be well separated, though they don't have to be. I have also rarely encountered any vegetables other than an occasional potato in a sanza, unlike upma which ranges from plain to additions of vegetables and cashews.

Adaptation with Quinoa

If you have read my posts until now, you know I cannot resist twists on ingredients and techniques. I had always wanted to try Quinoa for a long time, for its high nutrition value and protein content, but only when I read about how to cook Quinoa on the-cooker's blog, I knew that I could try giving it the sanza treatment. It worked out very well. 'The Cooker', thank you for those pictures and information!

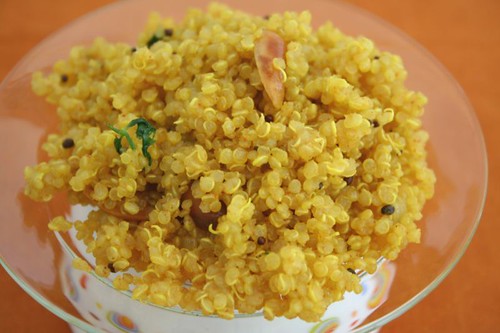
Quinoa Sanza

I used the above sanza recipe as it is, but there was no need to roast the grains beforehand. After the water started boiling and spices were added, I stirred in the quinoa, turned down the heat and cooked everything for roughly 10-15 minutes, and added the sugar and peanuts at the end. By then, the grains absorbed all the water, and the germ ring was visible too!

At this point, it is actually hard to decide which one I like better. The original will always remain a favorite, no doubt, but the quinoa version will not be left behind either, especially when a good protein boost is needed.

Friday, June 29, 2007

Bhindi Masala

When I go out to eat, I usually like to order something that I don't particularly enjoy making at home either because it is too complicated, or needs a lot of time or patience, or involves deep frying, or for myriad other reasons. So I was quite surprised when I was eating with a bunch of friends when someone ordered 'Bhindi Masala'. Why would one order something as simple as that, I thought. I know that everyone has their own preferences when eating out, and some prefer to stay within familiar limits, but this wasn't the case here. As it turned out, she was not very comfortable making it at home. I know she is a good cook, so it had nothing to do with her skills either. Perhaps she did not have a good recipe. Whatever. I will leave that in the realm of conjecture.

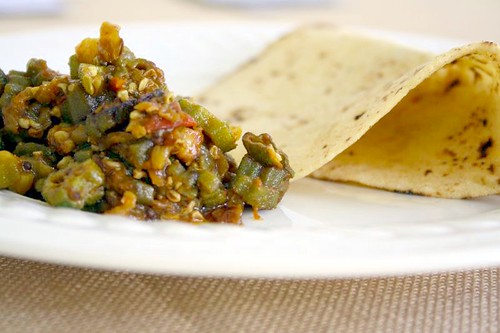
Bhindi Masala with Tomato 2

There are many people who have extreme reactions to Okra (Bhindi in Hindi, Bhendi in Marathi, Bhinda in Gujrati). There are those who like it so much that they can eat it as often as they can, and there are those who cannot stand it, usually because of the seeds or because of the slime. Then there are those like me who are more, ahem, balanced, about it. We like to eat it once every so often, but will not go overboard with it.

Selecting Okra

Fresh okra is available increasingly now in regular grocery stores as well as at farmers' markets, and especially during spring and summer. Look for uniformly green pods, that are tender and firm but not tough. Oh, and try not to snap the end of each pod to check if they are good. Snap one if you must, and if a batch is good, they are all likely to be good.

Cleaning and Prepping Okra

To avoid the okra getting slimy while it is being cooked, it is important that it is very dry beforehand. Washing okra is not recommended. I wipe each pod of okra with a damp towel, and let it dry completely before chopping. Trim off the ends before chopping it further as required by a recipe. Some preparations like 'Stuffed Bhindi' need only one slit along the length to create a pocket for the filling.

I make 'Bhindi Masala' two different ways, sometimes with tomato and sometimes without it, and I like both of them. Okra is capable of taking a lot of spice without getting too spicy, so do not be afraid to season it well. While cooking, add salt only towards the end, as salt tends to draw out moisture, which makes it undesirably sticky. I like the okra to be cooked well, to a point where it is crisp and has some brown spots. Best to serve with phulkaas, parathas, or rotis, with any kind of thick dal on the side.

Bhindi Masala (with tomato)

1 lb bhindi (okra)
1 medium yellow onion
1-2 ripe tomatoes, (1 is enough if it is large)
2-3 Tablespoons of oil
1 teaspoon of ghee (optional, but definitely adds to the flavor)
pinch of mustard seeds
1/2 teaspoon of cumin seeds
1/4 teaspoon of fennel seeds
1/4 teaspoon of turmeric
1/2 teaspoon of chili powder
1/2 teaspoon cumin powder
1/2 teaspoon coriander powder
few pinches ground black pepper
1/2 teaspoon amchoor (dried raw mango powder)
1/2 teaspoon garam masala
1/2 teaspoon of sugar
1 teaspoon salt, or to taste
2 Tablespoons chopped cilantro, optional

Clean the okra with a damp towel, and after it is completely dry, slice each pod of okra into thin rounds, discarding the ends. Slice the onion thinly and chop the tomato finely.

In a large kadhai or wok, heat the oil and ghee, and add mustard seeds. When they start to pop, add the cumin and fennel seeds, followed by onion, and saute for a minute. Add turmeric and okra and saute till it starts to change color slightly. Let it cook for a few minutes, then add the tomatoes and chili powder, and continue to stir-fry on medium-low heat until everything is cooked together, which takes 5-10 minutes depending on the okra. At the end, add salt, and the remaining spices, and keep cooking for a few more minutes on low heat, stirring if required. Add cilantro.

Without tomato

Bindi Masala without tomato

Everything stays the same, but increase the amount of amchoor to 1 teaspoon, and do not add sugar. The okra tends to get crisper in this version; since there is no tomato, the overall moisture content is reduced.

Note: A true Punj is likely to scoff at the mention of sugar in a sabjee, even in a tiny amount, so feel free to leave it out for authenticity's sake. I think it balances the acidity of the tomato and amchoor and helps to caramelize the okra very well. Mustard too, is not commonly added to Punjabi sabjees, so you can leave that out too.


I am sending this to the 'Regional Cuisines of India - Punjab' event.

Friday, June 22, 2007

Ginger Chai Masala Spiced Scones

While reading some of the food blogs, I noticed a lot of them displaying icons for an event called WBB. That sent me searching for what it meant, and found out that it stood for 'Weekend Breakfast Blogging'. Ah, I see. Quite fortuitous, as I was about to post a recipe that would fit in with the latest theme 'Spice it up'.

When I saw this recipe for Lavender Scones in Sunset, the first thought that crossed my mind was that I wanted to try it out with Chai Masala, instead of the lavender. I liked the idea of steeping it in milk to infuse its flavor and then using that in the dough. Instead of lemon zest, I used chopped crystalized ginger for compatibility.

The resulting scones were light and airy, with a mild scent of chai masala, and predominant notes of cardamom and ginger, but faint enough to make one wonder what exactly it is. I served these with a bit of jam, but that seemed unnecessary. They are wonderful on their own, with tea, coffee, or milk.

Chai Ginger Scones

Here is the adapted recipe, with all the changes I made to it.

Ingredients

1/2 cup milk
1 teaspoon chai masala (*see note below)
1 1/2 cups all-purpose flour
1/4 cup sugar
1 1/4 teaspoons baking powder
1/2 teaspoon baking soda
1/4 teaspoon salt
1/3 cup (5-1/3 Tablespoons) butter, chilled and cut into small pieces
2 Tablespoons fresh finely chopped crystallized ginger (candied ginger)
2 Tablespoons turbinado sugar

Preparation

1. In a saucepan over medium heat, bring milk and chai masala to a simmer. Let it steep for 15 minutes, then cover and chill for about 45 minutes. Strain the milk and set aside; discard the chai masala.

2. Preheat oven to 375° F. In a food processor, whirl flour, sugar, baking powder, baking soda, and salt for a few seconds. Add butter and chopped crystallized ginger and pulse to form a coarse meal. Add masala-infused milk and pulse to form a shaggy dough. Turn dough onto a floured surface and knead 3 to 5 times, just enough to form a ball.

3. Form dough into a 6-inch. circle. Cut into 6 wedges. Arrange wedges 2 inches apart on a baking sheet and sprinkle each lightly with turbinado sugar. Bake until golden, 20 to 25 minutes.

Yield: Makes 6 scones

Note: You could use your favorite homemade or store-bought chai masala. If you do not have access to it, you could subtitute with a mix of powdered ginger, cardamom, cinnamon, cloves, and a touch of black pepper, a teaspoon in total.


I am sending this to WBB #12 : Spice it up

Sunday, June 17, 2007

Cherry Cobbler

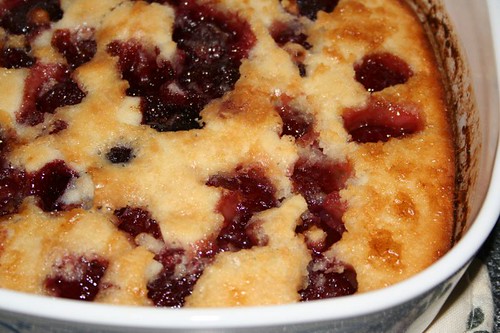
I mentioned earlier about picking tons of cherries and lugging them home from the orchard. After I gave away a few packets of these fresh cherries to friends, one of the things I made right away was Cherry Pickle. I liked it so much that I made another double batch of it, and gifted some of that too. Most of the remaining ones were used for snacking and as a natural dessert, but I also wanted to cook something with them. So while searching for recipes that use fresh cherries, I found this Cherry Cobbler, and decided to give it a try. It was absolutely delicious. Of course, if it was anything less than that, I would not have blogged about it. It is worth mentioning that it was even better the next day, warmed just a bit, so it is something that can be made in advance too.

Cherry Cobbler: whole

Since the cherries I used were very sweet, I reduced the amount of sugar in it, and added a dash of vanilla extract for flavor. I made only half of the recipe, which is something I really regreted.

Noting the recipe here for reference, along with a few changes.

Ingredients

1/2 cup butter

2 cups pitted sweet bing cherries
1/3rd cup white sugar
1 tablespoon all-purpose flour

1 cup all-purpose flour
1 cup white sugar
1 teaspoon baking powder
1 cup milk
a few drops of pure vanilla extract

Method

Preheat the oven to 350 degrees F (175 degrees C). Place the butter in a 9x13 inch baking dish, and place in the oven to melt while the oven is preheating. Remove as soon as butter has melted, about 5 minutes.

Place the cherries into a bowl, and toss with the 1/3rd cup of sugar and 1 tablespoon of flour.

In a medium bowl, stir together 1 cup of flour, 1 cup of sugar, and baking powder. Mix in the milk and vanilla extract until well blended, then pour the batter into the pan over the butter. Do not stir. [Note: I think it might not hurt to stir this together a little. The butter at the edges is what causes the brown lines along the side of the pan]

Distribute the cherry mixture evenly over the batter. Do not stir.

Bake for about 45-50 minutes in the preheated oven, until golden brown. A toothpick inserted into the cobber should come out clean.

This is a hastily taken picture before gobbling.

Cherry Cobbler: piece

Archana's cherry lassi was on the radar, but that will have to wait now.

Thursday, June 14, 2007

A spin on the farmer's lunch

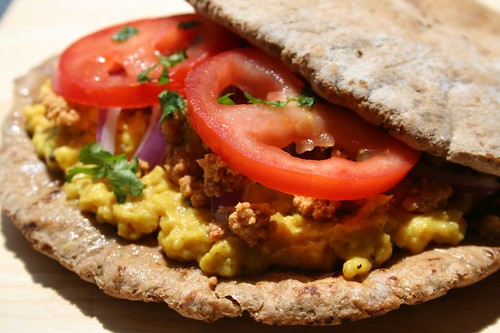
Pithale - Bhakri Sandwich

Growing up in a big city, having a yard was a dream, and being on a farm was just impossible. In fact there wasn't a farm to be seen for miles. So you have to forgive me, but my idea about farmers on the deccan plateau of Maharashtra was derived from geography books, and marathi movies that were shown on Doordarshan on Saturday evenings. These movies often romanticised the hard working farmer (shetkari), who ate a humble lunch of pithale and bhakri, wrapped in a cloth, with a garlic chutney and chilies on the side, washed down with buttermilk. It was an impressionable age, after all, and this was the image that lasted with me.

Apart from something seen from a car or bus, I have yet to see a real farm in Maharashtra or meet a farmer who eats such a lunch, but I think I am on the right track about the food. While the visit remains a dream, the lunch is much more achievable, and hopefully atleast half as good. After all, nothing can replace that smell of the earth and the crops swaying in the field, as I partake a fresh warm bhakri.

About the main components

Pithale, pronounced 'piTh-luh', but usually spelled in English as 'pithale', is a dish made out of chickpea flour (besan), with basic ingredients that are typically available in the pantry. It is unbelievably quick and easy, as you will see in the recipe below. The thickness of the pithale varies from runny to scrambled depending on the preferences of people. It can be thickened even further, at which point it beomes very dry, nearly crisp, but not completely, which is then referred to as 'zunkaa'.

Bhakri (bhAkri, bhaakri) is a flatbread, made by patting the dough on a flat surface, rotating it as it flattens and spreads. Easier said than done, as I know from experience. I have tried to learn it from someone who has made bhakris for years, and hoped to emulate her, but have abandoned it now as something I might not be able to do. There are bhakris made out of bajri, jowar, nachani, even rice.

Here, I have adapted the concept, to make a handy sandwich, which can be enjoyed outdoors, or anywhere else. It is a great option for a picnic lunch or a busy weeknight dinner.

pithale bhakri

Pithale - Bhakri Sandwich

Ingredients:

1 small onion
3/4 th cup besan (chickpea flour)
2 Tablespoons oil
1/2 teaspoon mustard seeds
pinch of hing (asafoetida)
1/2 teaspoon turmeric
1-1/2 teaspoons kanda-lasun masala (*see note)

4 whole wheat pita breads
a little softened butter or ghee
1 tomato, sliced
4 Tablespoons peanut sesame chutney or to taste
4 Tablespoons chopped cilantro

Peel the onion, cut 2 or 3 round slices, separate into rings, and leave these aside to add to the sandwich. Chop the rest of the onion. In a medium bowl, add a little water to the besan, just enough to make a thick paste.

Heat the oil in a wok or kadhai. Add the mustard seeds, and when they pop, add the hing, turmeric, chopped onion and kanda lasun masala. Saute it for a few minutes until the onion softens, and add half a cup of water. When the water comes to a boil, add in the besan paste, and stir continuously with a wooden spoon as it starts to thicken. Stir it until it forms a thick mass, roughly scrambled.

Apply butter to the pita breads, and spread some of the pithale on it. Top with the reserved sliced onion, chutney, cilantro, and tomato. Cover with another pita bread, press gently, and slice into two or four. Repeat for the other sandwich.

This will make 2 sandwiches.

Notes and Variations:

* In this recipe, you could substitute the kanda-lasun masala with 2 cloves of minced garlic, 1/2 teaspoon red chili powder, and 1 minced scallion.

If you like very spicy food, you could add some red chili powder to the paste, depending on how hot the kanda lasun masala is.

I use whichever chutney is on hand - garlic chutney or cilantro chutney works just as well, although they lack the crunch of the peanuts.

Add some lettuce leaves to the sandwich if you like.


I am sending this too to the 'Regional Cuisines of India - Maharashtra' event.

Monday, June 11, 2007

Peanut Sesame Chutney

Good things come in small packages

It would be an understatement to say that chutneys are an integral part of an Indian meal. They come in countless forms and combinations, and are used as condiments to zip up something that someone might find bland. In traditional maharashtrian meals, chutneys are generally served as part of a meal, in small quantitites, on the top left side of the plate.

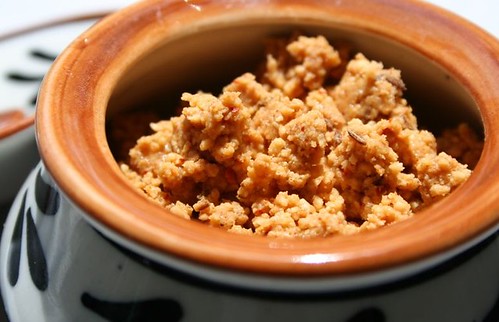
Peanut Sesame Chutney

This is a simple dry chutney that takes only minutes to make, but is high on flavor and very versatile. Since it is dry, it also lasts for a long time. In marathi it could be called 'shengdANe ANI tILAchi chaTNI'.

Ingredients

1 scant cup of peanuts
2 Tablespoons sesame seeds
2 dried red chilies
1 teaspoon cumin seeds
1/2 teaspoon red chili powder
1/2 teaspoon salt (or to taste)
1 teaspoon sugar

Method

On a medium skillet, roast the peanuts, sesame seeds, chilies and cumin seeds for a few minutes. Take it off the heat and let it get cool. Add the chili powder, salt, and sugar to it, and powder everything in a food processor. Do not over process, as it could get sticky. It will keep in an airtight container for several days, even weeks.

Serving Suggestions:

While this chutney can be definitely served as part of a meal, there are plenty of uses for it that I like. It can be stirred into some sesame oil to eat with dosas and idlis, or it can be stirred into some yogurt to make a wet chutney.

Other uses:

Add it to simple salads like onion-tomato or tomato-cucumber. Add it to sauteed okra at the end for an added crunch and taste. Sprinkle some on top of a bagel with cream cheese, a new favorite use.

I am sending this to the 'Regional Cuisines of India - Maharashtra' event.

Friday, June 08, 2007

Vibrant Vancouver

When a neice called me up a couple of months ago to say that she will be in Vancouver for a project, I immediately started looking for flight tickets. Of course, it wasn't until she got somewhat settled that I made real plans to go there. I had visited Vancouver a few years ago, and was quite smitten with the place and the surrounding area of British Columbia at that time. So this was a good excuse to go and hang out in the city, where she is now living it up in a downtown high-rise.

On my previous trip I had been to Victoria, which is a charming ferry ride away to Vancouver Island, and had done the obligatory road trip to Whistler, which was also beautiful. This time, I just wanted to spend more time in the city, walk around and use the skytrain, go bicyling, and enjoy life in the city itself, and had a swell time doing just that. The weather was gorgeous on all the days, in fact, it was too hot for this time of the year, but that is any day better than rain.

Vancouver is a vibrant young city, very compact and easy to navigate, surrounded by water and mountains, with plenty of places for good food, and lots of activity. We started off by walking along the waterfront, and then later in the afternoon took the seabus to Lonsdale Quay. Walked around the market there, had a crepe with ice cream, and returned back to continue walking in Gastown.

I had been to Capilano before, so this time we went to Lynn Canyon, where there is a suspension brige as well, from where we hiked up to Rice Lake. Spent the gorgeous evening later at Kits beach, in the Kitsilano neighborhood. The day was heating up so much at that point that I actually got tanned.


Another thing we did was to rent bicycles and go riding along the seawall in Stanley Park. Awesome. Part of the seawall is closed for reconstruction right now, which took away some of the joy of doing the whole loop of the park along the water, but there was still plenty to enjoy.

The only place that got a repeat visit was Granville Island - I love it. There is the public market, cute stores to browse, and it is easy to get to from downtown either by bus, or across the False Creek by aquabus.

Will leave you with some more pictures. You can click on an image to see the larger version.


Wednesday, May 30, 2007

Cherry Pickle

When life gives you cherries do you make pickle or jam?

In either case, you first need to pit them. I always fancied buying a cherry pitter but never had the need to buy one. I usually eat cherries straight up, but last weekend I brought tons of fruit home, and I am quite sure that it would be impossible to finish it all by simply snacking. So, I have plans to preserve them a couple of different ways, and that means I would need to pit a whole lot of them. So, here comes the Cherry Pitter to the rescue! Phtk, phtk, phtk, one by one they popped out - hah, I am easily pleased.

One batch of it went into a pickle that I adapted from a recipe in 'Usha's Pickle Digest', written by Usha Prabakaran. More on that book sometime later.

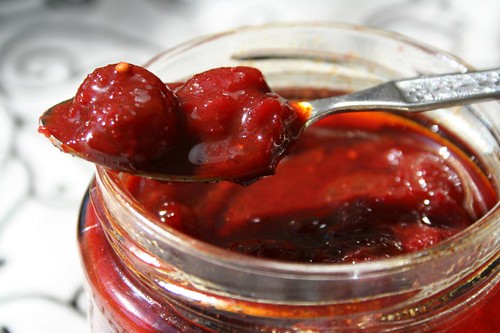
Although I started with the quantities given, I changed the quantities quite a bit when I started measuring out the ingredients because most of the spices seemed too much to me. The end result was really good. It is a pickle that will please people who like pickles. By that I mean that it has just the right amount of that salty, spicy and sour taste which is the hallmark of Indian pickles. This inspite of drastically reducing the amount of salt, spice and oil given in the recipe.

Apart from that joyful pitting activity, the recipe is quite simple. Here is what I did, with volumetric measurements instead of the orginal ones in grams, except for the cherries.

Cherry Pickle, close up

Ingredients:

500 grams cherries
1 teaspoon + 2 Tablespoons pickling salt, or kosher salt
1 teaspoon methi (fenugreek) seeds
1/4 teaspoon hing (asafoetida)
1 teaspoon + 4 Tablespoons of oil
1/2 teaspoon turmeric
2 Tablespoons jaggery
1 1/2 Tablespoon red chili powder
1 teaspoon mustard seeds
3 Tablespoons lime juice

Method:

Pit the cherries. This is also called stoning the cherries. Marinate the cherries in a teaspoon of salt for a day. Roast the methi and hing on medium heat for a few minutes and powder them together.

Heat one teaspoon oil, add mustard seeds, and when they start to pop, add turmeric, cherries, and jaggery. Stir it together for a few minutes until the cherries start to soften, and some of them break down.

Add the remaining salt, oil, and dry spices, and continue cooking until the oil starts to separate (I did not see this happening, but I knew it was done when the oil got really hot). Add the lime juice, and remove when the mixture starts to bubble.

It is ready to eat as soon as it is cool. The book says that this pickle can stay upto 2 months.

Tuesday, May 29, 2007

Cherry Picking

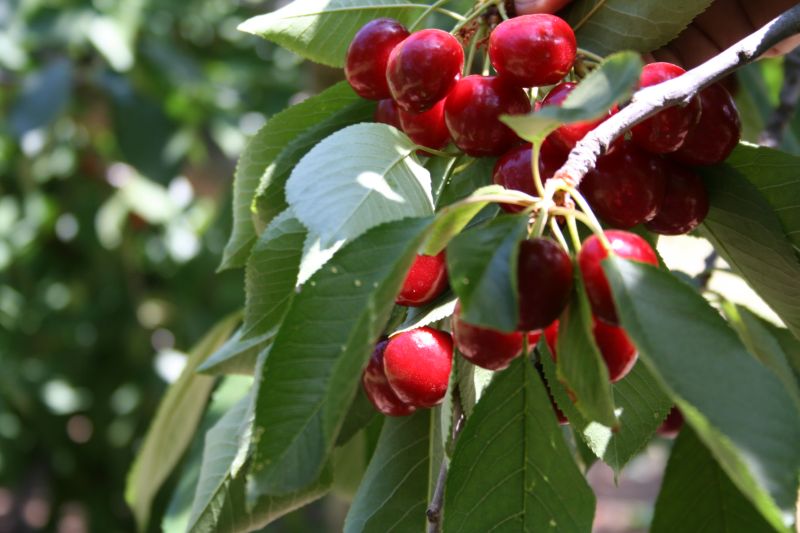
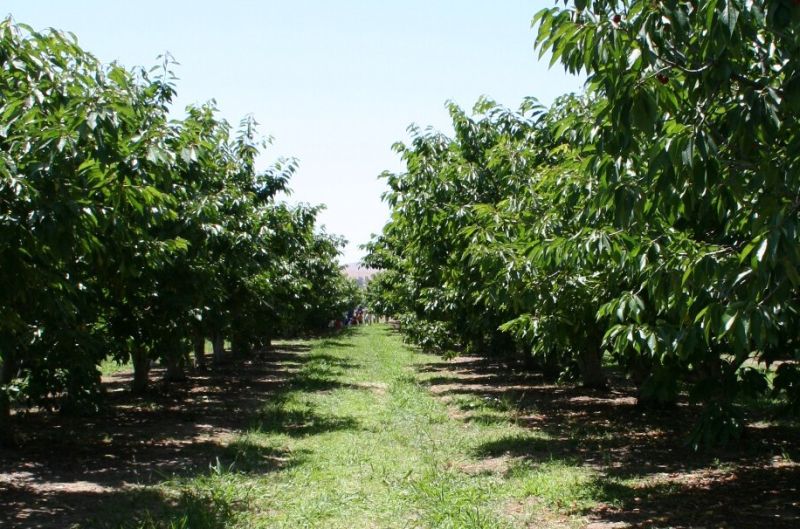
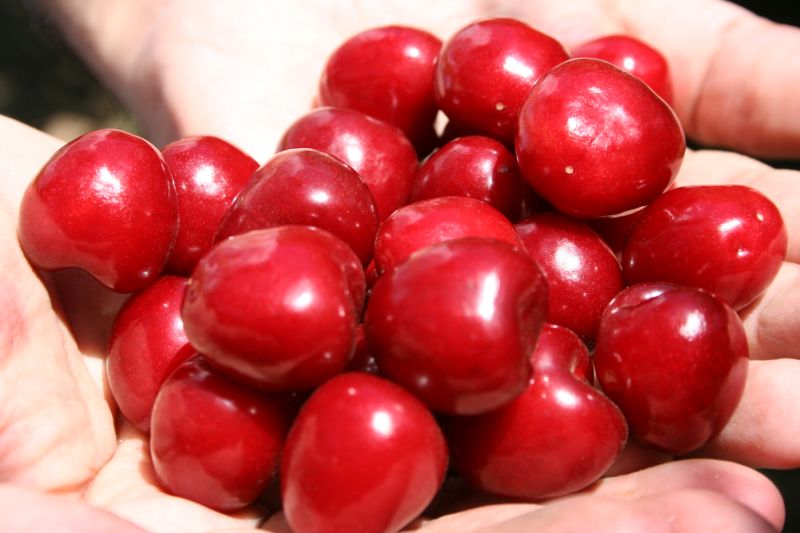
Around here, the cherries are starting to get ripe and ready. Which means thousands of people will be thronging to various orchards, especially on weekends, to eat some fruit off the trees and then pick some to take home. Last weekend, I was one among the many, and oh, what fun it was. The cherry trees were overflowing with fruit, and at one point I could see green orchards dotted with red as far as the eye could see.

These picture do not do justice to that joy of seeing such a sight, and the experience of picking the fruits off the tree.

Clustered on a branch

Cherries, closeup

A row of cherry trees

Cherry Orchard

Blindingly beautiful sweet Bing cherries, just picked

Picked beauties
Related Posts Plugin for WordPress, Blogger...